No edit summary |
mNo edit summary |
||
| (44 intermediate revisions by 21 users not shown) | |||
| Line 9: | Line 9: | ||
---- |
---- |
||
| − | {| style="text-align:center; margin:auto; width: |
+ | {| style="text-align:center; margin:auto; width: 500px;" |
|- |
|- |
||
| [[File:Balloon1.png|100px|link=]] |
| [[File:Balloon1.png|100px|link=]] |
||
| Line 15: | Line 15: | ||
| [[File:Balloon5.png|100px|link=]] |
| [[File:Balloon5.png|100px|link=]] |
||
| [[File:Balloon6.png|100px|link=]] |
| [[File:Balloon6.png|100px|link=]] |
||
| ⚫ | |||
| ⚫ | |||
|- |
|- |
||
| − | | style="width: 25%;" | '''Level 1 |
+ | | style="width: 25%;" | '''Level 1-2''' |
| − | | style="width: 25%;" | '''Level 3 |
+ | | style="width: 25%;" | '''Level 3-4''' |
| style="width: 25%;" | '''Level 5''' |
| style="width: 25%;" | '''Level 5''' |
||
| style="width: 25%;" | '''Level 6''' |
| style="width: 25%;" | '''Level 6''' |
||
| ⚫ | |||
| ⚫ | |||
| − | | style=" |
+ | {| style="text-align:center; margin:auto; width: 500px;" |
| ⚫ | |||
| ⚫ | |||
| + | |[[File:Balloon9.png|110px|link=]] |
||
| ⚫ | |||
| ⚫ | |||
| + | |style="width:33.3%;" |'''Level 8''' |
||
| + | |style="width:33.3%;" |'''Level 9''' |
||
|} |
|} |
||
---- |
---- |
||
*'''Summary''' |
*'''Summary''' |
||
| − | **Balloons are the sixth overall [[Army|troop]] unlocked in the [[Barracks]], and is the first [[:Category:Air Troops|aerial unit]] unlocked in the Home Village. |
+ | **Balloons are the sixth overall [[Army|troop]] unlocked in the [[Barracks]], and is the first [[:Category:Air Troops|aerial unit]] unlocked in the Home Village, unlocked in Level 6 [[Barracks]]. |
**Balloons are "promoted" [[Wall Breaker]]s that now attack from a hot air balloon. They drop bombs towards the ground with a large area splash damage, which can destroy a wide range of ground targets, but can be easily taken out by any anti air building (such as the [[Air Defense]]). |
**Balloons are "promoted" [[Wall Breaker]]s that now attack from a hot air balloon. They drop bombs towards the ground with a large area splash damage, which can destroy a wide range of ground targets, but can be easily taken out by any anti air building (such as the [[Air Defense]]). |
||
**They are the [[Troop Movement Speed|slowest-moving]] and slowest-attacking [[Army|troops]] in the game. However, they have the fourth-highest DPS for a troop in the game. |
**They are the [[Troop Movement Speed|slowest-moving]] and slowest-attacking [[Army|troops]] in the game. However, they have the fourth-highest DPS for a troop in the game. |
||
| − | **When they are defeated, Balloons drop to the ground |
+ | **When they are defeated, Balloons drop to the ground and explode, dealing relatively minor damage (as compared to the damage of their bombs). |
| + | **{{PreferredTarget|Defenses}} |
||
---- |
---- |
||
*'''Offensive Strategy''' |
*'''Offensive Strategy''' |
||
| − | ** |
+ | **In lower trophy ranges (Up to Bronze), you can request for balloons and demolish your opponents because the opponents probably won't have an Air Defense yet. Balloons (as well as [[Minion]]s, {{H|Baby Dragon}}s and [[Dragon]]s if you can obtain them from Clan donations) are a great way to gain trophies and resources. |
| + | **It would be advisable to destroy all aerial defenses such as [[Archer Tower]]s, [[Wizard Tower]]s and [[Air Defense]]s before deploying Balloons. Also beware of the [[Clan Castle]]: [[Archer]]s, [[Minion]]s, [[Wizard|Wizards]] and [[Dragon]]s hiding in a [[Clan Castle]] will make short work of Balloons. Mistakenly placing a Balloon while the [[Air Defense]]s remains active will cost you 5 housing space in a snap! You can also send Balloons after [[Air Defense]]s themselves, but this isn't recommended if the Balloons have a long distance to fly for they will be shot down quickly. |
||
| − | **Balloons are excellent with Minions, Dragons, or to draw the [[Clan Castle]] [[Army|Troops]] out. The death damage can also chip some buildings. Pair your Balloons with [[Rage Spell]] or [[Haste Spell]] to increase your army's speed and attack speed. |
||
| + | ***On the other hand, if [[Resources#Elixir|Elixir]] and time are not priorities, Lava Hounds and Dragons are good troops to tank the Balloons. They can also be used to draw or defeat the [[Clan Castle]] [[Army|Troops]]. |
||
| ⚫ | ** |
||
| ⚫ | |||
**Balloons are exceptionally useful in the [[Single Player Campaign]]. You can simply destroy all of the [[Air Defense]]s, [[Archer Tower]]s and [[Wizard Tower]]s, then deploy a single Balloon. It will destroy every building. It takes a bit of patience, but it pays off at the end. With [[Single Player Campaign]]s, there are no time limits, so one Balloon will eventually destroy every building. |
**Balloons are exceptionally useful in the [[Single Player Campaign]]. You can simply destroy all of the [[Air Defense]]s, [[Archer Tower]]s and [[Wizard Tower]]s, then deploy a single Balloon. It will destroy every building. It takes a bit of patience, but it pays off at the end. With [[Single Player Campaign]]s, there are no time limits, so one Balloon will eventually destroy every building. |
||
***''Important note:'' In many cases a single Balloon will take enough time to destroy the remaining buildings (commonly in the [[Single Player Campaign]] maps) that your game will time out due to inactivity, which will cause your attack to end prematurely and be unsuccessful (regardless of how many stars you had earned prior to that point). To prevent this from happening simply change the view every few moments (by panning or zooming). |
***''Important note:'' In many cases a single Balloon will take enough time to destroy the remaining buildings (commonly in the [[Single Player Campaign]] maps) that your game will time out due to inactivity, which will cause your attack to end prematurely and be unsuccessful (regardless of how many stars you had earned prior to that point). To prevent this from happening simply change the view every few moments (by panning or zooming). |
||
| − | **When raiding other players, time is limited, so make sure you take out all the [[Air Defense]]s and other defensive buildings that can target Air [[Army|Troops]] (e.g. [[Archer Tower]]s, |
+ | **When raiding other players, time is limited, so make sure you take out all the [[Air Defense]]s and at least most other defensive buildings that can target Air [[Army|Troops]] (e.g. [[Archer Tower]]s, Wizard Towers) quickly so you can sweep up the raid. |
| + | ***This strategy loses its steam at Town Hall 7, due to a Third Air Defense and more Wizard Towers. |
||
| ⚫ | |||
| − | **If [[Resources#Elixir|Elixir]] and time are not priorities, dropping a [[Dragon]] or a [[Lava Hound]] near an [[Air Defense]] before deploying Balloons can protect them from being attacked for a significant amount of time, much like [[Giant]]s can occupy a [[Mortar]]. |
||
| − | **You can also send Balloons after [[Air Defense]]s themselves, but this isn't recommended if the Balloons have a long distance to fly for they will be shot down quickly. |
||
**Although Balloons are slow moving, their damage is excellent; a good option is to speed them up with a [[Rage Spell]] or a [[Haste Spell]]. "Rage-Balloons" is an effective, if not often used, strategy. |
**Although Balloons are slow moving, their damage is excellent; a good option is to speed them up with a [[Rage Spell]] or a [[Haste Spell]]. "Rage-Balloons" is an effective, if not often used, strategy. |
||
| − | ***Balloons deal a lot of damage on their own and the extra bonus from the [[Rage Spell]] usually isn't necessary and can be traded with two [[Haste Spell]]s. |
+ | ***Balloons deal a lot of damage on their own at higher levels and the extra bonus from the [[Rage Spell]] usually isn't necessary and can be traded with two [[Haste Spell]]s. |
| ⚫ | **Balloons can be very strong if you know how to use them, but never train an army of only Balloons; [[Clan Castle]] [[Army|troops]] can make short work of them! Bring other troops to help out in this department. However at around TH8 most people began using Dragons in their army which can counter many clan castle troops. |
||
| − | **Beware of [[Wizard Tower]]s and [[Hidden Tesla]]s, as they can cause quite a bit of damage before being destroyed, allowing [[Archer Tower]]s to then destroy your Balloons easily. |
||
| + | ***Beware of Splash Damage, as a Balloon's relatively low health makes them very vunerable once weakened from them. Once weakened, they can be quickly chopped down by other defenses, like archer towers and X-bows. Balloons’ slow speed and relatively mediocre health leave them vulnerable to traps. Air Bombs can drastically reduce the health of Balloons when clustered together, potentially allowing defenses to rapidly destroy the entire group by picking them off one by one (1 shot per balloon) |
||
| − | **Early on, some people forget to build [[Air Defense]]s; Balloons (as well as [[Minion]]s and [[Dragon]]s if you can obtain them) are a great way to teach them the error of their ways. |
||
| ⚫ | **If the Clan Castle happens to have a ton of Archers or other low health [[Army|troops]] in it, a single balloon can be used to take them all out with the death damage. Group all the Clan Castle Troops together and as the Balloon gets destroyed by the defending troops it will use the death splash to chip or wipe out ground Clan Castle Troops such as [[Archer]]s or [[Wizard]]s beneath. This does not affect air troops. |
||
| − | ***Beware of [[Archer Tower]]s, though; destroy or distract them first or they will destroy small groups of balloons quickly. Troops with high hitpoints, such as the [[Barbarian]] can be effective as distractions for [[Archer Tower]]s. |
||
| − | **Destroy the [[Air Defense]]s, as their sole purpose is to destroy [[:Category:Air Troops|air units]] (and they are very good at it). Mistakenly placing a Balloon while the [[Air Defense]]s remains active will cost you! |
||
| ⚫ | |||
| − | **If the Clan Castle happens to have a ton of Archers or other low health [[Army|troops]] in it, a single balloon can be used to take them all out with the death damage. |
||
***However, this usually does not occur, since in higher trophy ranges, higher health troops such as Wizards and Dragons would be more likely to occupy the Castle. |
***However, this usually does not occur, since in higher trophy ranges, higher health troops such as Wizards and Dragons would be more likely to occupy the Castle. |
||
| + | ***In very high trophy ranges, ones which strong single target troops are used to destroy the clan castle, Low health troops are often used in mass formation to tank for stronger troops so this strategy can be used to deal with them. |
||
| + | **When Balloons are researched to level 6, they undergo a massive change. Their damage is increased drastically, and their health as well. Most interactions are changed: |
||
| + | ***They now 2 shot Mortars, Archer Towers, and other low HP defenses(Cannons may require 3) |
||
| + | ***Air bombs do not destroy balloons in 2 bombs, making double air bombs not as effective. |
||
| + | ***Archer Towers require more shots to destroy them, allowing you to send some balloons to destroy it without much dying. The amount needed is significantly less. |
||
| + | **Some players place air traps, particularly [[Seeking Air Mine]]s, near the outside of their base to defend against Queen Walks/Charges and similar strategies. Placing a Balloon before starting such a walk can trigger these traps, keeping [[Healer]]s safe. |
||
| + | ---- |
||
*'''Defensive Strategy''' |
*'''Defensive Strategy''' |
||
| − | **Due to the Balloon's slow movement speed and melee range, an |
+ | **Due to the Balloon's slow movement speed and melee range, an Air Defense at equivalent level can wipe out a single Balloon in two hits. It is recommended to deploy balloons in swarms, but be careful of [[:Air_Bomb|Air Bombs]] too. |
| − | *** |
+ | ***Air Bombs, Wizard Towers , Air Defenses , Archer Queens, (especially when higher-leveled), and Air Sweepers can be very annoying to deal with when raiding with Balloons. Bringing some Lava Hounds may counter some of these, as if the Archer Queen is occupied with one of your other troops, any [[Lava Pup]]s nearby can injure her or even stun her for the rest of the raid. Lava Hounds are also excellent for tanking. |
| + | ***On the defensive hand, when balloons are in the defending clan castle, the Archer Queen will take massive damage from their bombs if left unattended, so don't ignore them. |
||
| − | **Generally, high-level Balloons are relatively decent as a defensive unit: its powerful bombs can destroy groups of ground troops, usually in a single hit, making them very dangerous. If a player is attacking only with [[Army|troops]] that cannot target air units ([[Barbarian]]s, [[Giant]]s, [[Goblin]]s, etc.), the Balloon is perfect for defending in those cases as it cannot be destroyed except by [[Lightning Spell]]s or [[Poison Spell]]s. It is especially effective against hordes of [[Barbarian]]s, [[Goblin]]s and [[Valkyrie]]s as it does splash damage, but its slow movement speed means that most troops can easily outrun it. |
||
| + | **Generally, high-level Balloons are relatively decent as a defensive unit: its powerful bombs can destroy groups of ground troops, usually in a single hit, making them very dangerous. If your opponent does not have any troops/spells that can attack air, a Balloon in the Clan Castle will teach them a lesson. Most low-TH level troops lack the ability to target Balloons and thus will be helpless against them, leading to an easy fail. However, if they do have a troop to target air, the balloons are essentially useless as they are incredibly slow and pretty weak and are a waste of clan castle space. |
||
| − | **From a defensive standpoint, it takes quite a few |
+ | **From a defensive standpoint, it takes quite a few Archers to take out the Balloon, which effectively weakens the raid. Its only major weaknesses are air troops capable of attacking air, such as [[Minion]]s, which can destroy it easily without fear of counterattack. A single similar-level [[Wizard]] (up to level 3) is also able to destroy a Balloon due to its high damage output, but only if it has sufficient range to fire twice before the Balloon closes (the Balloon will destroy the [[Wizard]] in one shot). Beyond level 3, two [[Wizard]]s would be required. |
***However, under normal circumstances, one should not be too conservative in trying to destroy a defensive Balloon, since it will be able to deal more damage and reduce the amount of time the attacker has before the raid ends. |
***However, under normal circumstances, one should not be too conservative in trying to destroy a defensive Balloon, since it will be able to deal more damage and reduce the amount of time the attacker has before the raid ends. |
||
| − | **At lower levels the Balloon has such low HP that it is vulnerable to being taken down by two [[Air Bomb]]s. Consequently, a great way to defend against lower-leveled Balloons is using a grouped pair of Air Bombs; they can take an entire group out before they get a chance to get healed with a [[Healing Spell]]. However, this can also hurt your chances of winning if the bombs target a small group of balloons, or other, stronger, air units like the [[Dragon]]. |
+ | **At lower levels the Balloon has such low HP that it is vulnerable to being taken down by two [[Air Bomb]]s. Consequently, a great way to defend against lower-leveled Balloons is using a grouped pair of Air Bombs; they can take an entire group out before they get a chance to get healed with a [[Healing Spell]]. However, this can also hurt your chances of winning if the bombs target a small group of balloons, or other, stronger, air units like the [[Dragon]] that has an extremely high health pool which render air bombs ineffective. |
| + | ***However once the Balloon reaches level 5 it becomes stronger and can survive two Air Bombs, but will still be heavily damaged and can easily be finished off by splash damage. |
||
---- |
---- |
||
*'''Upgrade Differences''' |
*'''Upgrade Differences''' |
||
**Appropriately, at each level the Balloon pilot resembles a similar-level [[Wall Breaker]]. |
**Appropriately, at each level the Balloon pilot resembles a similar-level [[Wall Breaker]]. |
||
**The Balloon undergoes significant visual changes at levels 3, 6, and 8. |
**The Balloon undergoes significant visual changes at levels 3, 6, and 8. |
||
| − | ***At level 3, the Balloon receives wooden |
+ | ***At level 3, the Balloon receives wooden armor attached to the sides of the envelope underneath its rigging. |
| − | ***At level 5, the Balloon's basket gain golden spikes attached to its side and the bombs it drops become golden in |
+ | ***At level 5, the Balloon's basket gain golden spikes attached to its side and the bombs it drops become golden in color. |
***At level 6, the Balloon's red envelope turns to black with a white skull on it, and the wooden armor become gray-black steel. |
***At level 6, the Balloon's red envelope turns to black with a white skull on it, and the wooden armor become gray-black steel. |
||
***At level 7, the Balloon's steel armor gets plated with miniature golden spikes, it also gains larger golden spikes that replace some of the old spikes. A light inside the Balloon can be seen. The bombs it drops look like the level 5 and 6 [[Bomb]]s. |
***At level 7, the Balloon's steel armor gets plated with miniature golden spikes, it also gains larger golden spikes that replace some of the old spikes. A light inside the Balloon can be seen. The bombs it drops look like the level 5 and 6 [[Bomb]]s. |
||
***At level 8, the Balloon's envelope is now dark red, but the skull pattern is retained. The golden spikes on its armor are replaced with thicker silver ones, while the spikes on the basket are removed. |
***At level 8, the Balloon's envelope is now dark red, but the skull pattern is retained. The golden spikes on its armor are replaced with thicker silver ones, while the spikes on the basket are removed. |
||
| + | ***At level 9, the Balloon's envelope gets back its black base color with an icy blue fade on the sides. It gets golden spikes on its armor as well as spiky icicles underneath the basket. |
||
---- |
---- |
||
*'''Trivia''' |
*'''Trivia''' |
||
| Line 73: | Line 85: | ||
**Balloons "hover around" slightly while they are attacking. |
**Balloons "hover around" slightly while they are attacking. |
||
**A level 6 or 7 Balloon has the same design on its exterior as a [[Seeking Air Mine]] (a black sphere with a broad white skull), which suits as both do extremely high damage per hit. |
**A level 6 or 7 Balloon has the same design on its exterior as a [[Seeking Air Mine]] (a black sphere with a broad white skull), which suits as both do extremely high damage per hit. |
||
| − | **Although piloted by former [[Wall Breaker]]s, Balloons do not use kamikaze-style attacks (though they do |
+ | **Although piloted by former [[Wall Breaker]]s, Balloons do not use kamikaze-style attacks (though they do explode on death). |
**While most levels of Balloons drop bombs that are carried by [[Wall Breaker]]s of the same level, the level 6 and 7 Balloons do not drop barrels (see Upgrade Differences above). |
**While most levels of Balloons drop bombs that are carried by [[Wall Breaker]]s of the same level, the level 6 and 7 Balloons do not drop barrels (see Upgrade Differences above). |
||
**Each of the four upgrades which upgrade the Balloon from level 2 to level 6 increases the Balloon's damage by 50%. |
**Each of the four upgrades which upgrade the Balloon from level 2 to level 6 increases the Balloon's damage by 50%. |
||
| − | ***This is not true for level 7 |
+ | ***This is not true for level 7 and 8 Balloons, its damage being increased by about 20% for each of these levels. |
| + | **Currently, the Balloon is one of the only only [[:Category:Air Troops|air troops]] that has no wings, the the other being [[Grand Warden]] if counted as a troop and set to air mode and [[Drop Ship]], as well as the seasonal [[Skeleton Barrel]]. The [[Hog Glider]] is considered to have wings in this because all gliders in real life are said to have wings. |
||
| − | ***For the level 8 Balloon, the damage is increased by 20% |
||
| − | **A level 8 Balloon under a level 5 [[Rage Spell]] can do 1,911.6 damage per shot. |
||
| − | **Currently, the Balloon is the only [[:Category:Air Troops|air troop]] that has no wings, aside from the seasonal [[Skeleton Barrel]]. |
||
| − | **If a Balloon's death causes the battle to end (if there are no more non-[[Healer]] [[Army|troops]], [[Heroes]], [[Lightning Spell]], [[Earthquake Spell]]s or [[Skeleton Spell]]s remaining), the Balloon will appear to drop to the ground (as it should) but it will not deal any damage upon death. |
||
| − | **The Balloon is the only [[Army|troop]] with a death animation. When anti-air defenses defeat a Balloon, it will fall to the ground, damaging any [[buildings]] within its death damage radius. |
||
**During late October 2016, the Balloon's training cost was temporarily reduced by 50% and it's training time changed to 1 minute and 20 seconds to celebrate Halloween. |
**During late October 2016, the Balloon's training cost was temporarily reduced by 50% and it's training time changed to 1 minute and 20 seconds to celebrate Halloween. |
||
| − | **The Balloon's design strongly resembles that of the [https://cnc.wikia.com/wiki/Kirov_airship_(Red_Alert_iPhone) Kirov Airship] from the Command and Conquer games. They are both airships that deal massive damage to things right under them, both are very slow and |
+ | **The Balloon's design strongly resembles that of the [https://cnc.wikia.com/wiki/Kirov_airship_(Red_Alert_iPhone) Kirov Airship] from the Command and Conquer games. They are both airships that deal massive damage to things right under them, both are very slow and can only target ground units. |
| − | **The balloon is the only air troop to have no range. |
||
<center> |
<center> |
||
<div style="margin-top: 10px; margin-bottom:10px; border:0px ridge Green; padding: 10px; font-size: 100%; -moz-border-radius: 15px; border-radius:15px; -webkit-border-radius:15px; border-color: silver; color:black; background-color: gainsboro;"> |
<div style="margin-top: 10px; margin-bottom:10px; border:0px ridge Green; padding: 10px; font-size: 100%; -moz-border-radius: 15px; border-radius:15px; -webkit-border-radius:15px; border-color: silver; color:black; background-color: gainsboro;"> |
||
| + | {{Modifiers|type=TroopHV}} |
||
{| class="wikitable" border="0" cellpadding="1" cellspacing="1" style="text-align: center; width: 100%;" |
{| class="wikitable" border="0" cellpadding="1" cellspacing="1" style="text-align: center; width: 100%;" |
||
! Preferred Target {{Res|RES=Target}} |
! Preferred Target {{Res|RES=Target}} |
||
| Line 102: | Line 110: | ||
| Area Splash 1.2 Tile Radius (Ground Only) |
| Area Splash 1.2 Tile Radius (Ground Only) |
||
| 5 |
| 5 |
||
| + | | class="ModifierStat Speed" | 10 |
||
| ⚫ | |||
| + | | class="AttackSpeed" | 3s |
||
| ⚫ | |||
| 6 |
| 6 |
||
| 0.5 tiles |
| 0.5 tiles |
||
| Line 110: | Line 118: | ||
{| class="wikitable" border="0" cellpadding="1" cellspacing="1" style="text-align: center; width: 650px;" |
{| class="wikitable" border="0" cellpadding="1" cellspacing="1" style="text-align: center; width: 650px;" |
||
| − | ! colspan=" |
+ | ! colspan="4" style="text-align: center; width: 650px" |<big>'''Training Time of Balloons'''</big> |
|- |
|- |
||
| − | ! |
+ | ! 1 [[Barracks]] |
| + | ! 2 [[Barracks]] |
||
| − | ! Training Time |
||
| + | ! 3 [[Barracks]] |
||
| + | ! 4 [[Barracks]] |
||
|- |
|- |
||
| + | | class="GoldPass 1B"| 2m |
||
| − | | 1 |
||
| + | | class="GoldPass 2B"| 1m |
||
| − | | 2 minutes |
||
| + | | class="GoldPass 3B"| 40s |
||
| ⚫ | |||
| + | | class="GoldPass 4B"| 30s |
||
| − | | 2 |
||
| − | | 1 minute |
||
| ⚫ | |||
| − | | 3 |
||
| − | | 40 seconds |
||
| ⚫ | |||
| − | | 4 |
||
| − | | 30 seconds |
||
|} |
|} |
||
{| class="wikitable" border="0" cellpadding="1" cellspacing="1" style="text-align: center; width: 100%;" |
{| class="wikitable" border="0" cellpadding="1" cellspacing="1" style="text-align: center; width: 100%;" |
||
| − | ! Level {{Res|RES=Level}} |
+ | ! Level<br />{{Res|RES=Level}} |
| − | ! Damage per Second {{Res|RES=Damage}} |
+ | ! Damage per Second<br />{{Res|RES=Damage}} |
| − | ! Damage per Attack {{Res|RES=Damage}} |
+ | ! Damage per Attack<br />{{Res|RES=Damage}} |
| − | ! Damage Upon Death {{Res|RES=Death Damage}} |
+ | ! Damage Upon Death<br />{{Res|RES=Death Damage}} |
| − | ! Hitpoints {{Res|RES=Hitpoint}} |
+ | ! Hitpoints<br />{{Res|RES=Hitpoint}} |
| − | ! [[Resources#Elixir|Training Cost]] {{Res|RES=Elixir}} |
+ | ! [[Resources#Elixir|Training Cost]]<br />{{Res|RES=Elixir}} |
| − | ! [[Resources#Elixir|Research Cost]] {{Res|RES=Elixir}} |
+ | ! [[Resources#Elixir|Research Cost]]<br />{{Res|RES=Elixir}} |
| − | ! [[Laboratory]] |
+ | ! [[Laboratory|Research Time]]<br />{{Res|RES=Time}} |
| − | ! [[Laboratory |
+ | ! [[Laboratory]] Level Required<br />{{Res|RES=Laboratory}} |
|- |
|- |
||
| 1 |
| 1 |
||
| + | | class="ModifierStat DPS" | 25 |
||
| + | | class="ModifierStat DPH" | 75 |
||
| 25 |
| 25 |
||
| + | | class="ModifierStat HP" | 150 |
||
| − | | 75 |
||
| + | |class="GoldPass tCost"| 1,750 |
||
| − | | 25 |
||
| − | | 150 |
||
| − | | 1,750 |
||
| N/A |
| N/A |
||
| N/A |
| N/A |
||
| Line 150: | Line 153: | ||
|- |
|- |
||
| 2 |
| 2 |
||
| + | | class="ModifierStat DPS" | 32 |
||
| + | | class="ModifierStat DPH" | 96 |
||
| 32 |
| 32 |
||
| + | | class="ModifierStat HP" | 180 |
||
| − | | 96 |
||
| + | |class="GoldPass tCost"| 2,250 |
||
| − | | 32 |
||
| + | |class="GoldPass rCost"| 150,000 |
||
| − | | 180 |
||
| + | |class="GoldPass rTime"| 12h |
||
| − | | 2,250 |
||
| − | | 150,000 |
||
| 2 |
| 2 |
||
| − | | 12 hours |
||
|- |
|- |
||
| 3 |
| 3 |
||
| + | | class="ModifierStat DPS" | 48 |
||
| + | | class="ModifierStat DPH" | 144 |
||
| 48 |
| 48 |
||
| + | | class="ModifierStat HP" | 216 |
||
| − | | 144 |
||
| + | |class="GoldPass tCost"| 2,750 |
||
| − | | 48 |
||
| + | |class="GoldPass rCost"| 450,000 |
||
| − | | 216 |
||
| + | |class="GoldPass rTime"| 1d 12h |
||
| − | | 2,750 |
||
| − | | 450,000 |
||
| 4 |
| 4 |
||
| − | | 1d 12h |
||
|- |
|- |
||
| 4 |
| 4 |
||
| + | | class="ModifierStat DPS" | 72 |
||
| + | | class="ModifierStat DPH" | 216 |
||
| 72 |
| 72 |
||
| + | | class="ModifierStat HP" | 280 |
||
| − | | 216 |
||
| + | |class="GoldPass tCost"| 3,500 |
||
| − | | 72 |
||
| + | |class="GoldPass rCost"| 1,350,000 |
||
| − | | 280 |
||
| + | |class="GoldPass rTime"| 2d |
||
| − | | 3,500 |
||
| − | | 1,350,000 |
||
| 5 |
| 5 |
||
| − | | 2 days |
||
|- |
|- |
||
| 5 |
| 5 |
||
| + | | class="ModifierStat DPS" | 108 |
||
| + | | class="ModifierStat DPH" | 324 |
||
| 108 |
| 108 |
||
| + | | class="ModifierStat HP" | 390 |
||
| − | | 324 |
||
| + | |class="GoldPass tCost"| 4,000 |
||
| − | | 108 |
||
| + | |class="GoldPass rCost"| 2,500,000 |
||
| − | | 390 |
||
| + | |class="GoldPass rTime"| 3d |
||
| − | | 4,000 |
||
| − | | 2,500,000 |
||
| 6 |
| 6 |
||
| − | | 3 days |
||
|- |
|- |
||
| 6 |
| 6 |
||
| + | | class="ModifierStat DPS" | 162 |
||
| + | | class="ModifierStat DPH" | 486 |
||
| 162 |
| 162 |
||
| + | | class="ModifierStat HP" | 545 |
||
| − | | 486 |
||
| + | |class="GoldPass tCost"| 4,500 |
||
| − | | 162 |
||
| + | |class="GoldPass rCost"| 4,500,000 |
||
| − | | 545 |
||
| + | |class="GoldPass rTime"| 5d |
||
| − | | 4,500 |
||
| − | | 6,000,000 |
||
| 7 |
| 7 |
||
| − | | 5 days |
||
|- |
|- |
||
| 7 |
| 7 |
||
| + | | class="ModifierStat DPS" | 198 |
||
| − | | 198 |
||
| + | | class="ModifierStat DPH" | 594 |
||
| − | | 594 |
||
| 214 |
| 214 |
||
| + | | class="ModifierStat HP" | 690 |
||
| − | | 690 |
||
| − | | 5,000 |
+ | |class="GoldPass tCost"| 5,000 |
| − | | 9,500,000 |
+ | |class="GoldPass rCost"| 9,500,000 |
| + | |class="GoldPass rTime"| 10d |
||
| 9 |
| 9 |
||
| − | | 10 days |
||
|- |
|- |
||
| 8 |
| 8 |
||
| + | | class="ModifierStat DPS" | 236 |
||
| − | | 236 |
||
| + | | class="ModifierStat DPH" | 708 |
||
| − | | 708 |
||
| 268 |
| 268 |
||
| + | | class="ModifierStat HP" | 840 |
||
| − | | 840 |
||
| − | | 5,500 |
+ | |class="GoldPass tCost"| 5,500 |
| − | | 12,000,000 |
+ | |class="GoldPass rCost"| 12,000,000 |
| + | |class="GoldPass rTime"| 14d |
||
| 10 |
| 10 |
||
| ⚫ | |||
| − | | 14 days |
||
| ⚫ | |||
| + | | class="ModifierStat DPS" | 256 |
||
| + | | class="ModifierStat DPH" | 768 |
||
| + | | 322 |
||
| + | | class="ModifierStat HP" | 940 |
||
| + | |class="GoldPass tCost"| 6,000 |
||
| + | |class="GoldPass rCost"| 14,000,000 |
||
| + | |class="GoldPass rTime"| 16d |
||
| ⚫ | |||
|} |
|} |
||
{{UCH}} |
{{UCH}} |
||
Revision as of 06:04, 19 September 2020


|

|

|

|
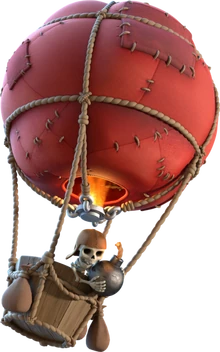
| Level 1-2 | Level 3-4 | Level 5 | Level 6 |

|

|

|
| Level 7 | Level 8 | Level 9 |
- Summary
- Balloons are the sixth overall troop unlocked in the Barracks, and is the first aerial unit unlocked in the Home Village, unlocked in Level 6 Barracks.
- Balloons are "promoted" Wall Breakers that now attack from a hot air balloon. They drop bombs towards the ground with a large area splash damage, which can destroy a wide range of ground targets, but can be easily taken out by any anti air building (such as the Air Defense).
- They are the slowest-moving and slowest-attacking troops in the game. However, they have the fourth-highest DPS for a troop in the game.
- When they are defeated, Balloons drop to the ground and explode, dealing relatively minor damage (as compared to the damage of their bombs).
- Balloons prioritize defensive structures above all other targets, and will bypass all other types of enemy buildings and troops while any defenses remain on the battlefield. This is true even if they are under attack by enemy Clan Castle troops, heroes or Skeleton Trap skeletons. Note that like all troops that prioritize defenses, Balloons do not consider the Clan Castle to be a defense regardless of whether or not it contains enemy troops, but do consider the defending Grand Warden and the activated Town Hall weapon (if any) to be defensive buildings.
Once all defenses are destroyed, Balloons become like any other troop with no preferred target; they will attack the nearest building to them regardless of type, and will turn and attack enemy units if they become aware of any nearby and can fight back against them. However, they will not switch targets to enemy units until their previous target was destroyed.
- Offensive Strategy
- In lower trophy ranges (Up to Bronze), you can request for balloons and demolish your opponents because the opponents probably won't have an Air Defense yet. Balloons (as well as Minions, Baby Dragons and Dragons if you can obtain them from Clan donations) are a great way to gain trophies and resources.
- It would be advisable to destroy all aerial defenses such as Archer Towers, Wizard Towers and Air Defenses before deploying Balloons. Also beware of the Clan Castle: Archers, Minions, Wizards and Dragons hiding in a Clan Castle will make short work of Balloons. Mistakenly placing a Balloon while the Air Defenses remains active will cost you 5 housing space in a snap! You can also send Balloons after Air Defenses themselves, but this isn't recommended if the Balloons have a long distance to fly for they will be shot down quickly.
- On the other hand, if Elixir and time are not priorities, Lava Hounds and Dragons are good troops to tank the Balloons. They can also be used to draw or defeat the Clan Castle Troops.
- At low levels, Groups of three Balloons or more can usually overwhelm an Archer Tower. Five Balloons is generally assured destruction unless there are Air Bombs or an Air Defense nearby.
- Balloons are exceptionally useful in the Single Player Campaign. You can simply destroy all of the Air Defenses, Archer Towers and Wizard Towers, then deploy a single Balloon. It will destroy every building. It takes a bit of patience, but it pays off at the end. With Single Player Campaigns, there are no time limits, so one Balloon will eventually destroy every building.
- Important note: In many cases a single Balloon will take enough time to destroy the remaining buildings (commonly in the Single Player Campaign maps) that your game will time out due to inactivity, which will cause your attack to end prematurely and be unsuccessful (regardless of how many stars you had earned prior to that point). To prevent this from happening simply change the view every few moments (by panning or zooming).
- When raiding other players, time is limited, so make sure you take out all the Air Defenses and at least most other defensive buildings that can target Air Troops (e.g. Archer Towers, Wizard Towers) quickly so you can sweep up the raid.
- This strategy loses its steam at Town Hall 7, due to a Third Air Defense and more Wizard Towers.
- Although Balloons are slow moving, their damage is excellent; a good option is to speed them up with a Rage Spell or a Haste Spell. "Rage-Balloons" is an effective, if not often used, strategy.
- Balloons deal a lot of damage on their own at higher levels and the extra bonus from the Rage Spell usually isn't necessary and can be traded with two Haste Spells.
- Balloons can be very strong if you know how to use them, but never train an army of only Balloons; Clan Castle troops can make short work of them! Bring other troops to help out in this department. However at around TH8 most people began using Dragons in their army which can counter many clan castle troops.
- Beware of Splash Damage, as a Balloon's relatively low health makes them very vunerable once weakened from them. Once weakened, they can be quickly chopped down by other defenses, like archer towers and X-bows. Balloons’ slow speed and relatively mediocre health leave them vulnerable to traps. Air Bombs can drastically reduce the health of Balloons when clustered together, potentially allowing defenses to rapidly destroy the entire group by picking them off one by one (1 shot per balloon)
- If the Clan Castle happens to have a ton of Archers or other low health troops in it, a single balloon can be used to take them all out with the death damage. Group all the Clan Castle Troops together and as the Balloon gets destroyed by the defending troops it will use the death splash to chip or wipe out ground Clan Castle Troops such as Archers or Wizards beneath. This does not affect air troops.
- However, this usually does not occur, since in higher trophy ranges, higher health troops such as Wizards and Dragons would be more likely to occupy the Castle.
- In very high trophy ranges, ones which strong single target troops are used to destroy the clan castle, Low health troops are often used in mass formation to tank for stronger troops so this strategy can be used to deal with them.
- When Balloons are researched to level 6, they undergo a massive change. Their damage is increased drastically, and their health as well. Most interactions are changed:
- They now 2 shot Mortars, Archer Towers, and other low HP defenses(Cannons may require 3)
- Air bombs do not destroy balloons in 2 bombs, making double air bombs not as effective.
- Archer Towers require more shots to destroy them, allowing you to send some balloons to destroy it without much dying. The amount needed is significantly less.
- Some players place air traps, particularly Seeking Air Mines, near the outside of their base to defend against Queen Walks/Charges and similar strategies. Placing a Balloon before starting such a walk can trigger these traps, keeping Healers safe.
- Defensive Strategy
- Due to the Balloon's slow movement speed and melee range, an Air Defense at equivalent level can wipe out a single Balloon in two hits. It is recommended to deploy balloons in swarms, but be careful of Air Bombs too.
- Air Bombs, Wizard Towers , Air Defenses , Archer Queens, (especially when higher-leveled), and Air Sweepers can be very annoying to deal with when raiding with Balloons. Bringing some Lava Hounds may counter some of these, as if the Archer Queen is occupied with one of your other troops, any Lava Pups nearby can injure her or even stun her for the rest of the raid. Lava Hounds are also excellent for tanking.
- On the defensive hand, when balloons are in the defending clan castle, the Archer Queen will take massive damage from their bombs if left unattended, so don't ignore them.
- Generally, high-level Balloons are relatively decent as a defensive unit: its powerful bombs can destroy groups of ground troops, usually in a single hit, making them very dangerous. If your opponent does not have any troops/spells that can attack air, a Balloon in the Clan Castle will teach them a lesson. Most low-TH level troops lack the ability to target Balloons and thus will be helpless against them, leading to an easy fail. However, if they do have a troop to target air, the balloons are essentially useless as they are incredibly slow and pretty weak and are a waste of clan castle space.
- From a defensive standpoint, it takes quite a few Archers to take out the Balloon, which effectively weakens the raid. Its only major weaknesses are air troops capable of attacking air, such as Minions, which can destroy it easily without fear of counterattack. A single similar-level Wizard (up to level 3) is also able to destroy a Balloon due to its high damage output, but only if it has sufficient range to fire twice before the Balloon closes (the Balloon will destroy the Wizard in one shot). Beyond level 3, two Wizards would be required.
- However, under normal circumstances, one should not be too conservative in trying to destroy a defensive Balloon, since it will be able to deal more damage and reduce the amount of time the attacker has before the raid ends.
- At lower levels the Balloon has such low HP that it is vulnerable to being taken down by two Air Bombs. Consequently, a great way to defend against lower-leveled Balloons is using a grouped pair of Air Bombs; they can take an entire group out before they get a chance to get healed with a Healing Spell. However, this can also hurt your chances of winning if the bombs target a small group of balloons, or other, stronger, air units like the Dragon that has an extremely high health pool which render air bombs ineffective.
- However once the Balloon reaches level 5 it becomes stronger and can survive two Air Bombs, but will still be heavily damaged and can easily be finished off by splash damage.
- Due to the Balloon's slow movement speed and melee range, an Air Defense at equivalent level can wipe out a single Balloon in two hits. It is recommended to deploy balloons in swarms, but be careful of Air Bombs too.
- Upgrade Differences
- Appropriately, at each level the Balloon pilot resembles a similar-level Wall Breaker.
- The Balloon undergoes significant visual changes at levels 3, 6, and 8.
- At level 3, the Balloon receives wooden armor attached to the sides of the envelope underneath its rigging.
- At level 5, the Balloon's basket gain golden spikes attached to its side and the bombs it drops become golden in color.
- At level 6, the Balloon's red envelope turns to black with a white skull on it, and the wooden armor become gray-black steel.
- At level 7, the Balloon's steel armor gets plated with miniature golden spikes, it also gains larger golden spikes that replace some of the old spikes. A light inside the Balloon can be seen. The bombs it drops look like the level 5 and 6 Bombs.
- At level 8, the Balloon's envelope is now dark red, but the skull pattern is retained. The golden spikes on its armor are replaced with thicker silver ones, while the spikes on the basket are removed.
- At level 9, the Balloon's envelope gets back its black base color with an icy blue fade on the sides. It gets golden spikes on its armor as well as spiky icicles underneath the basket.
- Trivia
- You can have a maximum of 64 Balloons at one time in a complete set of fully upgraded Army Camps. This number increases to 74 if you include the 10 that can fit into a fully upgraded Clan Castle. On the battlefield, you can clone an additional 32 Balloons with four fully upgraded Clone Spells (three from the regular spell inventory and one from a level 10 or higher Clan Castle), for a total of 106 Balloons.
- Due to a peculiarity of the Balloon attack, the first bomb a Balloon drops on an individual building does damage the instant it is dropped; the last bomb it drops will do no damage.
- Balloons "hover around" slightly while they are attacking.
- A level 6 or 7 Balloon has the same design on its exterior as a Seeking Air Mine (a black sphere with a broad white skull), which suits as both do extremely high damage per hit.
- Although piloted by former Wall Breakers, Balloons do not use kamikaze-style attacks (though they do explode on death).
- While most levels of Balloons drop bombs that are carried by Wall Breakers of the same level, the level 6 and 7 Balloons do not drop barrels (see Upgrade Differences above).
- Each of the four upgrades which upgrade the Balloon from level 2 to level 6 increases the Balloon's damage by 50%.
- This is not true for level 7 and 8 Balloons, its damage being increased by about 20% for each of these levels.
- Currently, the Balloon is one of the only only air troops that has no wings, the the other being Grand Warden if counted as a troop and set to air mode and Drop Ship, as well as the seasonal Skeleton Barrel. The Hog Glider is considered to have wings in this because all gliders in real life are said to have wings.
- During late October 2016, the Balloon's training cost was temporarily reduced by 50% and it's training time changed to 1 minute and 20 seconds to celebrate Halloween.
- The Balloon's design strongly resembles that of the Kirov Airship from the Command and Conquer games. They are both airships that deal massive damage to things right under them, both are very slow and can only target ground units.
Statistic Modifiers
Input values into these modifiers below to modify the statistics in the tables below accordingly
Gold Pass modifiers 
Rocket Balloon Spotlight modifiers
| ApplyReset |
| Preferred Target |
Attack Type |
Housing Space |
Movement Speed |
Attack Speed |
Barracks Level Required |
Range |
Death Damage Radius |
|---|---|---|---|---|---|---|---|
| Defenses | Area Splash 1.2 Tile Radius (Ground Only) | 5 | 10 | 3s | 6 | 0.5 tiles | 1.2 tiles |
| Training Time of Balloons | |||
|---|---|---|---|
| 1 Barracks | 2 Barracks | 3 Barracks | 4 Barracks |
| 2m | 1m | 40s | 30s |
| Level |
Damage per Second |
Damage per Attack |
Damage Upon Death |
Hitpoints |
Training Cost |
Research Cost |
Research Time |
Laboratory Level Required |
|---|---|---|---|---|---|---|---|---|
| 1 | 25 | 75 | 25 | 150 | 1,750 | N/A | N/A | N/A |
| 2 | 32 | 96 | 32 | 180 | 2,250 | 150,000 | 12h | 2 |
| 3 | 48 | 144 | 48 | 216 | 2,750 | 450,000 | 1d 12h | 4 |
| 4 | 72 | 216 | 72 | 280 | 3,500 | 1,350,000 | 2d | 5 |
| 5 | 108 | 324 | 108 | 390 | 4,000 | 2,500,000 | 3d | 6 |
| 6 | 162 | 486 | 162 | 545 | 4,500 | 4,500,000 | 5d | 7 |
| 7 | 198 | 594 | 214 | 690 | 5,000 | 9,500,000 | 10d | 9 |
| 8 | 236 | 708 | 268 | 840 | 5,500 | 12,000,000 | 14d | 10 |
| 9 | 256 | 768 | 322 | 940 | 6,000 | 14,000,000 | 16d | 11 |
Template:UCH