

| Defensive Buildings | Resource Buildings | Army Buildings | Other Buildings |

On this page you can view Building Strategy Guides in the Home Village. This page will tell you where to position each building at high or low levels.
- For Building Strategy Guides in the Builder Base, see Building Strategy Guides/Builder Base.
Cannon

Cannon
The Cannon is the first thing you will unlock and should be upgraded when you get enough Gold to do so. Cannons should be placed near the Town Hall for lower-level players, and for higher-level players it should be placed so it overlaps Wizard Towers and Mortars.
Archer Tower

Archer Towers have longer range than Cannons and can target air troops similar to the Air Defenses. Similar to Cannons, Archer Towers should be up upgraded as soon as the opportunity presents itself. For lower-level players, Archer Towers should be placed near to the Town Hall, similar to Cannons.
Mortar


Mortars deal a lot of damage per shot, but have the lowest rate of fire of any defensive structure. Mortars should be at the heart of your base beside your Town Hall or Resources (depending on if you are farming or trophy hunting) as they are the first defense with splash damage. When Mortars are upgraded they typically only gain 1~3 DPS (damage per second); this is because of their low rate of fire, so don't worry (higher-level Mortars pack quite a punch).
Air Defense

Air Defense
Air Defenses are the most powerful defense against air units. For lower-level players (who typically do not have to worry about Balloons or Dragons), Air Defenses are not essential but will make it harder for opponents to win battles against you. For higher-level players, multiple Air Defenses are absolutely essential, as they will influence the outcome of the battle tremendously, and may ultimately be the difference between losing and winning trophies (or losing and keeping Resources). You should place your Air Defenses so that they overlap splash damage defenses (Wizard Tower, Mortar) with at least one at the heart of your base.
Wizard Tower


Wizard Tower
Wizard Towers are perfect for killing a massive amount of enemy troops. Wizard Towers are most effective against weak troops and Minions as they deal splash damage. They should be placed where they cannot be surrounded by Archers without other defenses being able to target them, but due to their relatively short range should not be too far away from the outer wall (or else they may be idle most of the battle). Wizard Towers take a long time to upgrade past level 2, so take that into consideration when upgrading it.
Air Sweeper

Air Sweeper
The Air Sweeper is a great defense for stalling enemy Air Troops; even though they do no damage they can blow back Air Troops a fairly good distance. Despite it's extremely long range, take note of the fact that the Air Sweeper can only fire in one direction, but it can be rotated to cover another angle. Also note that you can only have up to two Air Sweepers even when you are a Town Hall 13, so make sure to maximize their usage by covering the sides that is most likely to be attacked by Air Troops!
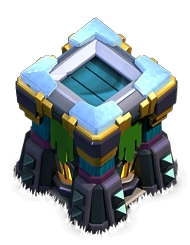
Hidden Tesla

Hidden Tesla
Hidden Teslas are very sneaky as they begin the battle hidden from sight but rise out of the ground when enemy troops come within their trigger range. Like Wizard Towers they can target both ground and air troops but they only attack one unit at a time. Hidden Teslas are not as effective placed near the corners of your village out of range of other defenses; however they can (and should) be placed where your attacker won't expect them to be, even if that means outside the Walls. Remember that Hidden Teslas reveal themselves at 51% destruction, so if they are placed in corners or out of the way, they will typically lose their only advantage (stealth).
Bomb Tower

Bomb Tower
Bomb Towers are defenses that hurl bombs at ground enemies, dealing splash damage similarly to the Wizard Tower. They go out with a bang, however; once they go down, the big bomb beneath the tower will explode shortly after, doing great damage to nearby ground troops. Their range is shorter than any other defense, so it is imperative to support the Bomb Tower with other defenses to keep your base safe. They are helpless against air troops, so it is best to keep air troops away from this tower!
X-Bow

X-Bow
X-Bows are fast-firing defenses that can kill low-health troops in a matter of seconds. X-Bows can be set to target both air and ground troops at a range of 11 tiles, or ground troops only at a range of 14 tiles. This gives it a very long range, and as such should be placed near the center of your base behind at least one other defensive unit for maximum effectiveness. Many players attempt to achieve both benefits of extreme range and anti-air capability by setting one X-Bow to ground troops only and one to both ground and air. This can unbalance the base, though, as an air sttacker can attack from the ground target side and vice versa.
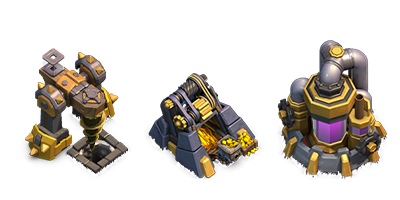
Inferno Tower

Inferno Tower
The Inferno Tower is one of the most powerful defenses, as it can reach up to 2,150 damage per second in single-target mode, although it takes several seconds to reach that level of damage and begins attacking at a very low value. For this reason it is particularly strong against high-health targets but somewhat weak against large numbers of lower-health ones. There is a compensation for this, and it is the Multi-Target made, which does moderate damage against up to 5 troops at a time. If you plan to attack a single-target Inferno Tower with a majority of high-health Troops you may want to try to dispose of the Inferno Tower with Lightning Spells, but be cognizant of the fact that the Inferno Tower has a great deal of hitpoints and will likely take all a full complement of spells to destroy. Inferno Towers should be placed so that troops, like Balloons and especially Minions, will not target it straight away.
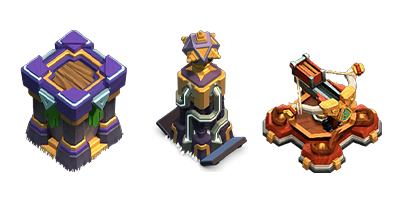
Eagle Artillery

Eagle Artillery
The Eagle Artillery is a strong defense capable of covering virtually the entire village, save for a 7-tile blind spot around itself. It activates only after a large amount of troops are deployed, and then begins its attacks for the rest of the battle. Every 10 seconds, it fires three artillery shells at a time to up to three different targets, dealing a moderately high amount of damage capable of eliminating weak troops as well as Wizards, Witches, and Minions in one shot; multiple shots can eliminate whole groups of Balloons as well. Although it is possible to destroy with only Spells, due to its extremely high hitpoints, this is certainly not recommended.
Scattershot

Scattershot
The Scattershot is a defense that throws boulders that deal high damage. These boulders also deal Area Splash which can wipe out large hordes of troops, and sometimes troops with higher hitpoints. One can use an Earthquake Spell to lower its hitpoints so it can be destroyed quicker. Scattershot disadvantages include its slow attack speed and its blind spot. The blind spot is not too large, but it is easy for melee troops, especially with high hitpoints (e.g. P.E.K.K.A, Yeti) to destroy it. To prevent this, put some single target defenses is possible next to your Scattershots, such as Single Target Inferno Towers.
Walls

Wall
Walls are great for keeping enemies directly in the line of fire from Cannons and Archer Towers. When trophy hunting, Walls should surround your Defensive Buildings, your storages and your Town Hall. When farming, Walls should surround your Defensive Buildings and storages. When attacking with ground troops, Walls can be a big setback and stall them enough such that other defenses will kill a lot of your troops, so it's advised to take at least 1 or 2 Wall Breakers into battle if your army is primarily a ground assault. For more information go to Layouts.
Town Hall
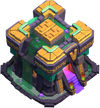
Town Hall
The Town Hall is the heart of the village, and upgrading it unlocks additional buildings and level upgrades. It is paramount to protect it by Walls and other Defensive Buildings. If your Town Hall is destroyed, you automatically lose the battle, as well as a significant amount of loot. However, if you successfully protect your Town Hall, the most the attacker can get in the battle is one star (see Raiding Mechanics for more details).
Clan Castle

Clan Castle
The Clan Castle is used to either join or start a clan. Clan Castles hold troops and Dark Spells donated by your clan members, which can be used either alongside your own Troops in an attack, or as additional defensive firepower if your own village is attacked.
Once an enemy unit comes within range of the Clan Castle, any Troops within that can target that unit will deploy to attack it. Once deployed, they will continue to attack any enemy units on the map regardless of location. It is a good idea to locate your Clan Castle in a central part of your village, though not necessarily in the most-protected area. This is important because you want your Clan Castle Troops to respond to an attack in any direction, but additionally you do not want them to be easily drawn away from your defenses (where they can be easily destroyed).
Gold Mine

Gold Mine
Gold Mines are your only source of Gold outside of raiding. Gold Mines should be kept outside your Walls, but they shouldn't be out of range of defensive buildings as attacking players can get up to 50% of the contents.
Elixir Collector

Elixir Collector
Elixir Collectors are exactly the same as Gold Mines but produce Elixir. Elixir Collectors are your only source of Elixir outside of raiding. Elixir Collectors should be kept outside your Walls but they shouldn't be out of range of defensive buildings as attacking players can get up to 50% of the contents. Elixir Collectors can be easily destroyed by Goblins, so lay Traps nearby and try to take out them out before they can destroy the collectors.
Gold Storage

Gold Storage
Gold Storages are where all of your collected Gold is kept; they are typically targeted after Gold Mines during a farming attack, but attackers can only get a small fraction of the contents (the percentage and cap depends on the Town Hall level of the defender). Gold Storages should be kept inside the walls of your village, as they is your primary source of Gold for defensive upgrades.
Elixir Storage

Elixir Storage
Elixir Storages are exactly the same as Gold Storages but they store Elixir. Elixir Storages are where all of your collected Elixir is kept; they are targeted after Elixir Collectors during a farming attack, but attackers can only get a fraction of the contents (the percentage and cap depends on the Town Hall level of the defender). Elixir Storages should be kept inside the walls of your village, as they are your primary source of Elixir for offensive upgrades.
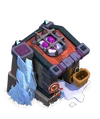
Dark Elixir Storage

Dark Elixir Storage
The Dark Elixir Storage is where all of your precious Dark Elixir is stored. It should be placed in a position where many defenses will overlap this structure, as attackers will be able to take up to 4-6% (with a cap of 2,000-3,500 depending on the Town Hall level of the defender), so you want to keep this building safe. Some good advice is to put a double wall around it so Archers cannot shoot at it and Wall Breakers cannot breach the Walls surrounding it in one attack.
Dark Elixir Drill

Dark Elixir Drill
Dark Elixir Drills are your only source of Dark Elixir outside of raiding. Attackers can gain up to 75% of their contents, so Dark Elixir Drills should be protected with Traps and Hidden Teslas. The best way to protect the uncollected Dark Elixir in the drills is not to have any, of course, so have your drills emptied as often as possible.
Barracks
Barracks
Barracks are the buildings that convert Elixir into Troops. As the Barracks is upgraded, they will both be able to train more powerful Troops as well as queue more Troops at a time. They have no significance other than training Troops (they don't store any Elixir or Gold, nor do they reward any if destroyed, even if Troops are being trained). They do not need to be near Army Camps; trained Troops will find their Army Camp regardless of how far they have to walk. Barracks should always be kept outside of your Walls, but do not put them in the corners. Use these buildings (and others in this section) as 'buffers' to keep Archers and Barbarians busy and away from more critical targets while your defenses systematically destroy them.
Army Camp
Army Camp
Army Camps are the staging areas for your army so you later use them for raids. Upgrading the Army Camps will increase your total troop capacity, which means you will be able to use more Troops in each battle. Due to their large size (4x4 tiles), the same as the Town Hall, Army Camps should never be inside of your Walls as they have no use but to store Troops. If you have them inside your Walls they will take up a great deal of space and your walls may not even fit around your village. Army Camps do have some strategic value as a 'buffer', however; their large size pushes out the 'no spawn' zone significantly, causing enemy Troops to have to spawn very far away from their targets and giving you a greater opportunity to destroy them. For this reason, position Army Camps close to sensitive areas of your base.
Dark Barracks

Dark Barracks
Dark Barracks are functionally identical to Barracks, but instead of using Elixir, it uses Dark Elixir to train special Dark Elixir Troops. The building doesn't hold any Gold or Elixir (or Dark Elixir), even when training Troops. The Dark Barracks should always be kept outside of your Walls, but do not need to be positioned next to Army Camps unless that area requires additional buffers.
Laboratory

Laboratory
The Laboratory is used to upgrade Troops and Spells to make them stronger. Although the upgrades can cost significant amounts of Elixir or Dark Elixir (and the building appears to have large vats of both attached to it), the Laboratory yields neither to an attacker, even if an upgrade is in progress. The Laboratory should be kept outside of your Walls as it otherwise has no strategic significance.
Spell Factory

Spell Factory
The Spell Factory is a building that creates Spells for use in raids. Even though Spells cost significant amounts of Elixir to create, the Spell Factory yields nothing to the attacker even if a Spell is being created. The building should be kept outside of your Walls as a buffer, as it has no strategic significance.
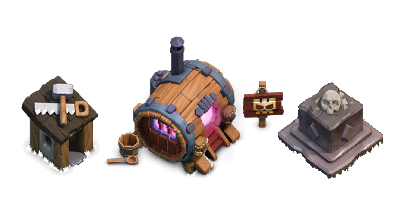
Dark Spell Factory

Dark Spell Factory
The Dark Spell Factory is a building that allows you to utilize Dark Elixir to create Spells for use in raids. The spells brewed in this factory are compact and take up half as much space as an Elixir spell. Like the Spell Factory, it should be kept outside of your Walls as a buffer, as it has no strategic significance.
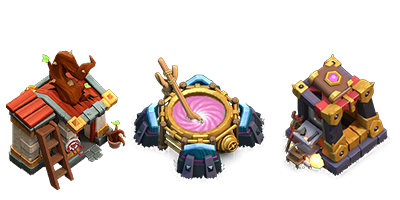
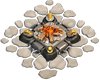
Barbarian King Altar

Barbarian King Altar
The Barbarian King Altar is a structure that houses the Barbarian King, who is a Hero that can play various roles in battles, whether it be supporting an attacking force or defending a village from enemy attackers. The Altar's placement determines the Barbarian King's general location whenever he defends, so you could place it outside your Walls to force enemies to expend troops to defeat the King; or, you could place the Altar inside to let your King serve as a temporary distraction.
Archer Queen Altar

Archer Queen Altar
The Archer Queen Altar is a structure that houses the Archer Queen, another Hero that serves purpose on both offense and defense. Like the Barbarian King Altar, placement determines the Archer Queen's general location whenever she defends; however, due to the Archer Queen's range, it may be more viable to place the Altar within Walls; that way the Archer Queen can attack ground troops from behind the safety of your Walls.
Grand Warden Altar

Grand Warden Altar
The Grand Warden Altar houses the Grand Warden, a support Hero that provides additional health to nearby allied units (and buildings, when defending). Unlike the other two Heroes in the Home Village, the Grand Warden will remain fixed as a statue on his Altar whenever defending; any building near the statue when it is defending will gain a boost in hitpoints, making them harder to destroy. You may want to consider placing the Grand Warden Altar near your Town Hall or other important defenses.
Royal Champion Altar

Royal Champion Altar
The Royal Champion Altar is a structure that houses the Royal Champion, that can either attack in offense or defense. The placement determines where the Royal Champion's defending location, however, the altar should be put within Walls because of the Royal Champion's range, which can defeat ground troops with the Wall's protection. The Royal Champion also deal a lot of damage, with high hitpoints, so put the altar near valuable buildings to make the Royal Champion a shield to the buildings.
Builder's Hut

Builder's Hut
The Builder's Hut houses your Builders, which are fundamental to constructing and upgrading other buildings. These huts have low hitpoints and serve no purpose on defense (with the exception of certain events). Thus, it is best left outside your Walls. As many players overlook Builder's Huts due to their size, placing them in the corners of the village can be a good idea, but more experienced players will be able to spot them and even take advantage of them, so be careful!
| Home Village Buildings | |
|---|---|
| Defensive Buildings | Cannon • Archer Tower • Mortar • Air Defense • Wizard Tower • Air Sweeper • Hidden Tesla • Bomb Tower • X-Bow • Inferno Tower • Eagle Artillery • Scattershot • Builder's Hut • Spell Tower • Monolith • Ricochet Cannon • Multi-Archer Tower • Giga Tesla • Giga Inferno (TH13 • TH14 • TH15 • TH16) • Wall Traps: Bomb • Spring Trap • Air Bomb • Giant Bomb • Seeking Air Mine • Skeleton Trap • Tornado Trap |
| Resource Buildings | Town Hall (Magic Items) • Gold Mine • Elixir Collector • Dark Elixir Drill • Gold Storage • Elixir Storage • Dark Elixir Storage • Clan Castle (Treasury) |
| Army Buildings | Army Camp • Barracks • Dark Barracks • Laboratory • Spell Factory • Dark Spell Factory • Blacksmith • Workshop • Barbarian King Altar • Archer Queen Altar • Grand Warden Altar • Royal Champion Altar • Pet House |
| Other Buildings | Boat • Airship • Forge • Decorations • Obstacles • Loot Cart • Strongman's Caravan • Super Sauna • Builder's Hut • B.O.B's Hut |
Feedback
If this Strategy Guide contains any inappropriate content, please report it here: Clash of Clans Wiki:Report