
- For the Builder Base building with the same name, see Gold Mine/Builder Base.

"The Gold Mine produces gold. Upgrade it to boost its production and gold storage capacity."

|

|

|

|

|
  |
| Level 1 | Level 2 | Level 3 | Level 4 | Level 5 | Level 6 |

|

|

|

|

|

|
|
| Level 8 | Level 9 | Level 10 | Level 11 | Level 12 | Level 13 | Level 14 |
- Summary
- The Gold Mine collects gold from an unlimited underground reserve and stores it until collected by the player and placed into a Gold Storage. When the mine is full, production will be stopped until it is collected (or raided by an enemy player).
- The production rate and storage capacity depends on the level of the Gold Mine. One can estimate the amount of resources in the mine by looking at the cart at the right side of the mine.
- The Gold Mine takes up a 3x3 space.
- When you choose to upgrade a Gold Mine, it will automatically collect any uncollected Gold. Note that if your Gold Storages are full at that time, the uncollected gold will be lost! During the upgrade the mine stops producing gold.
- Tapping on a gold mine when the gold icon is up collects gold from all the gold mines.
- Once the Gold Mine is level 5, you can temporarily boost its production with Gems. Spending Gems will double the Mine's production for 1 day. When you click to boost the Gold Mine, a clock appears for a few seconds.
- Defensive Strategy
- It is a good idea to put your Gold Mines outside of your Walls, so they can act as a distraction to units such as Barbarians and Archers.
- Attackers can steal up to 50% of the uncollected Gold in your mine. Having too many uncollected resources will make you a more attractive target.
- If a Gold Mine is destroyed in an attack while it is being upgraded, no gold will be lost, as the mine is empty during this time.
- There is no need to protect them in your war base, as people cannot take your loot anyway.
- When you are farming for resources, it is a good idea to put all or some of your Gold Mines and Elixir Collectors in your walls, so people can't steal uncollected resources as easily.
- It is better to place higher level collectors inside of walls, as they will produce more gold and are more valuable.
- Offensive Strategy
- Pay careful attention to the location of Gold Mines when planning your attack, as Gold Mines are usually only marginally protected and can be quite lucrative, especially at high levels. Many times a single Archer can be placed in such a way that it can destroy a Gold Mine while standing clear of any defenses.
- If you see a round number of gold in a raid, it is most likely going to be in the Gold Mines rather than in the Gold Storages (example 90,000). Although round numbers can occur in Gold Storages, they happen much more often when Gold Storages have been emptied by a previous raid and the resultant shield has allowed the Gold Mines to completely fill up.
- Make sure you target carefully, as gold mines tend to lure your troops away from what you really want to attack, ex. a Cannon or the Dark Elixir Storage.
- If you are scrolling through opponents and happen to find an opponent with high level full collectors, it is highly recommended that you attack it, because even a simple barch army (Barbarians and Archers) can yield hundreds of thousands of resources.
- Upgrade Differences
- Gold Mines undergo significant visual changes at levels 5, 8, 10 and 12.
- When initially constructed, the Gold Mine consists of a somewhat dilapidated wooden structure partially covering a set of narrow rails diving deep within the earth. Periodically a rail cart full of gold arrives and dumps its contents into a small repository to the side of the mine, and then re-enters the mine.
- At level 2, the Gold Mine appears to be fully repaired, and two wooden reinforcing bars appear on the outside of the wooden structure. There is also a very small stone rubble pile on the edge of the structure.
- At level 3, a third wooden reinforcing bar is added, and the rubble pile outside the structure grows to a noticeable size.
- At level 4, a fourth wooden reinforcing bar is added, and the rubble pile outside the structure grows larger as well.
- At level 5, the first major graphical change takes place. The wooden reinforcing bars are replaced with a blue-gray steel bar, and the rubble pile outside the mine is replaced by stone supports. This is also when you can really start to see the light from the mine.
- At level 6, there is a very slight and rather unnoticeable change. There is a small wooden reinforcing bar added to the back of the Gold Mine.
- At level 7, the steel reinforcing bar appears to be larger in width. Another wooden bar is also added to the back.
- At level 8, the Gold Mine now has two wide steel reinforcing bars bolted down, and a small pulley system, complete with a wooden track for the cable, appears on the top surface of the mine.
- At level 9, additional pulley hardware is added to the top of the structure, and the pulley wheel itself grows larger.
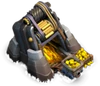
- At level 10, this is another large graphical change as the Gold Mine now has a large cover on the top made of steel that covers the wood below, and the sides are more heavily protected by spiked metal. A large gear appears beside the pulley wheel as well. The light shines even brighter.
- At level 11, the pulley system on top of the mine grows larger still with a second large gear and pulley wheel appearing, and additional spiked metal armor appears around the sides.
- At level 12, the pulley system on top of the mine becomes gold, and the corners and top of the gold mine turn black. Also, the bolts appear to move higher above the spiked metal armor. The light becomes significantly brighter.
- At level 13, the mine gains large black steel plates on both sides of the mine along with new material used for the bolts/screws along with some bottom ones being replaced by the black steel plates.
- Gold Mines undergo significant visual changes at levels 5, 8, 10 and 12.
- Trivia
- Although every other number matches between the Gold Mine and Elixir Collector, the level 5 upgrade prices are different (3,000 Elixir for the Gold Mine, 3,500 Gold for the Elixir Collector).
- The Gold mine is one of the 8 buildings that you are automatically set with at the beginning of the tutorial.
- On 5/23/2017 (the builder base update), you can collect gold from all the gold mines by tapping on one of them.
- Although directly selecting a Gold Mine with a Gold bubble above it automatically collects any resources it has stored, there is a way to check how much Gold has been stored without collecting it. This can be done by moving any other building to an invalid spot on your map (e.g., off the edge of your map, or fully or partially occupied by an obstacle, decoration or another building) and releasing it while its surrounding square has turned red. Then select the desired Gold Mine and choose the "Info" option to display the amount of Gold gathered by the mine to that point.
Icon Descriptions
| Tapping this icon displays information about the Gold Mine, such as Level, Capacity, Production and Hitpoints. | |
| Tapping this icon begins upgrading the Gold Mine to the next level, if you have enough resources and a free Builder (or B.O.B). When the Gold Mine is at maximum level, this icon is not shown. | |
| Tapping this icon instantly upgrades the Gold Mine to the next level, at the cost of one Hammer of Building if you have one. When the Gold Mine is at maximum level, or if the Town Hall requirements for the next level are not met, this icon is not shown. | |
| Tapping this icon, which is displayed only while an upgrade is in progress, instantly finishes that upgrade at the cost of the displayed number of Gems. | |
| Tapping this icon, which is displayed only while an upgrade is in progress, instantly finishes that upgrade at the cost of one Book of Building. This icon is only shown if you have at least one Book of Building. | |
| Tapping this icon, which is displayed only while an upgrade is in progress, instantly finishes that upgrade at the cost of one Book of Everything. This icon is only shown if you have at least one Book of Everything but do not have a Book of Building. | |
| Tapping this icon, which is displayed only while an upgrade is in progress, boosts all your Builders for 1 hour by a factor of ten, at the cost of one Builder Potion. This icon is only shown if you have at least one Builder Potion. | |
| Tapping this icon, which is displayed only while an upgrade is in progress, cancels the current upgrade and refunds half of the upgrade cost. | |
| Tapping this icon boosts your Gold production for 1 day at the cost of the displayed amount of Gems. | |
| Tapping this icon boosts your Gold production of all the Gold Mines for 1 day at the cost of the displayed amount of Gems. | |
| Tapping this icon boosts the production of all the Resource collector buildings for 1 day at the cost of one Resource Potion. This icon is only shown if you have at least one Resource Potion. | |
| Tapping this icon collects the uncollected Gold from the Gold Mine. | |
| This icon informs you that you don't have Gold to be collected from your Gold Mine. | |
| Town Hall Level | 1 | 2 | 3 | 4 | 5 | 6 | 7 | 8 |
|---|---|---|---|---|---|---|---|---|
| Number Available | 1 | 2 | 3 | 4 | 5 | 6 | 6 | 6 |
| Town Hall Level | 9 | 10 | 11 | 12 | 13 | 14 | 15 | 16 |
| Number Available | 7 | 7 | 7 | 7 | 7 | 7 | 7 | 7 |
| Size |
|---|
| 3x3 |
| Level | Build Cost |
Build Time | Experience Gained |
Boost Cost |
Capacity |
Production Rate |
Hitpoints | Time to Fill | Catch-Up Point* | Town Hall Level Required |
|---|---|---|---|---|---|---|---|---|---|---|
| 1 | 150 | 10s | 3 | N/A | 500 | 200/hr | 400 | 2h 30m | N/A | 1 |
| 2 | 300 | 1m | 7 | N/A | 1,000 | 400/hr | 440 | 2h 30m | 1m | 1 |
| 3 | 700 | 15m | 30 | N/A | 1,500 | 600/hr | 480 | 2h 30m | 30m | 2 |
| 4 | 1,400 | 1h | 60 | N/A | 2,500 | 800/hr | 520 | 3h 7m 30s | 3h | 2 |
| 5 | 3,000 | 1h | 60 | 4 | 10,000 | 1,000/hr | 560 | 10h | 4h | 3 |
| 6 | 7,000 | 4h | 120 | 5 | 20,000 | 1,300/hr | 600 | 15h 23m 5s | 13h 20m | 3 |
| 7 | 14,000 | 6h | 146 | 6 | 30,000 | 1,600/hr | 640 | 18h 45m | 1d 2h | 4 |
| 8 | 28,000 | 8h | 169 | 7 | 50,000 | 1,900/hr | 680 | 1d 2h 18m 57s | 1d 18h 40m | 4 |
| 9 | 56,000 | 10h | 189 | 8 | 75,000 | 2,200/hr | 720 | 1d 10h 5m 27s | 2d 15h 20m | 5 |
| 10 | 84,000 | 12h | 207 | 9 | 100,000 | 2,800/hr | 780 | 1d 11h 42m 52s | 1d 20h | 5 |
| 11 | 168,000 | 16h | 240 | 10 | 150,000 | 3,500/hr | 860 | 1d 18h 51m 26s | 2d 16h | 7 |
| 12 | 336,000 | 1d | 293 | 10 | 200,000 | 4,200/hr | 960 | 1d 23h 37m 9s | 5d | 8 |
| 13 | 504,000 | 3d | 509 | 11 | 250,000 | 4,900/hr | 1,080 | 2d 3h 1m 14s | 18d | 10 |
| 14 | 840,000 | 5d | 657 | 11 | 300,000 | 5,600/hr | 1,180 | 2d 5h 34m 18s | 35d | 11 |
* The Catch-Up Point is the time at which the newly upgraded Gold Mine has equaled the total production of the mine had it not been upgraded - this does not consider recovering the cost of the Elixir required to perform the upgrade. Or, in easier to understand terms, the catch-up point is the amount of time it would take to get the resources it would have collected if it wasn't being upgraded.
Caveat: The Catch-Up Point calculation assumes that the player collects all resources from the Gold Mine without allowing it to reach its storage capacity, as resource production ceases at that point. This is more of a concern at lower levels where the capacity is limited and Time to Fill is relatively short. If the player is unable to regularly collect and achieve the full potential of the collector, the Catch-Up Point is actually shorter and performing the upgrade becomes more advantageous.
| Home Village Buildings | |
|---|---|
| Defensive Buildings | Cannon • Archer Tower • Mortar • Air Defense • Wizard Tower • Air Sweeper • Hidden Tesla • Bomb Tower • X-Bow • Inferno Tower • Eagle Artillery • Scattershot • Builder's Hut • Spell Tower • Monolith • Ricochet Cannon • Multi-Archer Tower • Giga Tesla • Giga Inferno (TH13 • TH14 • TH15 • TH16) • Wall Traps: Bomb • Spring Trap • Air Bomb • Giant Bomb • Seeking Air Mine • Skeleton Trap • Tornado Trap |
| Resource Buildings | Town Hall (Magic Items) • Gold Mine • Elixir Collector • Dark Elixir Drill • Gold Storage • Elixir Storage • Dark Elixir Storage • Clan Castle (Treasury) |
| Army Buildings | Army Camp • Barracks • Dark Barracks • Laboratory • Spell Factory • Dark Spell Factory • Blacksmith • Workshop • Barbarian King Altar • Archer Queen Altar • Grand Warden Altar • Royal Champion Altar • Pet House |
| Other Buildings | Boat • Airship • Forge • Decorations • Obstacles • Loot Cart • Strongman's Caravan • Super Sauna • Builder's Hut • B.O.B's Hut |