m (Reverted edits by Bobbywoo (talk | block) to last version by Zazme Yakuza) |
m (Reverted edits by Thistleheart1 (talk) to last version by Tankst) |
||
| (33 intermediate revisions by 14 users not shown) | |||
| Line 1: | Line 1: | ||
__NOTOC__ __NOEDITSECTION__ |
__NOTOC__ __NOEDITSECTION__ |
||
{{Protection}} |
{{Protection}} |
||
| − | {{Translate|SpanishLink=Gólem/Gólemite|DutchLink=Golempje|RussianLink=Голем/Големчик|GermanLink=Mini-Golem|HungarianLink=Gòlem}} |
||
| − | {{AjaxGallery}} |
||
[[File:Golemite info.png|500x250px|center|link=]] |
[[File:Golemite info.png|500x250px|center|link=]] |
||
| Line 15: | Line 13: | ||
| [[File:Golem5.png|60px|link=]] |
| [[File:Golem5.png|60px|link=]] |
||
| [[File:Golem6.png|60px|link=]] |
| [[File:Golem6.png|60px|link=]] |
||
| + | | [[File:Golem7.png|60px|link=]] |
||
| + | | [[File:Golem8.png|60px|link=]] |
||
| + | | [[File:Golem9.png|60px|link=]] |
||
|- |
|- |
||
| '''Level 1 & 2''' |
| '''Level 1 & 2''' |
||
| Line 20: | Line 21: | ||
| '''Level 5''' |
| '''Level 5''' |
||
| '''Level 6''' |
| '''Level 6''' |
||
| + | | '''Level 7''' |
||
| + | | '''Level 8''' |
||
| + | | '''Level 9''' |
||
|} |
|} |
||
---- |
---- |
||
*'''Summary''' |
*'''Summary''' |
||
**Golemites are basically a smaller and less powerful version of the [[Golem]]. |
**Golemites are basically a smaller and less powerful version of the [[Golem]]. |
||
| − | **When a [[Golem]] dies, it splits into |
+ | **When a [[Golem]] dies, it splits into a pair or trio of Golemites. |
**Both [[Golem]]s and Golemites do splash damage, similar to [[Balloon]]s, when destroyed. |
**Both [[Golem]]s and Golemites do splash damage, similar to [[Balloon]]s, when destroyed. |
||
**{{PreferredTarget|Defenses}} |
**{{PreferredTarget|Defenses}} |
||
| + | **The Golemite is considered to take up 15 housing spaces for the purpose of determining its interactions with the [[Spring Trap]], [[Tornado Trap]] and [[Clone Spell]]. |
||
---- |
---- |
||
*'''Offensive Strategy''' |
*'''Offensive Strategy''' |
||
| Line 33: | Line 38: | ||
---- |
---- |
||
*'''Upgrade Differences''' |
*'''Upgrade Differences''' |
||
| − | **The Golemite undergoes a significant graphic change at levels 3 and 5. The Golemites go through graphic changes whenever the [[Golem]] does, and gets the same change. |
+ | **The Golemite undergoes a significant graphic change at levels 3 and 5, 6, and 7. The Golemites go through graphic changes whenever the [[Golem]] does, and gets the same change. |
***At level 3, the Golemite's rocky exterior changes shade from light gray to a darker gray. |
***At level 3, the Golemite's rocky exterior changes shade from light gray to a darker gray. |
||
***At level 5, the Golemite gains purple, crystal-like spikes, quite similar to those on the level 3 [[Wizard Tower]] and his entire body gains a purple/gray color. |
***At level 5, the Golemite gains purple, crystal-like spikes, quite similar to those on the level 3 [[Wizard Tower]] and his entire body gains a purple/gray color. |
||
| − | ***At level 6, the Golemites crystal changes from purple to pink, and a few more is added on |
+ | ***At level 6, the Golemites crystal changes from purple to pink, and a few more is added on its back |
| + | ***At level 7, the crystals turn into a light blue color and get sharper. |
||
---- |
---- |
||
*'''Trivia''' |
*'''Trivia''' |
||
| ⚫ | |||
| − | **Golemites (along with [[Golem]]s) were added in the 17 April 2013 update. |
||
| ⚫ | |||
| ⚫ | |||
| ⚫ | |||
| ⚫ | |||
| ⚫ | |||
| ⚫ | |||
| ⚫ | |||
**Golemites attack slightly slower than [[Golem]]s. |
**Golemites attack slightly slower than [[Golem]]s. |
||
<center> |
<center> |
||
<div style="margin-top: 10px; margin-bottom:10px; border:0px ridge Green; padding: 10px; font-size: 100%; -moz-border-radius: 15px; border-radius:15px; -webkit-border-radius:15px; border-color: silver; color:black; background-color: gainsboro;"> |
<div style="margin-top: 10px; margin-bottom:10px; border:0px ridge Green; padding: 10px; font-size: 100%; -moz-border-radius: 15px; border-radius:15px; -webkit-border-radius:15px; border-color: silver; color:black; background-color: gainsboro;"> |
||
| − | {| border="0" cellpadding="1" cellspacing="1" |
+ | {| class="wikitable" border="0" cellpadding="1" cellspacing="1" style="text-align: center; width: 100%;" |
| + | ! Preferred Target {{Res|RES=Target}} |
||
| − | ! data-type="preferred target" | Preferred Target |
||
| + | ! Attack Type {{Res|RES=Damage Type}} |
||
| − | ! data-type="attack type" | Attack Type |
||
| − | ! |
+ | ! [[Troop Movement Speed|Movement Speed]] {{Res|RES=Speed}} |
| − | ! |
+ | ! Attack Speed {{Res|RES=Attack Speed}} |
| + | ! Range {{Res|RES=Range}} |
||
| − | ! data-type="range" | Range |
||
| − | ! |
+ | ! Death Damage Radius {{Res|RES=Range}} |
|- |
|- |
||
| [[Defensive Buildings|Defenses]] |
| [[Defensive Buildings|Defenses]] |
||
| Line 64: | Line 69: | ||
|} |
|} |
||
| − | {| border="0" cellpadding="1" cellspacing="1 |
+ | {| class="wikitable" border="0" cellpadding="1" cellspacing="1" style="text-align: center; width: 100%;" |
| + | ! Level {{Res|RES=Level}} |
||
| − | ! data-type="level" | Level |
||
| + | ! Damage per Second {{Res|RES=Damage}} |
||
| − | ! data-type="dps" | Damage per Second |
||
| + | ! Damage per Attack {{Res|RES=Damage}} |
||
| − | ! data-type="dpa" | Damage per Attack |
||
| + | ! Damage Upon Death {{Res|RES=Damage}} |
||
| − | ! data-type="death damage" | Damage Upon Death |
||
| + | ! Hitpoints {{Res|RES=Hitpoint}} |
||
| − | ! data-type="hitpoints" | Hitpoints |
||
|- |
|- |
||
| 1 |
| 1 |
||
| Line 75: | Line 80: | ||
| 21 |
| 21 |
||
| 70 |
| 70 |
||
| − | | |
+ | | 1,020 |
|- |
|- |
||
| 2 |
| 2 |
||
| Line 81: | Line 86: | ||
| 24 |
| 24 |
||
| 80 |
| 80 |
||
| − | | 1, |
+ | | 1,080 |
|- |
|- |
||
| 3 |
| 3 |
||
| Line 87: | Line 92: | ||
| 27 |
| 27 |
||
| 90 |
| 90 |
||
| − | | 1, |
+ | | 1,140 |
|- |
|- |
||
| 4 |
| 4 |
||
| Line 104: | Line 109: | ||
| 12 |
| 12 |
||
| 36 |
| 36 |
||
| − | | 120 |
+ | | 120 |
| 1,320 |
| 1,320 |
||
| + | |- |
||
| + | | 7 |
||
| + | | 13 |
||
| + | | 39 |
||
| + | | 130 |
||
| + | | 1,380 |
||
| + | |- |
||
| + | | 8 |
||
| + | | 14 |
||
| + | | 42 |
||
| + | | 140 |
||
| + | | 1,440 |
||
| + | |- |
||
| + | | 9 |
||
| + | | 15 |
||
| + | | 45 |
||
| + | | 150 |
||
| + | | 1,500 |
||
|} |
|} |
||
| + | {{UCH}} |
||
| − | For additional statistics and information, see the [[Unit Calculators]] page. |
||
| − | |||
| − | [[File:New Dark Elixir Troop The Golem|400px|center]] |
||
</div> |
</div> |
||
</center> |
</center> |
||
| − | {{ |
+ | {{TroopsMenuHV}} |
[[Category:Troops]] |
[[Category:Troops]] |
||
[[Category:Dark Elixir Troops]] |
[[Category:Dark Elixir Troops]] |
||
Revision as of 18:37, 15 May 2020


|

|

|

|

|

|

|
| Level 1 & 2 | Level 3 & 4 | Level 5 | Level 6 | Level 7 | Level 8 | Level 9 |
- Summary
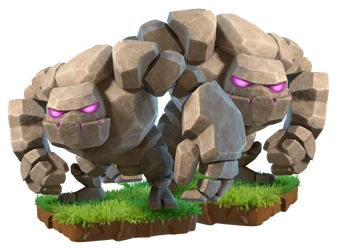
- Golemites are basically a smaller and less powerful version of the Golem.
- When a Golem dies, it splits into a pair or trio of Golemites.
- Both Golems and Golemites do splash damage, similar to Balloons, when destroyed.
- Golemites prioritize defensive structures above all other targets, and will bypass all other types of enemy buildings and troops while any defenses remain on the battlefield. This is true even if they are under attack by enemy Clan Castle troops, heroes or Skeleton Trap skeletons. Note that like all troops that prioritize defenses, Golemites do not consider the Clan Castle to be a defense regardless of whether or not it contains enemy troops, but do consider the defending Grand Warden and the activated Town Hall weapon (if any) to be defensive buildings.
Once all defenses are destroyed, Golemites become like any other troop with no preferred target; they will attack the nearest building to them regardless of type, and will turn and attack enemy units if they become aware of any nearby and can fight back against them. However, they will not switch targets to enemy units until their previous target was destroyed. - The Golemite is considered to take up 15 housing spaces for the purpose of determining its interactions with the Spring Trap, Tornado Trap and Clone Spell.
- Offensive Strategy
- You cannot train or place down Golemites, as they only appear when a Golem dies.
- Unlike the Golems, the Golemites are affected by Spring Traps.
- Upgrade Differences
- The Golemite undergoes a significant graphic change at levels 3 and 5, 6, and 7. The Golemites go through graphic changes whenever the Golem does, and gets the same change.
- At level 3, the Golemite's rocky exterior changes shade from light gray to a darker gray.
- At level 5, the Golemite gains purple, crystal-like spikes, quite similar to those on the level 3 Wizard Tower and his entire body gains a purple/gray color.
- At level 6, the Golemites crystal changes from purple to pink, and a few more is added on its back
- At level 7, the crystals turn into a light blue color and get sharper.
- The Golemite undergoes a significant graphic change at levels 3 and 5, 6, and 7. The Golemites go through graphic changes whenever the Golem does, and gets the same change.
- Trivia
- As one of the three subtroops in the Home Village (the others being the Skeleton and the Lava Pup), it cannot be trained, placed or donated directly via the Clan Castle (although the parent Troops can).
- The Golemite has one fifth of Golem's Damage per Second, Damage Upon Death and Hitpoints.
- If you have a Golem in your Clan Castle and it splits into Golemites when defending your base, the Golem will not be destroyed if at least one Golemite survives at the end of the battle.
- The Golemite is currently the only subtroop whose stats improve when you upgrade the parent troop.
- Golemites attack slightly slower than Golems.
| Preferred Target |
Attack Type |
Movement Speed |
Attack Speed |
Range |
Death Damage Radius |
|---|---|---|---|---|---|
| Defenses | Melee (Ground Only) | 12 | 3s | 0.5 tiles | 1.2 tiles |
| Level |
Damage per Second |
Damage per Attack |
Damage Upon Death |
Hitpoints |
|---|---|---|---|---|
| 1 | 7 | 21 | 70 | 1,020 |
| 2 | 8 | 24 | 80 | 1,080 |
| 3 | 9 | 27 | 90 | 1,140 |
| 4 | 10 | 30 | 100 | 1,200 |
| 5 | 11 | 33 | 110 | 1,260 |
| 6 | 12 | 36 | 120 | 1,320 |
| 7 | 13 | 39 | 130 | 1,380 |
| 8 | 14 | 42 | 140 | 1,440 |
| 9 | 15 | 45 | 150 | 1,500 |
Template:UCH