
"What dark secrets do the Alchemists hide inside their Laboratory? Nobody has dared to look. All we know is that their research makes our spells and troops harder, better, faster and stronger!"

|
|

|

|

|
| Level 1 | Level 2 | Level 3 | Level 4 | Level 5 |

|
|
|
|

|
| Level 6 | Level 7 | Level 8 | Level 9 | Level 10 |
- Summary
- The Laboratory is a building where you can upgrade your Troops and Spells. For a single research fee of Elixir or Dark Elixir, or one Hammer of Fighting or Hammer of Spells (which will instantly finish the upgrade), a chosen troop, spell or siege machine's stats (health, damage, etc.) and cost (not increased for siege machines) will increase by a small amount.
- If you decide to upgrade your Laboratory while there's a research going on, it will continue the research progression. If you happen to be logged on when the Laboratory upgrade completes, it may appear that the upgrade picks up where it left off. Log out and back on to see your troop upgrade progress reach its proper progress level.
- If an upgrade within the Laboratory would complete while the Laboratory itself is being upgraded, the upgrade will not complete until the Laboratory finishes upgrading.
- You cannot cancel the research while it is in progress, but you can immediately complete the upgrade. There are two methods to do so: using Gems, or with the relevant Magic Items (a Book of Fighting for troops, a Book of Spells for spells; a Book of Everything can be used for either).
- The Laboratories emit a purple (level 1-6), blue (level 7), red (level 8) or yellow (level 9 & 10) glow from the entrances when upgrading troop or spells.
- You do not need an available Builder to upgrade in the Laboratory.
- Different levels of troops will receive graphical changes. However, when you are upgrading a troop, the laboratory interface doesn't show what it looks like after the upgrade.
- When a Laboratory upgrade is completed, it is applied immediately to any relevant troops, spells or siege machines that are present on the village, wherever they may be (whether it is already ready or is being trained at the time that the upgrade completes). You do not have to create new instances of the upgraded unit to benefit from the upgrade.
- As a result, due to upgraded units having higher creation costs, you can queue the unit being upgraded in the relevant building just before the upgrade finishes, and then un-queue the unit when the upgrade finishes to gain some resources.
- Upgrade Differences
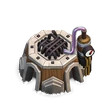
- Laboratories undergo significant visual changes at levels 2, 3, 6, 7, 8, 9 and 10.
- When initially constructed, the Laboratory consists of a wooden octagonal structure with multiple door-less entrances. A mass of black tubing covers the center of the Laboratory's roof.
- At level 2, the Laboratory adds a large vat of Elixir mounted on one side, while the roof is reinforced with steel. A dial is on the vat of elixir, and wires connect it to the roof, near the black tubing.
- At level 3, the Laboratory's roof adds a large black dome with circular [elixir-colored ports.
- At level 4, the doorways receive gold trim.
- At level 5, a second Elixir vat is added to the left wall.
- The level 6 Laboratory receives a faceted crystal sphere on its roof supported by a black iron rod and a helical golden spring. Electricity periodically runs up the surface of the sphere.
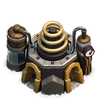
- At level 7, the crystal sphere is replaced by a huge set of stacked circular gold rings, identical to those found atop the level 7 Hidden Tesla. The elixir vat on the left side of the Laboratory is replaced with a larger one filled with Dark Elixir. The ringed structure on the roof crackles periodically with electricity. The dark color theme indicates that this level is unlocked at Town Hall level 9.
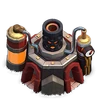
- At level 8, the circular gold rings are replaced with a vertical tube glowing from the inside. This tube is emblazoned with what appears to be the symbol representing radioactive material, which indicates that the liquid is likely radioactive. The door posts turn to a dark red color. It seems that red fluid is filling the left chamber. The dial also starts moving back and forth rapidly, showing that the vat may be overflowing. During an upgrade, the vertical tube spews fire. The red color theme indicates that this level is unlocked at Town Hall level 10.
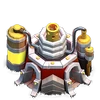
- At level 9, the stack of rings are re-added to the top of the Laboratory, instead this time the rings are white rather than gold. The door post turns from a dark red to white. The red fluid on the left side is changed to yellow. The white and yellow color theme indicates that this level is unlocked at Town Hall level 11.
- At level 10, the Laboratory takes on a blue-gray color scheme. The stack of rings is now replaced with a giant yellow screw, which twists in and out of the roof when an upgrade is in progress. The dial from level 8 returns, and is now larger than before. The fluid vat on the left is now replaced by a metal tube with a cyan glow in the middle.
- Laboratories undergo significant visual changes at levels 2, 3, 6, 7, 8, 9 and 10.
- Trivia
- Although a particular troop or spell may be listed in the table below as being available to upgrade at a particular Laboratory level, only those you have previously unlocked (with the appropriate level Barracks, Dark Barracks, Spell Factory or Dark Spell Factory) will actually appear in the upgrade interface. For instance, the level 2 Lightning Spell is available in the level 1 Laboratory, but the Lightning Spell itself is not unlocked until the Spell Factory is built. Once the Spell Factory is constructed, you will be able to upgrade the Lightning Spell as high as your current Laboratory allows.
- The conductor on top of the Laboratory on levels 6 and 7 depicts the 'lightning gatherer' that is used to raise the dead creatures to life that are often found in horror movies.
- The pressure gauges on the side Dark Elixir vats are only seen moving on the level 7 and 8 Laboratory, except for when troops/spells go under upgrade. Then, all laboratory gauges move.
- The Laboratory is currently the only building that can only be built/upgraded exactly once in every Town Hall level starting from Town Hall 3 to Town Hall 12.
- The phrase: "Harder, better, faster, and stronger!" is a reference to the French dance duo Daft Punk's widely known song, Harder Better Faster Stronger.
- None of the troops increase in speed when upgraded. However, upgrading the Rage Spell and Haste Spell in the Lab will produce more speed boosts, which justifies the word "faster".
- The Laboratory, the Town Hall and the Eagle Artillery are the only three buildings in the Home Village to take up a 4x4 grid space.
- The Laboratory contains 4 entry ways instead of 2, they can be seen in the back where the arches for the entry ways stand.
Icon Descriptions
| Tapping this icon displays information about the Laboratory, such as Level and Hitpoints. | |
| Tapping this icon begins upgrading the Laboratory to the next level, if you have enough resources and a free Builder (or B.O.B). When the Laboratory is at maximum level, this icon is not shown. | |
| Tapping this icon instantly upgrades the Laboratory to the next level, at the cost of one Hammer of Building if you have one. When the Laboratory is at maximum level, or if the Town Hall requirements for the next level are not met, this icon is not shown. | |
| Tapping this icon, which is displayed only while an upgrade is in progress, instantly finishes that upgrade at the cost of the displayed number of Gems. | |
| Tapping this icon, which is displayed only while an upgrade is in progress, instantly finishes that upgrade at the cost of one Book of Building. This icon is only shown if you have at least one Book of Building. | |
| Tapping this icon, which is displayed only while an upgrade is in progress, instantly finishes that upgrade at the cost of one Book of Everything. This icon is only shown if you have at least one Book of Everything but do not have a Book of Building. | |
| Tapping this icon, which is displayed only while an upgrade is in progress, boosts all your Builders for 1 hour by a factor of ten, at the cost of one Builder Potion. This icon is only shown if you have at least one Builder Potion. | |
| Tapping this icon, which is displayed only while an upgrade is in progress, cancels the current upgrade and refunds half of the upgrade cost. | |
| Tapping this icon boosts your Laboratory for 1 hour by a factor of twenty-four, at the cost of one Research Potion. This icon is only shown if you have at least one Research Potion. | |
| Tapping this icon opens up the Laboratory interface, allowing you to upgrade your Troops' and Spells' levels. | |
| Town Hall Level | 1 | 2 | 3 | 4 | 5 | 6 | 7 | 8 |
|---|---|---|---|---|---|---|---|---|
| Number Available | 0 | 0 | 1 | 1 | 1 | 1 | 1 | 1 |
| Town Hall Level | 9 | 10 | 11 | 12 | 13 | 14 | 15 | 16 |
| Number Available | 1 | 1 | 1 | 1 | 1 | 1 | 1 | 1 |
| Size |
|---|
| 4x4 |
| Level | Hitpoints | Build Cost |
Build Time | Experience Gained |
Town Hall Level Required |
|---|---|---|---|---|---|
| 1 | 500 | 25,000 | 30m | 42 | 3 |
| 2 | 550 | 50,000 | 3h | 103 | 4 |
| 3 | 600 | 90,000 | 8h | 169 | 5 |
| 4 | 650 | 270,000 | 16h | 240 | 6 |
| 5 | 700 | 500,000 | 1d 8h | 339 | 7 |
| 6 | 750 | 1,000,000 | 2d 16h | 480 | 8 |
| 7 | 830 | 2,500,000 | 3d 8h | 536 | 9 |
| 8 | 950 | 4,000,000 | 4d | 587 | 10 |
| 9 | 1,070 | 6,000,000 | 6d | 720 | 11 |
| 10 | 1,140 | 8,000,000 | 8d | 831 | 12 |
Upgrade Chart
The following charts lists the level of the Laboratory on the top and the unit/spell you can upgrade on the left. Each cell contains the level of the unit/spell you can train, how much it costs in elixir, and how long it takes. For example, Laboratory level 3 allows you to upgrade your Archers to level 3 for 250,000 Elixir and it takes 1 day. The top chart contains Elixir troop upgrades while the bottom chart contains Dark Elixir upgrades. Certain troops and spells don't have new levels unlocked at certain laboratory levels and are represented by ' - 's. For example, there's no new level of Goblin unlocked at Laboratory level 2, however you can upgrade it from level 1 to 2 with a level 2 (or higher) Laboratory if you didn't upgrade it when you had a level 1 Laboratory.
Those indicated by *(italics) show that certain items do not need the Laboratory fully upgraded to gain in levels. Those items are accessible by a lower Laboratory once the Town Hall and any other upgrade criteria is met. For example, a level 1 Laboratory can upgrade the Lightning Spell once the other requirements of Town Hall 5 and Spell Factory (level 1) are met.
Note that for the interest of keeping this table compact, abbreviations for costs and times are used. K and M stand for thousand and million, respectively. Upgrades taking a whole number of days and a half are written as X.5d instead of Xd 12h (for example, an upgrade time of 2d 12h is written as 2.5d).
| Upgrade Chart | Laboratory Level | ||||||||||
| 1 | 2 | 3 | 4 | 5 | 6 | 7 | 8 | 9 | 10 | ||
|---|---|---|---|---|---|---|---|---|---|---|---|
| Barbarian | Level | 2 | - | 3 | - | 4 | 5 | 6 | 7 | 8 | - |
| Cost | 50K | - | 150K | - | 500K | 1.5M | 4.5M | 6M | 8M | - | |
| Time | 6h | - | 1d | - | 2d | 3.5d | 4.5d | 7.5d | 10d | - | |
| Archer | Level | 2 | - | 3 | - | 4 | 5 | 6 | 7 | 8 | - |
| Cost | 50K | - | 250K | - | 750K | 2.25M | 6M | 7.5M | 9M | - | |
| Time | 12h | - | 1d | - | 2d | 3.5d | 4.5d | 7.5d | 10d | - | |
| Giant | Level | - | 2 | - | 3 | 4 | 5 | 6 | 7 | 8 | 9 |
| Cost | - | 100K | - | 250K | 750K | 2.25M | 5M | 6M | 9.5M | 12M | |
| Time | - | 12h | - | 1.5d | 2d | 3.5d | 6.5d | 8d | 11.5d | 14d | |
| Goblin | Level | 2 | - | 3 | - | 4 | 5 | 6 | 7 | - | - |
| Cost | 50K | - | 250K | - | 750K | 2.25M | 4.5M | 6.75M | - | - | |
| Time | 12h | - | 1.5d | - | 2d | 3.5d | 6.5d | 10d | - | - | |
| Wall Breaker | Level | - | 2 | - | 3 | 4 | 5 | - | 6 | 7 | 8 |
| Cost | - | 100K | - | 250K | 750K | 2M | - | 6M | 9M | 12M | |
| Time | - | 12h | - | 1.5d | 2d | 3.5d | - | 6.5d | 8d | 14d | |
| Balloon | Level | - | 2 | - | 3 | 4 | 5 | 6 | - | 7 | 8 |
| Cost | - | 150K | - | 450K | 1.35M | 2.5M | 6M | - | 9.5M | 12M | |
| Time | - | 12h | - | 1.5d | 2d | 3.5d | 6.5d | - | 11.5d | 14d | |
| Wizard | Level | - | - | 2 | 3 | 4 | 5 | 6 | 7 | 8 | 9 |
| Cost | - | - | 150K | 450K | 1.35M | 2.5M | 5M | 7M | 9M | 11M | |
| Time | - | - | 12h | 1.5d | 2d | 3.5d | 6d | 8d | 11.5d | 14d | |
| Healer | Level | - | - | - | - | 2 | 3 | 4 | - | 5 | - |
| Cost | - | - | - | - | 750K | 1.5M | 3M | - | 9.5M | - | |
| Time | - | - | - | - | 2d | 3.5d | 6d | - | 14d | - | |
| Dragon | Level | - | - | - | - | 2 | 3 | 4 | 5 | 6 | 7 |
| Cost | - | - | - | - | 2M | 3M | 5M | 7M | 9M | 11M | |
| Time | - | - | - | - | 4.5d | 6d | 6.5d | 8d | 11.5d | 14d | |
| P.E.K.K.A | Level | - | - | - | - | - | 2 / 3 | 4 | 5 / 6 | 7 | 8 |
| Cost | - | - | - | - | - | 3M / 5M | 6M | 7.5M / 8.5M | 10M | 12M | |
| Time | - | - | - | - | - | 4.5d / 5.5d | 6d | 7.5d / 8.5d | 11.5d | 14d | |
| Baby Dragon | Level | - | - | - | - | - | - | 2 | 3 / 4 | 5 | 6 |
| Cost | - | - | - | - | - | - | 5M | 6M / 7M | 8M | 9M | |
| Time | - | - | - | - | - | - | 5.5d | 6.5d / 8d | 11.5d | 14d | |
| Miner | Level | - | - | - | - | - | - | - | 2 / 3 | 4 / 5 | 6 |
| Cost | - | - | - | - | - | - | - | 6M / 7M | 8M / 9.5M | 11M | |
| Time | - | - | - | - | - | - | - | 5.5d / 6.5d | 8d / 11.5d | 14d | |
| Electro Dragon | Level | - | - | - | - | - | - | - | - | 2 | 3 |
| Cost | - | - | - | - | - | - | - | - | 9M | 11M | |
| Time | - | - | - | - | - | - | - | - | 10d | 14d | |
| Lightning Spell | Level | *2 | *3 | 4 | - | - | 5 | 6 | 7 | - | - |
| Cost | *200K | *500K | 1M | - | - | 2M | 6M | 8M | - | - | |
| Time | *1d | *2d | 3d | - | - | 4d | 6.5d | 14d | - | - | |
| Healing Spell | Level | - | *2 | - | 3 | 4 | 5 | 6 | 7 | - | - |
| Cost | - | *300K | - | 600K | 1.2M | 2M | 4M | 6M | - | - | |
| Time | - | *1d | - | 2d | 3d | 5d | 7d | 10d | - | - | |
| Rage Spell | Level | - | - | *2 | *3 | 4 | 5 | - | - | - | - |
| Cost | - | - | *450K | *900K | 1.8M | 3M | - | - | - | - | |
| Time | - | - | *2d | *3d | 5d | 7d | - | - | - | - | |
| Jump Spell | Level | - | - | - | - | *2 | - | - | 3 | - | - |
| Cost | - | - | - | - | *3M | - | - | 6M | - | - | |
| Time | - | - | - | - | 5d | - | - | 7d | - | - | |
| Freeze Spell | Level | - | - | - | - | - | - | - | 2 / 3 / 4 / 5 |
6 | 7 |
| Cost | - | - | - | - | - | - | - | 3M / 4M / 5M / 7M |
9.5M | 11M | |
| Time | - | - | - | - | - | - | - | 3d / 4.5d / 6.5d / 8d |
9d | 11.5d | |
| Clone Spell | Level | - | - | - | - | - | - | - | 2 / 3 | 4 / 5 | - |
| Cost | - | - | - | - | - | - | - | 4M / 6M | 8M / 10M | - | |
| Time | - | - | - | - | - | - | - | 4d / 5d | 6.5d / 11.5d | - | |
| Wall Wrecker | Level | - | - | - | - | - | - | - | - | - | 2 / 3 |
| Cost | - | - | - | - | - | - | - | - | - | 6M / 8M | |
| Time | - | - | - | - | - | - | - | - | - | 8d / 10d | |
| Battle Blimp | Level | - | - | - | - | - | - | - | - | - | 2 / 3 |
| Cost | - | - | - | - | - | - | - | - | - | 6M / 8M | |
| Time | - | - | - | - | - | - | - | - | - | 8d / 10d | |
| Stone Slammer | Level | - | - | - | - | - | - | - | - | - | 2 / 3 |
| Cost | - | - | - | - | - | - | - | - | - | 6M / 8M | |
| Time | - | - | - | - | - | - | - | - | - | 8d / 10d | |
| Upgrade Chart | Laboratory Level | ||||||||
| 5 | 6 | 7 | 8 | 9 | 10 | ||||
|---|---|---|---|---|---|---|---|---|---|
| Minion | Level | 2 | 3 / 4 | 5 | 6 | 7 | 8 | ||
| Cost | 10K | 20K / 30K | 40K | 100K | 140K | 180K | |||
| Time | 3.5d | 4d / 4.5d | 6.5d | 8d | 11.5d | 14d | |||
| Hog Rider | Level | 2 | 3 / 4 | 5 | 6 | 7 | 8 | ||
| Cost | 20K | 30K / 40K | 50K | 100K | 150K | 200K | |||
| Time | 3.5d | 4d / 5.5d | 6.5d | 8d | 11.5d | 14d | |||
| Valkyrie | Level | - | 2 | 3 / 4 | 5 | 6 | 7 | ||
| Cost | - | 50K | 60K / 70K | 110K | 150K | 190K | |||
| Time | - | 5.5d | 6.5d / 8d | 9.5d | 11.5d | 14d | |||
| Golem | Level | - | 2 | 3 / 4 | 5 | 6 / 7 | 8 | ||
| Cost | - | 60K | 70K / 80K | 90K | 150K / 200K | 200K | |||
| Time | - | 4d | 5.5d / 6.5d | 8d | 9.5d / 11.5d | 14d | |||
| Witch | Level | - | - | 2 | - | 3 | 4 | ||
| Cost | - | - | 75K | - | 160K | 200K | |||
| Time | - | - | 6.5d | - | 11.5d | 14d | |||
| Lava Hound | Level | - | - | 2 | 3 | 4 | 5 | ||
| Cost | - | - | 60K | 70K | 150K | 200K | |||
| Time | - | - | 6.5d | 8d | 11.5d | 14d | |||
| Bowler | Level | - | - | - | 2 | 3 | 4 | ||
| Cost | - | - | - | 120K | 200K | 200K | |||
| Time | - | - | - | 8.5d | 14d | 14d | |||
| Ice Golem | Level | - | - | - | - | 2 / 3 | 4 | ||
| Cost | - | - | - | - | 80K / 120K | 160K | |||
| Time | - | - | - | - | 8d / 10d | 12d | |||
| Poison Spell | Level | - | 2 | 3 | 4 | 5 | - | ||
| Cost | - | 25K | 50K | 75K | 150K | - | |||
| Time | - | 2.5d | 4d | 6.5d | 9.5d | - | |||
| Earthquake Spell | Level | - | 2 | 3 | 4 | - | - | ||
| Cost | - | 30K | 60K | 90K | - | - | |||
| Time | - | 4d | 5d | 9.5d | - | - | |||
| Haste Spell | Level | - | - | 2 | 3 / 4 | - | - | ||
| Cost | - | - | 40K | 80K / 100K | - | - | |||
| Time | - | - | 5d | 6.5d / 9d | - | - | |||
| Skeleton Spell | Level | - | - | - | 2 / 3 | 4 | 5 | ||
| Cost | - | - | - | 50K / 75K | 100K | 125K | |||
| Time | - | - | - | 5d / 6.5d | 8d | 9d | |||
| Bat Spell | Level | - | - | - | 2 / 3 | 4 | 5 | ||
| Cost | - | - | - | 60K / 80K | 120K | 160K | |||
| Time | - | - | - | 5d / 6.5d | 8d | 9d | |||
Template:UCH
| Home Village Buildings | |
|---|---|
| Defensive Buildings | Cannon • Archer Tower • Mortar • Air Defense • Wizard Tower • Air Sweeper • Hidden Tesla • Bomb Tower • X-Bow • Inferno Tower • Eagle Artillery • Scattershot • Builder's Hut • Spell Tower • Monolith • Ricochet Cannon • Multi-Archer Tower • Giga Tesla • Giga Inferno (TH13 • TH14 • TH15 • TH16) • Wall Traps: Bomb • Spring Trap • Air Bomb • Giant Bomb • Seeking Air Mine • Skeleton Trap • Tornado Trap |
| Resource Buildings | Town Hall (Magic Items) • Gold Mine • Elixir Collector • Dark Elixir Drill • Gold Storage • Elixir Storage • Dark Elixir Storage • Clan Castle (Treasury) |
| Army Buildings | Army Camp • Barracks • Dark Barracks • Laboratory • Spell Factory • Dark Spell Factory • Blacksmith • Workshop • Barbarian King Altar • Archer Queen Altar • Grand Warden Altar • Royal Champion Altar • Pet House |
| Other Buildings | Boat • Airship • Forge • Decorations • Obstacles • Loot Cart • Strongman's Caravan • Super Sauna • Builder's Hut • B.O.B's Hut |

