(- translation template) |
(Discussed in above point) Tag: Source edit |
||
| (43 intermediate revisions by 20 users not shown) | |||
| Line 1: | Line 1: | ||
| + | __NOEDITSECTION__ |
||
| − | __NOTOC____NOEDITSECTION__ |
||
{{Protection}} |
{{Protection}} |
||
| + | |||
| − | [[File:Push |
+ | [[File:Push Trap10.png|200px|center|link=]] |
<center>'''''"Toss ground troops in a direction you choose. Heave ho!"'''''</center> |
<center>'''''"Toss ground troops in a direction you choose. Heave ho!"'''''</center> |
||
---- |
---- |
||
| + | <div class="flexbox-display bold-text"> |
||
| − | {| style="text-align:center; margin:auto; width: 450px;" |
||
| + | <div>[[File:Push Trap1.png|100px|link=]]<div>Level 1</div></div> |
||
| ⚫ | |||
| − | + | <div>[[File:Push Trap2.png|100px|link=]]<div>Level 2</div></div> |
|
| − | + | <div>[[File:Push Trap3.png|100px|link=]]<div>Level 3</div></div> |
|
| − | + | <div>[[File:Push Trap4.png|100px|link=]]<div>Level 4</div></div> |
|
| − | + | <div>[[File:Push Trap5.png|100px|link=]]<div>Level 5</div></div> |
|
| − | + | <div>[[File:Push Trap6.png|100px|link=]]<div>Level 6</div></div> |
|
| − | + | <div>[[File:Push Trap7.png|100px|link=]]<div>Level 7</div></div> |
|
| − | + | <div>[[File:Push Trap8.png|100px|link=]]<div>Level 8</div></div> |
|
| + | <div>[[File:Push Trap9.png|100px|link=]]<div>Level 9</div></div> |
||
| ⚫ | |||
| + | <div>[[File:Push Trap10.png|100px|link=]]<div>Level 10</div></div> |
||
| − | |'''Level 1''' |
||
| + | </div> |
||
| − | |'''Level 2''' |
||
| − | |'''Level 3''' |
||
| − | |'''Level 4''' |
||
| − | |'''Level 5''' |
||
| − | |'''Level 6''' |
||
| − | |'''Level 7''' |
||
| − | <!--|'''Level 8'''--> |
||
| ⚫ | |||
| − | ---- |
||
| ⚫ | |||
| ⚫ | |||
| − | **It pushes ground units through the air that are within its unit capacity, and has no effect on air units. |
||
| − | **It does no damage to units alone. |
||
| − | **Upgrading the Push Trap only increases the number of unit capacity it pushes. |
||
| − | **The Push Trap, like any other trap in the Builder Base, does not need to be re-armed. |
||
| ⚫ | |||
| ⚫ | |||
| ⚫ | |||
| ⚫ | |||
| ⚫ | |||
| ⚫ | |||
| − | ***While game files reveal that the [[Battle Machine]] has a spring weight of 25, Push Traps have no effect on the Battle Machine even if its spring capacity is greater than or equal to 25. |
||
| − | ---- |
||
| ⚫ | |||
| ⚫ | |||
| ⚫ | |||
| ⚫ | |||
| ⚫ | |||
| ⚫ | |||
| ⚫ | |||
| ⚫ | |||
| ⚫ | |||
| ⚫ | |||
| ⚫ | |||
| − | ---- |
||
| ⚫ | |||
| ⚫ | |||
| ⚫ | |||
| ⚫ | |||
| ⚫ | |||
| ⚫ | |||
| ⚫ | |||
| ⚫ | |||
| − | ---- |
||
| ⚫ | |||
| ⚫ | |||
| ⚫ | |||
| ⚫ | |||
| + | *The Push Trap is a [[Traps/Builder Base|trap]] in the Builder Base that pushes ground units through the air that are within its unit capacity, and has no effect on air units. Tapping on the Push Trap shows with an 'X' where affected troops will land. It inflicts no damage. |
||
| ⚫ | |||
| ⚫ | |||
| ⚫ | |||
| + | **[[Drop Ship/Skeleton|Skeletons]] spawned by the [[Drop Ship]] have a spring weight of 1. |
||
| ⚫ | |||
| ⚫ | |||
| + | **[[Bomber]]s and [[Hog Glider|Hog Rider]]s have a spring weight of 12. |
||
| + | **[[Night Witch]]es and [[Electrofire Wizard]]s have a spring weight of 14. |
||
| ⚫ | |||
| ⚫ | |||
| + | **[[Power P.E.K.K.A]]s have a spring weight of 22. |
||
| + | **The [[Battle Machine]] has a spring weight of 25, but cannot be affected by this trap. |
||
| + | |||
| + | == Strategies== |
||
| + | |||
| ⚫ | |||
| ⚫ | |||
| ⚫ | |||
| ⚫ | |||
| ⚫ | |||
| ⚫ | |||
| ⚫ | |||
| + | *Try to keep Push Traps away from Mega Mines, as the Push Trap could inadvertently move enemy units away from its blast radius. |
||
| + | *You can place Push Traps around the edge of a short-ranged defense's radius to counter [[Cannon Cart]]s. Pushing a Cannon Cart closer to the defense will negate the Cannon Cart's range advantage if it attempts to snipe a defense using Mortar Mode. However, since Cannon Carts have a spring weight of 16, this only works if the Push Trap is upgraded to level 5 or higher. |
||
| + | |||
| ⚫ | |||
| ⚫ | |||
| ⚫ | |||
| ⚫ | |||
| + | *The effect of Push Traps on {{B|Sneaky Archer}}s vary based on the direction they are pushed towards: |
||
| + | **If they are pushed further away from their target, this cuts down the time they are able to attack the target while invisible, or may cause them to retarget entirely. |
||
| + | **Conversely, pushing them closer to their target will not benefit the defense if the Archer can still attack from its new location, unless the Push Trap is followed up by another trap such as a {{B|Spring Trap}}. This is because the Sneaky Archers can continue attacking while invisible without worry of being destroyed. |
||
| + | |||
| ⚫ | |||
| + | *Push Traps undergo significant visual changes at level 3, 5, 6, 7, and 8. |
||
| ⚫ | |||
| ⚫ | |||
| ⚫ | |||
| ⚫ | |||
| ⚫ | |||
| ⚫ | |||
| ⚫ | |||
| + | **At level 8, the wooden base is completely replaced with a blue base, similar to the arrow from level 3. |
||
| + | **At level 9, the corners gain golden yellow spikes. |
||
| + | **At level 10, the arrow and base turns black and the arrow is surrounded by a thin gold frame. |
||
| + | ==Statistics== |
||
<center> |
<center> |
||
| + | <div class="stats-background"> |
||
| − | <div style="margin-top: 10px; margin-bottom:10px; border:0px ridge Green; padding: 10px; font-size: 100%; -moz-border-radius: 15px; border-radius:15px; -webkit-border-radius:15px; border-color: silver; color:black; background-color: gainsboro;"> |
||
| − | {{BuilderBaseNumberAvailable |
+ | {{GoldPassForm|Building}}{{BuilderBaseNumberAvailable |
|BH2=1 |
|BH2=1 |
||
|BH3=2 |
|BH3=2 |
||
|BH4=3 |
|BH4=3 |
||
|BH5=4 |
|BH5=4 |
||
| + | |BH7=5 |
||
}} |
}} |
||
{{BuildingSize|2x2}} |
{{BuildingSize|2x2}} |
||
| − | {| class="wikitable |
+ | {| class="wikitable" border="0" cellpadding="1" cellspacing="1" style="text-align: center; width: 100%;" |
| − | ! |
+ | !Level<br />{{Res|RES = Level}} |
| − | ! |
+ | !Spring Capacity<br />{{Res|RES = Spring}} |
| − | ! |
+ | ![[Resource Buildings#Gold|Cost]]<br />{{Res|RES = GoldB}} |
| − | ! |
+ | ! Build Time<br />{{Res|RES = Time}} |
| − | ! |
+ | ![[Experience]] Gained<br />{{Res|RES = XP}} |
| − | ![[Builder Hall]] Level Required {{Res|RES = Builder Hall}} |
+ | ! [[Builder Hall]] Level Required<br />{{Res|RES = Builder Hall}} |
|- |
|- |
||
| − | | |
+ | |1 |
| − | | |
+ | |8 |
| − | | 1,000 |
+ | | class="GoldPass bCost" |1,000 |
| − | | |
+ | |N/A |
| − | | |
+ | |N/A |
| 2 |
| 2 |
||
|- |
|- |
||
| 2 |
| 2 |
||
| ⚫ | |||
| − | | 3,000 |
||
| − | | 5 minutes |
||
| − | | 17 |
||
| − | | 3 |
||
| ⚫ | |||
| − | | 3 |
||
| 10 |
| 10 |
||
| + | | class="GoldPass bCost" |3,000 |
||
| − | | 10,000 |
||
| + | | class="GoldPass bTime" |5m |
||
| − | | 20 minutes |
||
| + | | class="GoldPass EXP" |17 |
||
| − | | 34 |
||
| − | | |
+ | |3 |
|- |
|- |
||
| − | | |
+ | |3 |
| − | | |
+ | |12 |
| + | | class="GoldPass bCost" |10,000 |
||
| − | | 20,000 |
||
| + | | class="GoldPass bTime" |20m |
||
| − | | 2 hours |
||
| + | | class="GoldPass EXP" |34 |
||
| − | | 84 |
||
| − | | |
+ | |3 |
|- |
|- |
||
| − | | |
+ | |4 |
| + | |14 |
||
| + | | class="GoldPass bCost" |20,000 |
||
| + | | class="GoldPass bTime" |2h |
||
| + | | class="GoldPass EXP" |84 |
||
| ⚫ | |||
| ⚫ | |||
| + | |5 |
||
| + | |16 |
||
| + | | class="GoldPass bCost" |40,000 |
||
| + | | class="GoldPass bTime" |4h |
||
| + | | class="GoldPass EXP" |120 |
||
| + | |5 |
||
| ⚫ | |||
| + | |6 |
||
| + | |18 |
||
| + | | class="GoldPass bCost" |60,000 |
||
| + | | class="GoldPass bTime" |12h |
||
| + | | class="GoldPass EXP" |207 |
||
| + | |6 |
||
| ⚫ | |||
| ⚫ | |||
| 20 |
| 20 |
||
| + | | class="GoldPass bCost" |100,000 |
||
| − | | 40,000 |
||
| + | | class="GoldPass bTime" |16h |
||
| − | | 4 hours |
||
| + | | class="GoldPass EXP" |240 |
||
| − | | 120 |
||
| − | | |
+ | |7 |
| + | |- |
||
| + | |8 |
||
| + | |22 |
||
| + | | class="GoldPass bCost" |200,000 |
||
| + | | class="GoldPass bTime" |1d |
||
| + | | class="GoldPass EXP" |293 |
||
| + | |8 |
||
|- |
|- |
||
| − | | |
+ | |9 |
| − | | |
+ | |24 |
| + | | class="GoldPass bCost" |300,000 |
||
| − | | 60,000 |
||
| + | | class="GoldPass bTime" |1d 12h |
||
| − | | 6 hours |
||
| + | | class="GoldPass EXP" |360 |
||
| − | | 146 |
||
| − | | |
+ | |9 |
|- |
|- |
||
| − | | |
+ | |10 |
| − | | |
+ | | 26 |
| + | | class="GoldPass bCost" |500,000 |
||
| − | | 100,000 |
||
| + | | class="GoldPass bTime" | 2d |
||
| − | | 8 hours |
||
| + | | class="GoldPass EXP" |415 |
||
| − | | 169 |
||
| − | | |
+ | |10 |
|} |
|} |
||
| − | {| class="wikitable |
+ | {| class="wikitable" border="0" cellpadding="1" cellspacing="1" style="text-align: center; width: 100%;" |
| − | ! |
+ | !Trigger Radius {{Res|RES = Range}} |
| + | !AoE Radius {{Res|RES = Range}} |
||
! Push Distance {{Res|RES = Push Strength}} |
! Push Distance {{Res|RES = Push Strength}} |
||
| − | ! |
+ | !Unit Type Targeted {{Res|RES = Target}} |
| − | ! |
+ | !Favorite Target {{Res|RES = Target}} |
|- |
|- |
||
| − | | |
+ | |1 tile |
| − | | |
+ | |3.5 tiles |
| + | | 6 tiles |
||
| − | | |
+ | |Ground |
| − | | |
+ | |None |
|} |
|} |
||
</div> |
</div> |
||
</center> |
</center> |
||
| ⚫ | |||
| − | {{BuilderBaseBuildingsMenu}} |
||
| ⚫ | |||
| ⚫ | |||
| + | *It can also push troops into Walls. If that happens, then they will glitch to the side of the Walls away from the Push Trap. In extreme cases, the Push Trap can even displace them to a corner of the base. |
||
| + | *Troops pushed by the Push Trap will not become airborne. Defenses only targeting air cannot attack them, but those targeting ground units will function normally, as long as they're within range. |
||
| + | *The Push Trap is the only {{B|Traps|Trap}} that cannot harm troops alone. |
||
| + | {{BuildingsMenuBB}} |
||
[[Category:Traps]] |
[[Category:Traps]] |
||
[[Category:Builder Base]] |
[[Category:Builder Base]] |
||
| + | [[de:Stoßfalle]] |
||
| − | [[Category:Builder Base Traps]] |
||
Latest revision as of 09:52, 30 August 2023


Level 1
Level 2

Level 3
Level 4
Level 5
Level 6

Level 7

Level 8

Level 9

Level 10
Summary
- The Push Trap is a trap in the Builder Base that pushes ground units through the air that are within its unit capacity, and has no effect on air units. Tapping on the Push Trap shows with an 'X' where affected troops will land. It inflicts no damage.
- The Push Trap, like any other trap in the Builder Base, does not need to be re-armed.
- The Push Trap does not need the Master Builder for construction, but does for its upgrades.
- The Push Trap can affect a certain number of ground troops, determined by its spring capacity. The spring capacity is the total spring weights of the units on top of the trap.
- Skeletons spawned by the Drop Ship have a spring weight of 1.
- Sneaky Archers have a spring weight of 3.
- Raged Barbarians have a spring weight of 4.
- Bombers and Hog Riders have a spring weight of 12.
- Night Witches and Electrofire Wizards have a spring weight of 14.
- Cannon Carts have a spring weight of 16.
- Boxer Giants have a spring weight of 18.
- Power P.E.K.K.As have a spring weight of 22.
- The Battle Machine has a spring weight of 25, but cannot be affected by this trap.
Strategies
Defensive Strategy=
- Use the Push Trap to push away troops from critical buildings, like the Builder Hall or defenses.
- Try to push units into hazardous areas such as a Spring Trap, a Mega Mine or high-damaging buildings like the Crusher to do more damage or kill them.
- You can use the Push Trap to push units into an empty space surrounded by Walls to trap them inside.
- Push Traps can be carefully placed to push enemies into another Push Trap. This is best done to high value troops, like the Boxer Giant, to effectively stall and ruin an attack.
- This also uses a lot of Push Traps, and is not recommended as there are better uses than putting multiple Push Traps.
- You can purposefully upgrade a few Push Traps and use them to push units onto a lower level Push Trap. The higher level Push Trap would push more troops than the lower level Push Trap, effectively splitting up your opponent's units as some units cannot be pushed by the lower level one.
- Try to keep Push Traps away from Mega Mines, as the Push Trap could inadvertently move enemy units away from its blast radius.
- You can place Push Traps around the edge of a short-ranged defense's radius to counter Cannon Carts. Pushing a Cannon Cart closer to the defense will negate the Cannon Cart's range advantage if it attempts to snipe a defense using Mortar Mode. However, since Cannon Carts have a spring weight of 16, this only works if the Push Trap is upgraded to level 5 or higher.
Offensive Strategy:
- When going against this trap, try to use one expendable unit, such as a Raged Barbarian, to trigger this trap.
- The Push Trap remains hidden before triggered, so you would have to predict where it is.
- You can use the Battle Machine to trigger Push Traps amongst other traps due to it not being affected.
- The effect of Push Traps on Sneaky Archers vary based on the direction they are pushed towards:
- If they are pushed further away from their target, this cuts down the time they are able to attack the target while invisible, or may cause them to retarget entirely.
- Conversely, pushing them closer to their target will not benefit the defense if the Archer can still attack from its new location, unless the Push Trap is followed up by another trap such as a Spring Trap. This is because the Sneaky Archers can continue attacking while invisible without worry of being destroyed.
Upgrade Differences
- Push Traps undergo significant visual changes at level 3, 5, 6, 7, and 8.
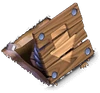
- When initially constructed, the Push Trap is 3 uneven wooden boards held up by a spring with an arrow carved in the planks.
- At level 2, four nails are screwed in at each corner.
- At level 3, the arrow in the middle turns metal, and the wooden planks join, leaving no gaps between. The spring appears to be thicker and golden.
- At level 4, the corners are now metallic, covering the nails.
- At level 5, the corners connect through metallic stripes, and the nails turn bronze.
- At level 6, the metallic stripes disappear and it becomes a golden version of level 4, but the nails stay bronze.
- At level 7, the corners connect through golden stripes, and looks like a golden version of level 5.
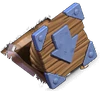
- At level 8, the wooden base is completely replaced with a blue base, similar to the arrow from level 3.
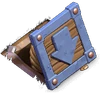
- At level 9, the corners gain golden yellow spikes.
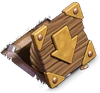
- At level 10, the arrow and base turns black and the arrow is surrounded by a thin gold frame.
Statistics
Gold Pass modifiers 
Input Gold Pass boost to modify the statistics in the tables below accordingly
| ApplyReset |
| Number Available | Builder Hall Level | |||||||||
|---|---|---|---|---|---|---|---|---|---|---|
| 1 | 2 | 3 | 4 | 5 | 6 | 7 | 8 | 9 | 10 | |
| Total | 0 | 1 | 2 | 3 | 4 | 4 | 5 | 5 | 5 | 5 |
| Size |
|---|
| 2x2 |
| Level |
Spring Capacity |
Cost |
Build Time |
Experience Gained |
Builder Hall Level Required |
|---|---|---|---|---|---|
| 1 | 8 | 1,000 | N/A | N/A | 2 |
| 2 | 10 | 3,000 | 5m | 17 | 3 |
| 3 | 12 | 10,000 | 20m | 34 | 3 |
| 4 | 14 | 20,000 | 2h | 84 | 4 |
| 5 | 16 | 40,000 | 4h | 120 | 5 |
| 6 | 18 | 60,000 | 12h | 207 | 6 |
| 7 | 20 | 100,000 | 16h | 240 | 7 |
| 8 | 22 | 200,000 | 1d | 293 | 8 |
| 9 | 24 | 300,000 | 1d 12h | 360 | 9 |
| 10 | 26 | 500,000 | 2d | 415 | 10 |
| Trigger Radius |
AoE Radius |
Push Distance |
Unit Type Targeted |
Favorite Target |
|---|---|---|---|---|
| 1 tile | 3.5 tiles | 6 tiles | Ground | None |
Icon Descriptions
| Tapping this icon displays information about the Push Trap, such as Level, Damage Type and Targets. | |
| Tapping this icon begins upgrading the Push Trap to the next level, if you have enough resources and a free Master Builder or O.T.T.O. When the Push Trap is at maximum level, this icon is not shown. | |
| Tapping this icon instantly upgrades the Push Trap to the next level, at the cost of one Hammer of Building if you have one. When the Push Trap is at maximum level, or the Builder Hall requirements for the next level are not met, this icon is not shown. | |
| Tapping this icon, which is displayed only while an upgrade is in progress, instantly finishes that upgrade at the cost of the displayed number of Gems. | |
| Tapping this icon, which is displayed only while an upgrade is in progress, instantly finishes that upgrade at the cost of one Book of Building. This icon is only shown if you have at least one Book of Building. | |
| Tapping this icon, which is displayed only while an upgrade is in progress, instantly finishes that upgrade at the cost of one Book of Everything. This icon is only shown if you have at least one Book of Everything but do not have a Book of Building. | |
| Tapping this icon, which is displayed only while an upgrade is in progress, cancels the current upgrade and refunds half of the upgrade cost. | |
| Tapping this icon rotates the Push Trap 90 degrees clockwise. | |
Trivia
- Although the Push Trap is rotated 90 degrees each time, it uses the Air Sweeper's smaller rotation icon (the Air Sweeper rotates 45 degrees each time), rather than the Walls' right angle rotation icon.
- It can also push troops into Walls. If that happens, then they will glitch to the side of the Walls away from the Push Trap. In extreme cases, the Push Trap can even displace them to a corner of the base.
- Troops pushed by the Push Trap will not become airborne. Defenses only targeting air cannot attack them, but those targeting ground units will function normally, as long as they're within range.
- The Push Trap is the only Trap that cannot harm troops alone.
| Builder Base Buildings | |
|---|---|
| Defensive Buildings | Cannon • Double Cannon • Archer Tower • Hidden Tesla • Firecrackers • Crusher • Guard Post • Air Bombs • Multi Mortar • O.T.T.O's Outpost (Zappy) • Roaster • Giant Cannon • Mega Tesla • Lava Launcher • X-Bow • Walls Traps: Push Trap • Spring Trap • Mine • Mega Mine |
| Resource Buildings | Builder Hall (Magic Items) • Gold Mine • Elixir Collector • Gold Storage • Elixir Storage • Gem Mine • B.O.B Control |
| Army Buildings | Builder Barracks • Army Camp • Star Laboratory • Battle Machine Altar • Reinforcement Camp • Healing Hut • Battle Copter Altar |
| Other Buildings | Boat • Decorations • Obstacles • Clock Tower • Elixir Cart |