m (i'm not very sure about these easter eggs, but the reference doesn't look sound (natural defense could just very well be the tactic of using the nearby land as a cover, hence the placement of the base on the corner)) Tag: Source edit |
No edit summary Tag: Visual edit |
||
| Line 202: | Line 202: | ||
This level has four level 2 [[Cannon]]s and level 1 and lvl 2 [[Walls]], but no [[Bomb]]s. |
This level has four level 2 [[Cannon]]s and level 1 and lvl 2 [[Walls]], but no [[Bomb]]s. |
||
| − | Deploy 5-10 [[Giant]]s through each opening on the left and right. |
+ | Deploy 5-10 [[Giant]]s through each opening on the left and right. |
| + | |||
| ⚫ | |||
[[File:Gold Rush|300px]] |
[[File:Gold Rush|300px]] |
||
| Line 256: | Line 258: | ||
This level has six level 4 [[Cannon]]s, level 1 and 2 [[Walls]] and [[Bomb]]s. |
This level has six level 4 [[Cannon]]s, level 1 and 2 [[Walls]] and [[Bomb]]s. |
||
| − | Deploy 8 level 2+ [[Giant]]s and 2 level 2+ [[Wall Breaker]]s next to a [[Cannon]]. A single air troop will easily destroy the base as well. |
+ | Deploy 8 level 2+ [[Giant]]s and 2 level 2+ [[Wall Breaker]]s next to a [[Cannon]]. A single air troop will easily destroy the base as well. |
| + | |||
| ⚫ | |||
[[File:Gobbotown|300px]] |
[[File:Gobbotown|300px]] |
||
| Line 401: | Line 405: | ||
==Walls of Steel== |
==Walls of Steel== |
||
| − | There are many [[Traps]]s at the two side entrances to the fort. Place an [[Archer]] or [[Barbarian]] to activate these. Next, use [[Giant]]s to destroy the [[Archer Tower]]s. Then place 1 or two [[Balloon]]s since there's nothing that targets them. |
+ | There are many [[Traps|trap]]s at the two side entrances to the fort. Place an [[Archer]] or [[Barbarian]] to activate these. Next, use [[Giant]]s to destroy the [[Archer Tower]]s. Then place 1 or two [[Balloon]]s since there's nothing that targets them. |
Alternative 1: Deploy 4 level 2 [[Balloon]]s at each [[Archer Tower]]. This number reduces to 3 with level 3 [[Balloon]]s. |
Alternative 1: Deploy 4 level 2 [[Balloon]]s at each [[Archer Tower]]. This number reduces to 3 with level 3 [[Balloon]]s. |
||
| Line 440: | Line 444: | ||
Alternative 2: Deploy some well-placed [[Archer]]s at each [[Air Defense]] until they are down. (you can do this without having [[Archer Tower]]s shoot your troops.) Then, strafe the remaining [[Defensive Buildings|defenses]] with [[Balloon]]s. Use [[Lightning Spell]] for the [[Wizard Tower]]s if necessary. |
Alternative 2: Deploy some well-placed [[Archer]]s at each [[Air Defense]] until they are down. (you can do this without having [[Archer Tower]]s shoot your troops.) Then, strafe the remaining [[Defensive Buildings|defenses]] with [[Balloon]]s. Use [[Lightning Spell]] for the [[Wizard Tower]]s if necessary. |
||
| + | |||
| ⚫ | |||
[[File:Obsidian Tower.jpg|right|300px]] |
[[File:Obsidian Tower.jpg|right|300px]] |
||
| Line 1,525: | Line 1,531: | ||
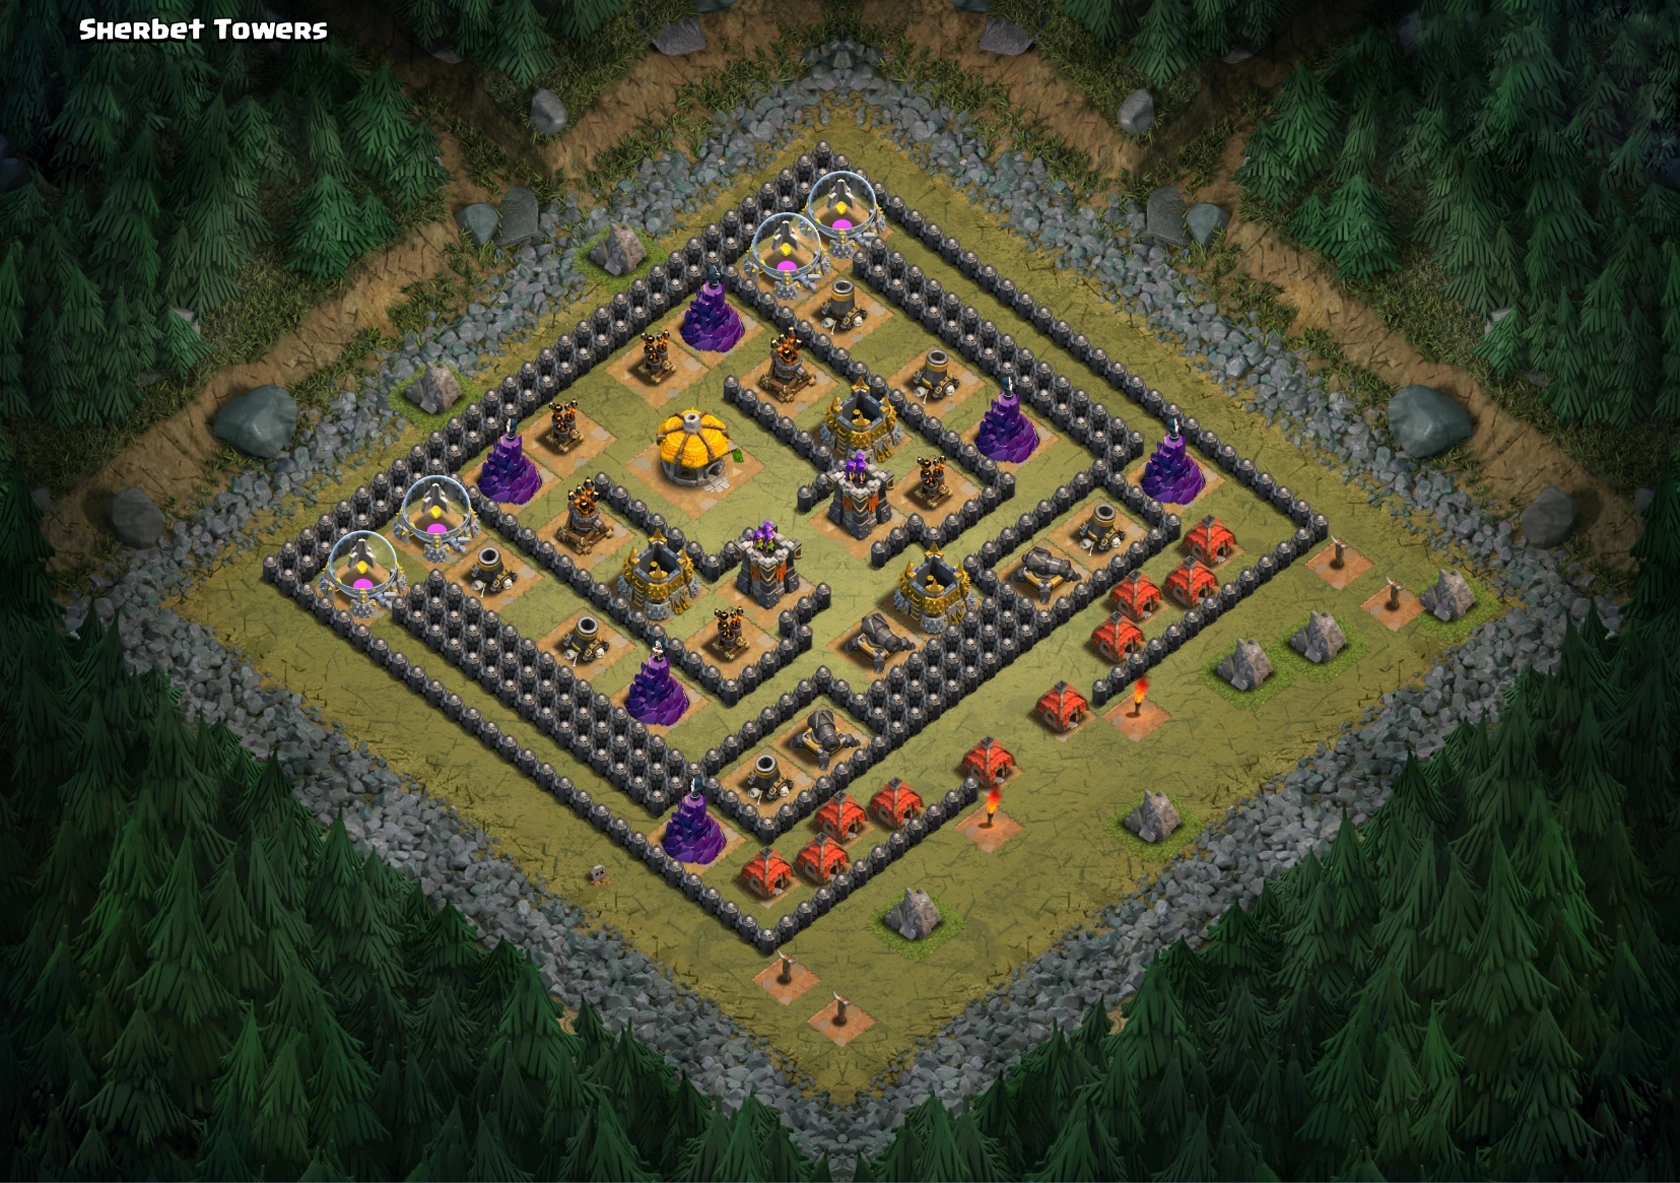
*The Sherbet Towers use to be labeled as 'Goblin King's Hideout'. However, the Sherbet Towers was later relabeled as 'Abandoned Hideout'. |
*The Sherbet Towers use to be labeled as 'Goblin King's Hideout'. However, the Sherbet Towers was later relabeled as 'Abandoned Hideout'. |
||
**Before its relabelling, some players believed the 'Goblin King's Hideout' label referred to the Goblin that appeared in the tutorial. |
**Before its relabelling, some players believed the 'Goblin King's Hideout' label referred to the Goblin that appeared in the tutorial. |
||
| − | *There are many secrets and Easter eggs in some levels so far: |
||
| ⚫ | |||
| ⚫ | |||
| ⚫ | |||
| − | **In Full Frontal, if you deploy your units next to a rock obstacle, there'll be a [[Pumpkin Bomb]] from the 2012 Halloween update. |
||
| − | **In Goblin Picnic, if you cast a [[Jump Spell]] on a [[Decorations|Statue of P.E.K.K.A]] surrounded with level 10 [[Walls/Home Village|Walls]], and your troops get inside there, the [[Santa's Surprise]] will trigger. |
||
| − | **In Natural Defense, if you deploy your units next to a [[Gold Storage/Home Village|Gold Storage]] that's surrounded with level 5 [[Walls/Home Village|Walls]], the four [[Hidden Tesla/Home Village|Hidden Teslas]] will activate. |
||
| − | **In Two Smoking Barrels, each corners have [[Walls/Home Village|Walls]] that look like letters. On the left side of the map, there is a letter H. On the top of the map, it either is n or u. On the bottom is a letter c. On the right side of the map, there is a letter t. |
||
| − | **In Rat Valley, if you deploy your troops next to a tombstone, the [[Pumpkin Bomb]] will get triggered. |
||
| − | ***However that feature was later removed for unknown reason. |
||
*When the Skeleton Run level was initially added, it featured all Halloween obstacles up to and including the 2018 obstacle (the level was added in the October 2018 update alongside the levels past Sherbet Towers). The 2020 Winter update also added the 2019 and 2020 Halloween obstacles to the level. |
*When the Skeleton Run level was initially added, it featured all Halloween obstacles up to and including the 2018 obstacle (the level was added in the October 2018 update alongside the levels past Sherbet Towers). The 2020 Winter update also added the 2019 and 2020 Halloween obstacles to the level. |
||
* The P.E.K.K.A's Playhouse from the Single Player Campaign is an inspiration of an [https://clashroyale.fandom.com/wiki/Arenas arena] from Clash Royale. |
* The P.E.K.K.A's Playhouse from the Single Player Campaign is an inspiration of an [https://clashroyale.fandom.com/wiki/Arenas arena] from Clash Royale. |
||
Revision as of 01:50, 25 March 2021

- For the single player practice mode, see Practice Mode.

Summary
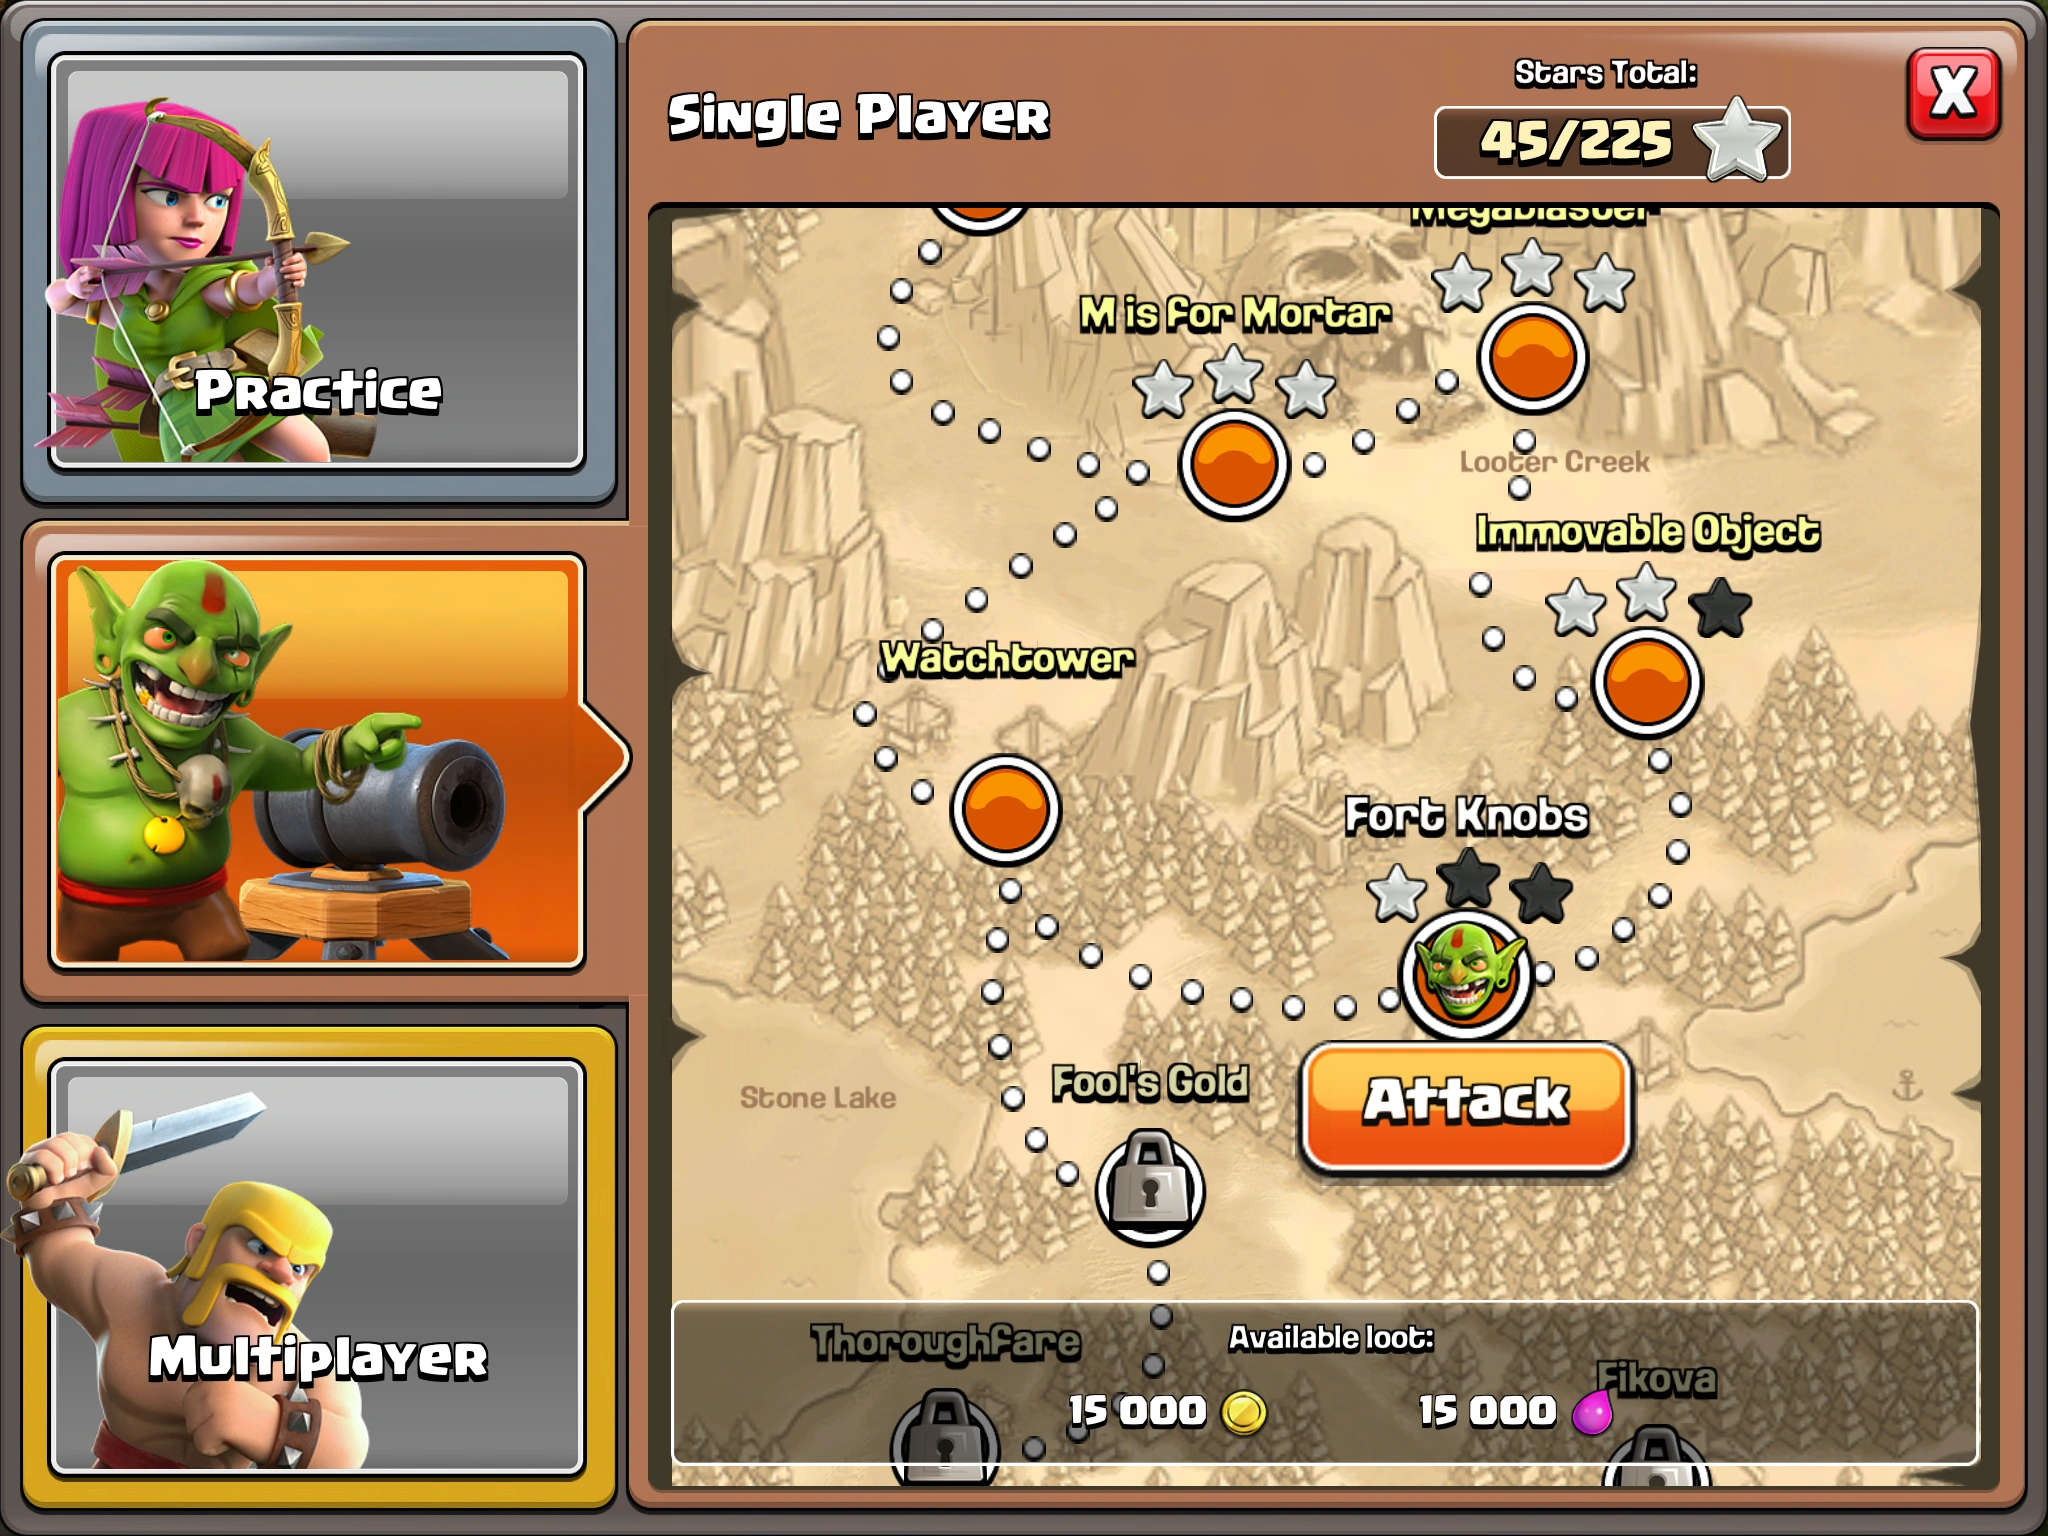
Single Player Campaigns are battles against NPC or Non-Player Character Goblins and their preset villages (internet access is still needed). There are currently 75 Single Player levels, and each level has 3 stars that can be achieved for a maximum possible 225 stars from all levels. Each level also has varying Gold, Elixir and Dark Elixir rewards that can be raided from the levels' storages and Town Halls.
Aside from resource rewards, there are three achievements tied to the Single Player Campaign:
- Get those Goblins!, rewarding a total of 35
 for achieving 150 stars in the campaign;
 - Get those other Goblins!, rewarding a total of 170 for achieving all 225 stars in the campaign;
- Dragon Slayer, rewarding 20 for slaying the Giant Dragon in the final "Dragon's Lair" level.
The basic mechanics in the Single Player Campaign are the same as in multiplayer, with the following exceptions:
- No player Trophies are won or lost.
- No loot bonuses are earned upon winning a battle in the Single Player Campaign if the player is placed in a Trophy League. Stars scored also do not count towards the Star Bonuses.
- There is no time limit.
- The number and type of Defensive Buildings do not follow what is available to players and are limited only by the available space. For example, the 50th level "Sherbet Towers" has 6 Wizard Towers and dozens of Bombs (only 5 Wizard Towers and 7 Bombs are available at Town Hall level 13).
- There are buildings and obstacles exclusive to this mode (see list below).
- Attacking (in the Single Player Campaign) will not decrease the duration of an active Shield, allowing the player to raid the Goblins if the player intends to wait out the Shield.
- A battle will not finish in the case of a disconnect. In fact, disconnecting during a battle will prevent a victory even if it had already been achieved; and you will lose all spawned troops.
A number of the earlier levels have no Air Defenses, Archer Towers or Wizard Towers. That means you can easily complete them with a single Balloon (or other air troops). Be aware that other missions can still be won with 1 Balloon as well; you just have to destroy all the Wizard Towers, Air Defenses and Archer Towers with other troops/spells first.
It should be noted that the resources available in the Single Player Campaign can only be obtained once and that damage does not persist between successive attacks on the same level; if a player destroys part of a level in one battle, all the damage will be repaired the next time the player attacks the same level.
Some levels have defensive troops housed in particular structures. These troops always respawn for the next battle if they are killed in a particular battle.
Below is a list of Single Player Campaign exclusive buildings.
Goblin Town Hall
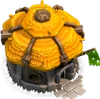
Goblin Town Hall
The Goblin Town Hall is the main building of these maps. It behaves exactly like the player Town Hall. Its appearance stays the same at levels 1-12, the difference being hitpoints (equal to player Town Hall of the same level), the amount of experience given (equal to the level of the Goblin Town Hall), and, last but not least, the level 12 Goblin Town Halls have a weapon that acts in a similar fashion to the Giga Tesla.
Each resource (Gold, Elixir, Dark Elixir) is split evenly between the Goblin Town Hall and each storage of this type. This may cause the Goblin Town Hall to hold more resources than a player Town Hall of the same level can possibly hold.
Goblin Hut

Goblin Hut
The Goblin Huts are non-defensive buildings. Like non-defensive buildings in Multiplayer Battles such as resource storages, they count towards destruction percentage. A Clash Royale building is inspired by this building.
Goblin Castle
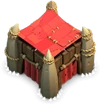
Goblin Castle
As its name suggests, it's the Goblin version of the Clan Castle, which houses defensive troops. However, it can hold much more troops than a player Clan Castle. Unlike the Clan Castle, it does not have a Treasury and is not considered as a Resource Building, and will not be the primary target of Goblins. When destroyed, its appearance resembles that of a ruined Clan Castle.
Dragon Cave

Dragon Cave
The Dragon Cave appears in the final level, Dragon's Lair, and houses the Giant Dragon. It functions like the Goblin Castle, spawning the Giant Dragon whenever a player's troop comes near it. When destroyed, the Dragon Cave uses the destroyed Clan Castle texture.
| Building | Size |
Hitpoints |
Trigger Radius |
|---|---|---|---|
| Goblin Town Hall | 4x4 | Same as player Town Hall of equal level | N/A |
| Goblin Hut | 2x2 | 250 | N/A |
| Goblin Castle | 3x3 | 4,000 | 13 |
| Dragon Cave | 4x4 | 25,000 | 13 |
| Building | Range |
Attack Speed |
Unit Type Targeted |
Damage per Second per Target |
Damage per Shot per Target |
Number of Targets |
Goblin Town Hall Level Required |
|---|---|---|---|---|---|---|---|
| Goblin Giga Tesla | 10 | 0.2s | Ground & Air | 150 | 30 | 3 | 12 |
Below is a list of all Single Player missions and their rewards, along with brief strategies for completing them.
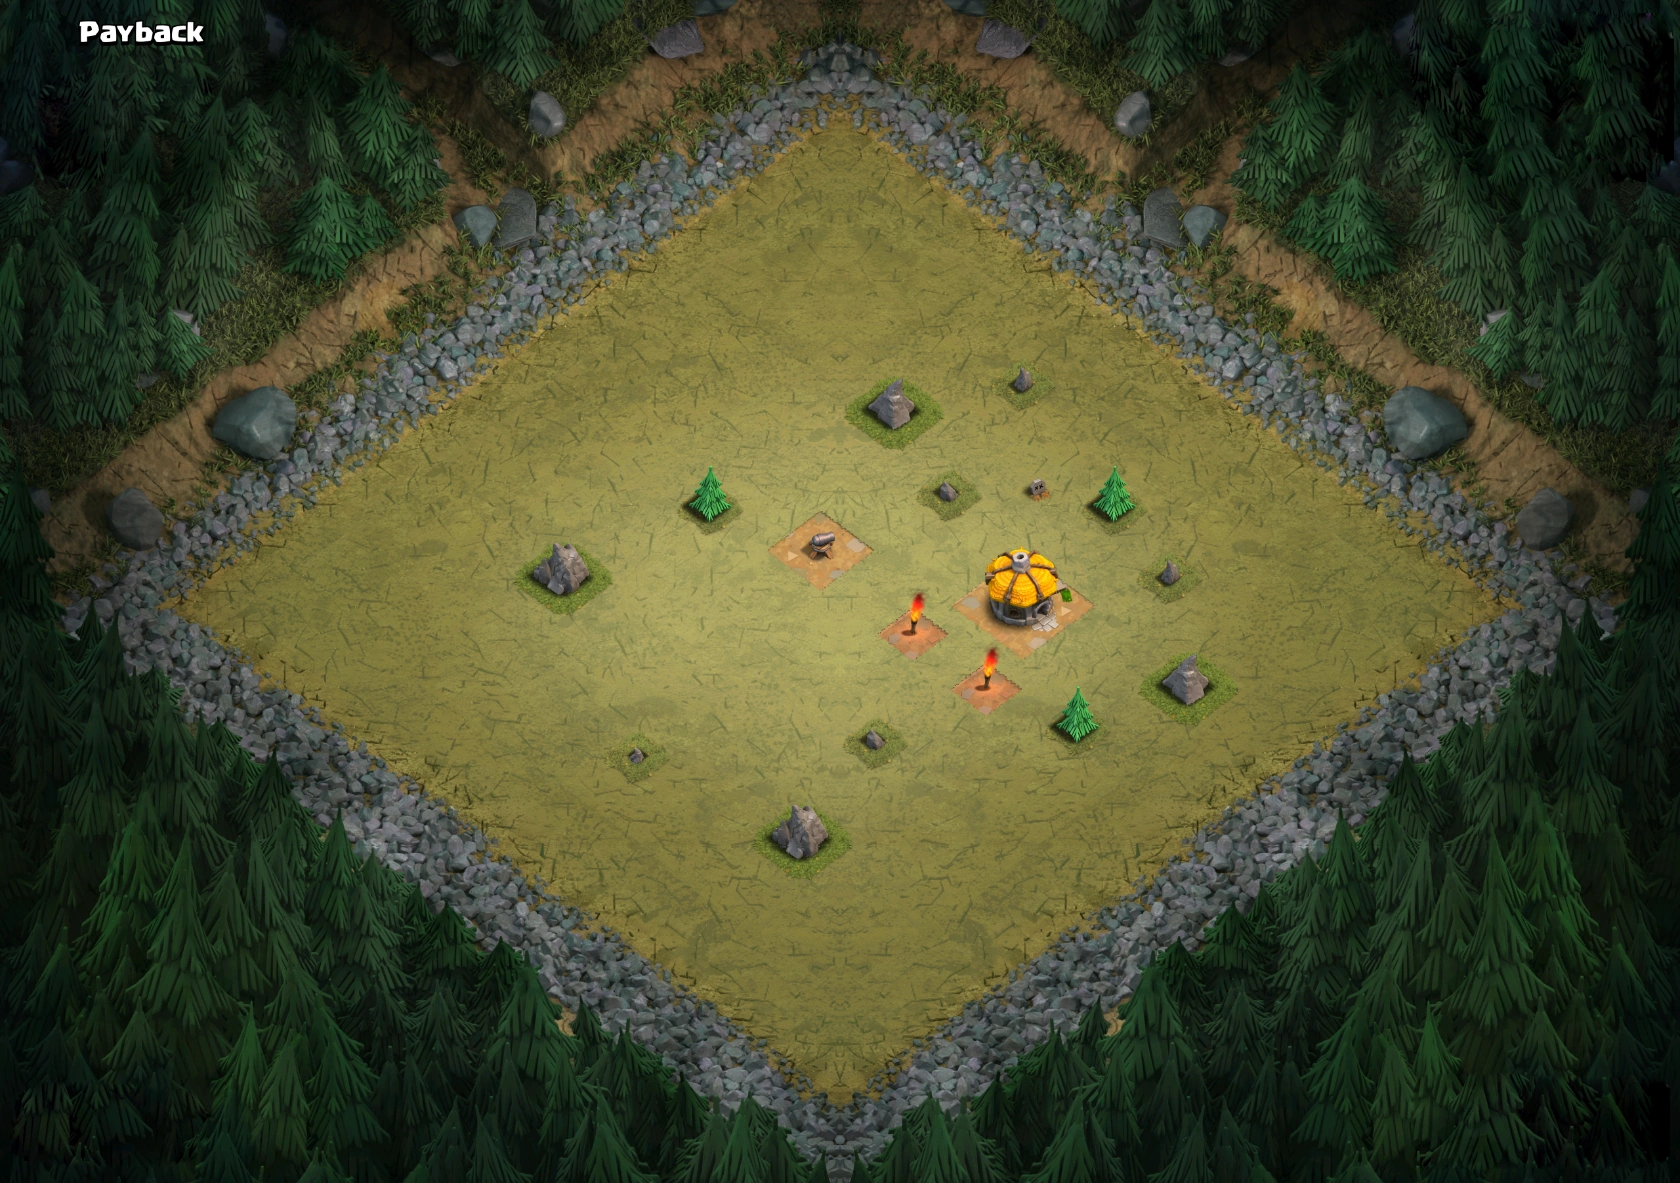
Payback
This map is part of the tutorial (Town Hall 1).
You only need to send in a few Barbarians to finish.
It consists of one level 1 Cannon and a Town Hall.
In the tutorial, it gives you 5 Wizards. You only need 2 for this, and you can save the 3 for other attacks.
Loot available: 500 Gold and 500 Elixir.

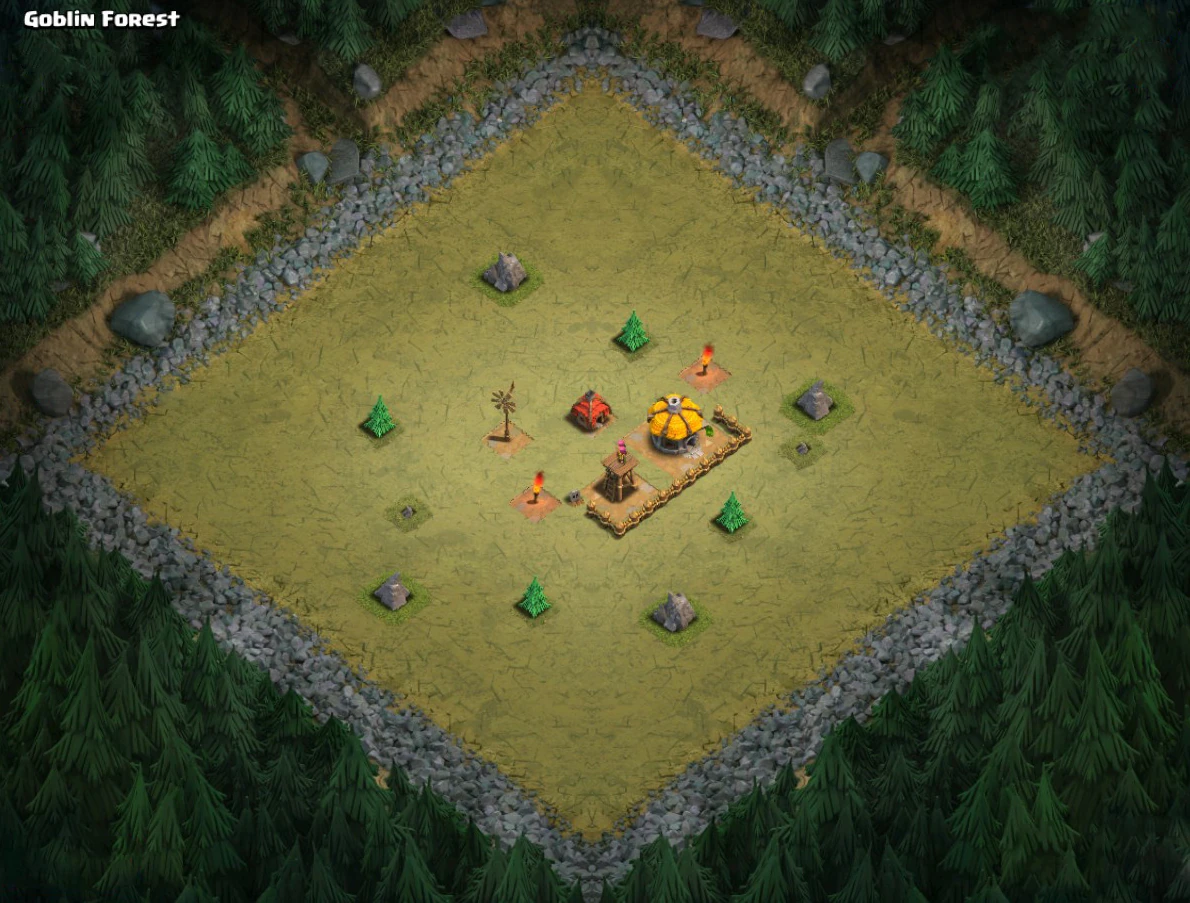
Goblin Forest
This map is part of the tutorial (Town Hall 1).
It has a level 1 Archer Tower, a Goblin Hut, some level 1 Walls, and a Town Hall. Drop-in 5 Barbarians at the Archer Tower to complete.
Loot available: 500 Gold and 500 Elixir.

Goblin Outpost
Recommended Town Hall 2
Loot available: 1,000 Gold and 1,500 Elixir.
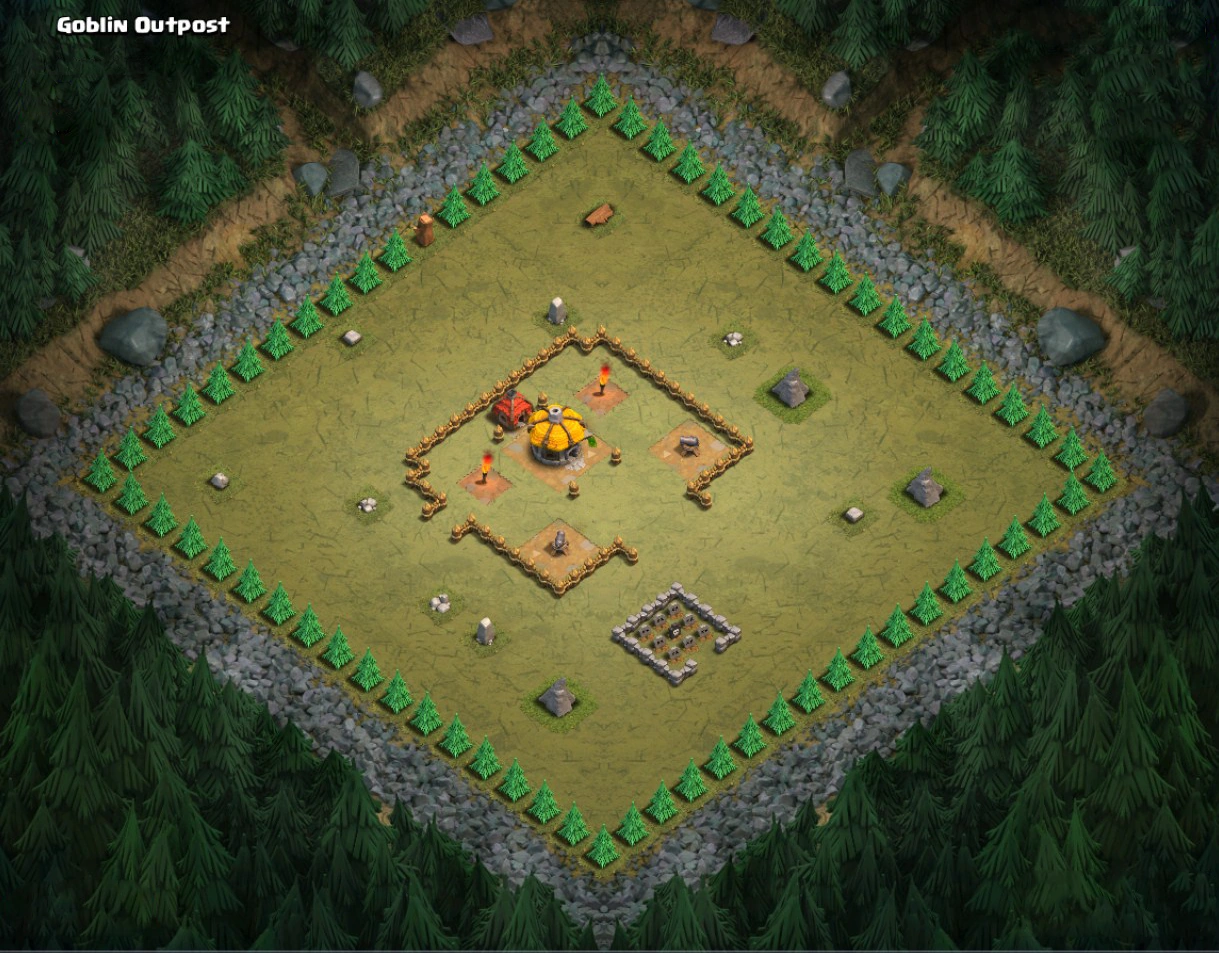
This level is the first non-tutorial level. It has two level 1 Cannons, lvl 1 Walls, a Goblin Hut and a Town Hall.
Just deploy a few Barbarians through the main door; they will destroy two Cannons.

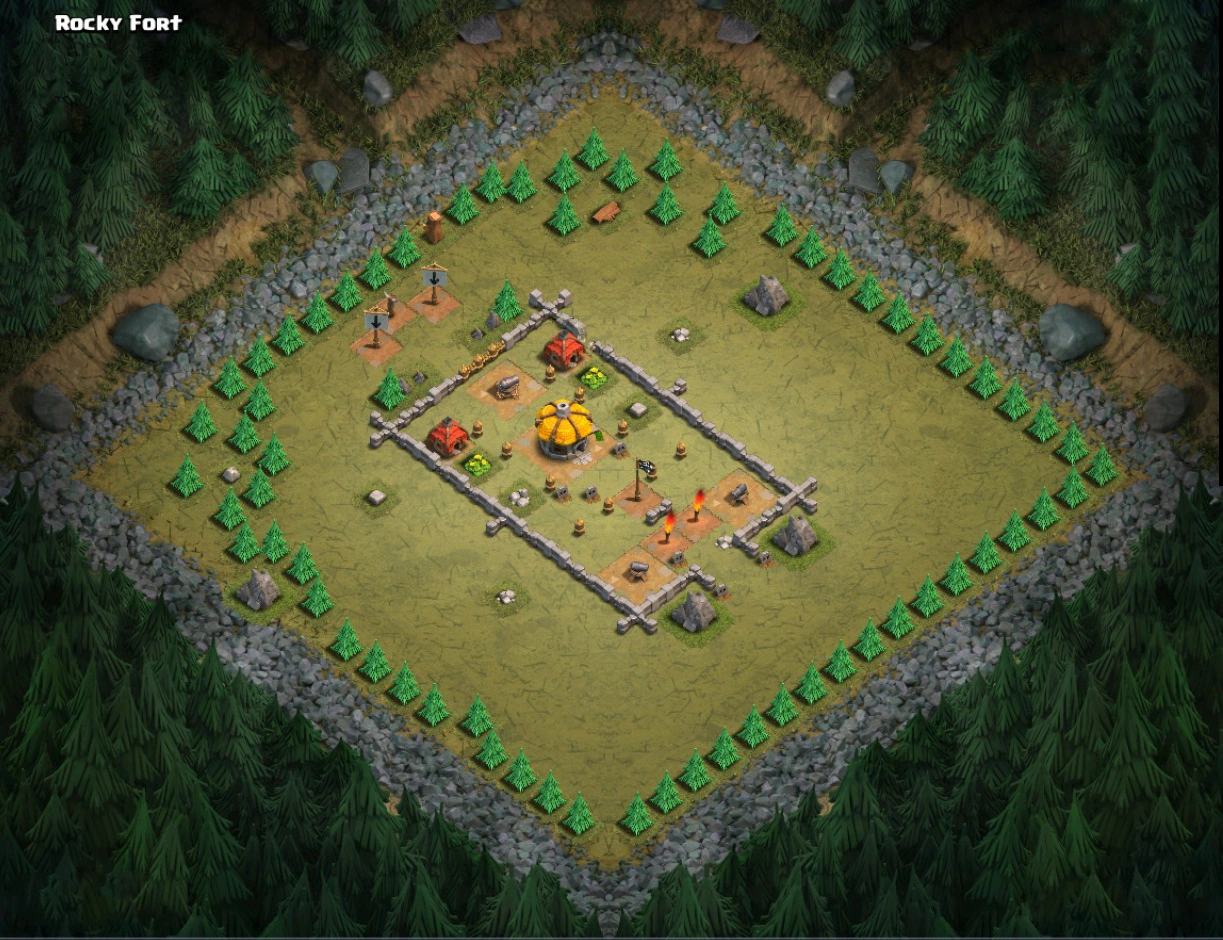
Rocky Fort
Recommended Town Hall 3.
Loot available: 1,000 Gold and 1,500 Elixir.
This level introduces the level 2 Walls. It consists of two level 1 Cannons, one level 2 Cannon and level 2 Walls.
Deploy 7 Giants through the opening with the two Cannons.
Alternatively, deploy around 10-20 Barbarians through the opening, and use a Giant and a few Archers on the side with the single Cannon protected by a few level 1 Walls.
Alternative 2: Follow the above but instead of Giants and Archers for the Walls, use 10 or so Barbarians.

Goblin Gauntlet
Recommended Town hall 2
Loot available: 1,000 Gold and 1,500 Elixir.
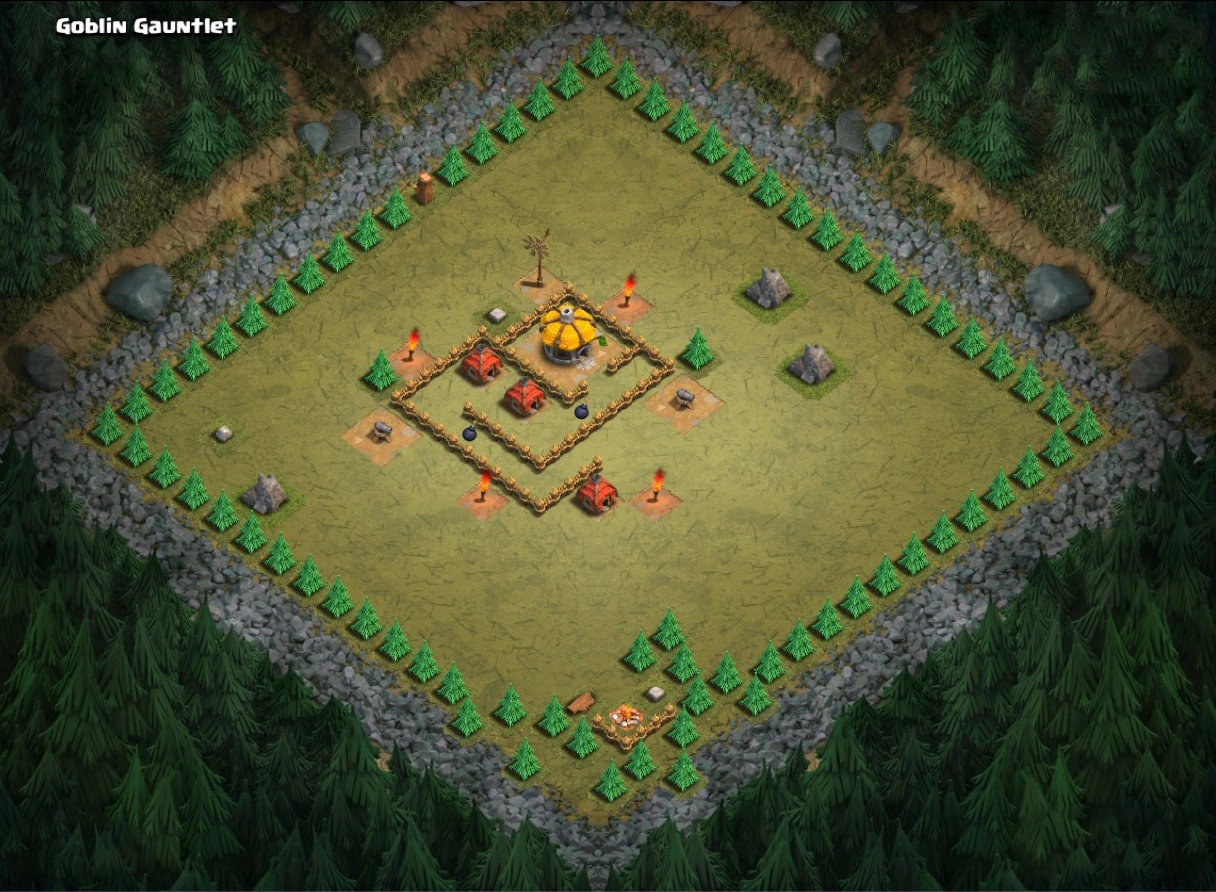
This level introduces the Bomb. The defenses are two level 1 Cannons, lvl 1 Walls and Bombs hidden in the passageway.
Deploy 3 Giants or few Barbarians at each Cannon.
Note: There is a structure at the bottom of the map of what seems to be an Army Camp, however, this doesn't count towards the percentage.

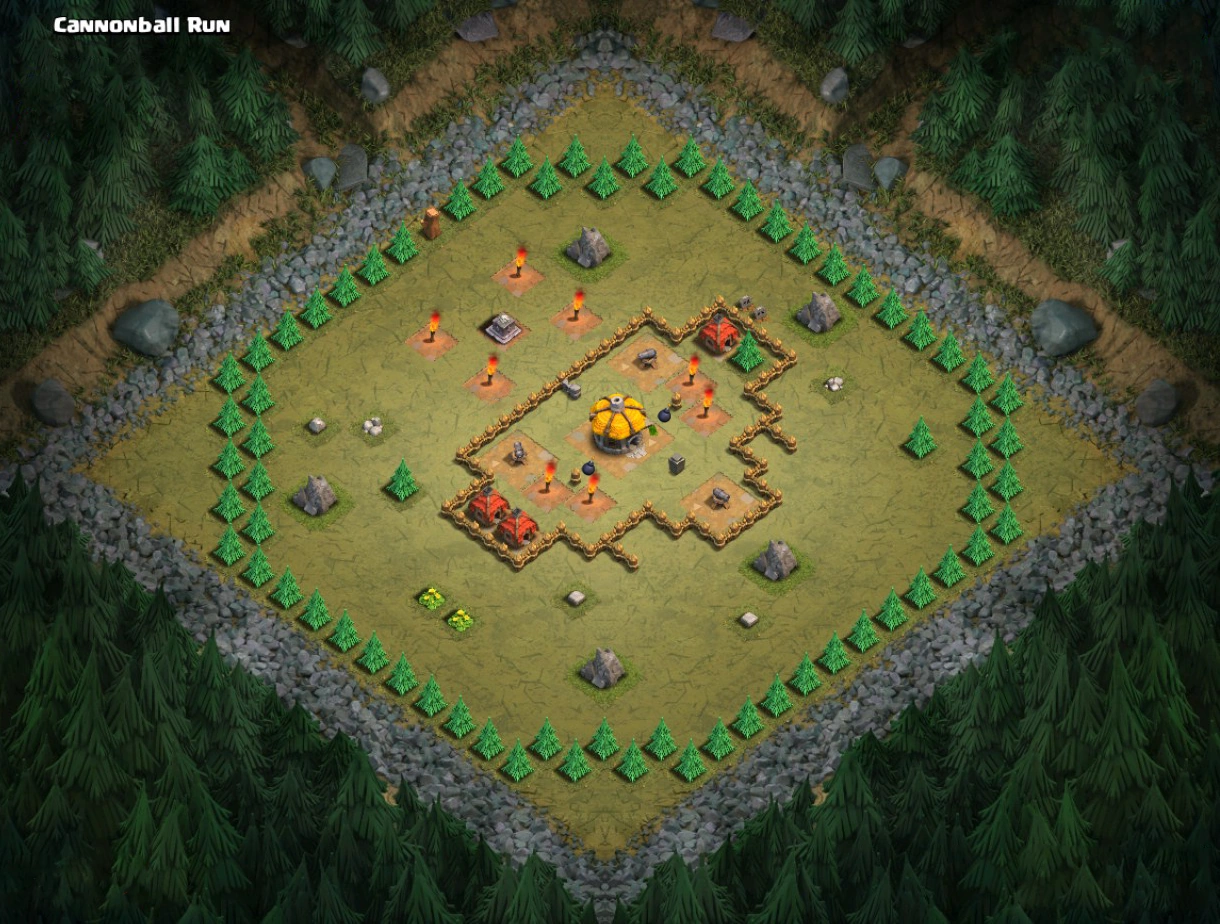
Cannonball Run
Recommended Town Hall 4.
Loot available: 1,000 Gold and 1,500 Elixir.
Cannonball Run consists of three level 1 Cannons, level 1 Walls and Bombs.
Deploy 5-10 Giants on the upper torches inside the base.
Alternatively, deploy one Giant for each Cannon as meatshields while you deploy Archers to take the Cannons out.

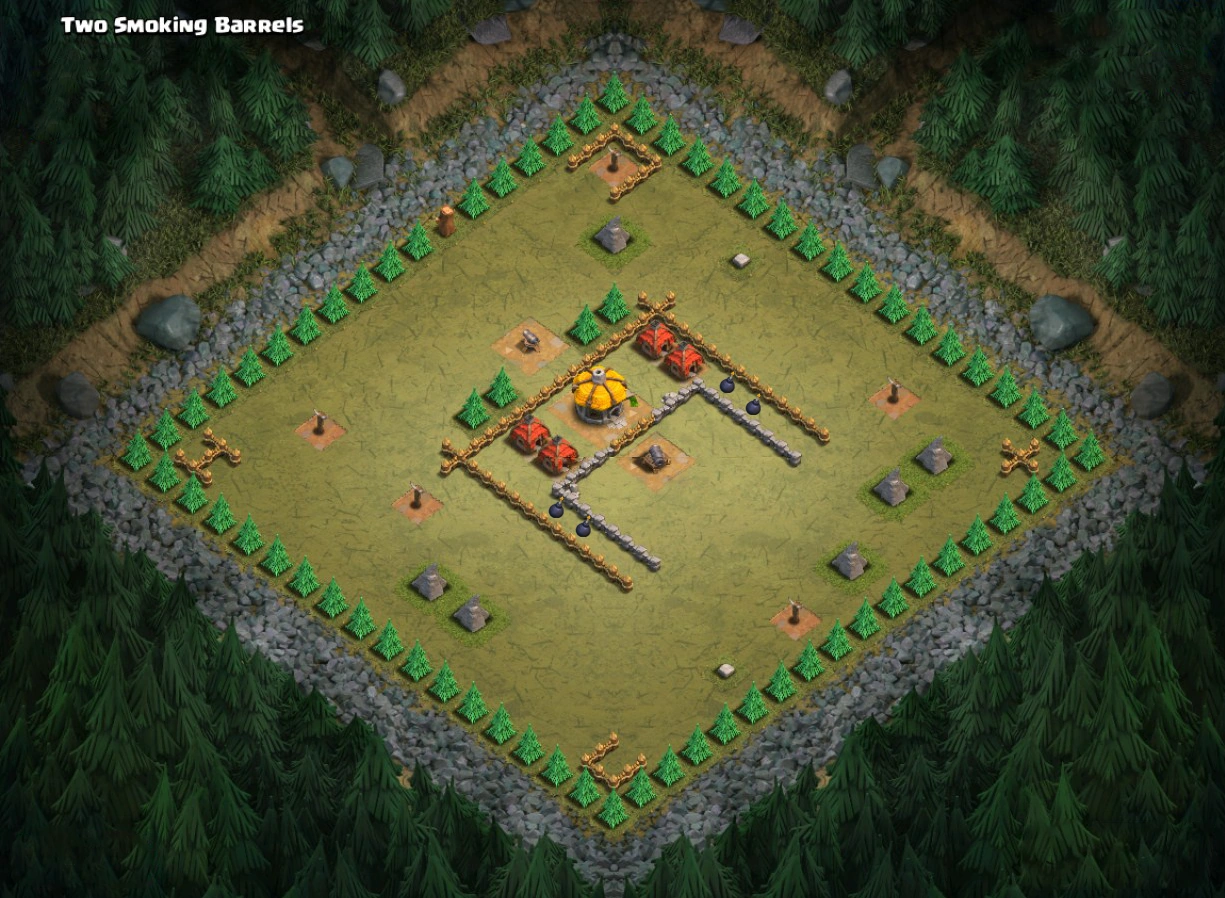
Two Smoking Barrels
Recommended Town Hall 3.
Loot available: 1,500 Gold and 2,000 Elixir.
This level introduces the level 4 Cannon. Its defenses are two Cannons (one level 4 and one level 1), level 1 Walls and Bombs hidden in the passageway.
Deploy 2-3 Giants on each Cannon. Deploy extra troops if necessary.

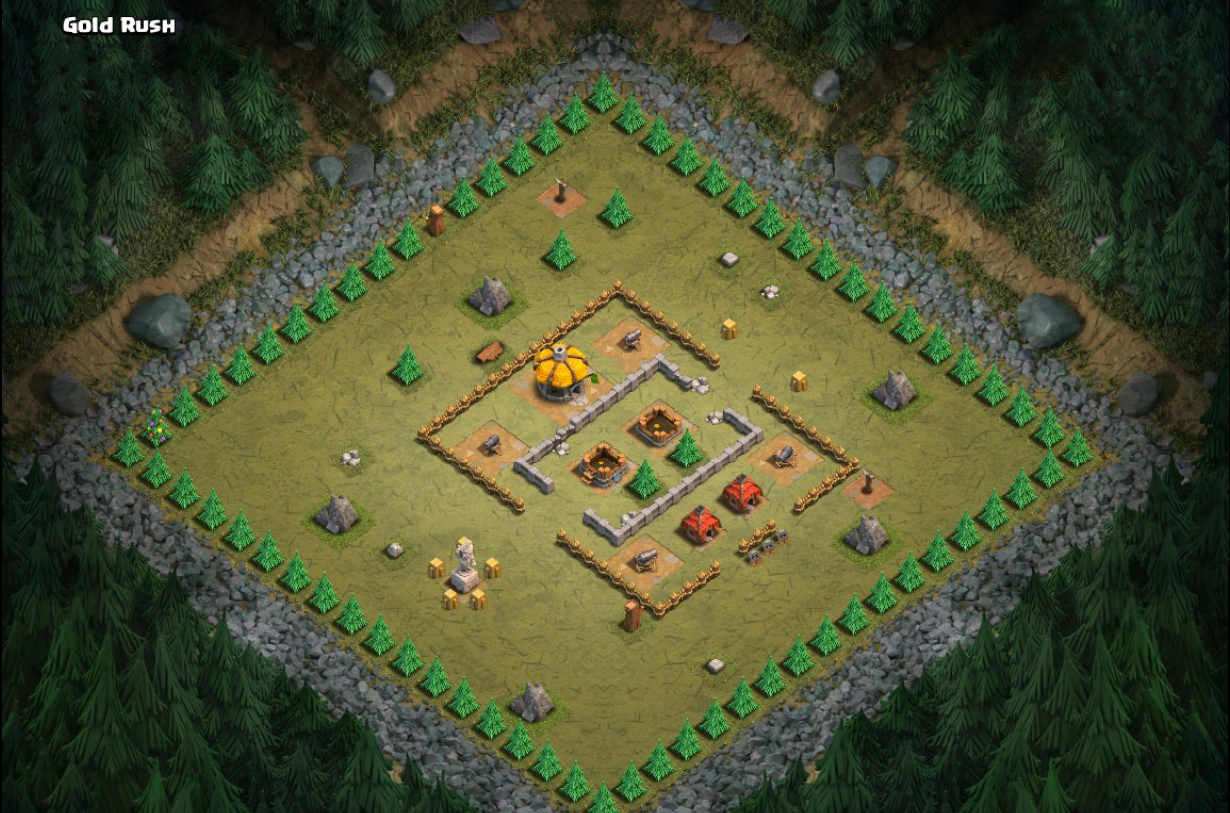
Gold Rush
Recommended Town Hall 4.
Loot available: 6,000 Gold and 2,000 Elixir.
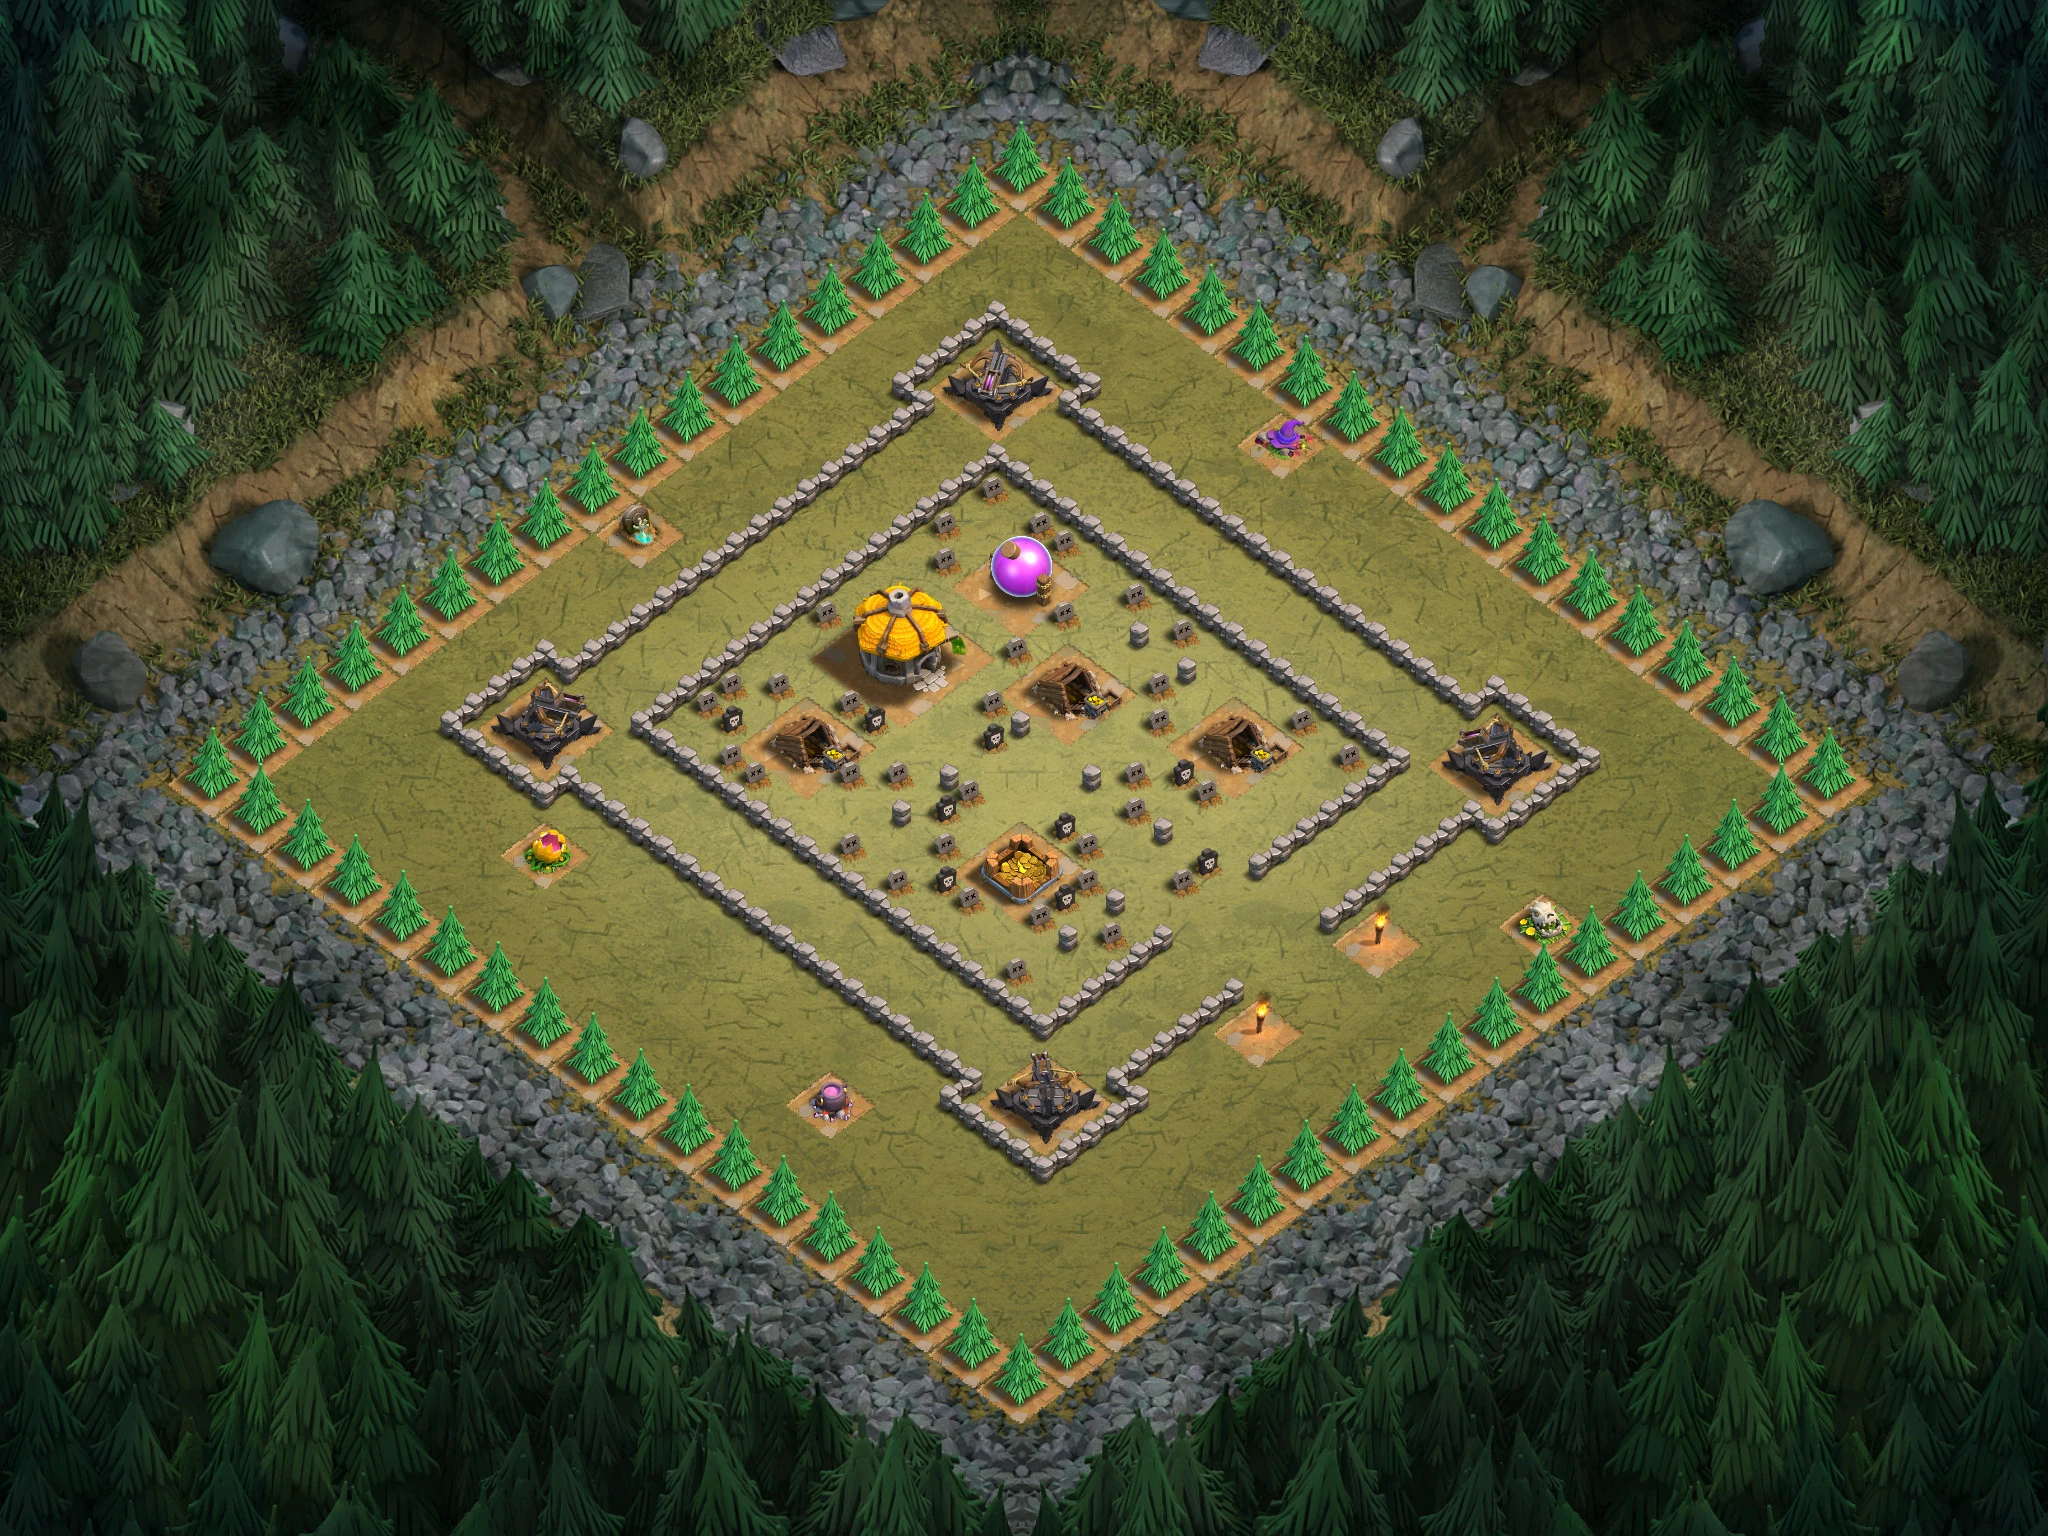
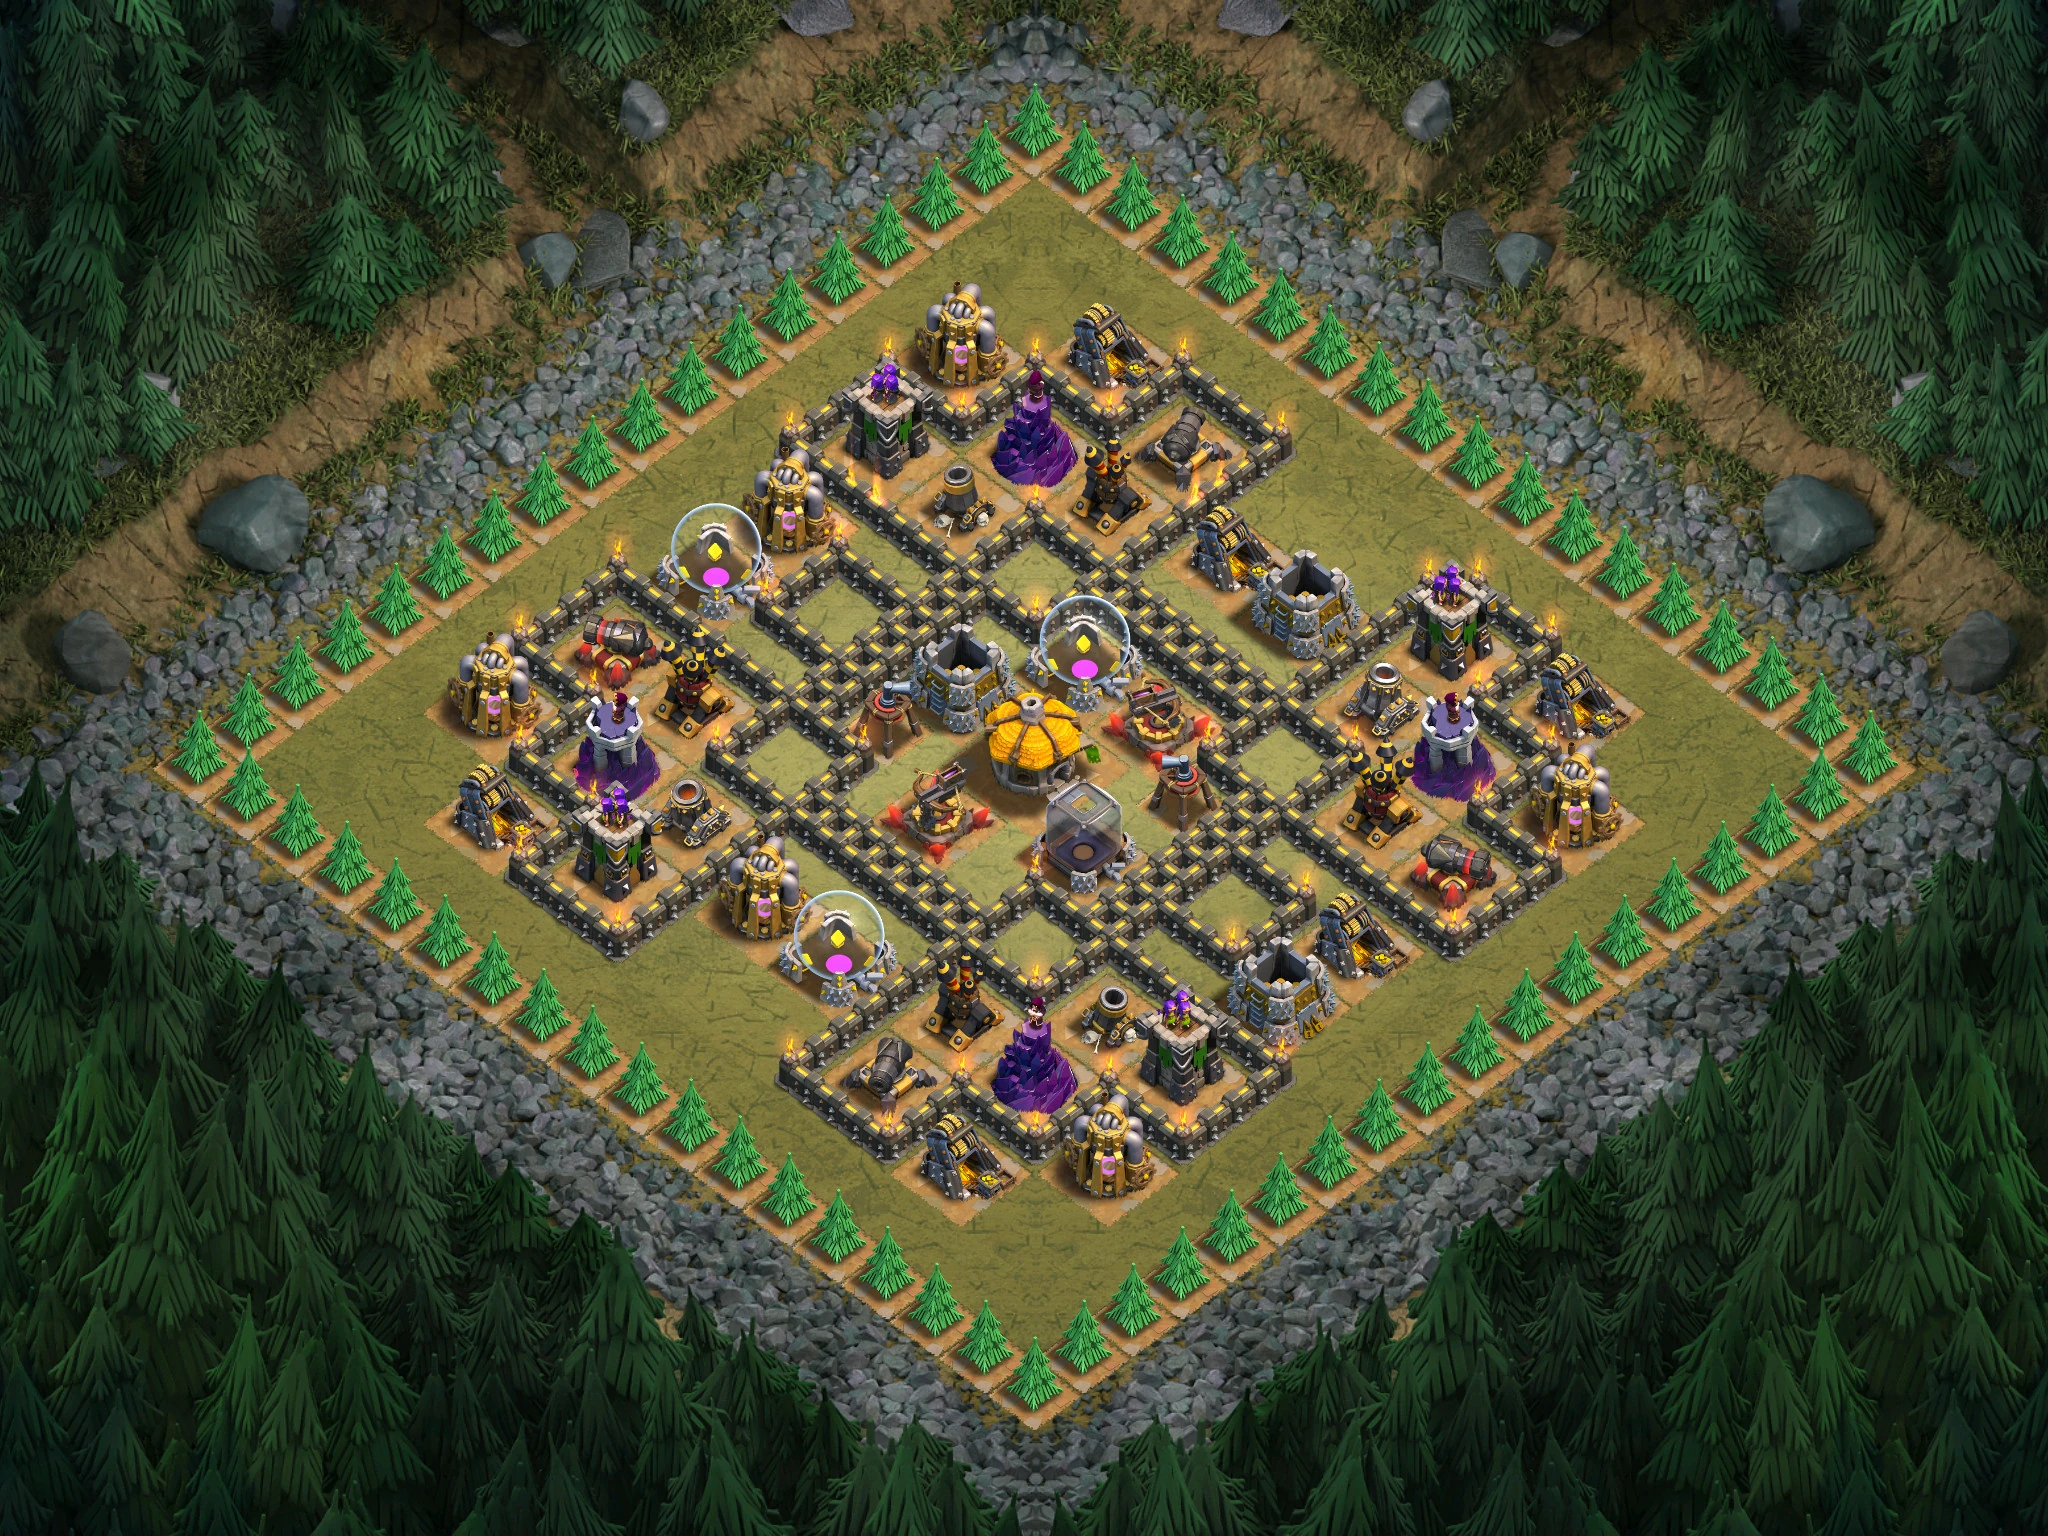
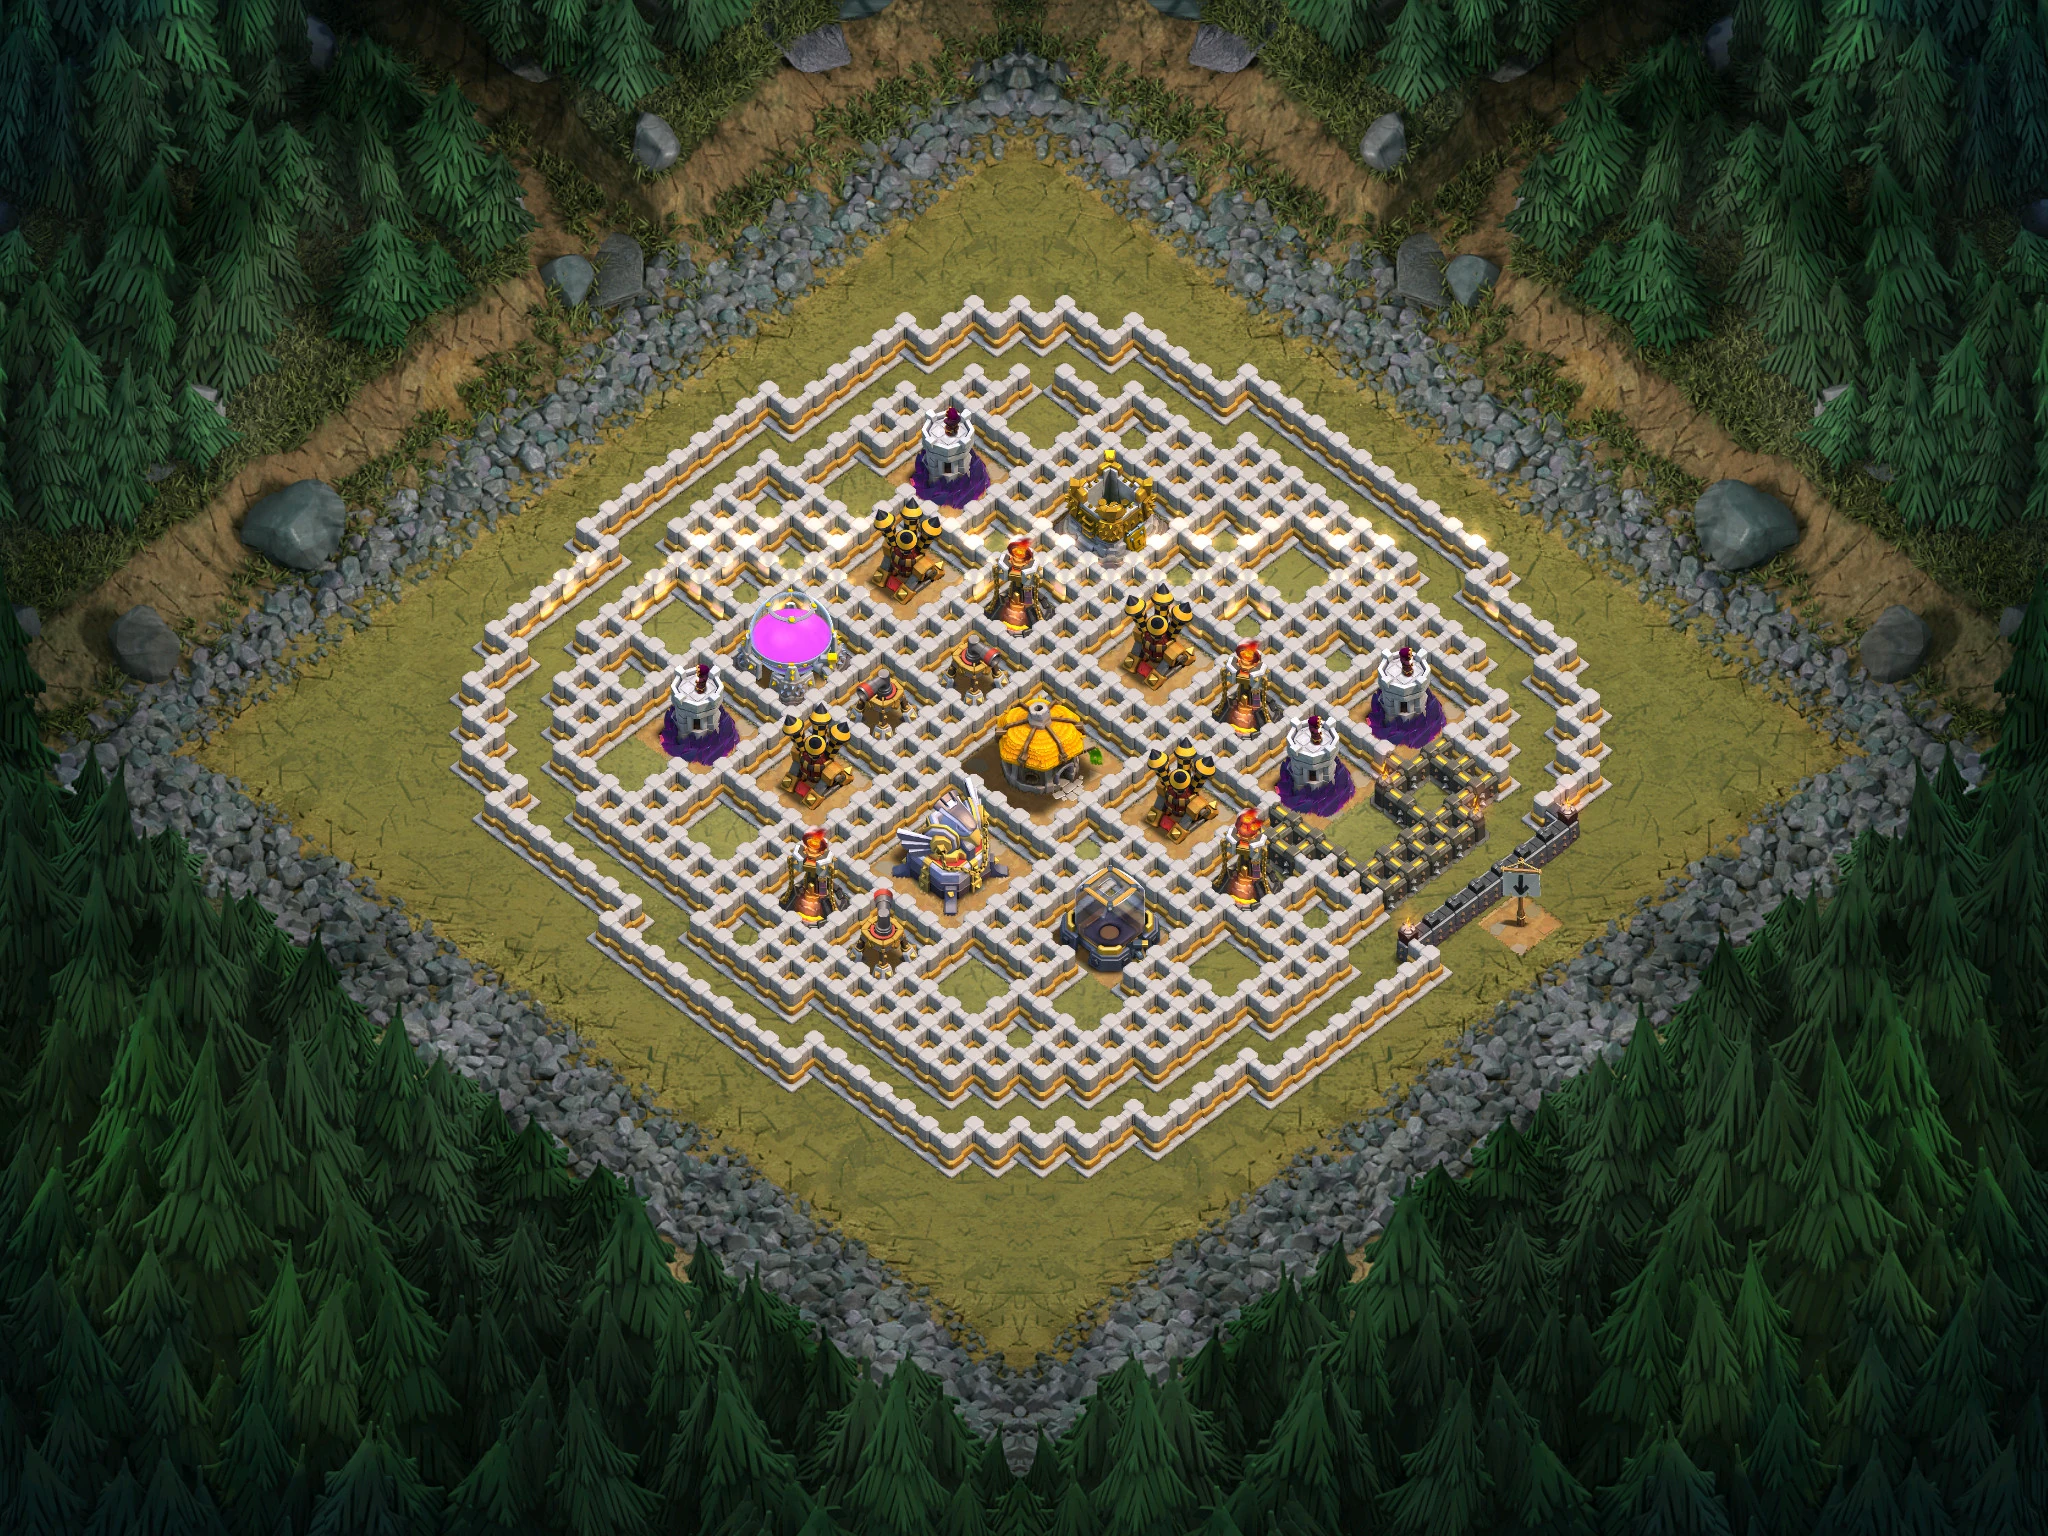
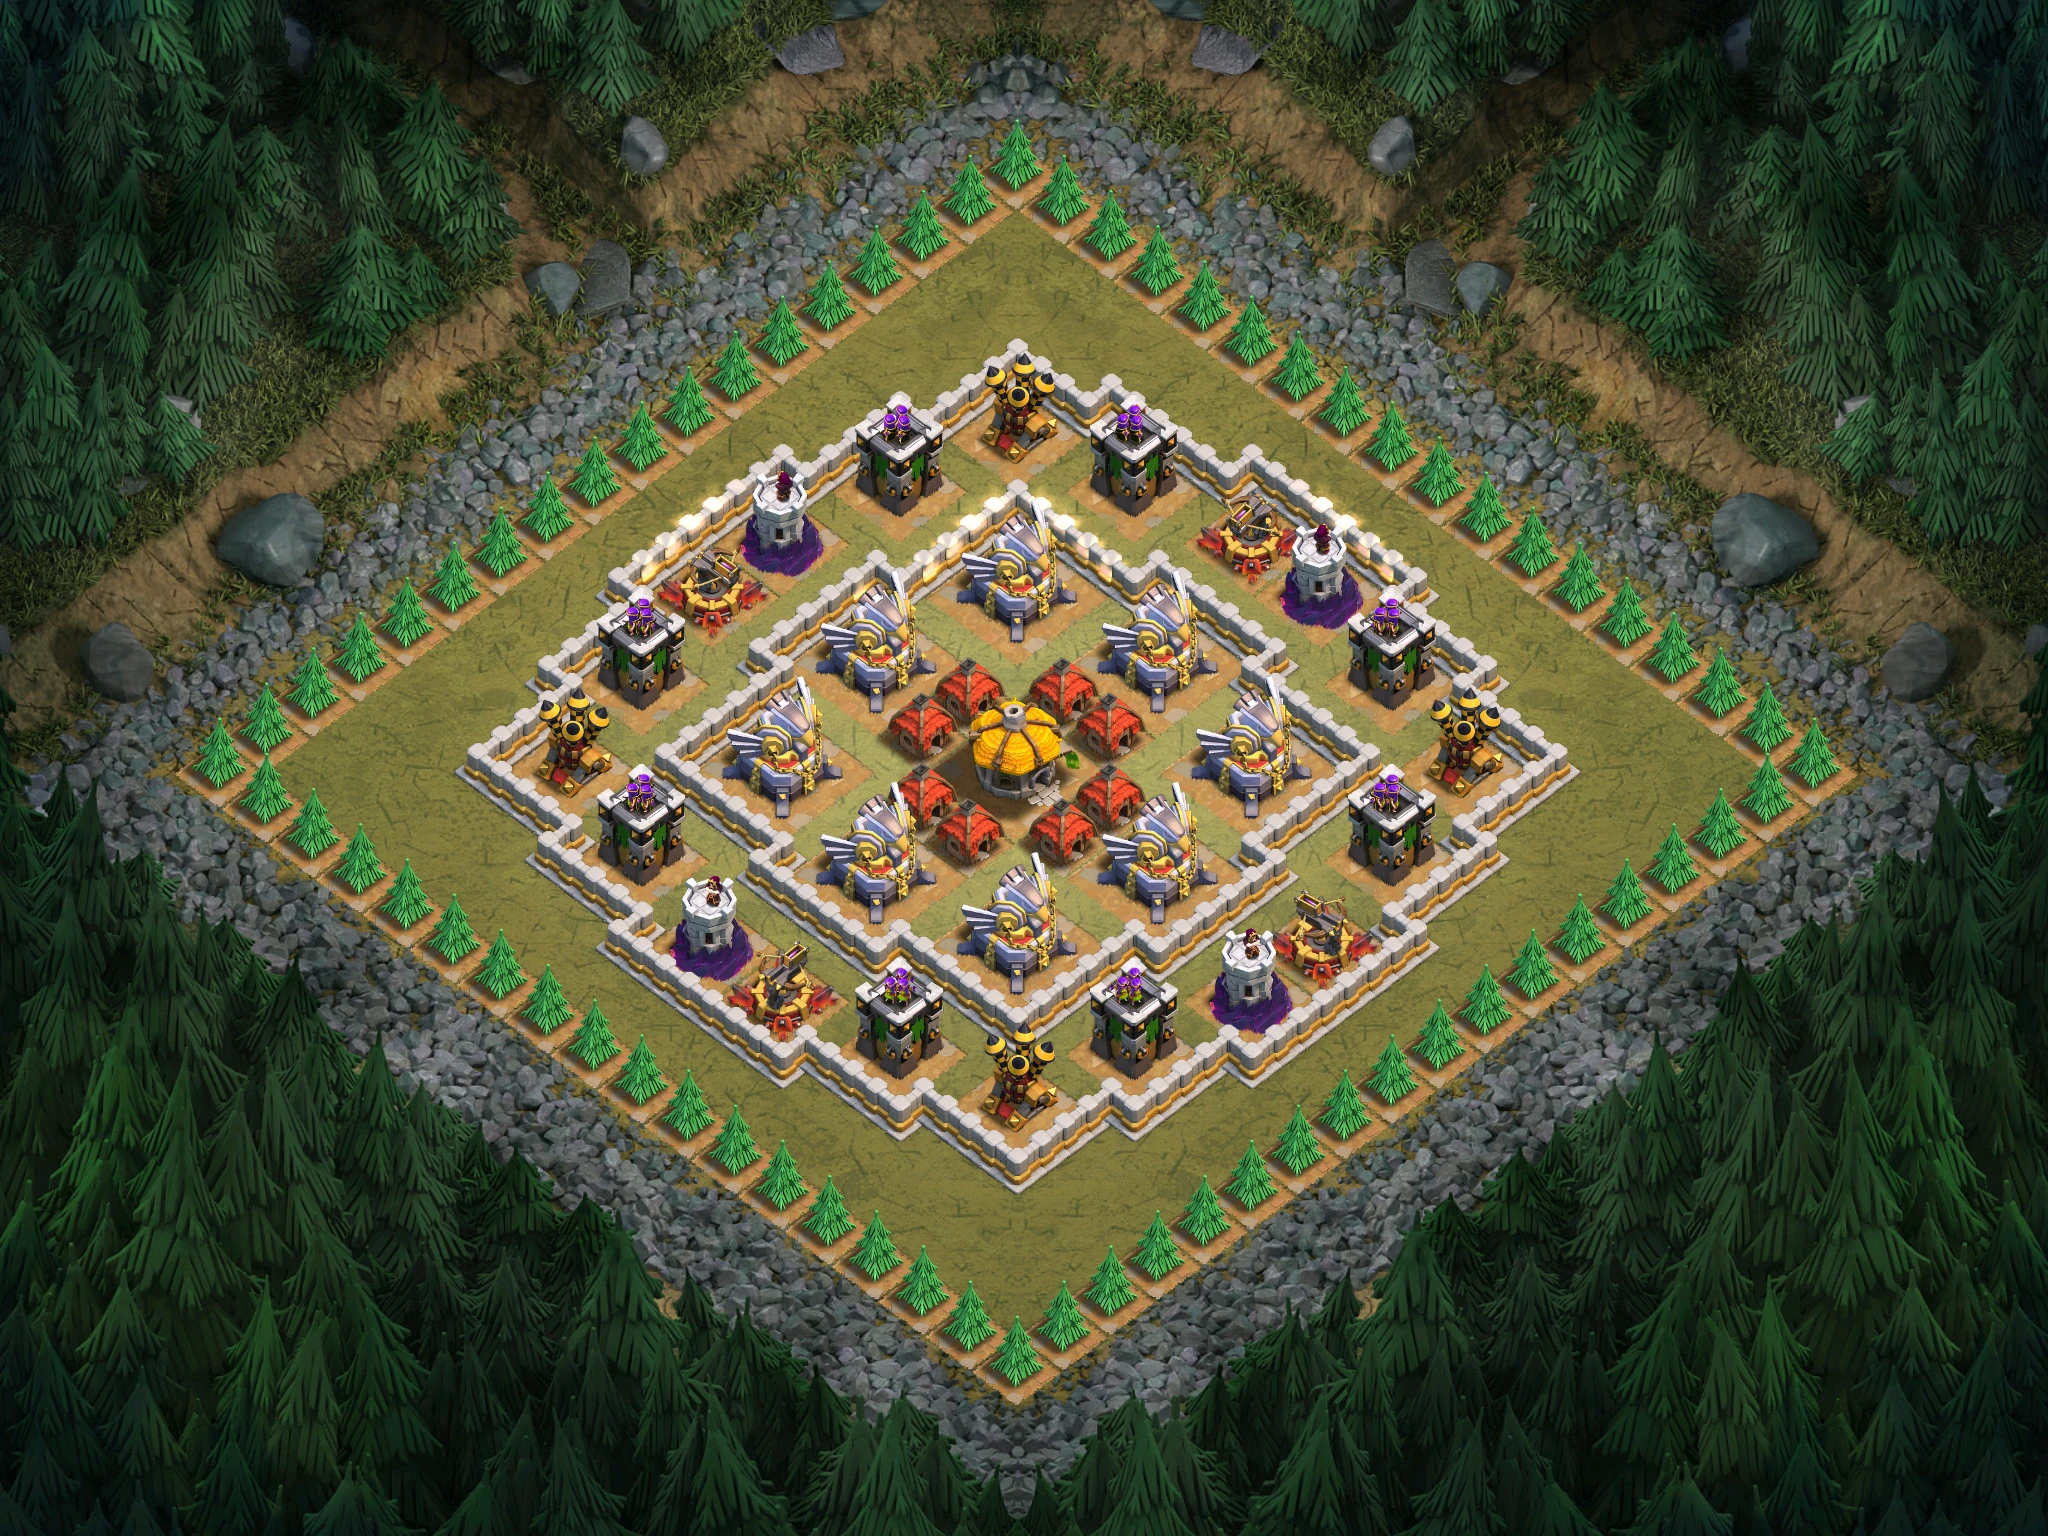
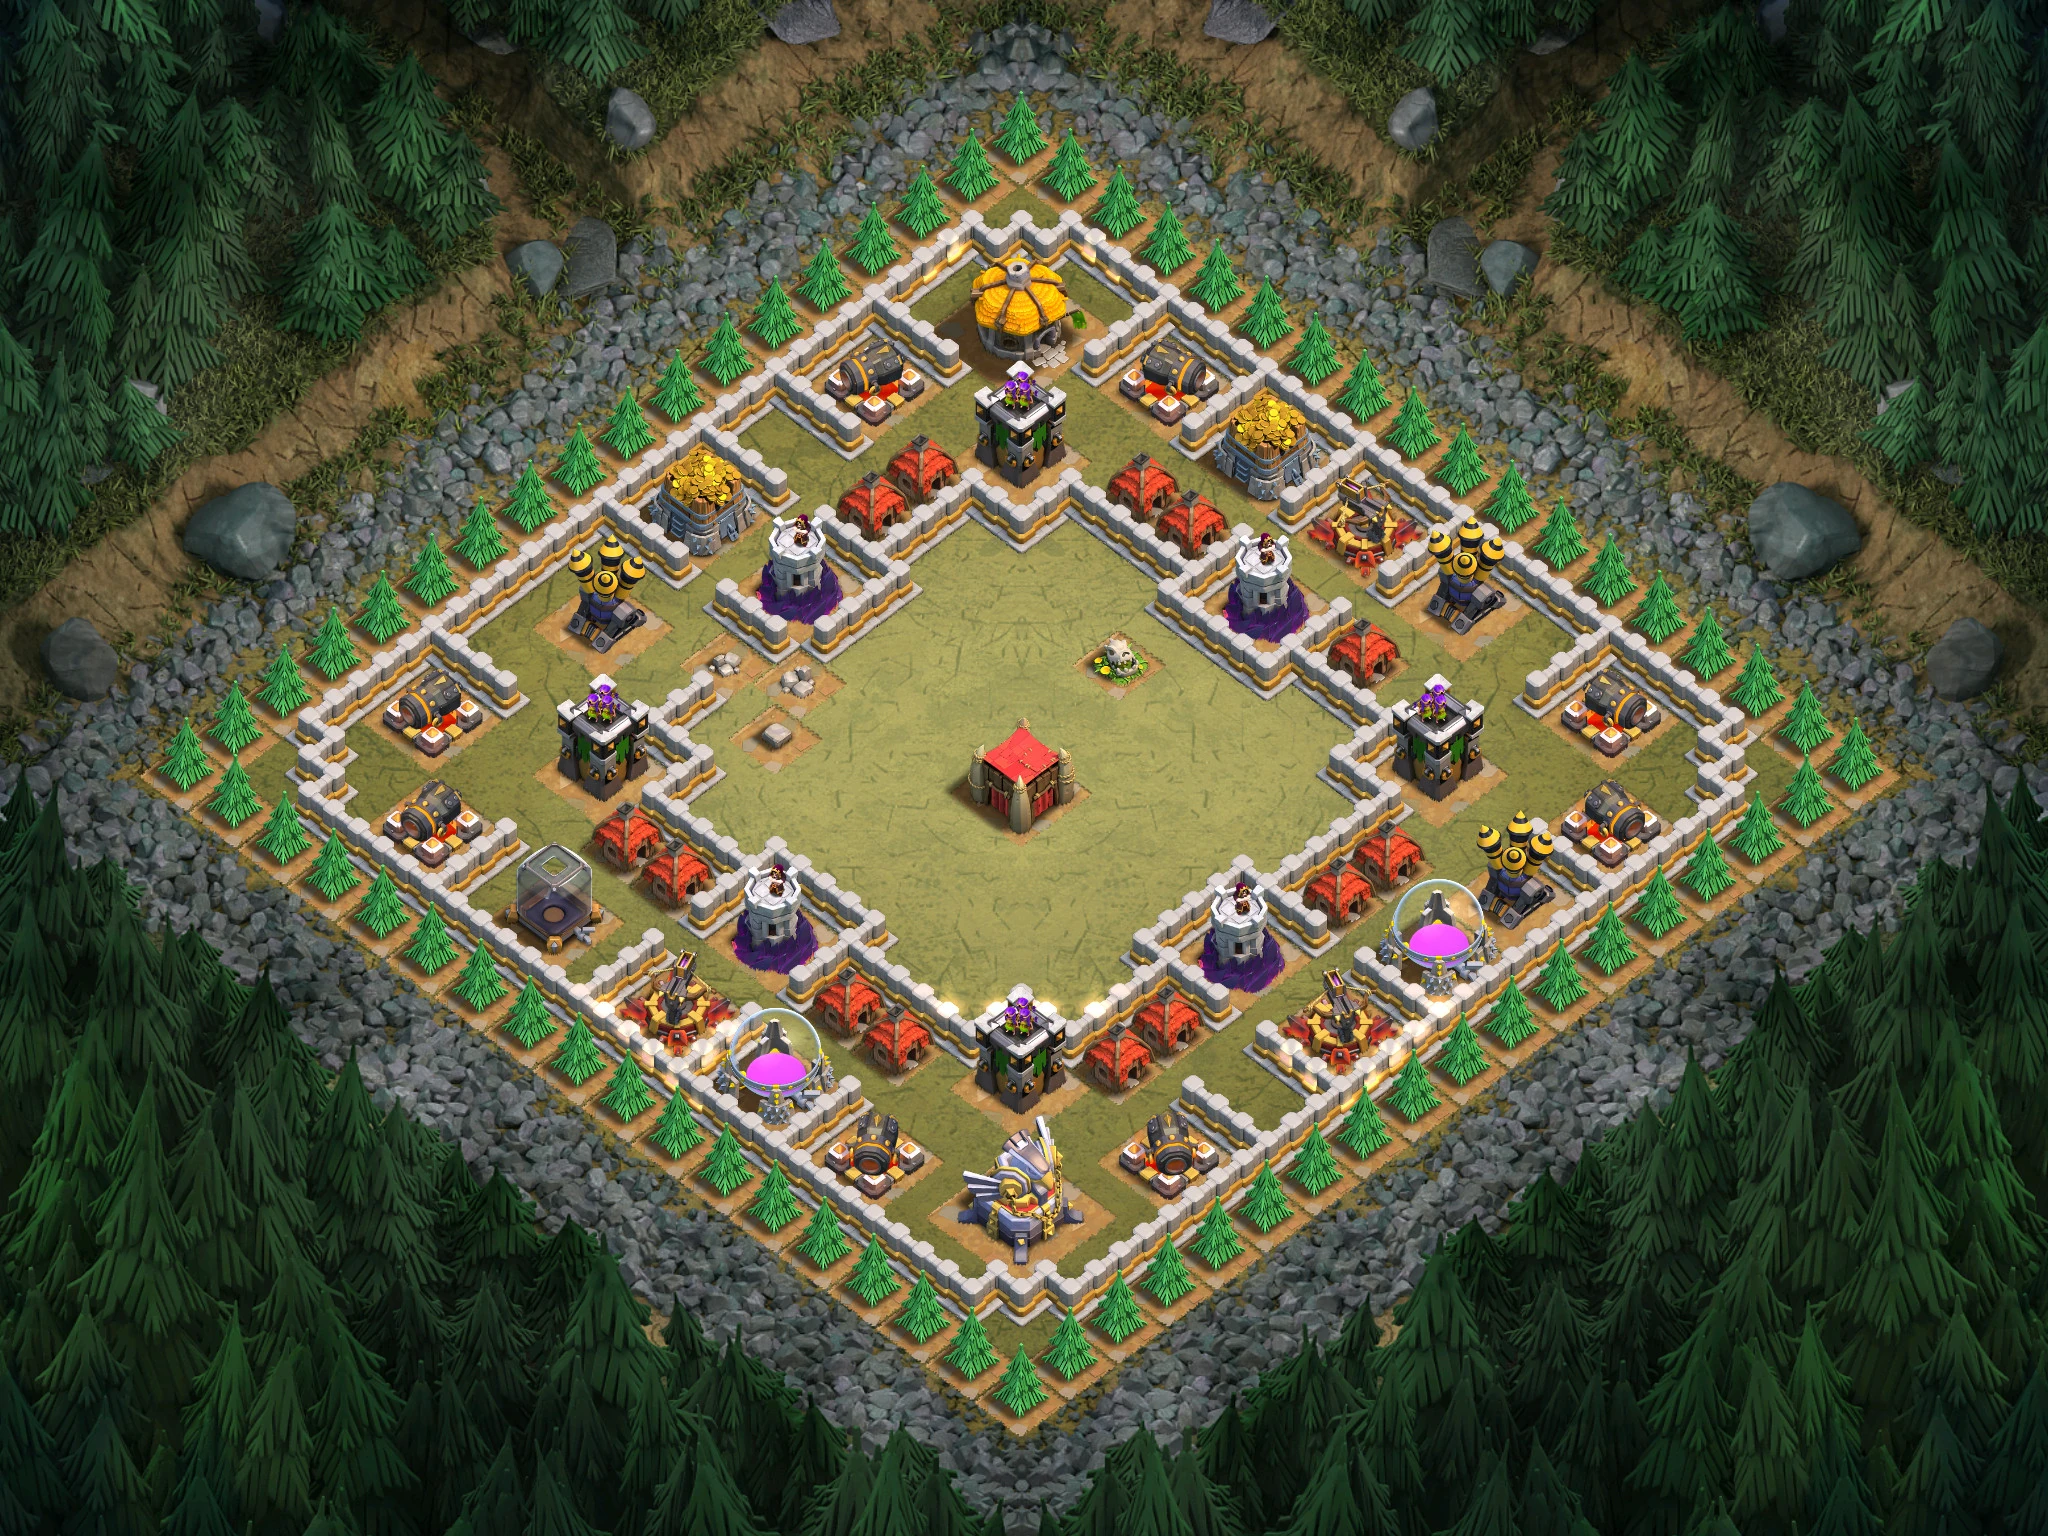
This level has four level 2 Cannons and level 1 and lvl 2 Walls, but no Bombs.
Deploy 5-10 Giants through each opening on the left and right.
Easter egg: If you look at the left side of the map, you will see that there is a X-Mas Tree from the 2012 winter update.

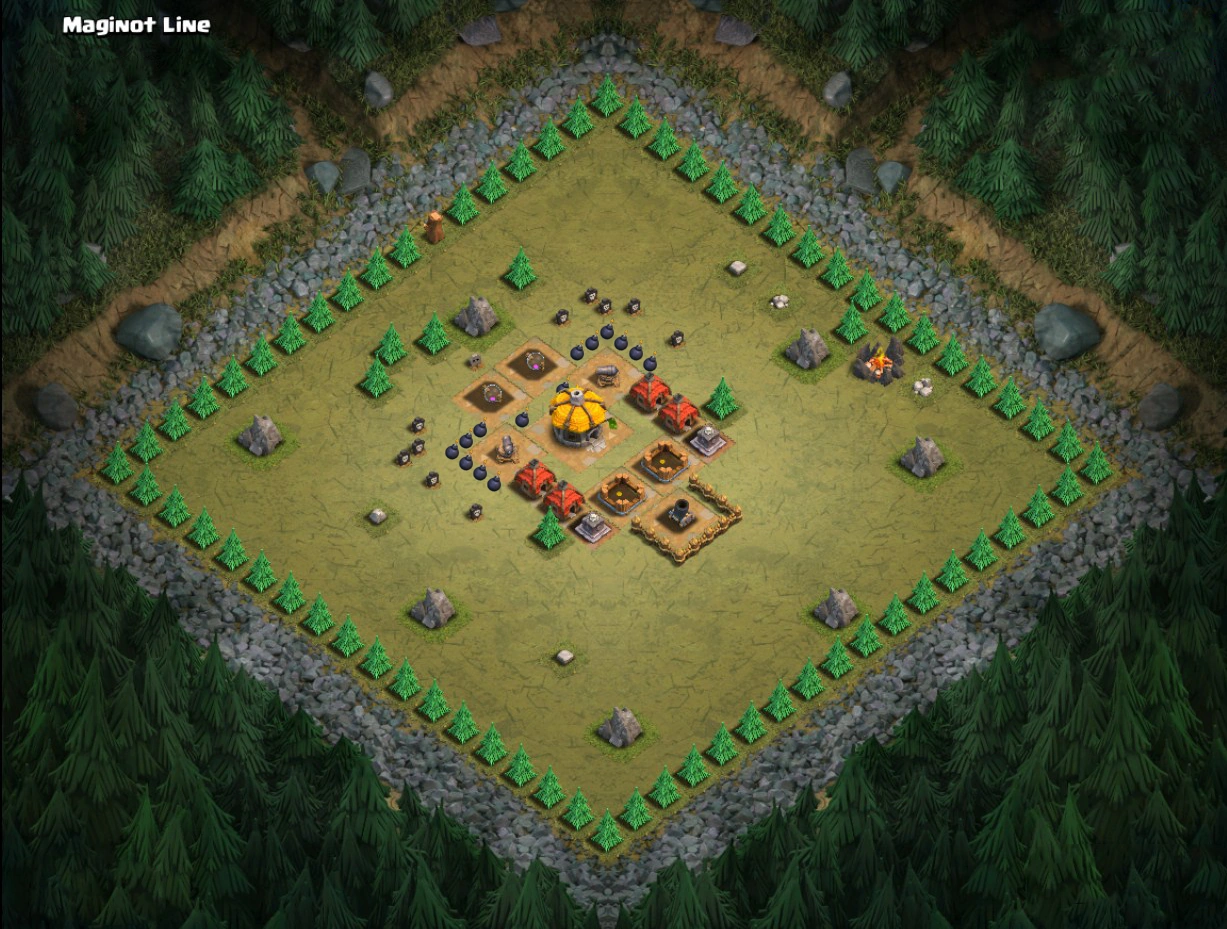
Maginot Line
Recommended Town Hall 4.
Loot available: 4,000 Gold and 4,000 Elixir.
This level introduces the Mortar. It consists of a level 1 Mortar, level 1 Walls, a bunch of Bombs and two level 2 Cannons.
Send in a couple of Barbarians to set off the Bombs, then charge for the Cannons.
Note: There is a structure at the right corner what seems to be an Army Camp. However, like the Goblin Gauntlet, it doesn't count towards the percentage.

Rat Valley
Recommended Town Hall 4.
Loot available: 2,000 Gold and 6,000 Elixir.
This level has three-level 2 Cannons, level 1 Walls and 26 Bombs.
Drop a single Balloon to wreck the whole base while ignoring the traps, or drop a few Goblins through the opening to set off the numerous Bombs, then send in a swath of Barbarians to destroy the "cleared" base.


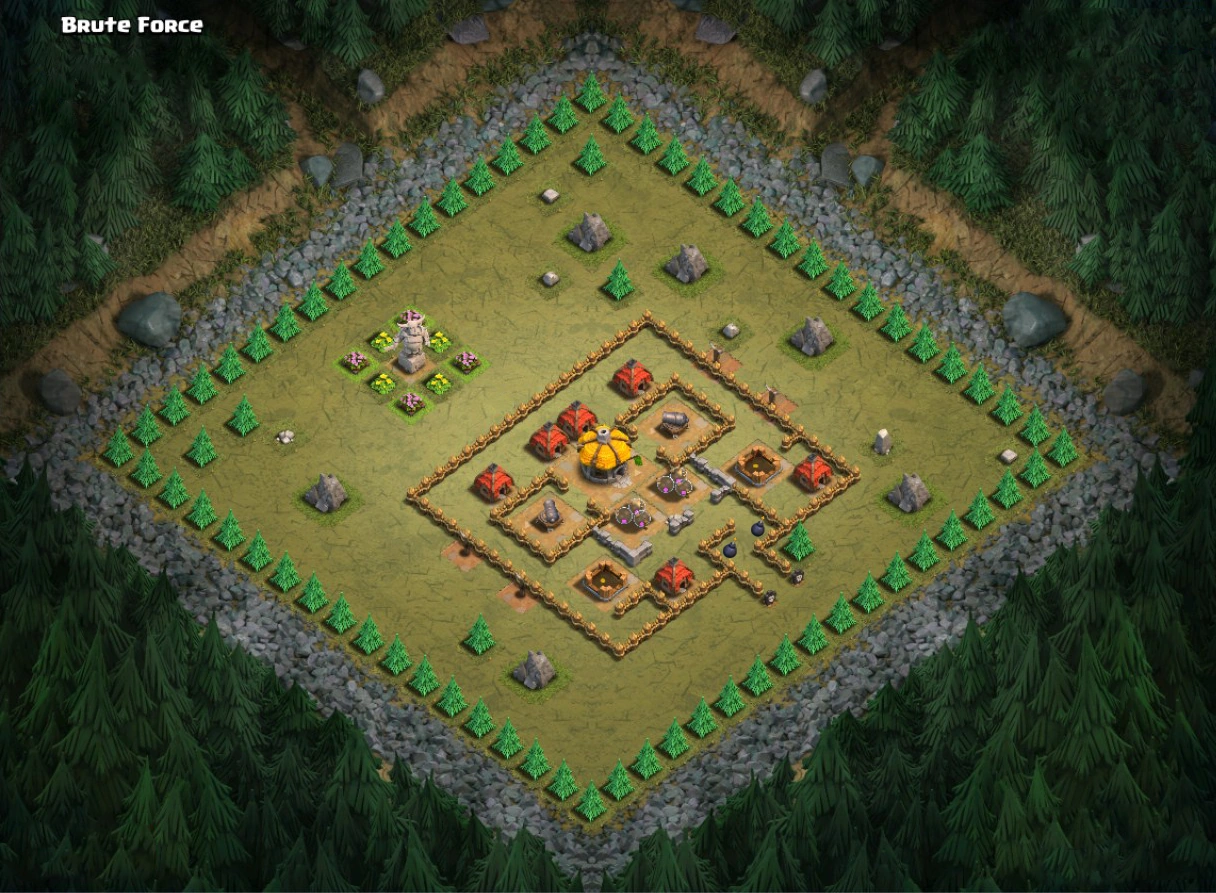
Brute Force
Recommended Town Hall 4.
Loot available: 4,000 Gold and 10,000 Elixir.
This level consists of level 1, 2 and 3 Walls, three level 4 Cannons and Bombs.
Drop one Goblin through the opening and deploy 5-10 Giants. One Balloon (or Minion) will also easily destroy the base as there are no defenses that kill air troops.
Note: There are 2 Pumpkin Bombs in the overhang under the left Gold Storage.

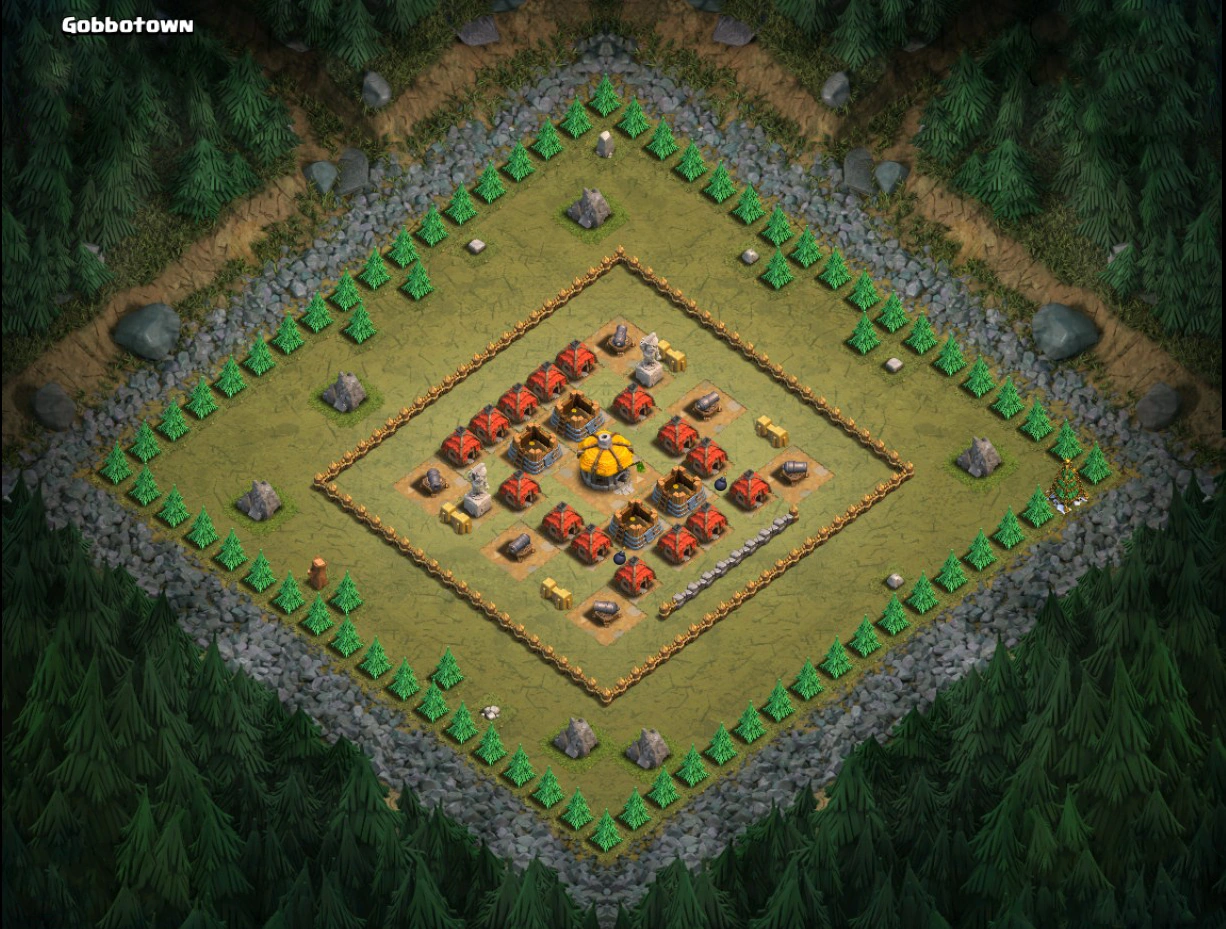
Gobbotown
Recommended Town Hall 4.
Loot available: 12,000 Gold and 2,000 Elixir.
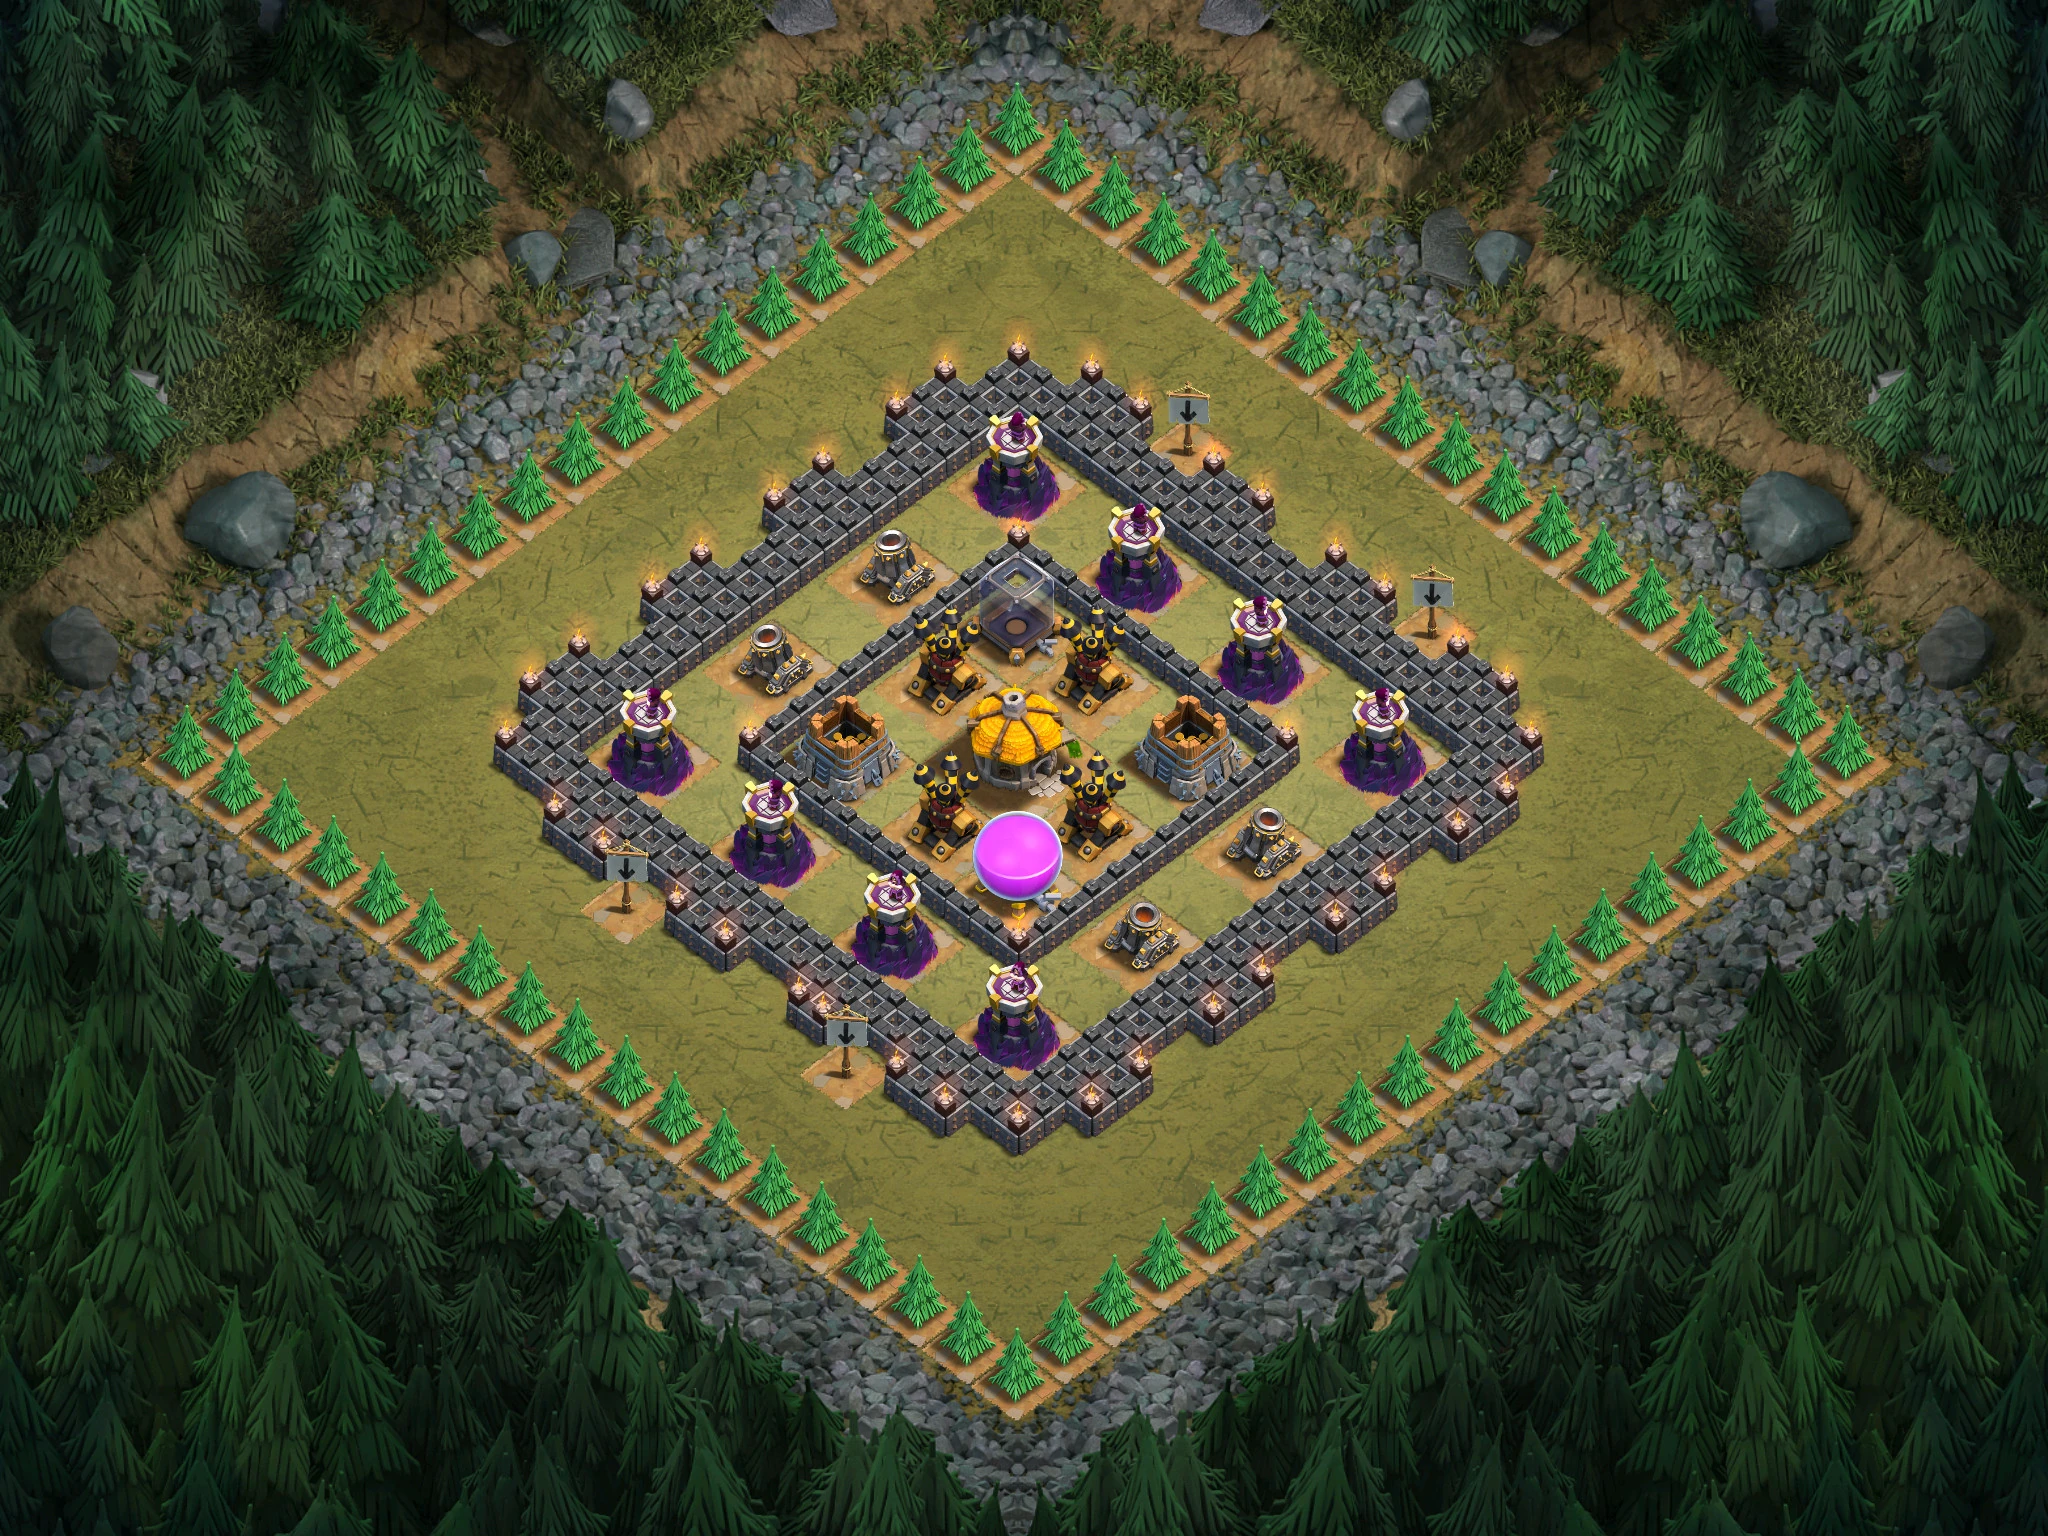
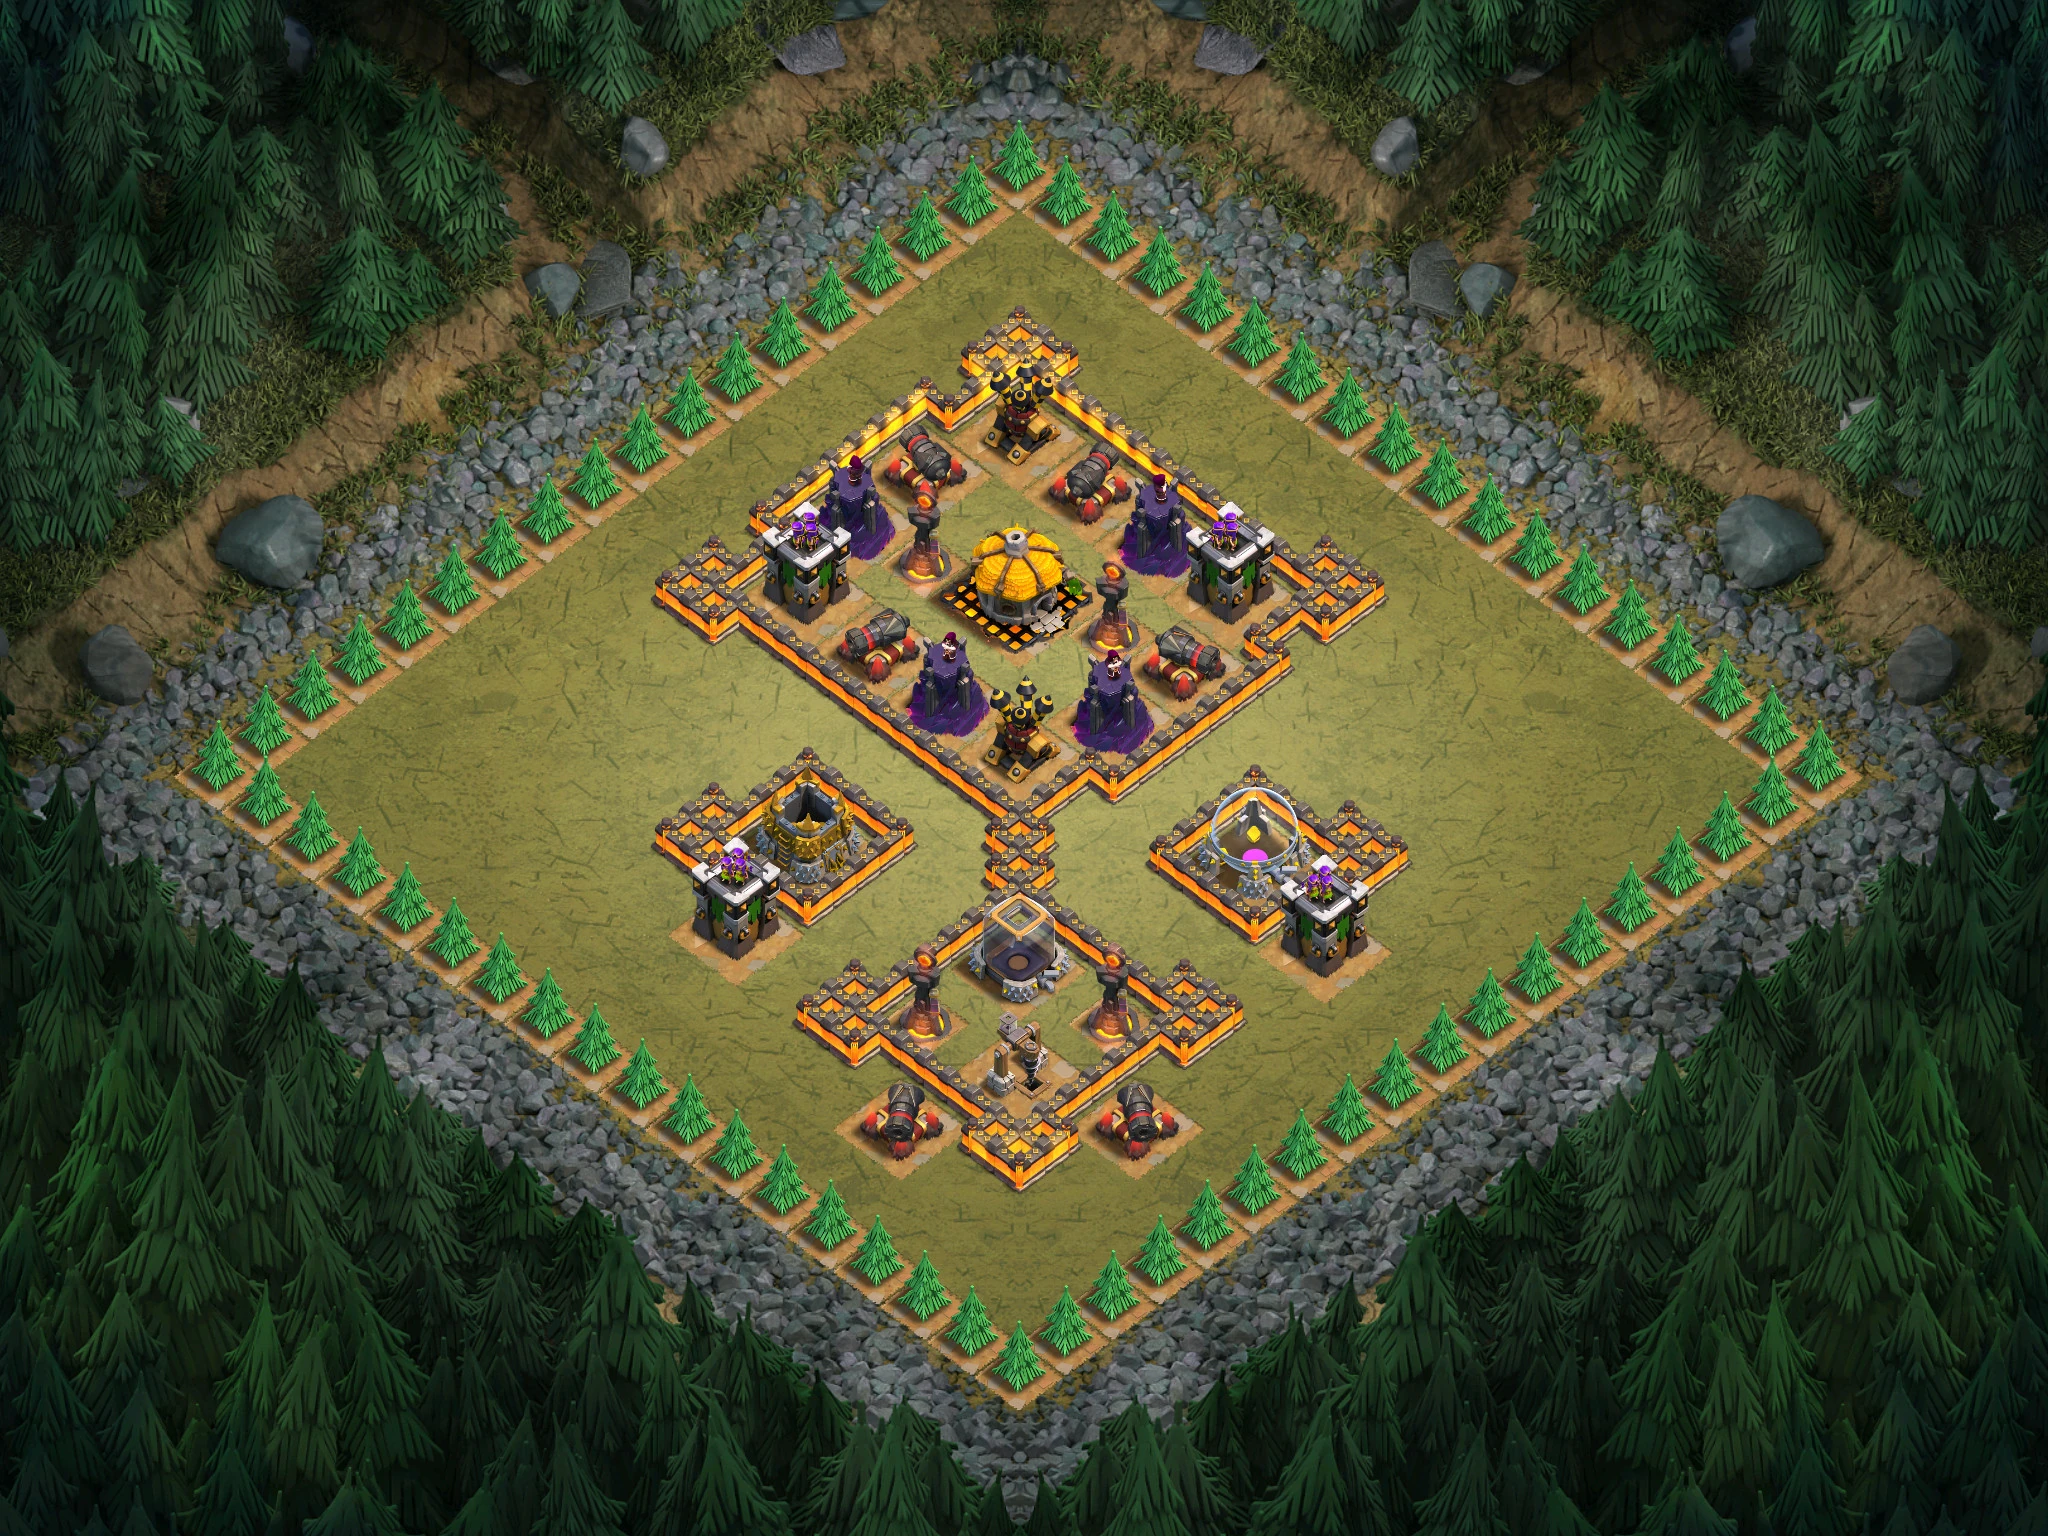
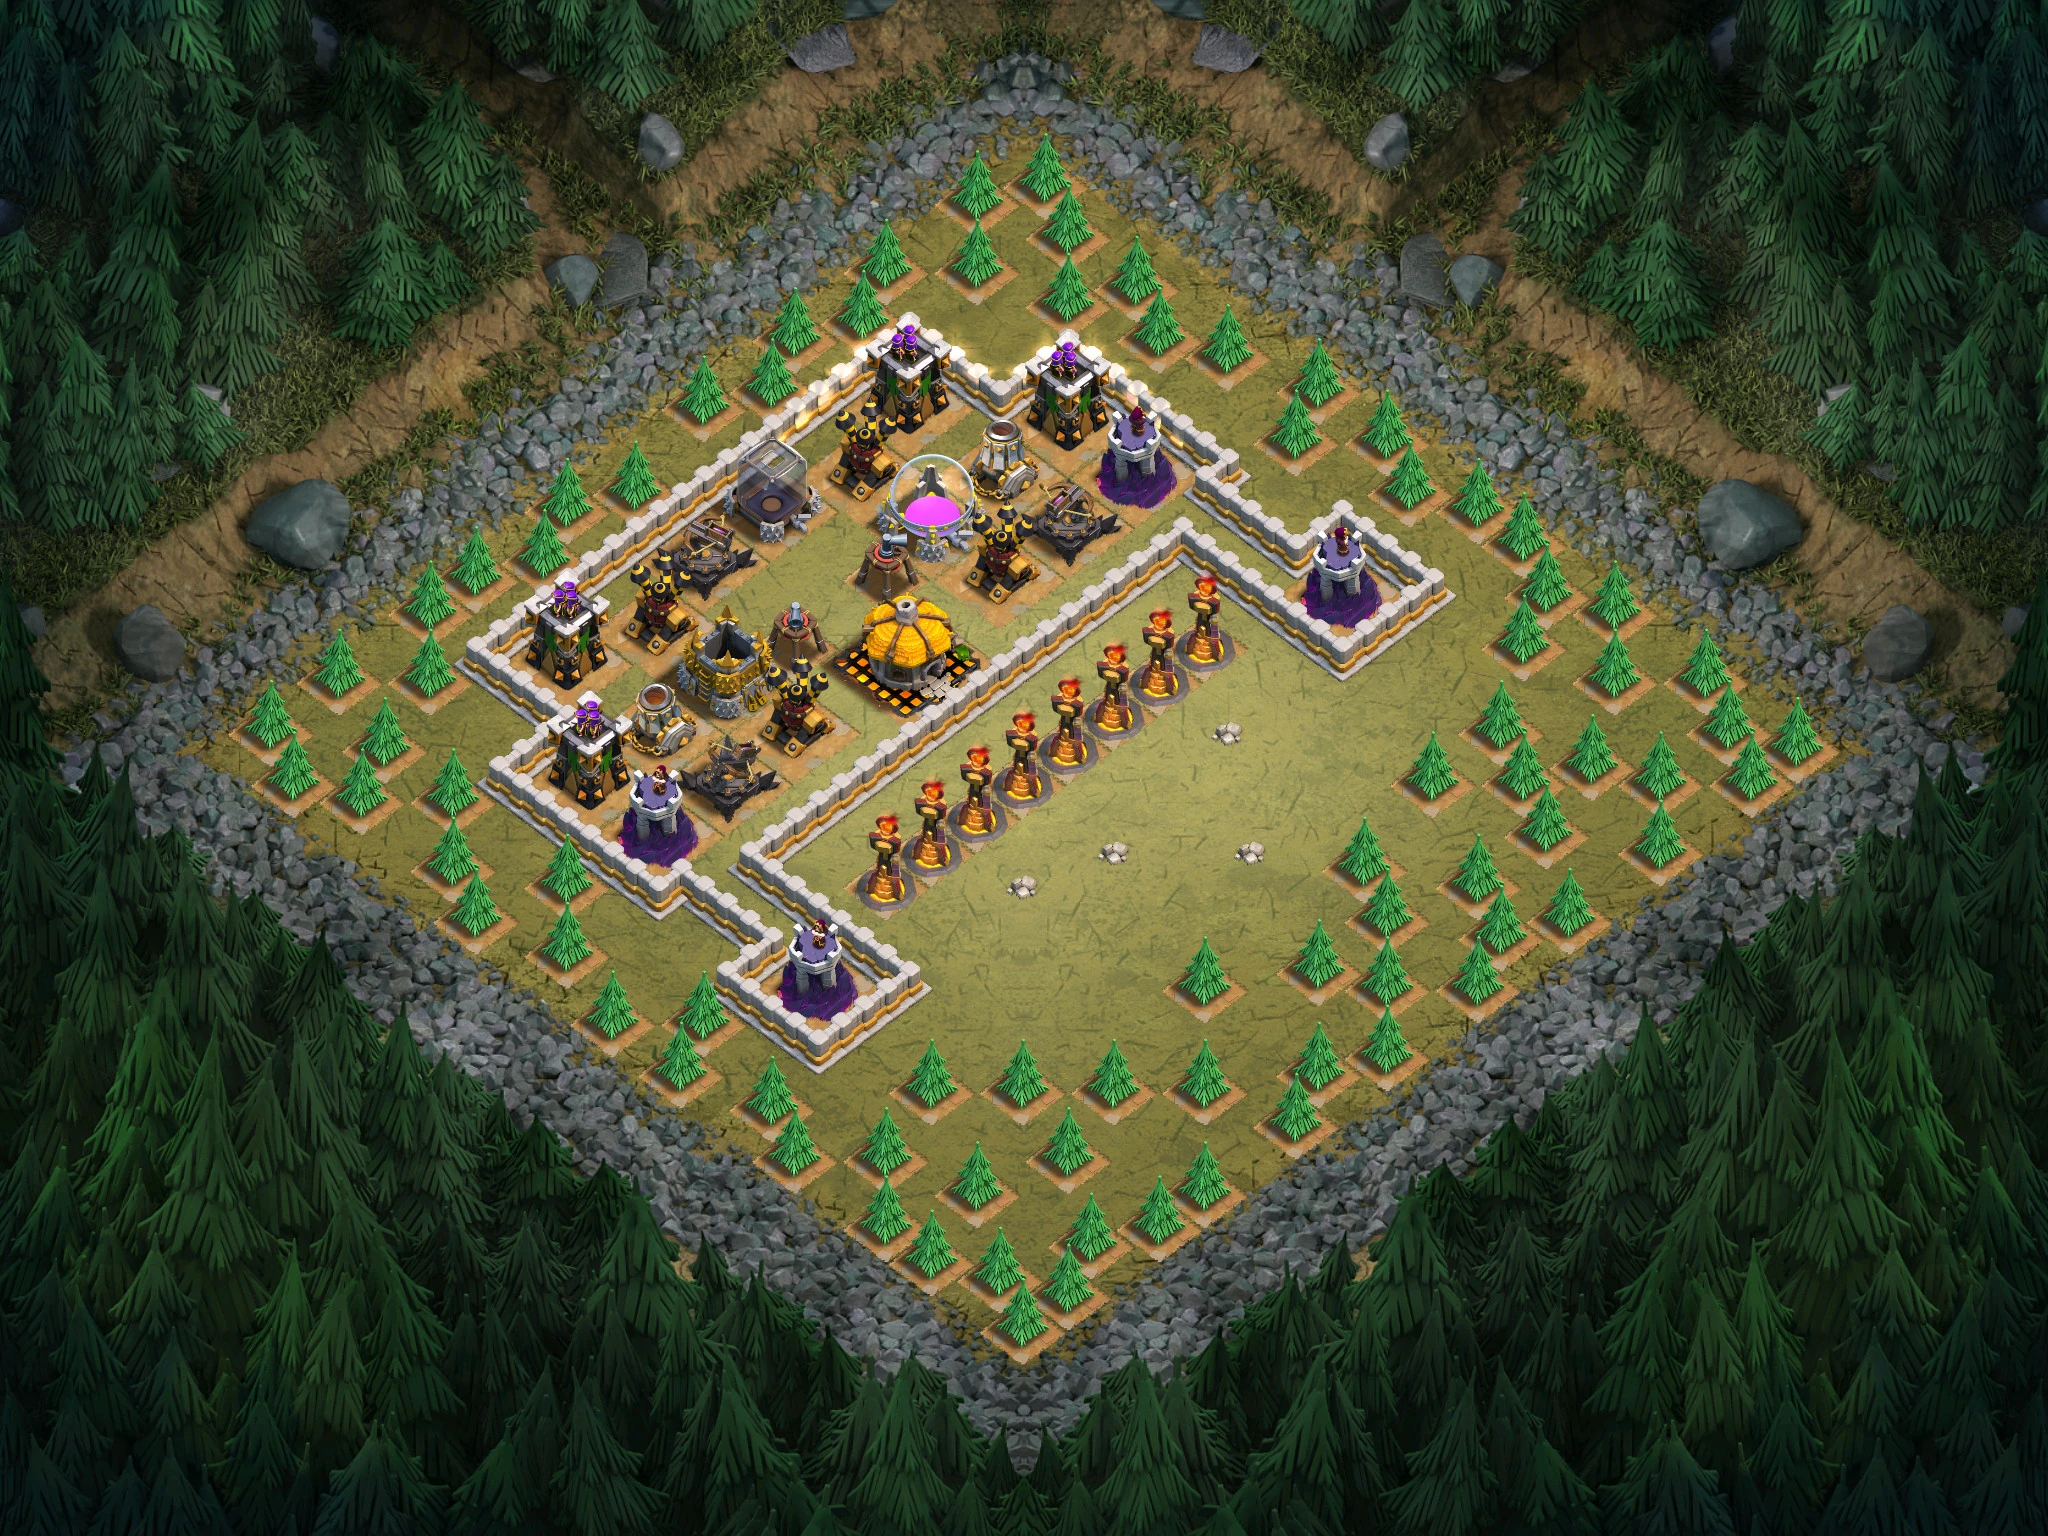
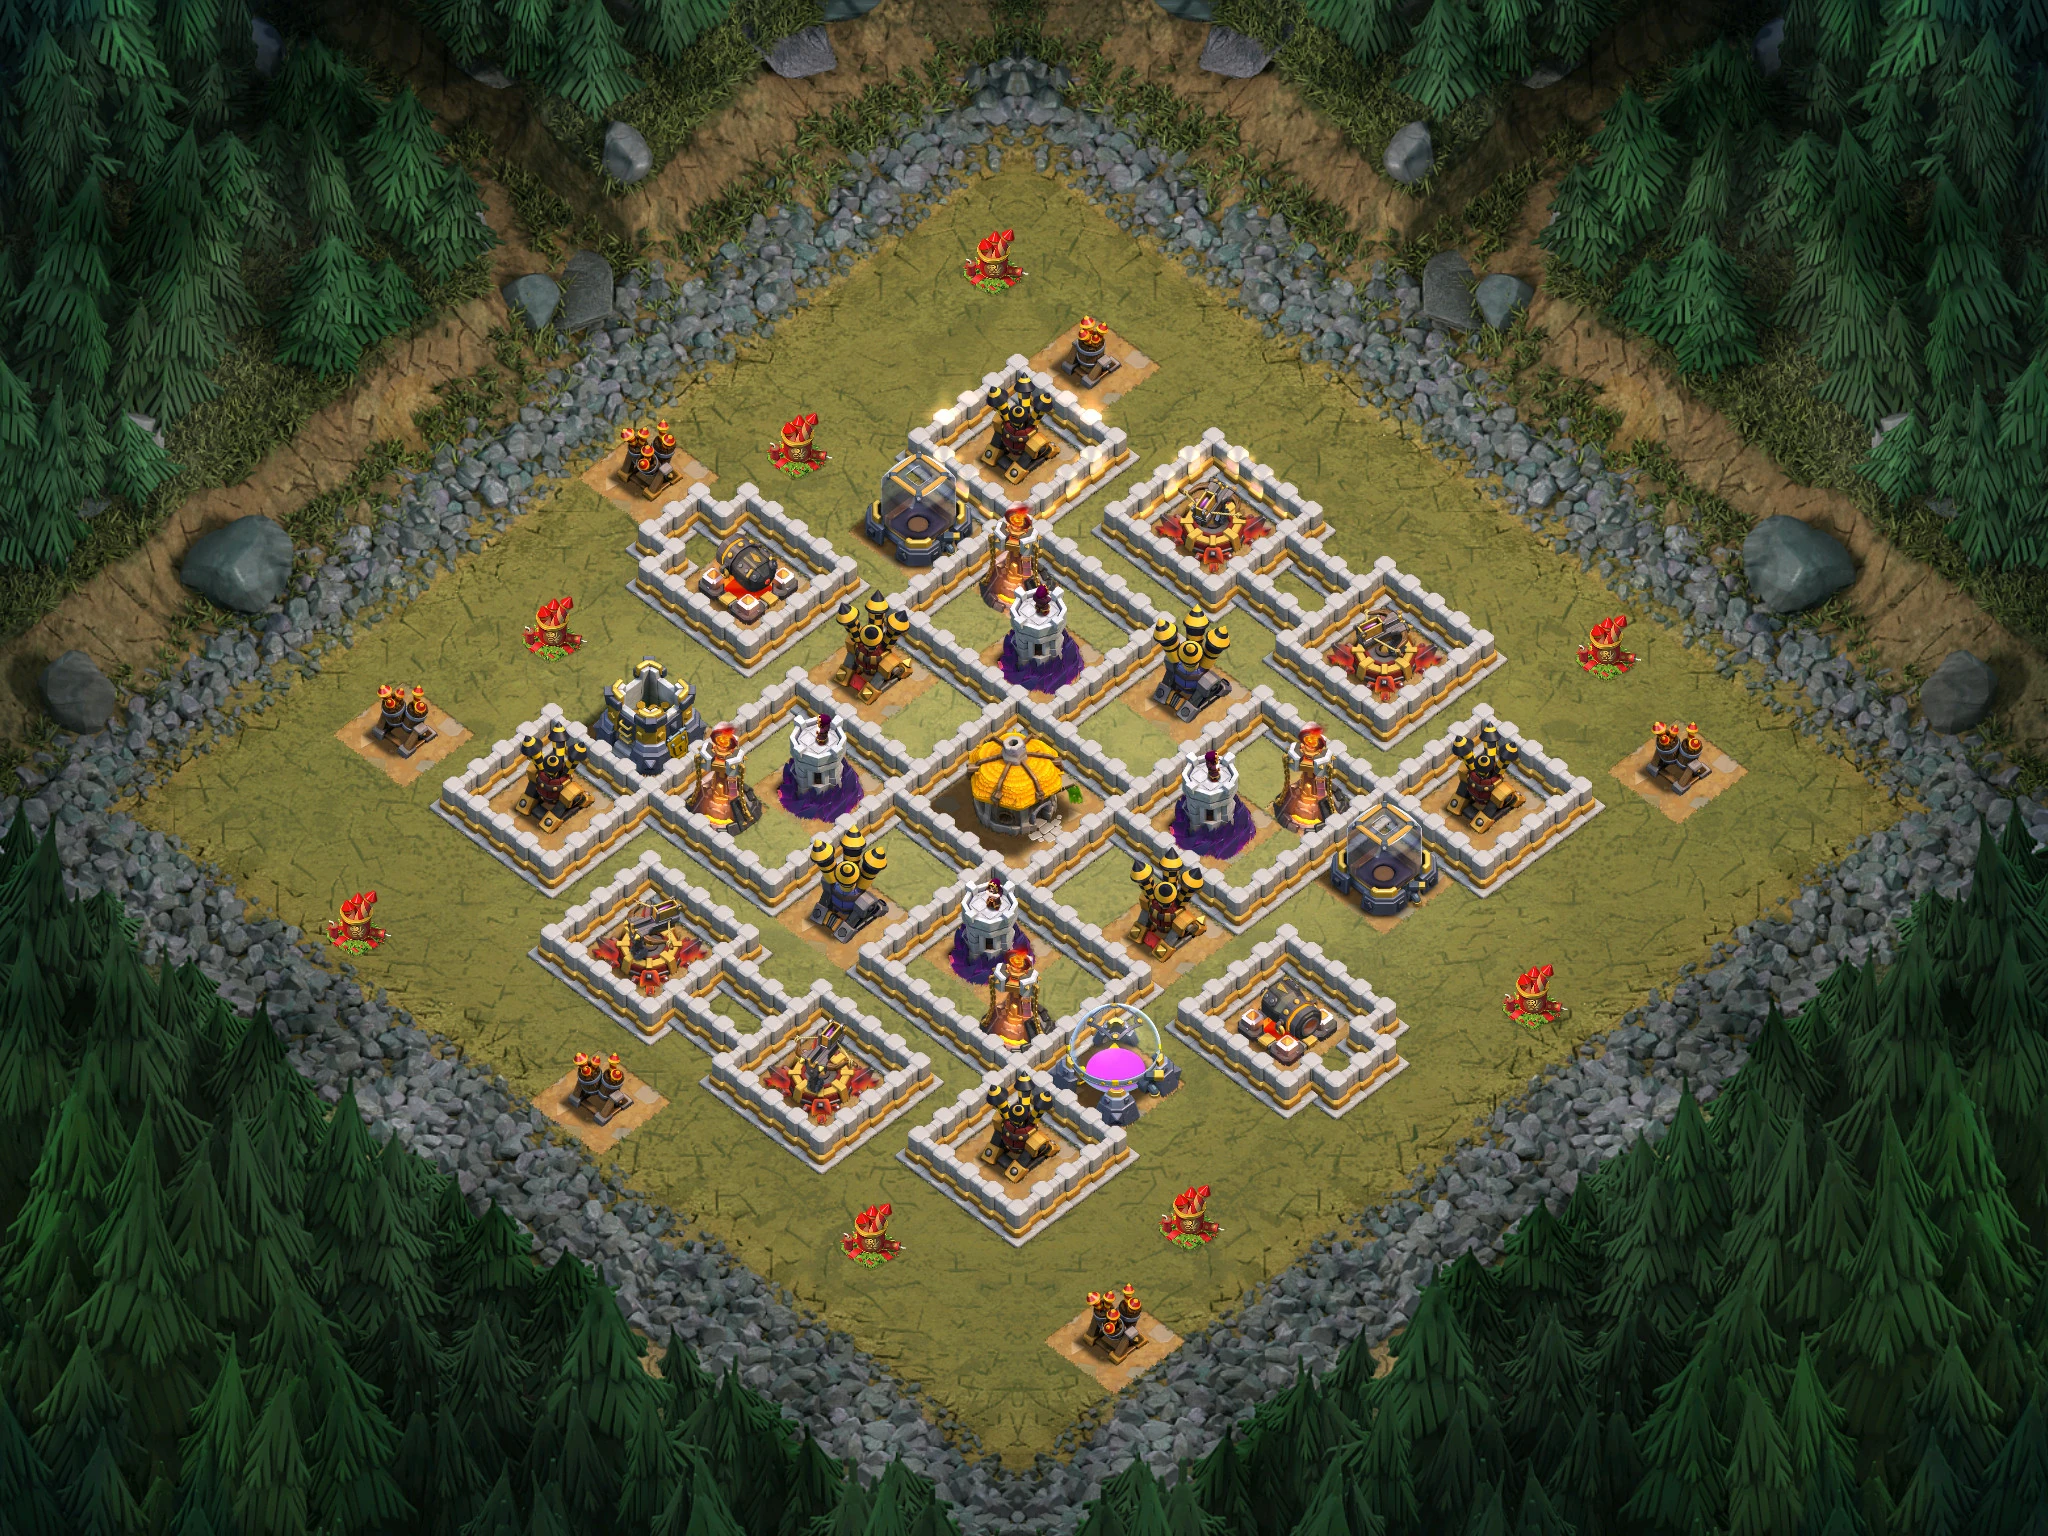
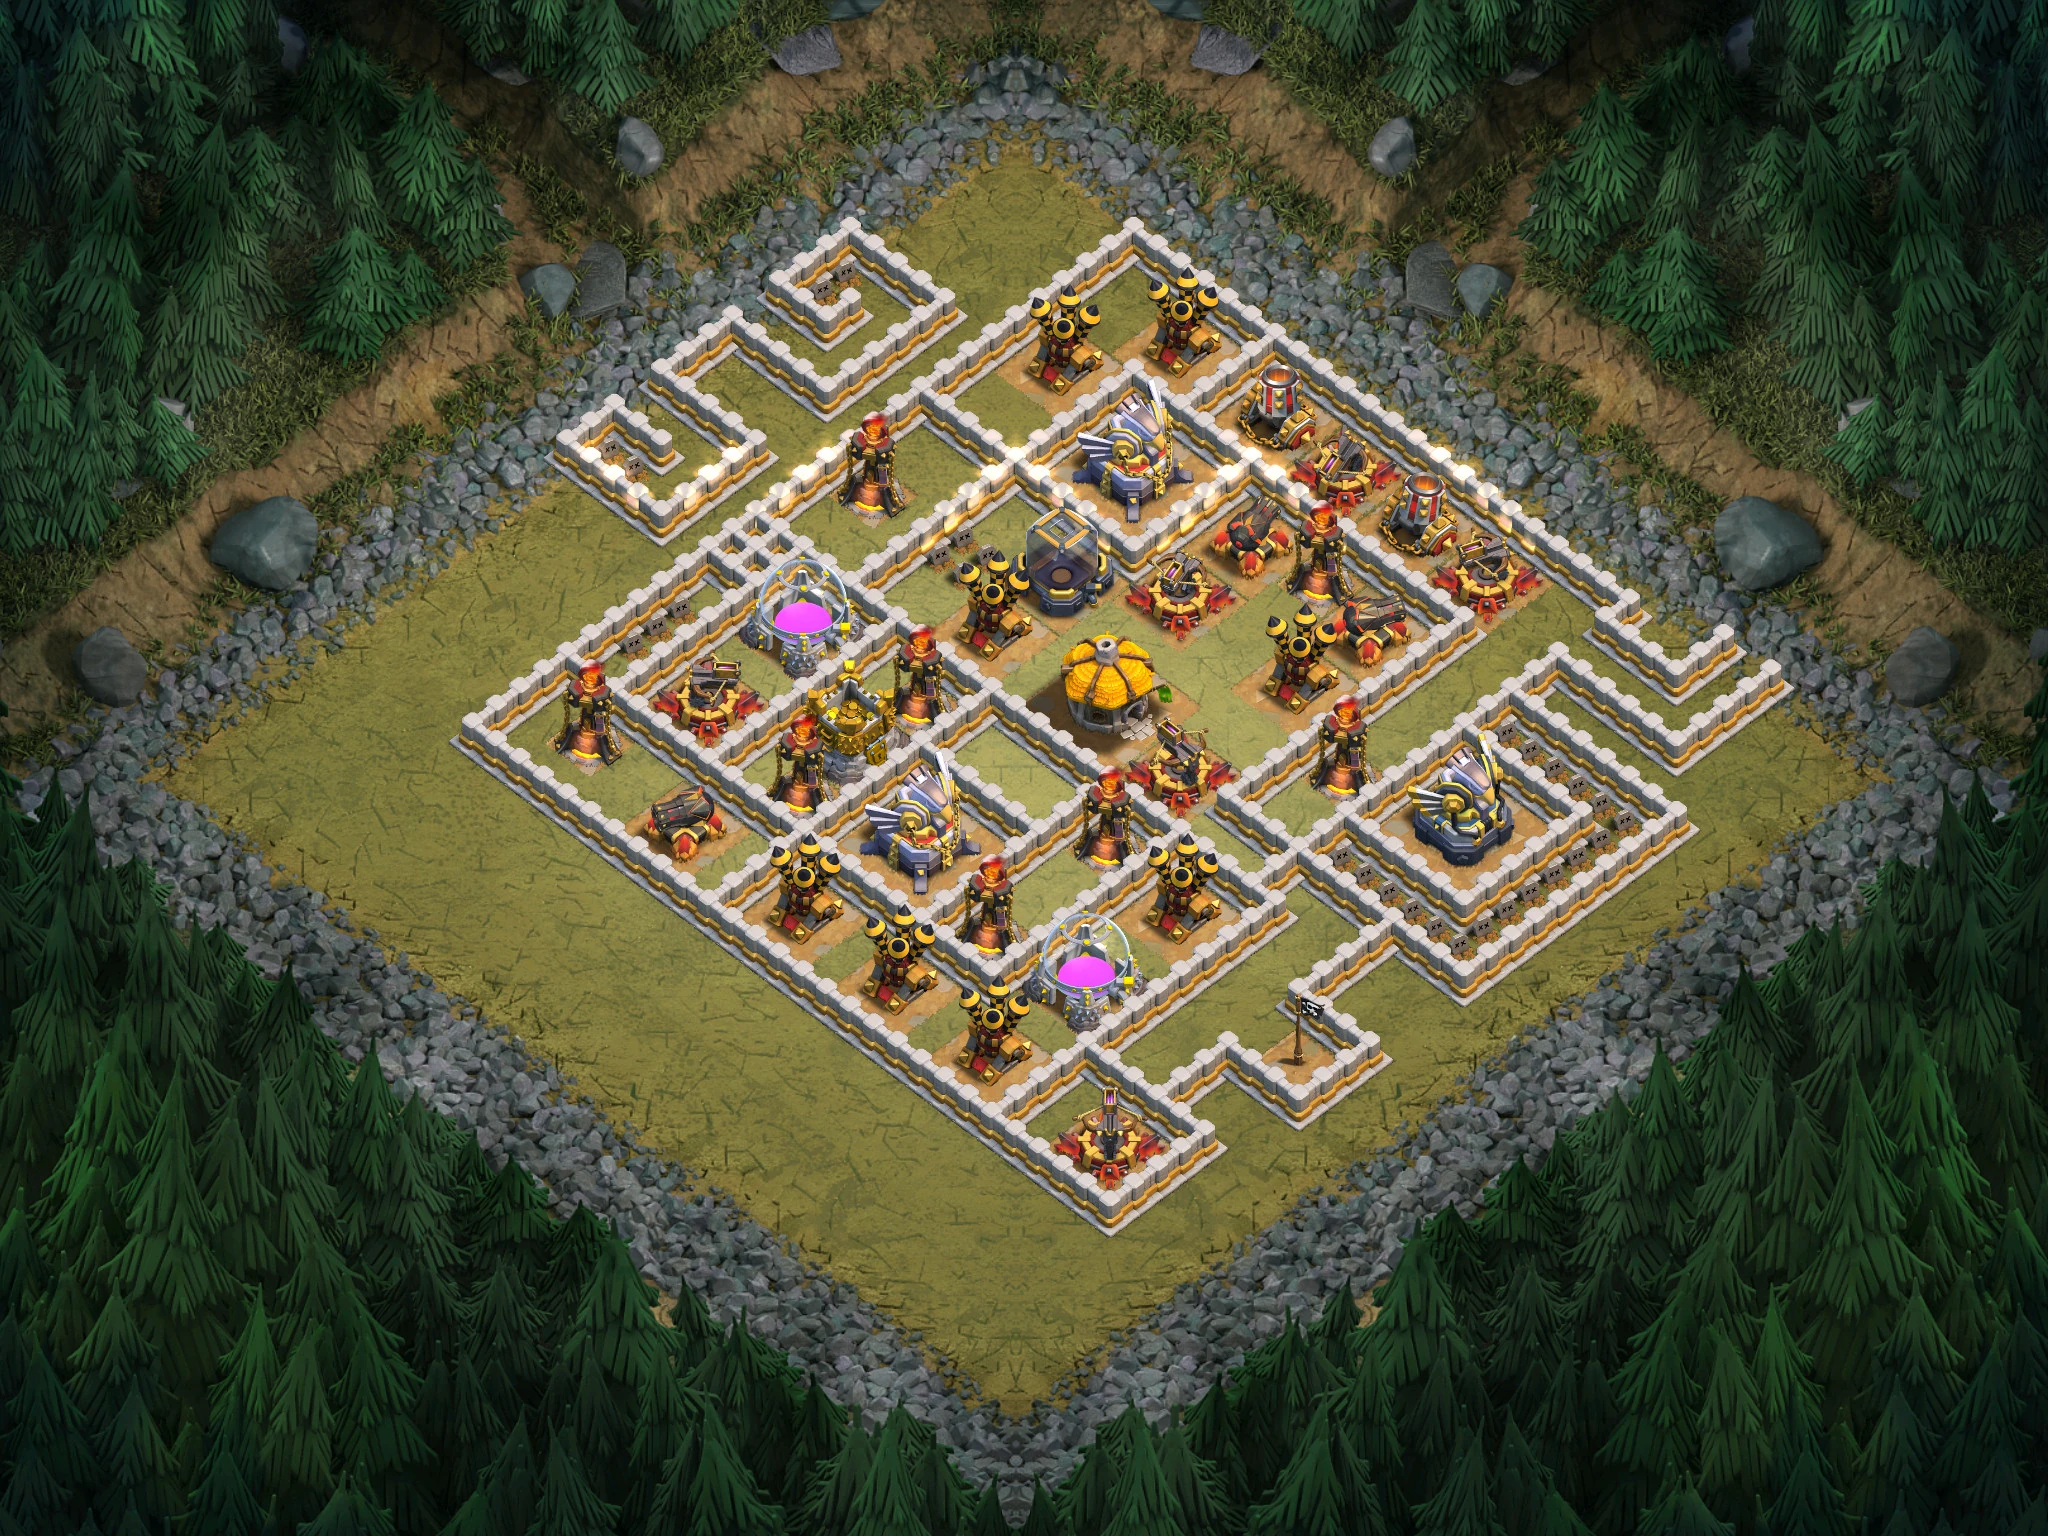
This level has six level 4 Cannons, level 1 and 2 Walls and Bombs.
Deploy 8 level 2+ Giants and 2 level 2+ Wall Breakers next to a Cannon. A single air troop will easily destroy the base as well.
Easter egg: If you look at the right side of the map, you will see that there is a X-Mas Tree from the 2013 winter update.

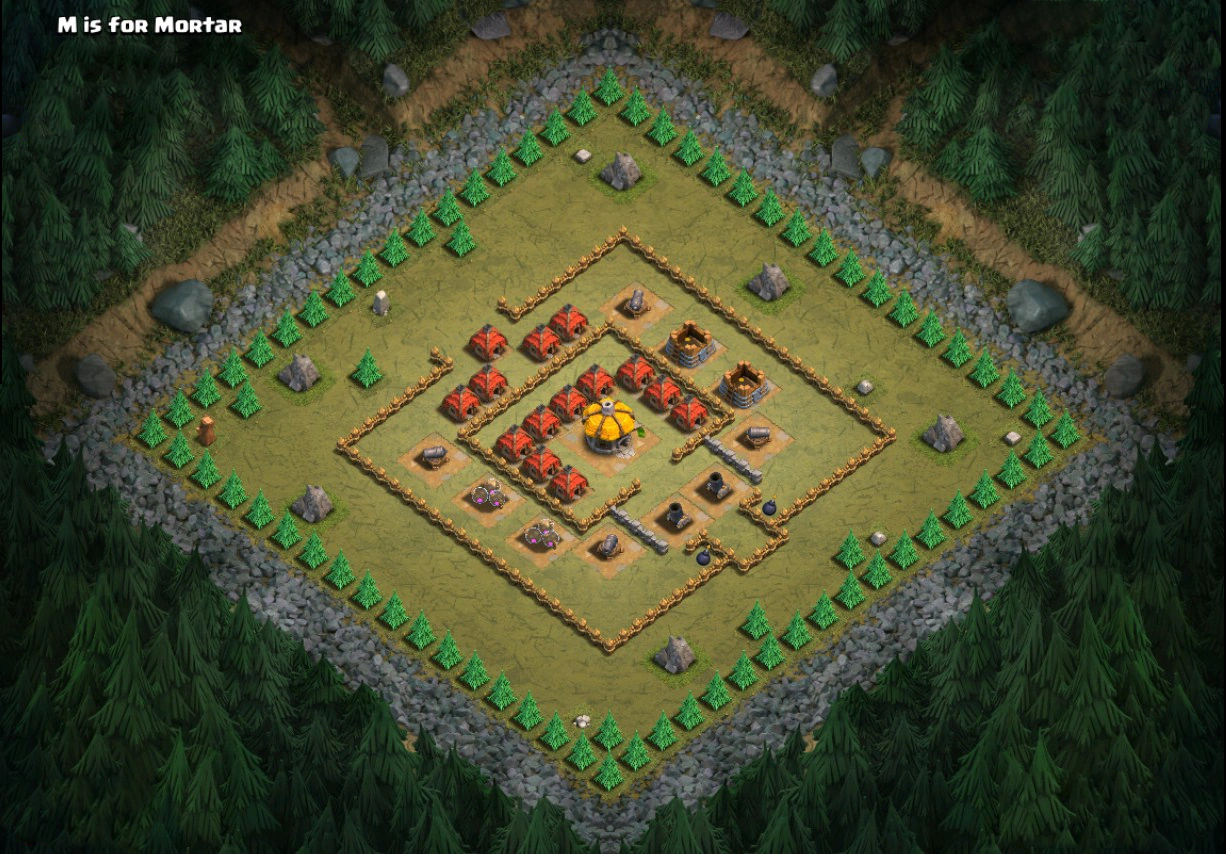
M is for Mortar
Recommended Town hall 5.
Loot available: 8,000 Gold and 8,000 Elixir.
This level introduces the Spring Trap. It consists of four level 4 Cannons, two level 1 Mortars, level 1 and 2 Walls, Bombs and Spring Traps.
There are no Air Defenses, Archer Towers or Wizard Towers in the base, so you may easily drop a Balloon or two and destroy it. Another strategy is to bomb the front of the base, then drop a Barbarian/Goblin to set off the Spring Trap. Then, use a few Giants to distract the Mortars and Cannons and deploy a few Goblins and Barbarians/Archers to destroy the rest of the base.

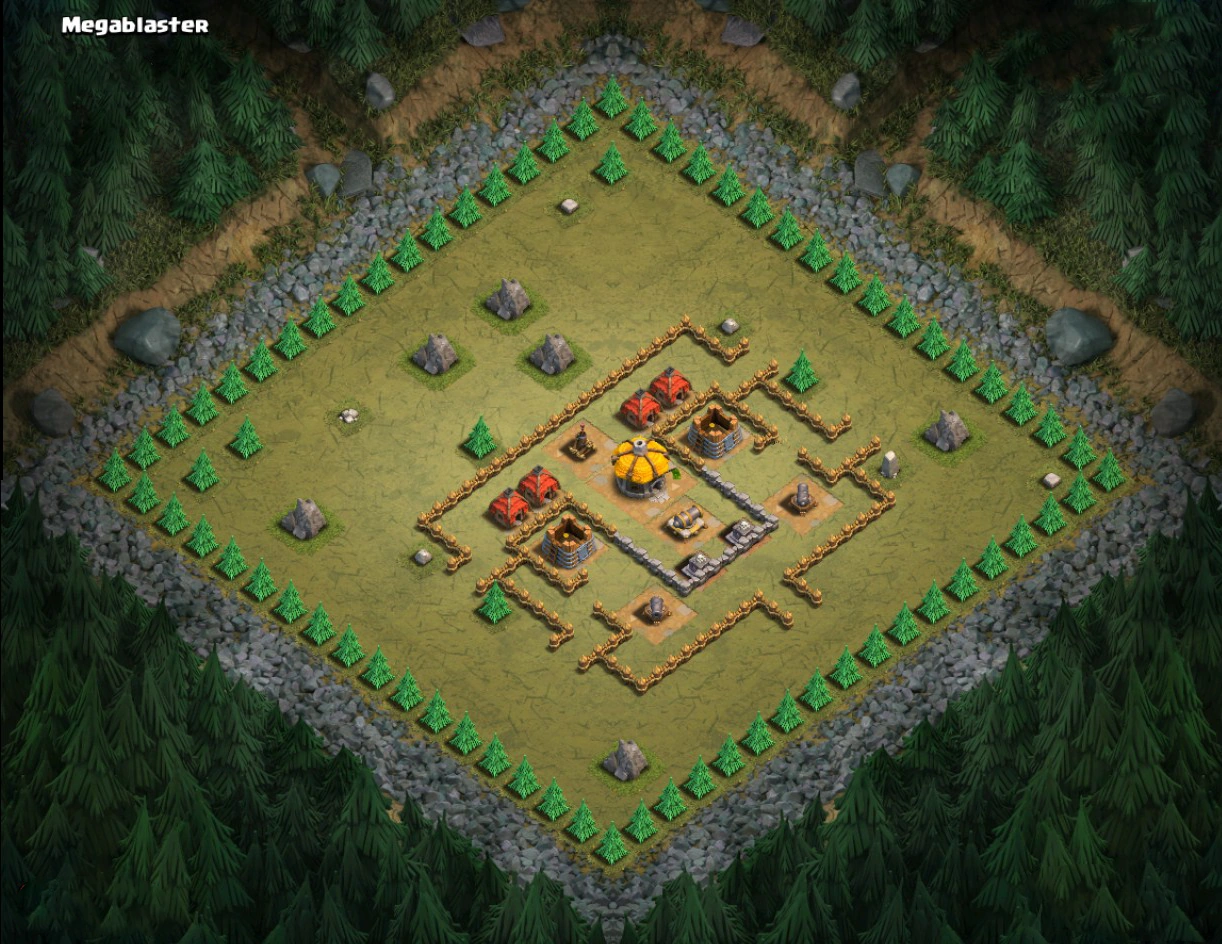
Megablaster
Recommended Town Hall 5.
Loot available: 8,000 Gold and 8,000 Elixir.
This level introduces the Air Defense and level 5 and 8 Cannons. It consists of two level 5 Cannons, one level 8 Cannon, one level 1 Air Defense and level 1 and 2 Walls. Some Spring Traps are present at the side entrances, with Bombs lining the level 2 Walls guarding the high-level Cannon.
Deploy 1 or more Archers at the top of the base to take care of the Air Defense, and drop a Balloon to take care of the rest of the defenses. Either then destroy the rest of the base with regular troops.

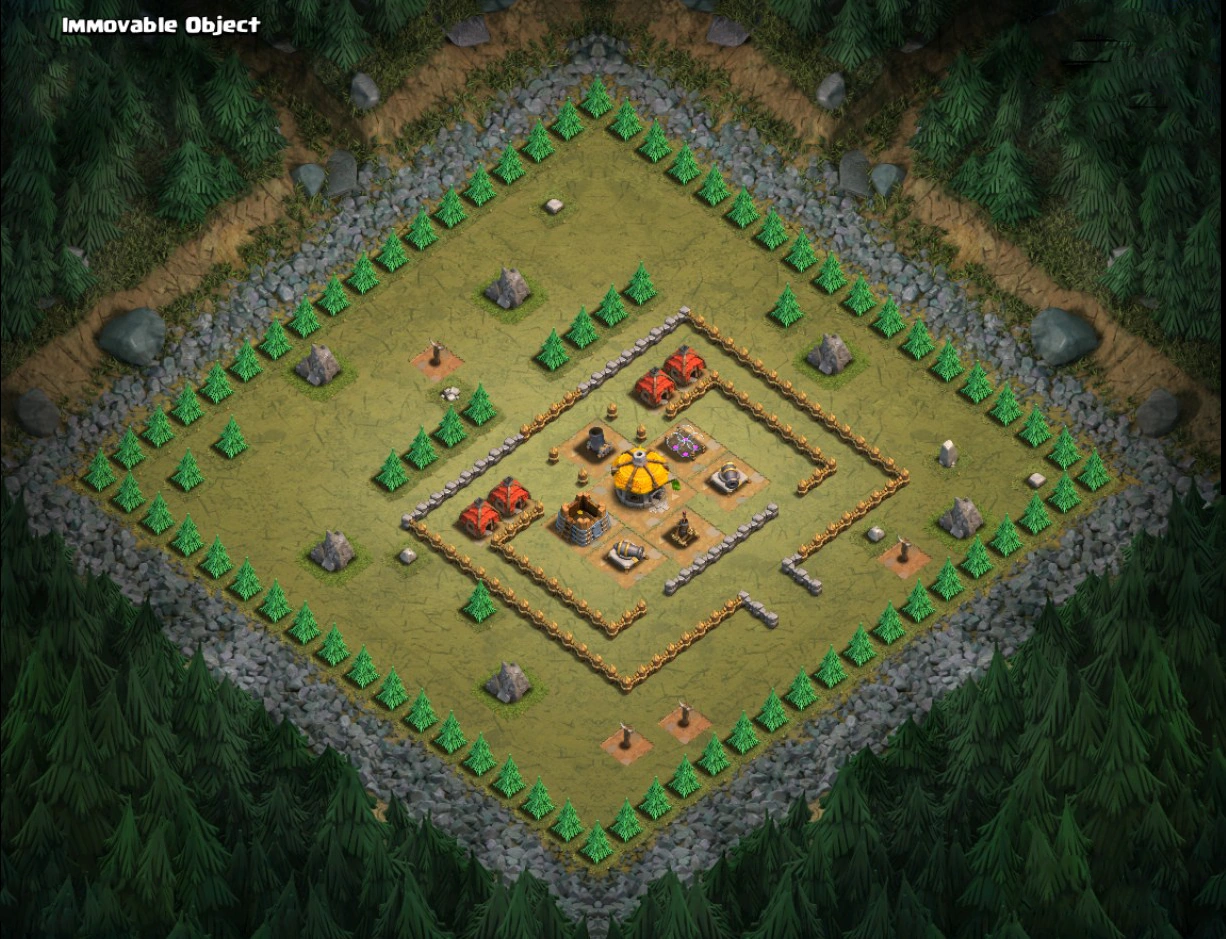
Immovable Object
Send in about 25 Archers (preferably level 2 or higher) at the southeast entrance to take out the Air Defense, then deploy at least 1 Balloon to take out the rest. Note that there are Spring Traps on the side entrance to the Cannons.
Loot available: 10,000 Gold and 10,000 Elixir.

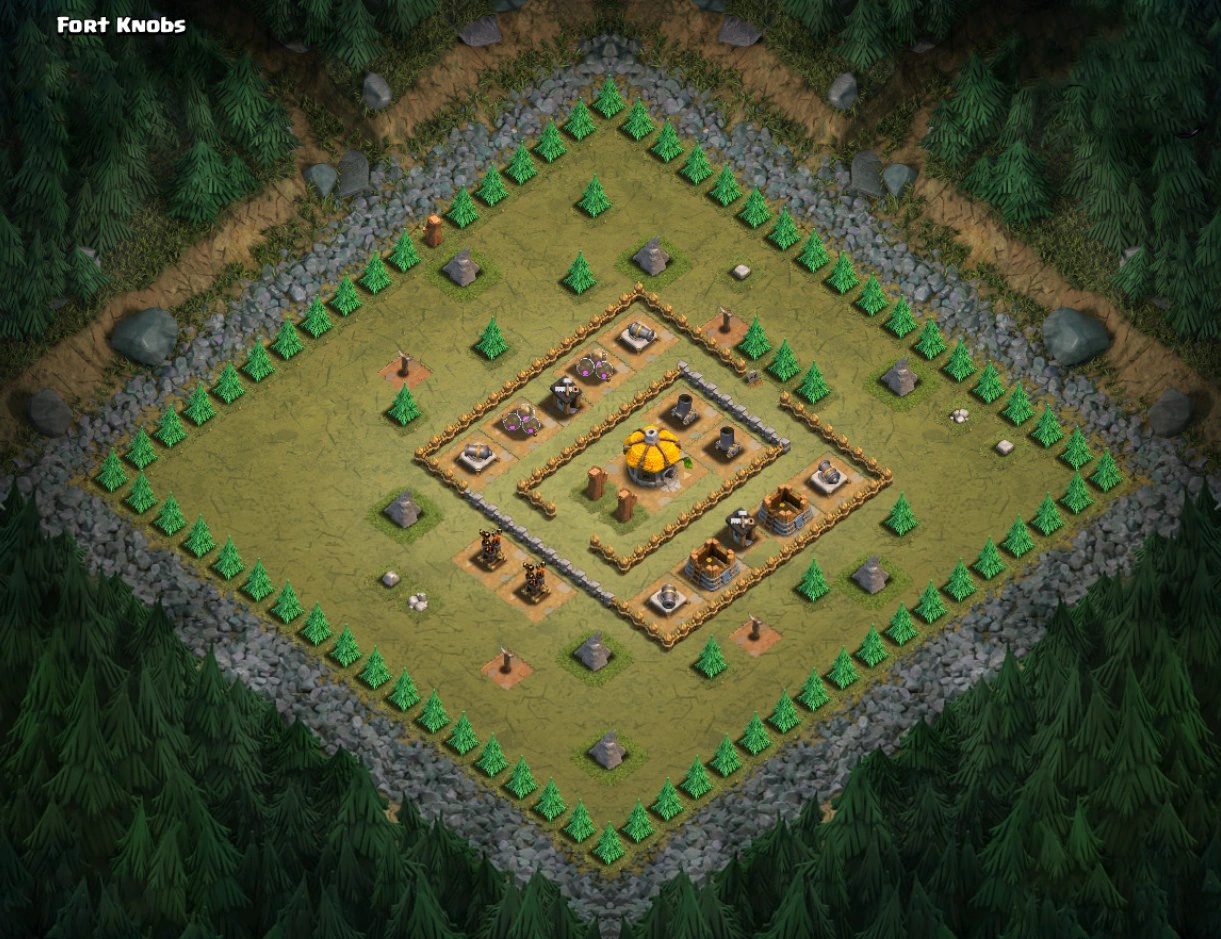
Fort Knobs
Use Barbarians on the Air Defenses, then drop one Balloon to destroy the entire base. Drop more Balloons if you want to speed up the process.
Another strategy is to use a single Archer to take out the Air Defenses and a single Balloon to destroy the remainder of the base. Care must be taken to place the Archer so the Cannons can't reach her. Also note that this will take a long time, but you will actually make a profit as a result of the few units used.
Loot available: 15,000 Gold and 15,000 Elixir.

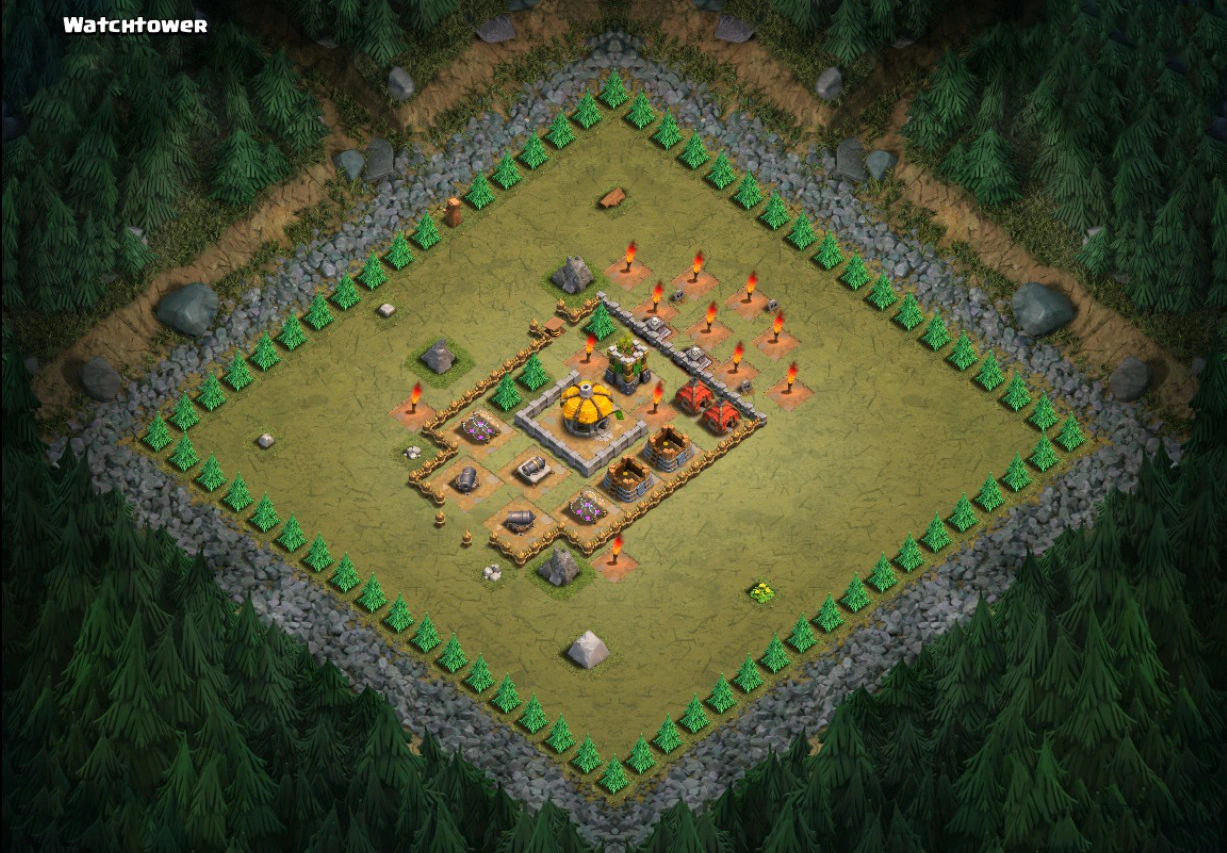
Watchtower
Place about 15-25 Archers to take out the Archer Tower, and a single Balloon will handle the rest (you can place a Giant to shield the Archers if necessary).
You can alternatively swarm the Archer Tower with several Balloons (about 10 or so); once destroyed, the Balloons will promptly destroy the remainder of the base.
Loot available: 10,000 Gold and 12,000 Elixir.
Fun fact: the level 10 Archer Tower is what's considered a "Watchtower" in this level. This is because people that normally attack this level don't have access to a level 10 Archer Tower which can be upgraded at Town Hall 8.

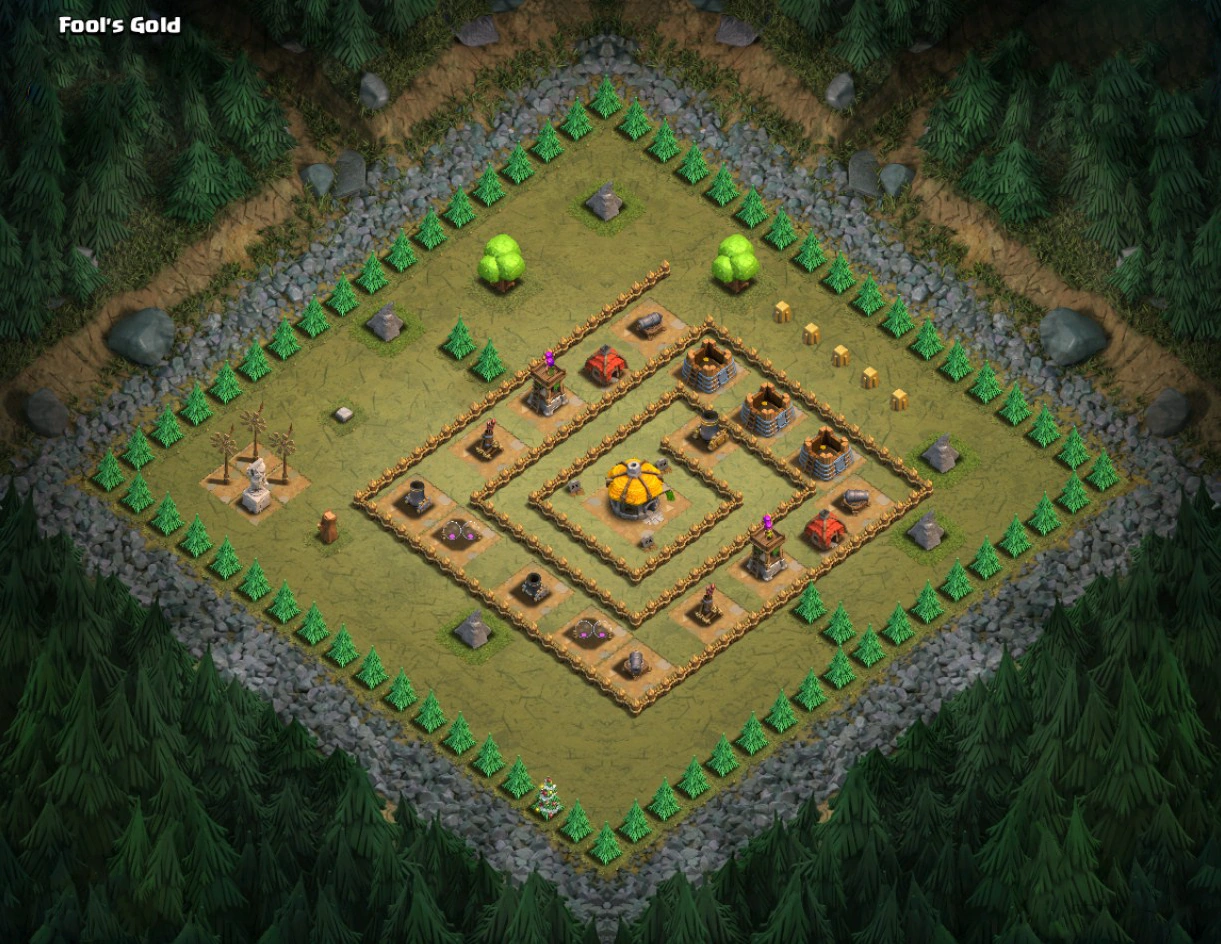
Fool's Gold
Swarm many Balloons or dozens of Archers on the left and right side at the Air Defense/Archer Tower.
6+6 Level 2 Balloons is not enough (confirmed), 8+8 Level 2 Balloons was enough though 7+7 may work if the Balloons target the Air Defense and then the Archer Tower (confirmed).
The Mortar farthest right is partially inside a Wallss. This is not just visual and melee troops can destroy the Mortar even if the Wallss separates them from the center of the Mortar.
Note: There are Skeleton Traps (set to ground) between the Gold Storages.
Loot available: 20,000 Gold and 6,000 Elixir.

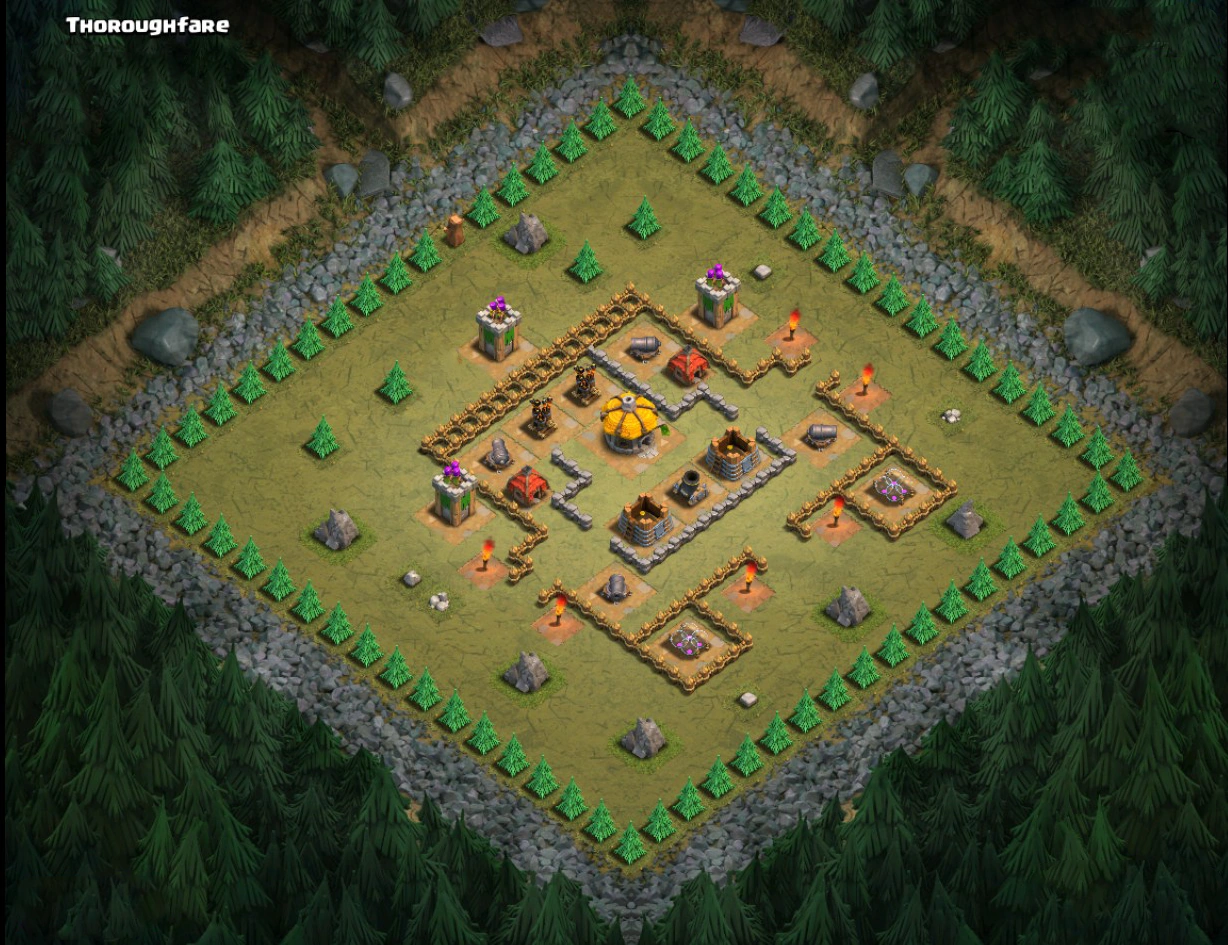
Thoroughfare
Send in 15 Barbarians to each of the Archer Towers, and then 20 Archers to take out the 2 Air Defenses. Clear the rest with a Balloon or two.
Loot available: 15,000 Gold and 15,000 Elixir.

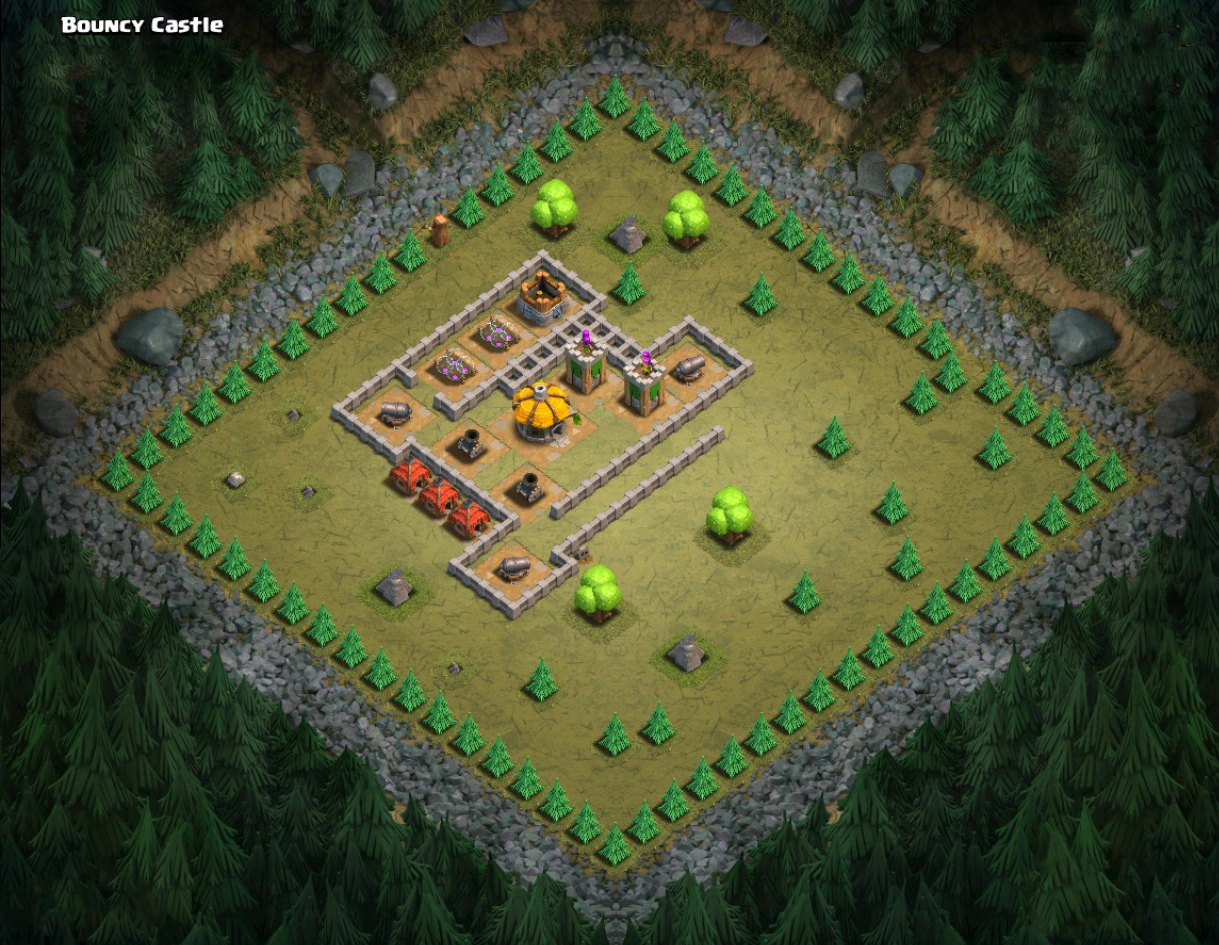
Bouncy Castle
Drop few Wall Breakers and then 50 level 3 or higher Barbarians at the upper right Cannon. Once the Archer Towers are destroyed, clean the rest with a Balloon.
Loot available: 17,000 Gold and 17,000 Elixir. If you're good, 3 Balloons from the Archer Tower will clear it.

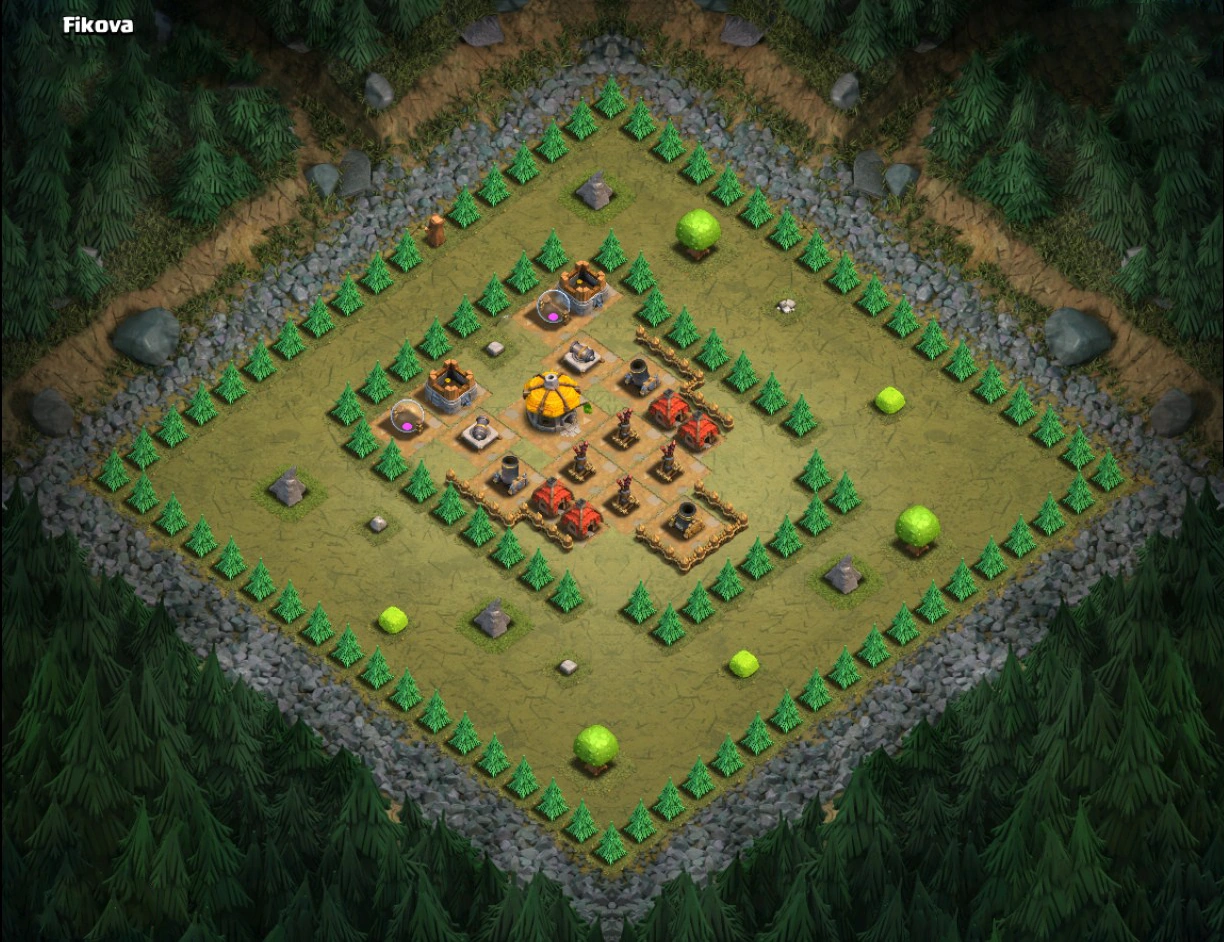
Fikova
Loot: 20,000 Gold and 20,000 Elixir.
Drop several Giants at the Air Defenses, and then sweep up with one Balloon. You could support the Giants by dropping a Lightning Spell (it won't do much but it's something).
Note: 15 Level 2 Giants (7 on one side of Air Defense, 8 on the other) wasn't enough to knock out the Air Defenses before being destroyed. Tested several times. Added Archers as extra damage but they target houses.

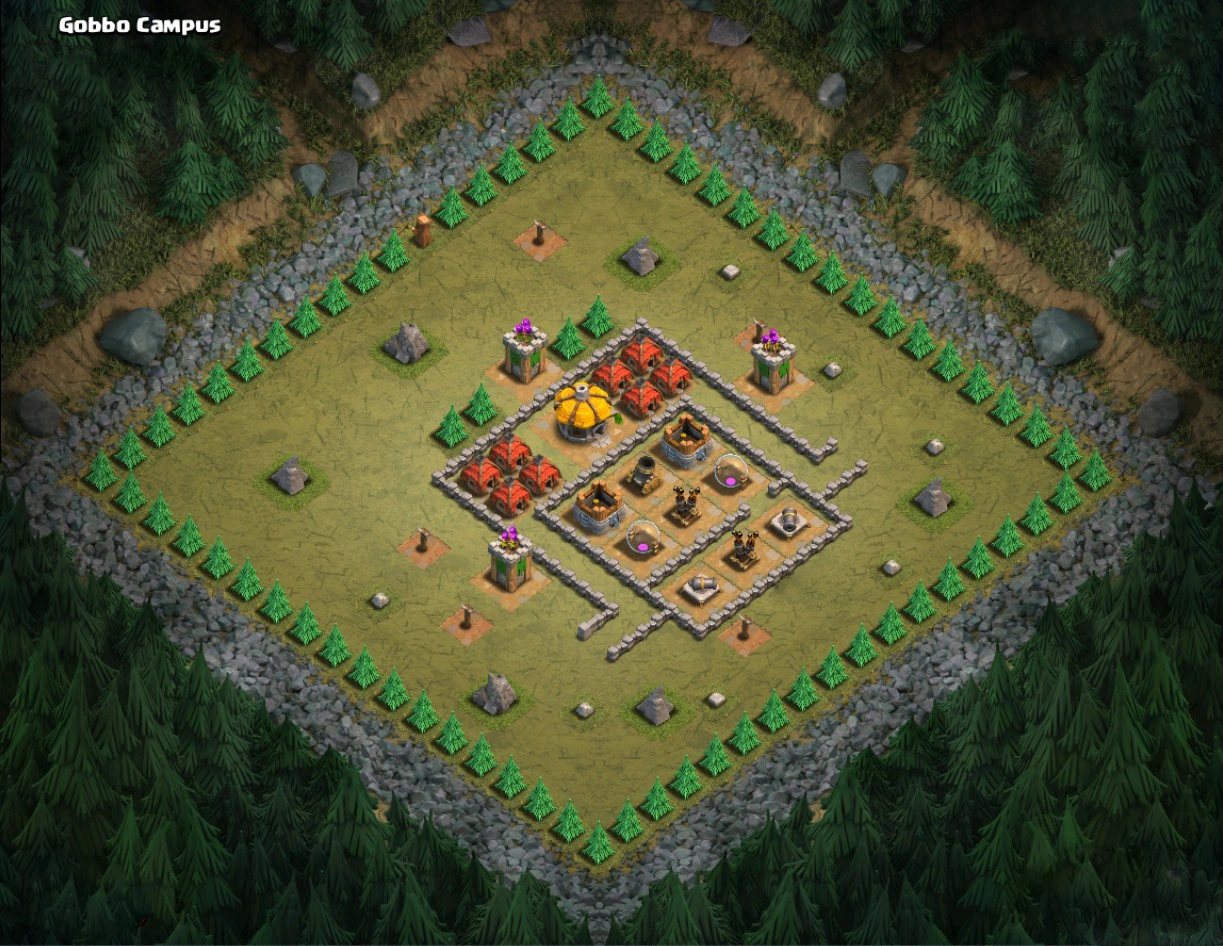
Gobbo Campus
Loot: 25,000 Gold and 25,000 Elixir.
Drop few Giants at the bottom, then send in Archers well behind Giants, then repeat for the next section. Drop a few Barbarians at the Archer Towers and finish up with a Balloon.
The above strategy didn't work with all level 2 units, so it took some testing to find one that did. 1 Wall Breaker at the bottom, suggest aiming for the bottom left Cannon first. Then deploy 11 Archers at each Archer Tower, 10 is not enough. After all, Archers are deployed, send all your Giants (should have 9 ) to the bottom Cannon. Then watch as you come close to losing but eventually win.

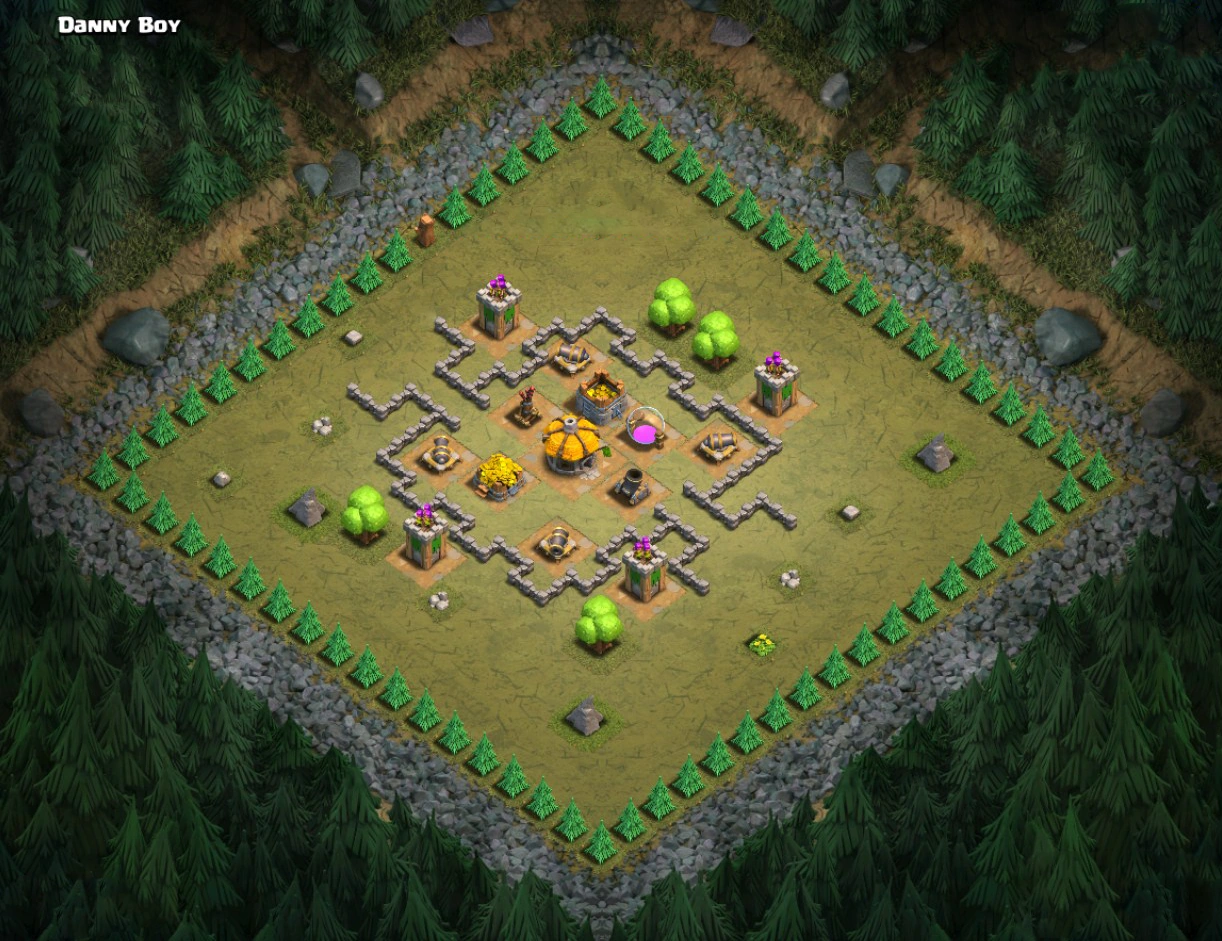
Danny Boy
1 Goblin in each will clear all of the traps out of the bottle-necks.
Drop few Barbarians at the Archer Towers, then deploy several Giants at the Air Defense, supported by a few Archers. Throw a Balloon at them to finish up.
The Barbarian strat didn't work for me. Dropped about 11 Archers per Archer Tower then about 10 Giants for Air Defenses, finishing with a Balloon.
Alternate strategy: Deploy 2 Giants at each Archer Tower, then deploy 1 Wizard (unlockable at TH5) at each of the Archer Towers excluding the top one. Instead, deploy some more Giants, send in a Wall Breaker, and Lightning Spell the Air Defense (it takes 3 to take it out). Clear the rest with a Balloon.
Loot: 30,000 Gold and 30,000 Elixir.

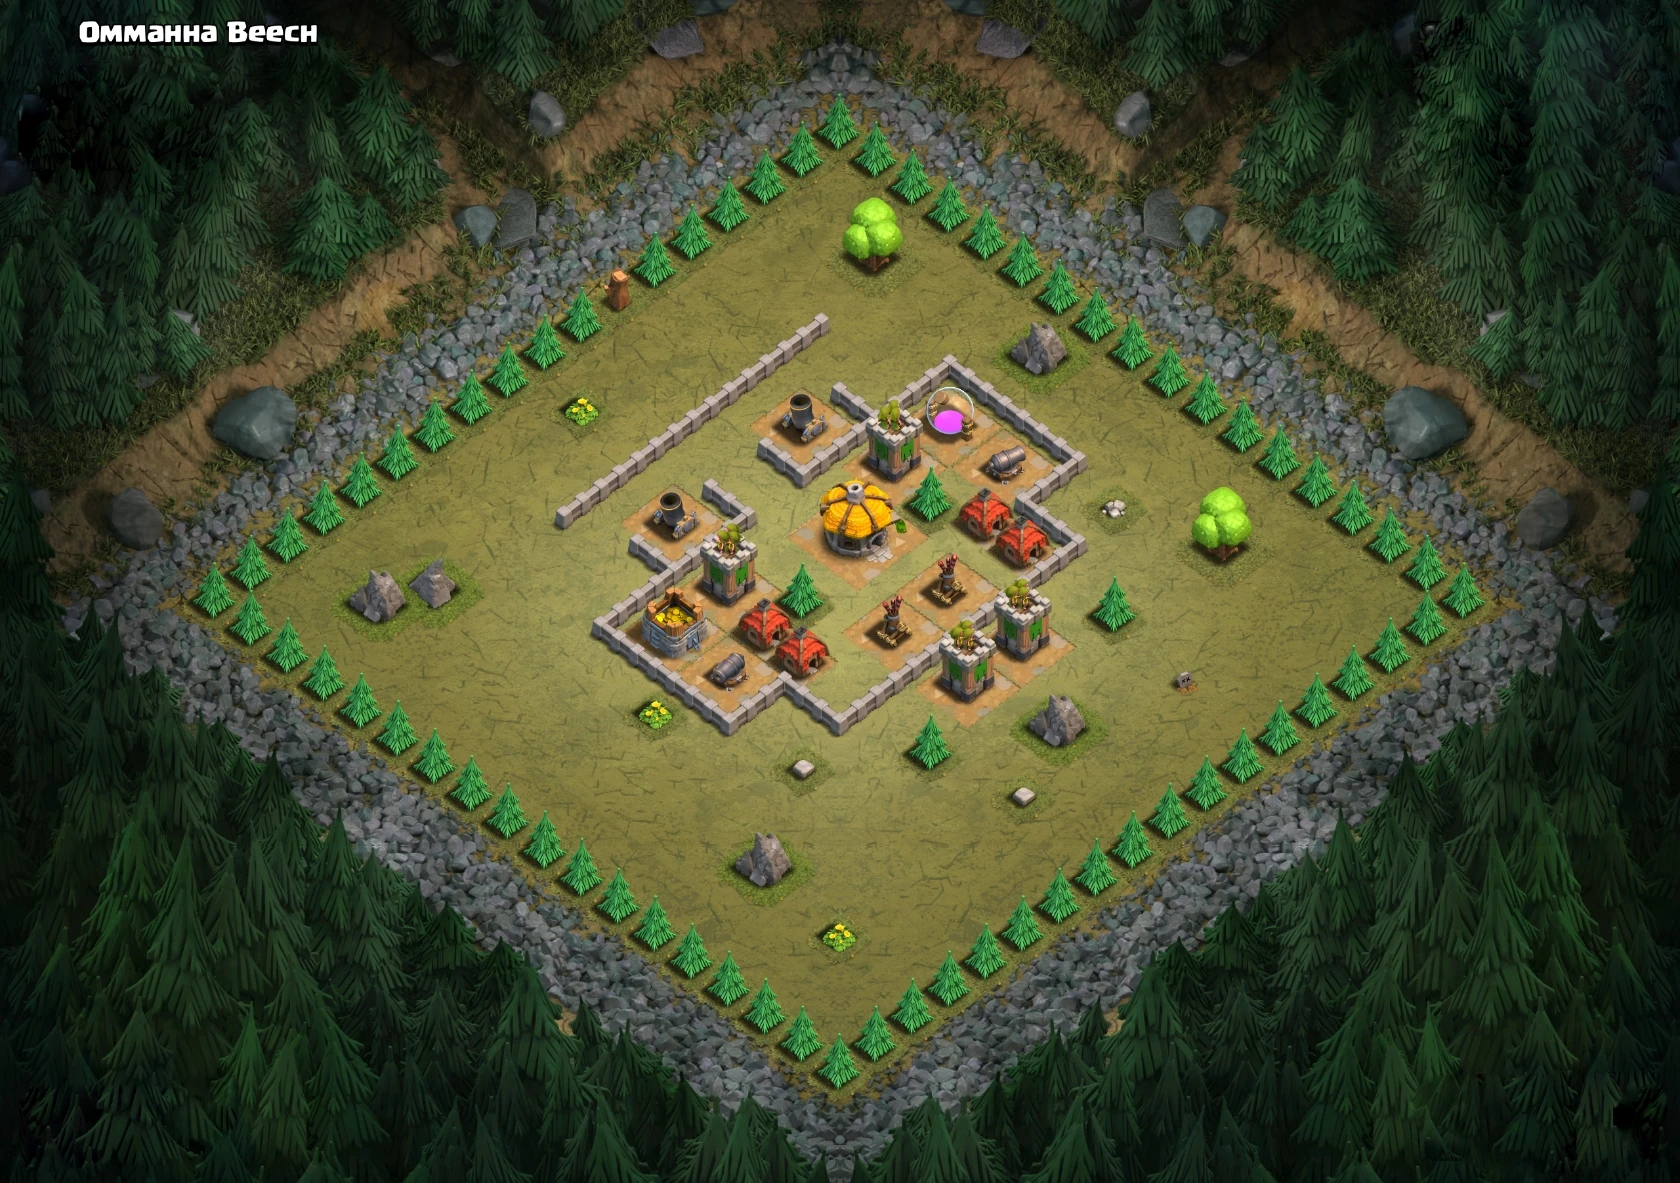
Ommahha Beech
Drop some Barbarians down below at the Archer Towers, then drop Archers at the Air Defenses. Finish with a Balloon.
Alternative 1: 26 Giants at the Archer Towers on bottom and 1 Balloon. Also, you can use the Giant-Healer combo from the bottom of the base, after destroying the Air Defenses.
Loot: 35,000 Gold and 35,000 Elixir.

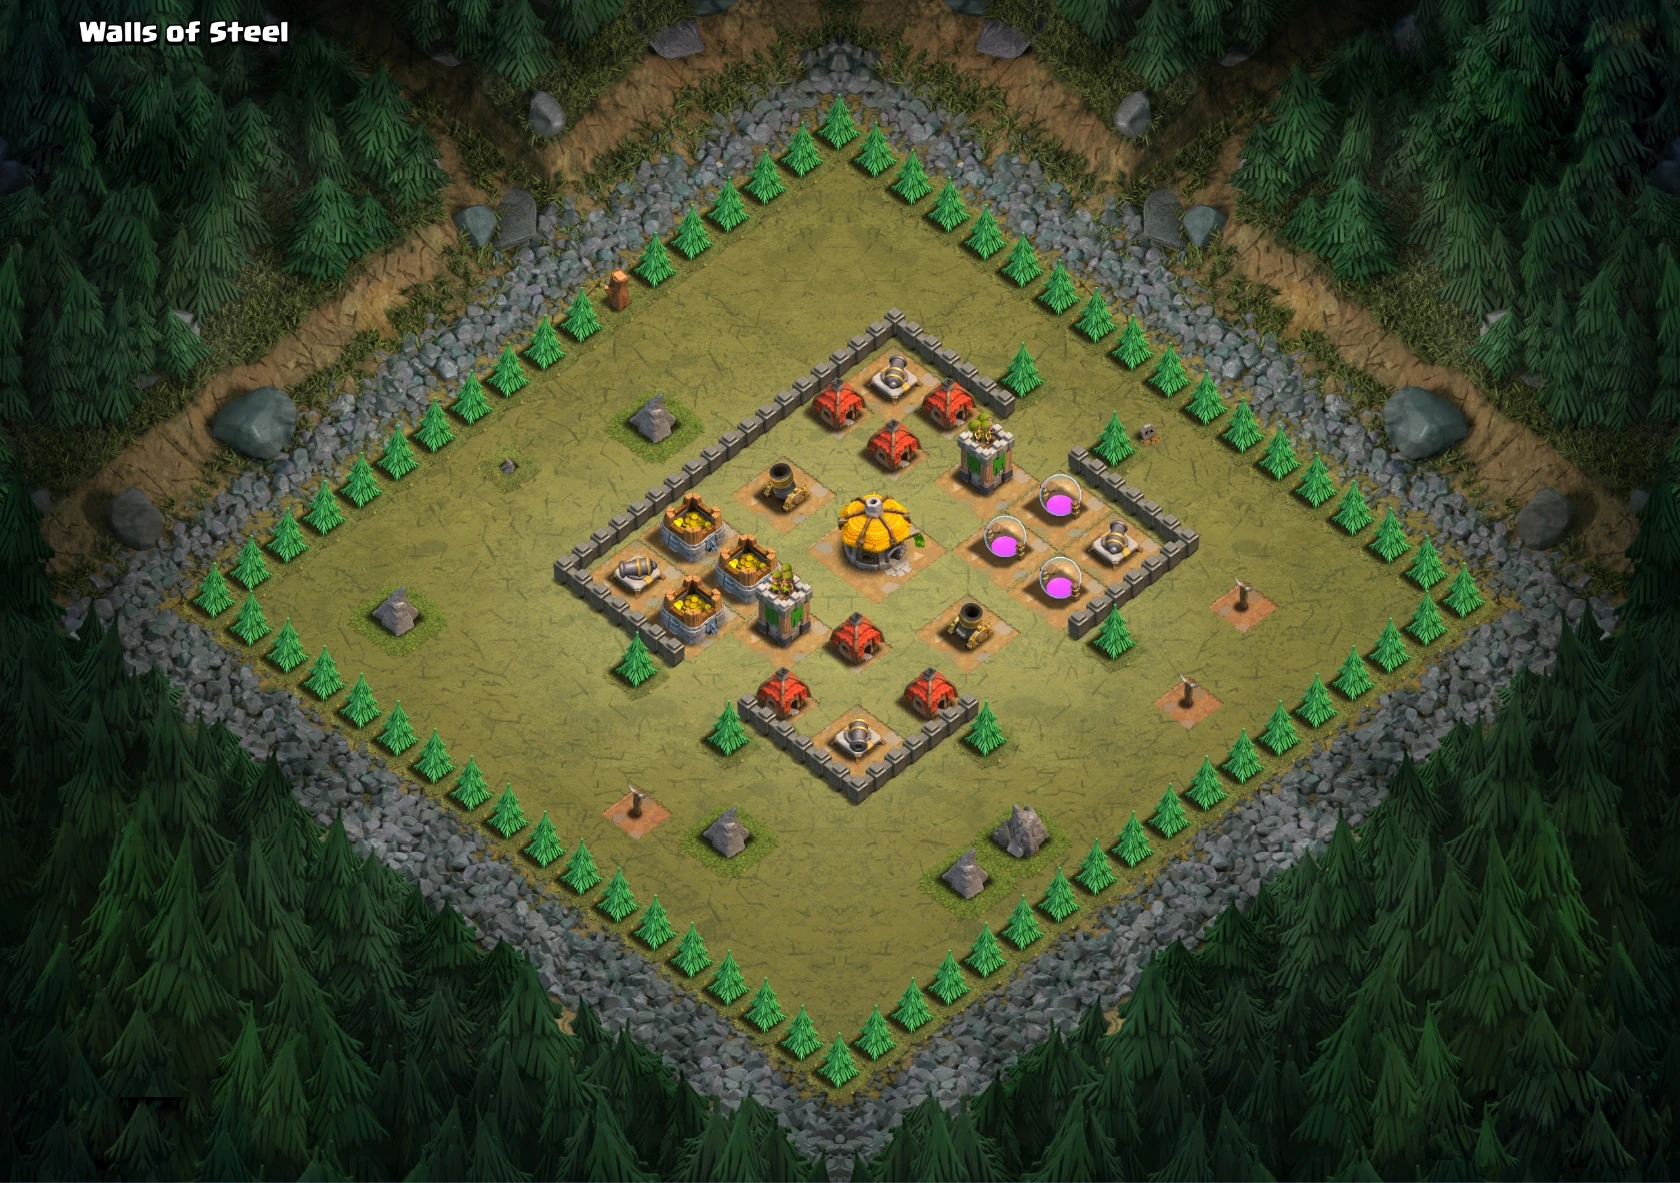
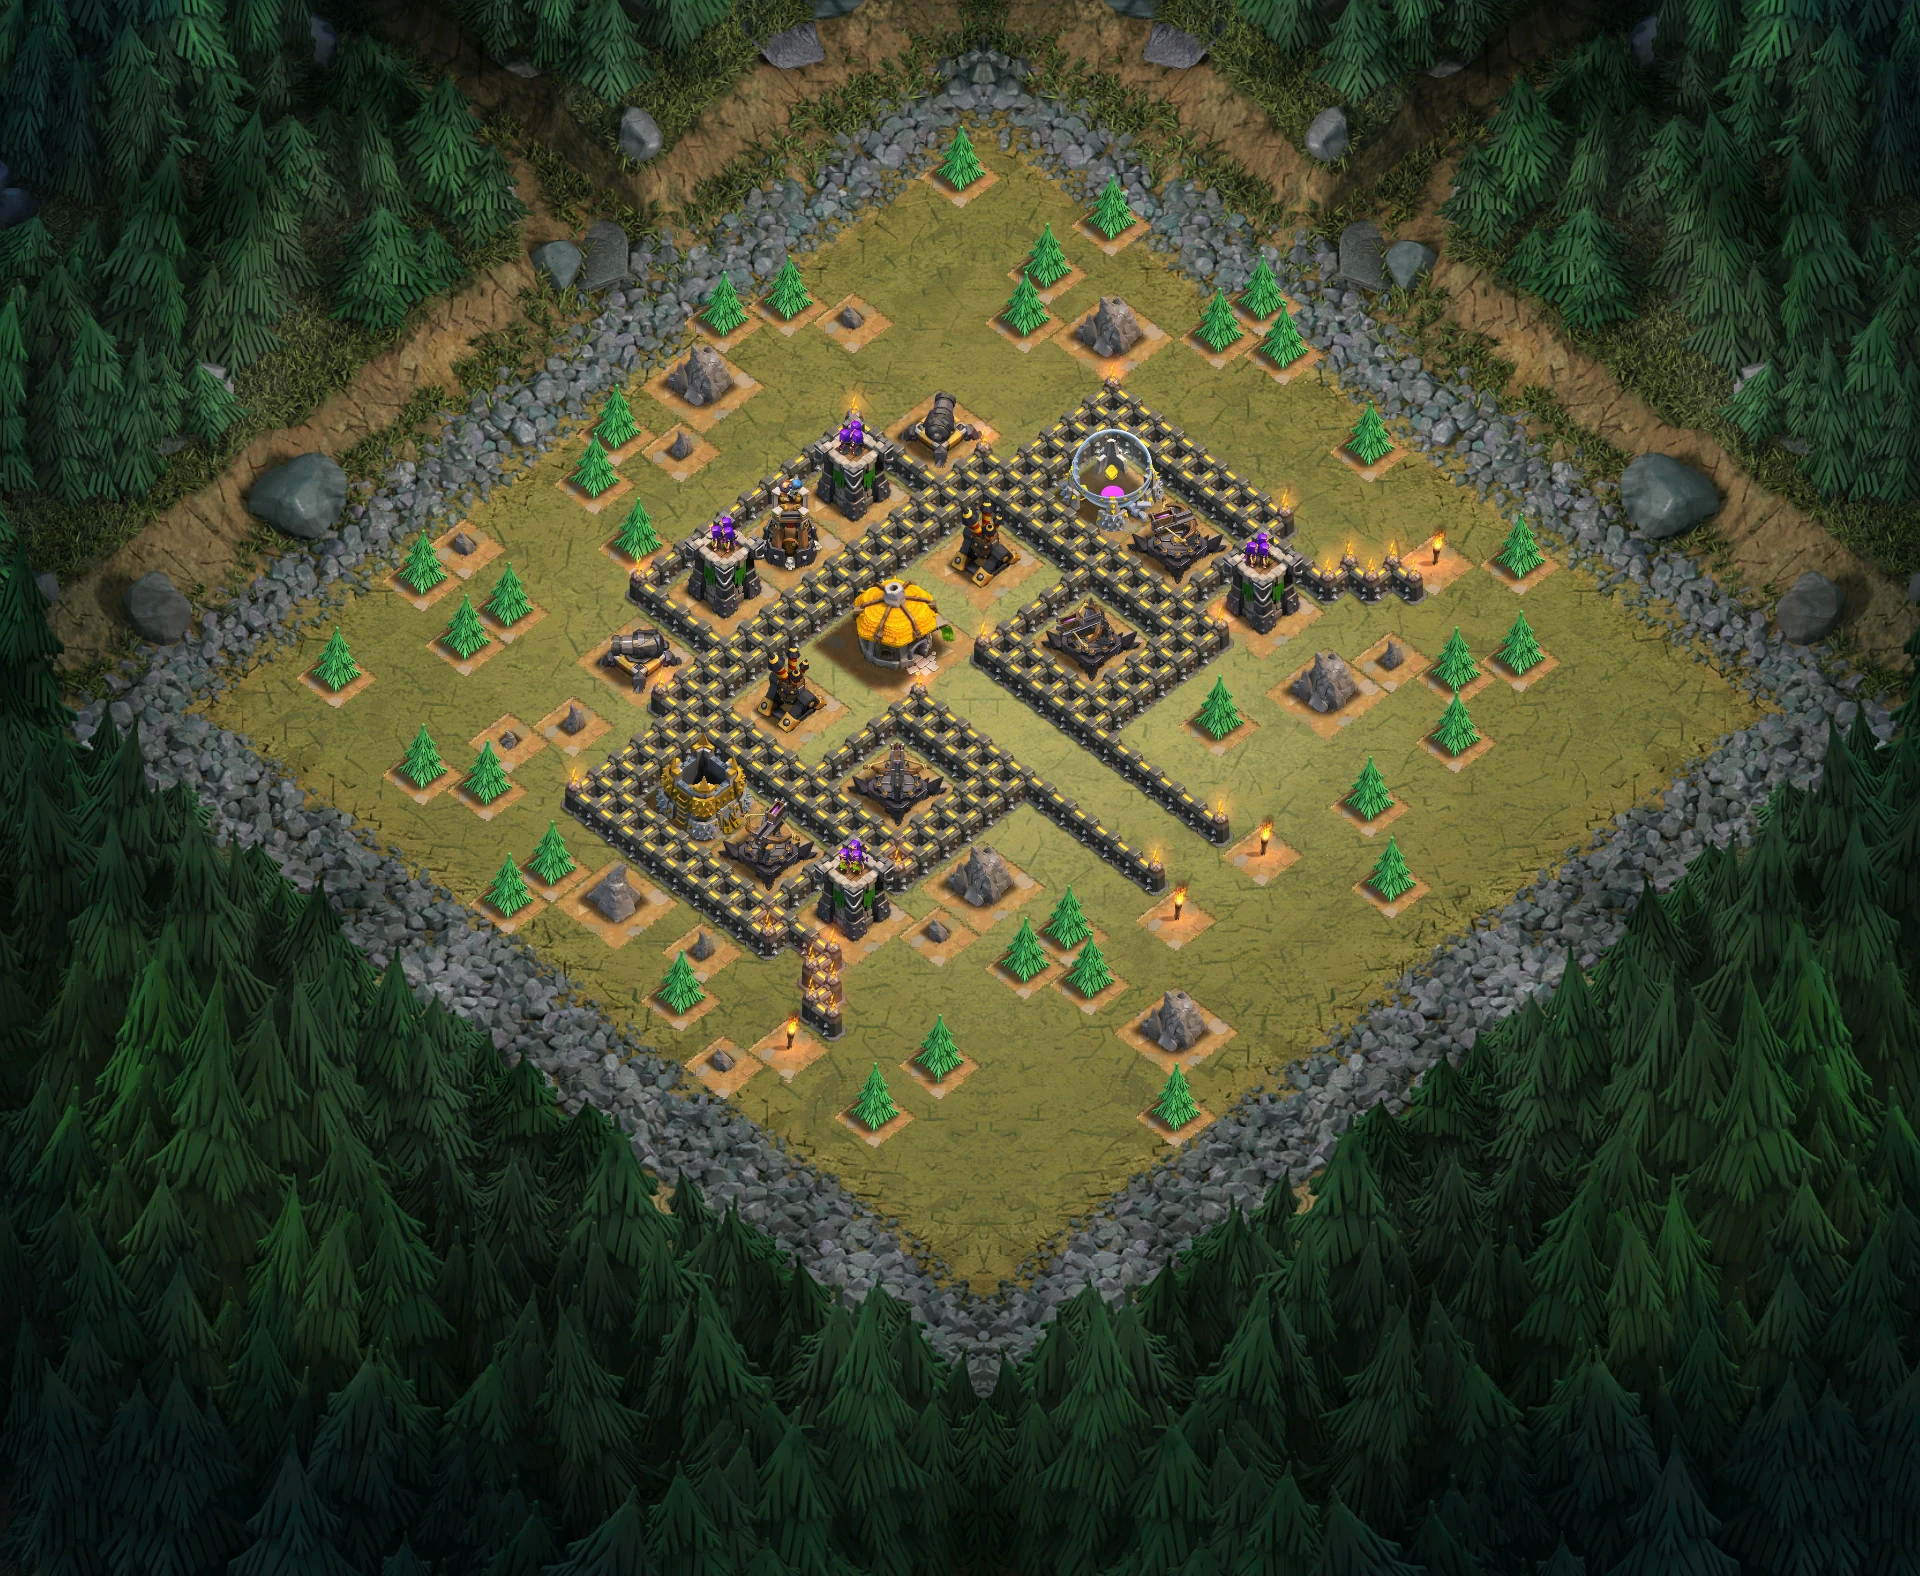
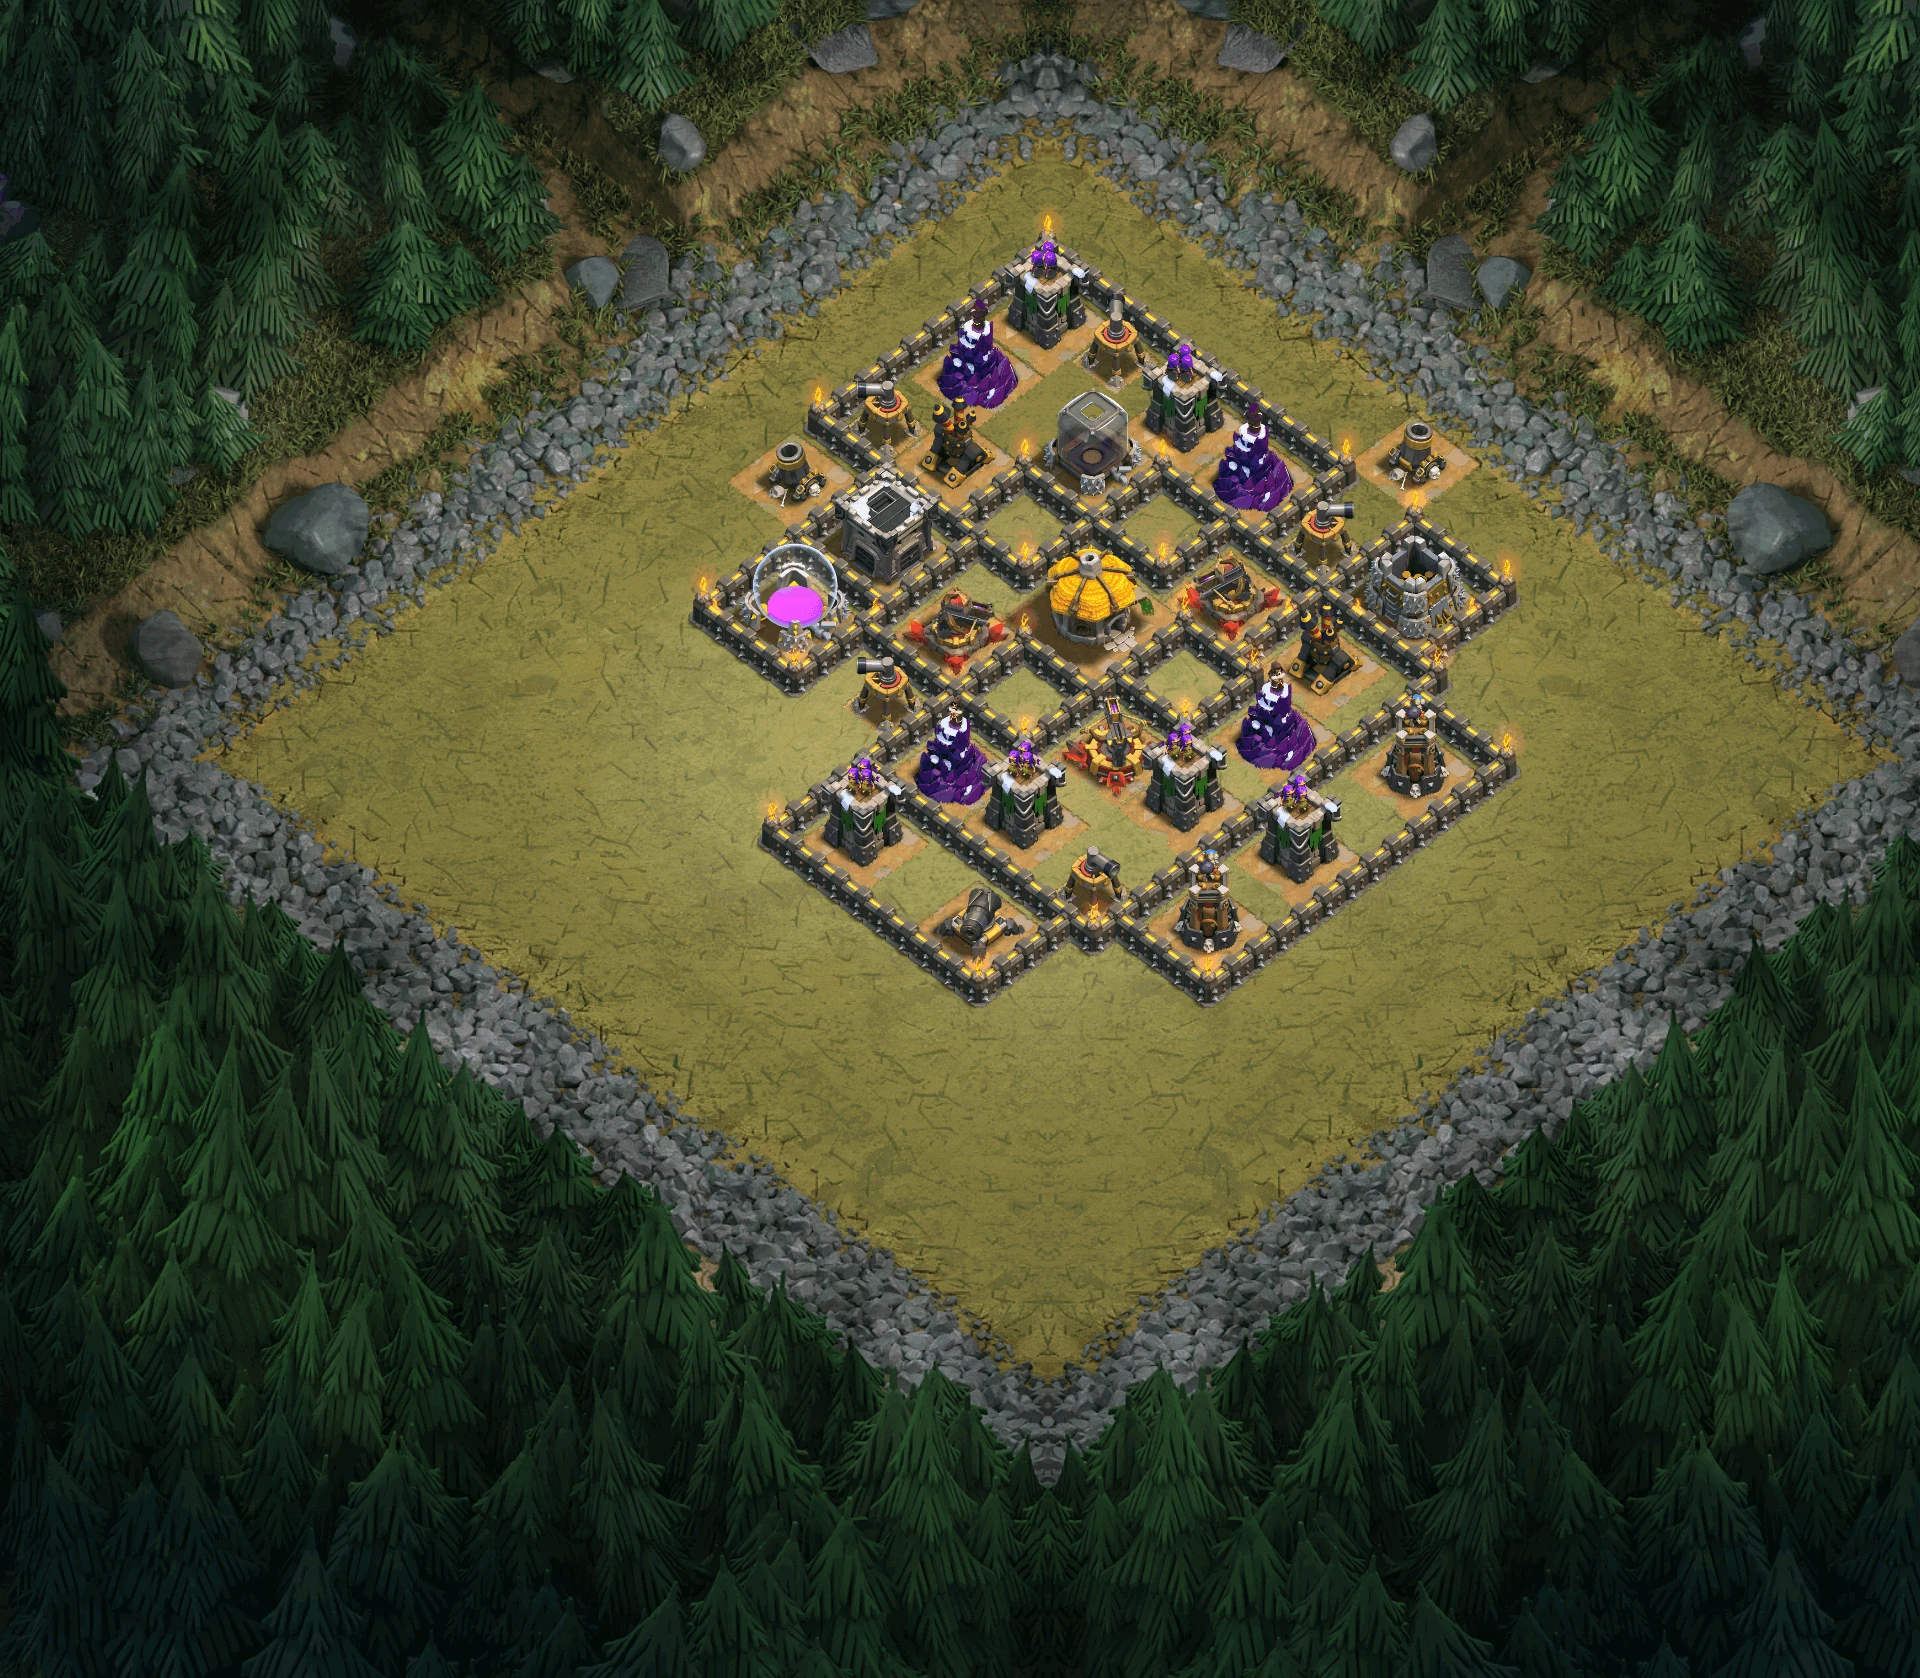
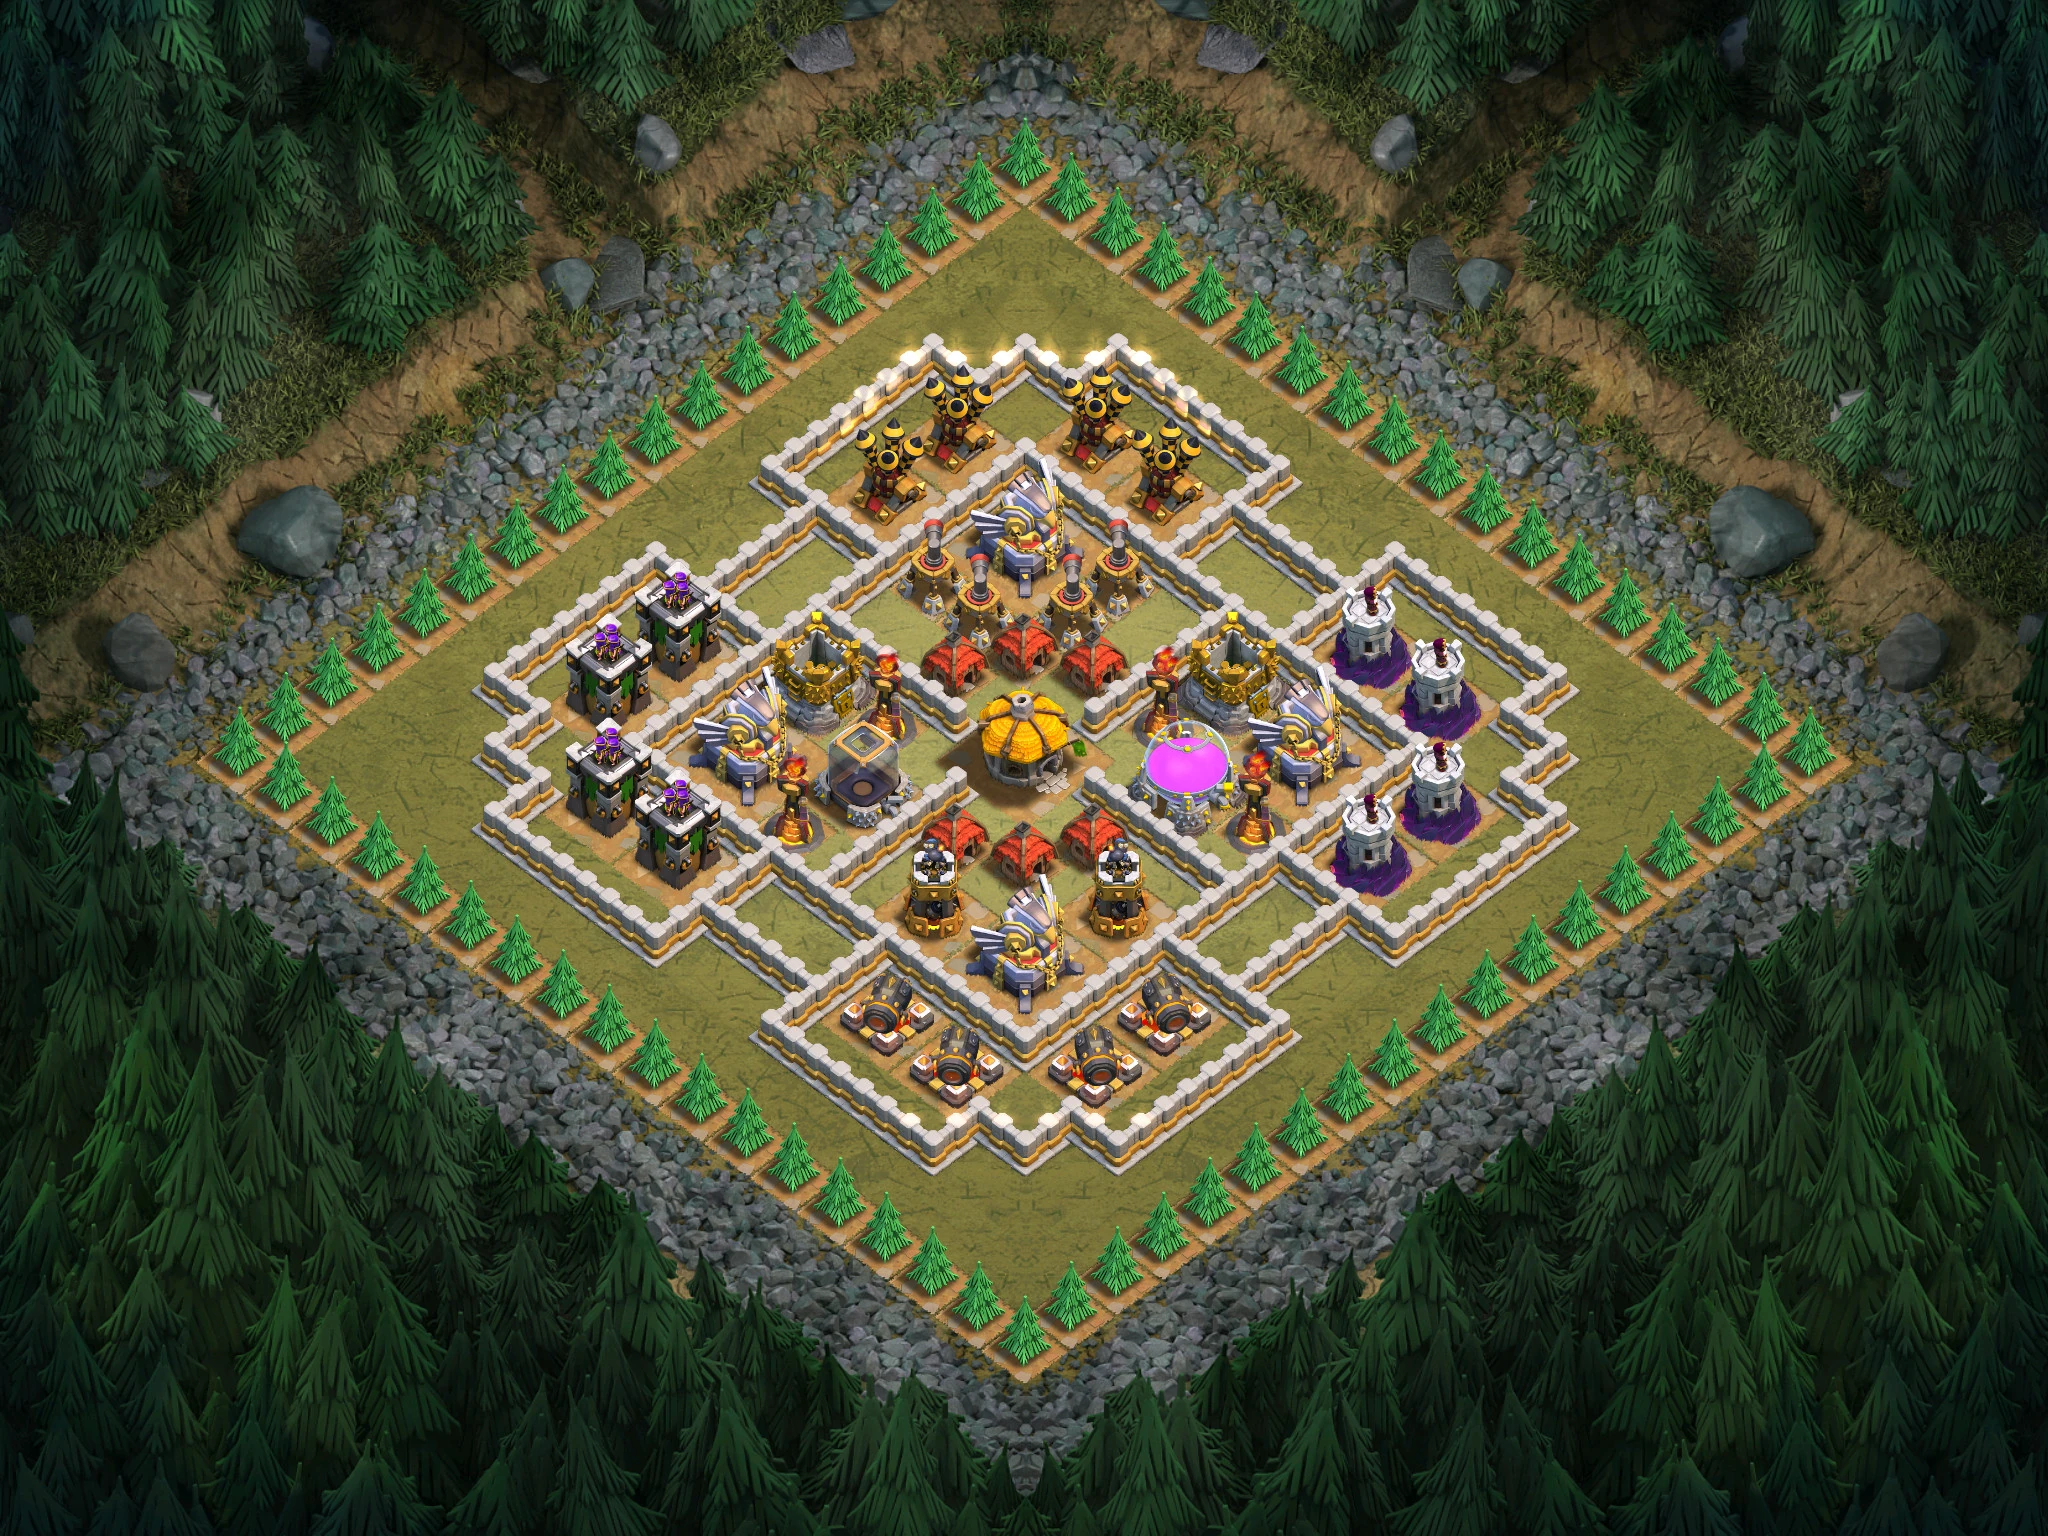
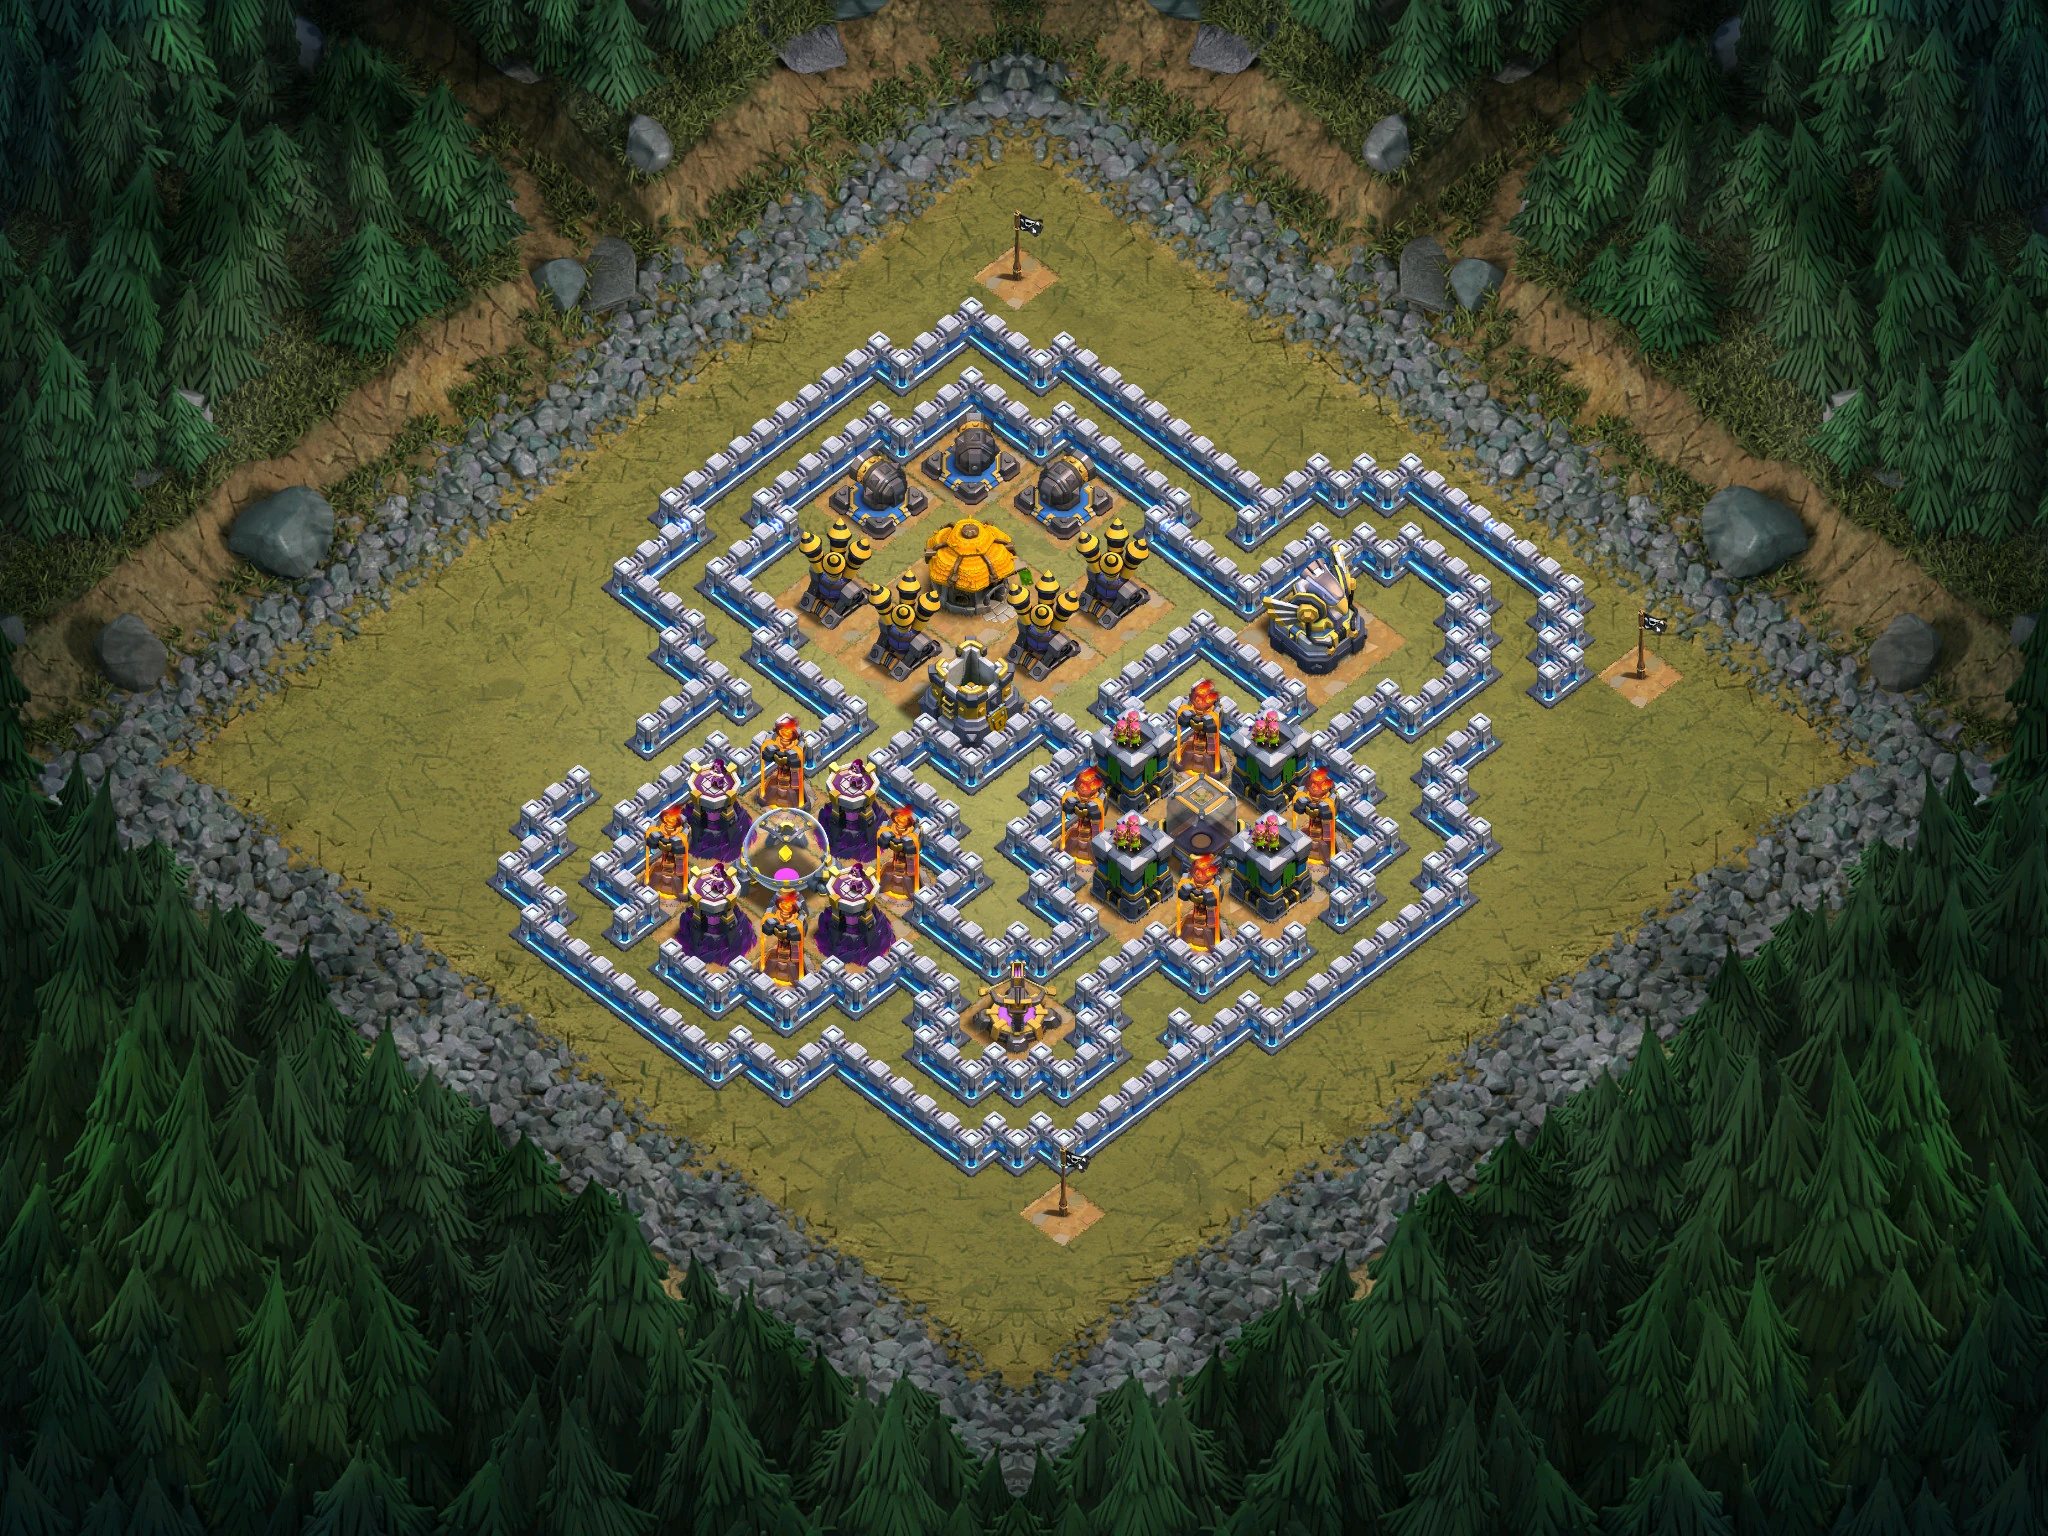
Walls of Steel
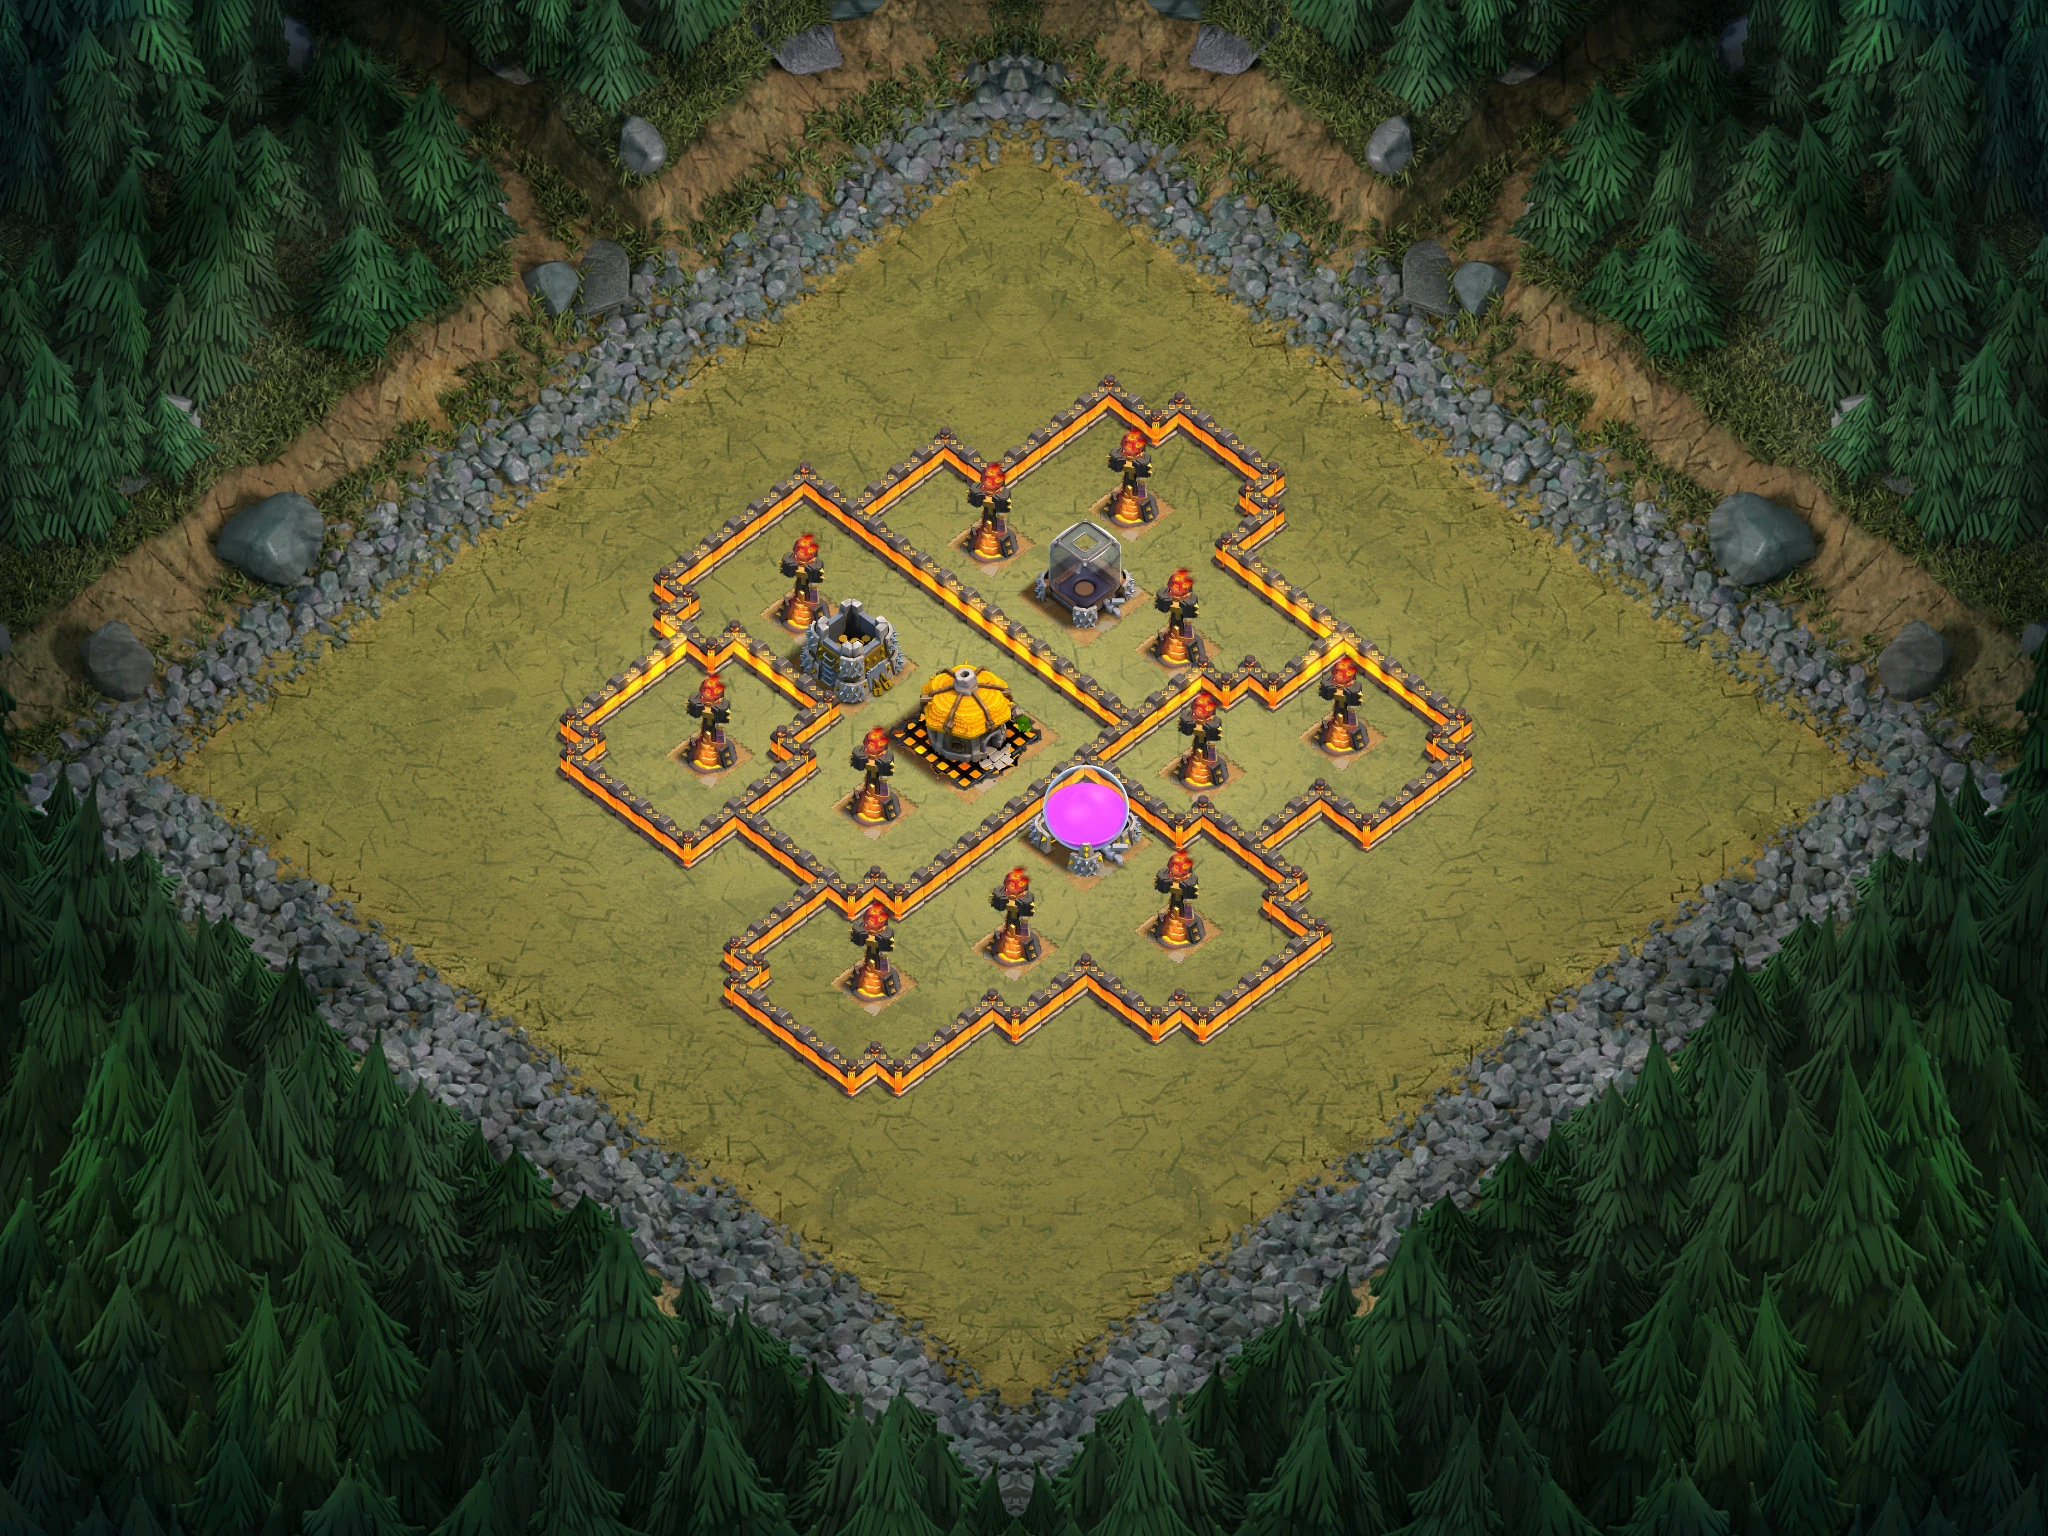
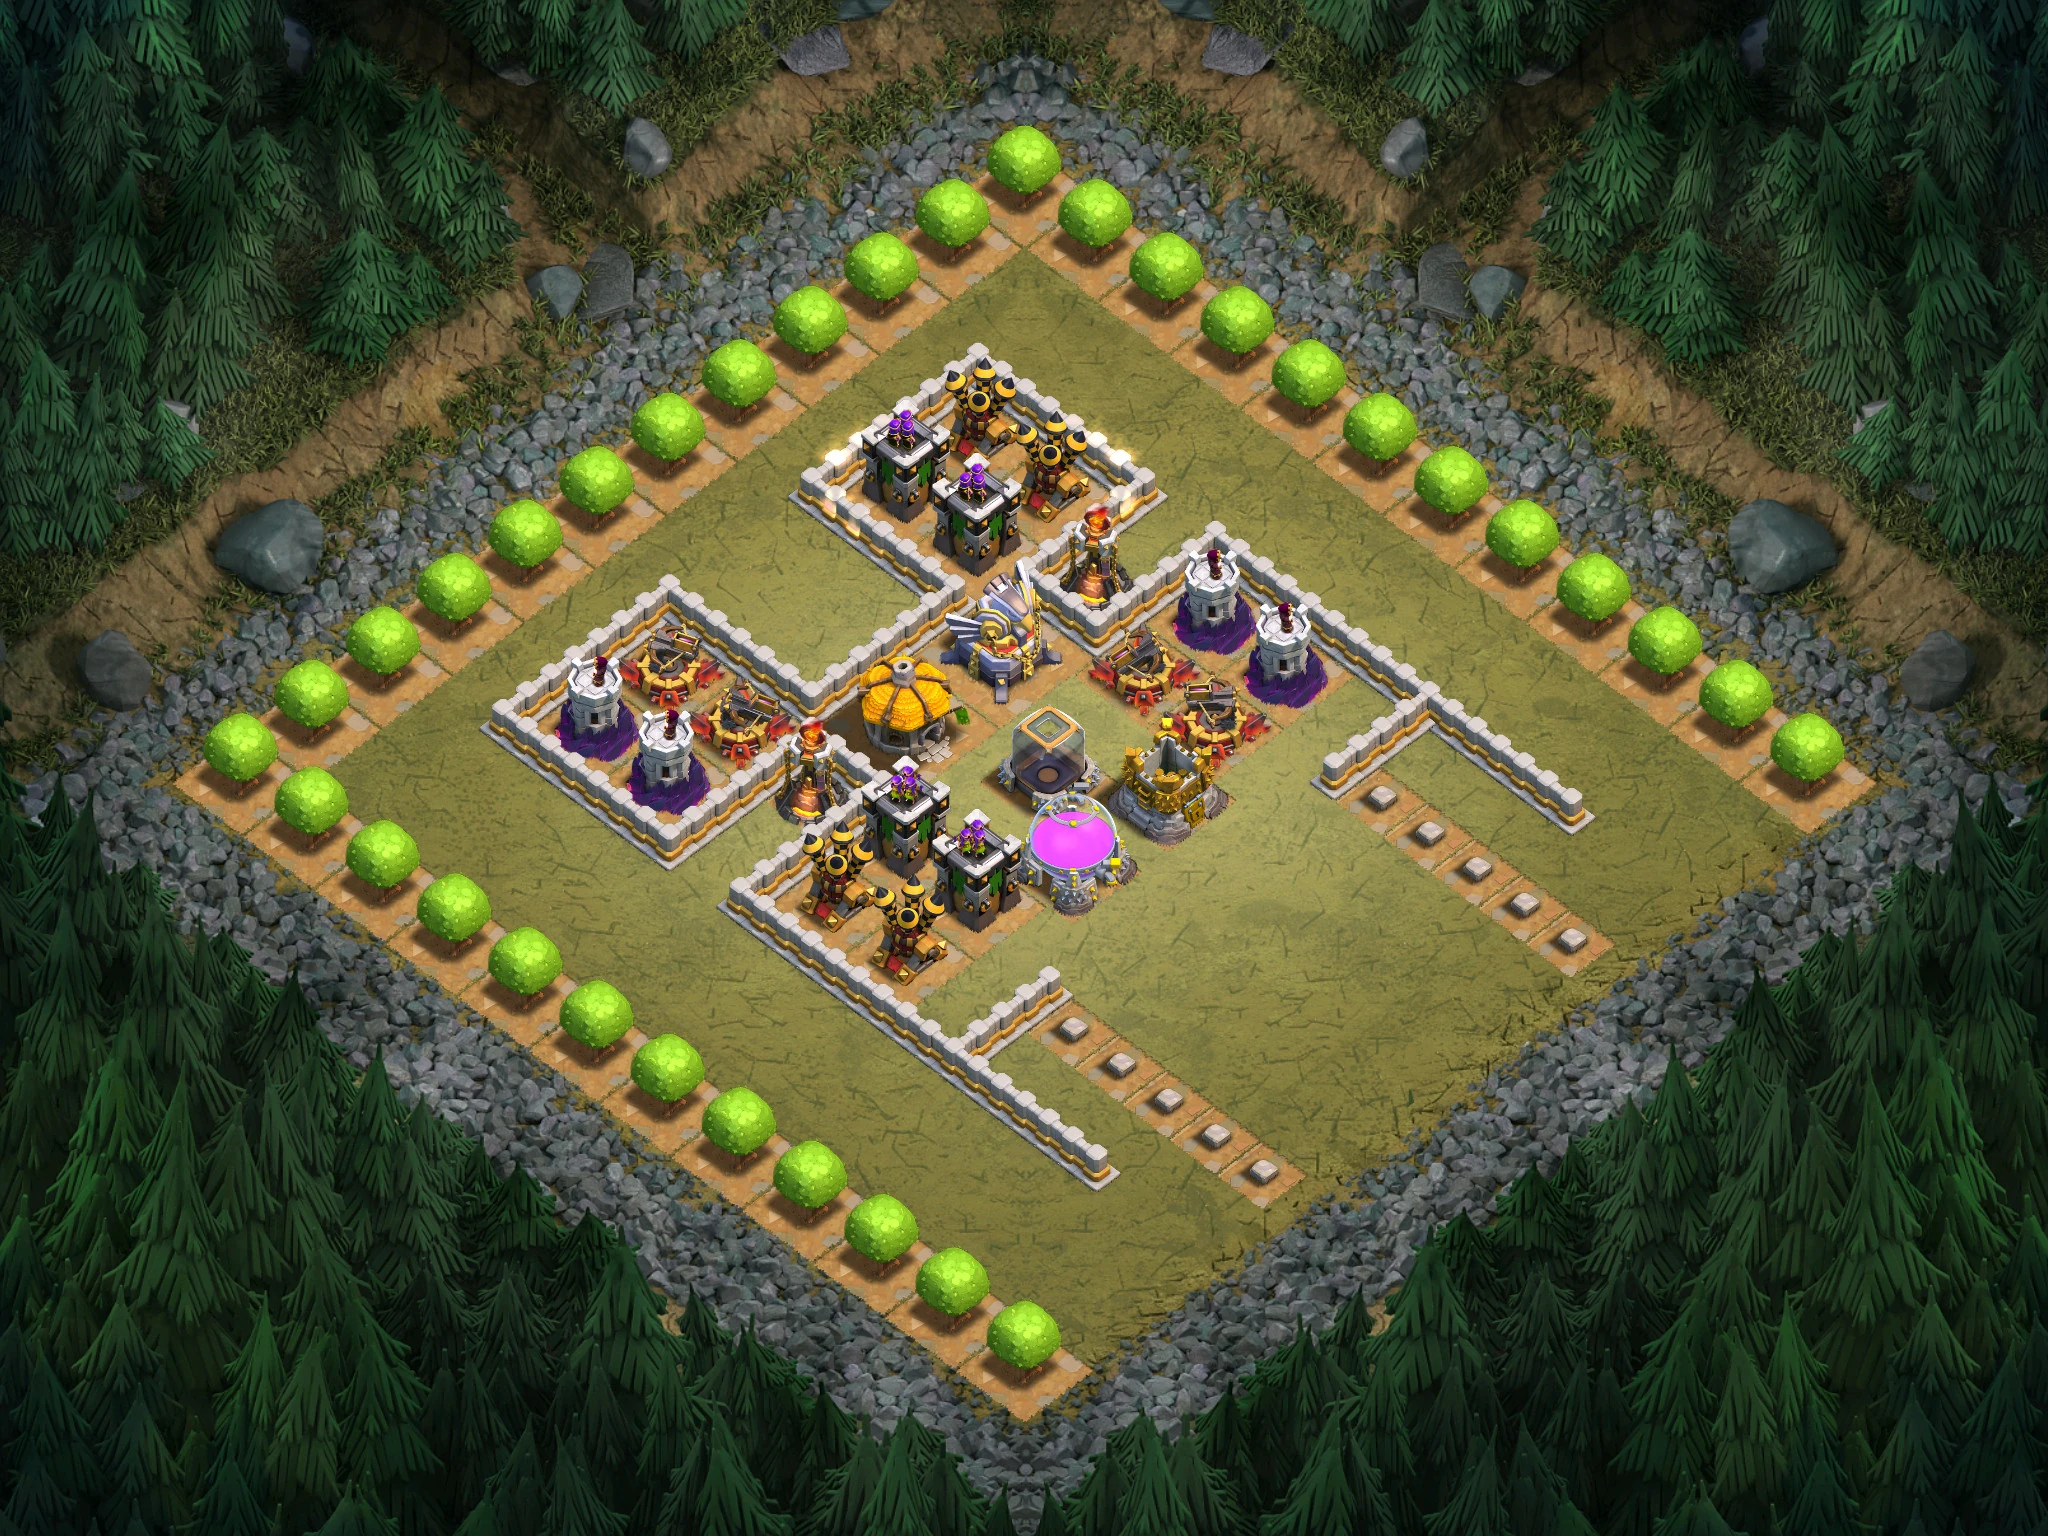
There are many traps at the two side entrances to the fort. Place an Archer or Barbarian to activate these. Next, use Giants to destroy the Archer Towers. Then place 1 or two Balloons since there's nothing that targets them.
Alternative 1: Deploy 4 level 2 Balloons at each Archer Tower. This number reduces to 3 with level 3 Balloons.
Loot: 40,000 Gold and 40,000 Elixir.
This level may be a reference to the internet meme of Duke Nukem saying he’s got Balls of Steel.

Sicilian Defence
Loot: 45,000 Gold and 45,000 Elixir.

Drop Barbarians at the Archer Towers up top, then drop a few at the bottom to storm the Archer Tower at the bottom, then one Balloon will take care of the rest.
Alternative 1: Make 26 Giants. Drop about 14 at the bottom Archer Tower and the rest at the top Archer Towers, finishing with 1 Balloon.
Alternative 2: Strafe the top Archer Towers with Archers, then deploy 3~4 Balloons (same as above) at the tower on the bottom. NEVER use ground troops to destroy the Town Hall.
Alternative 3: You can overwhelm the Archer Towers with Balloons; drop several Balloons for each Archer Tower.

The Sicilian Defense is a chess move that is typically used in the beginning of the game.
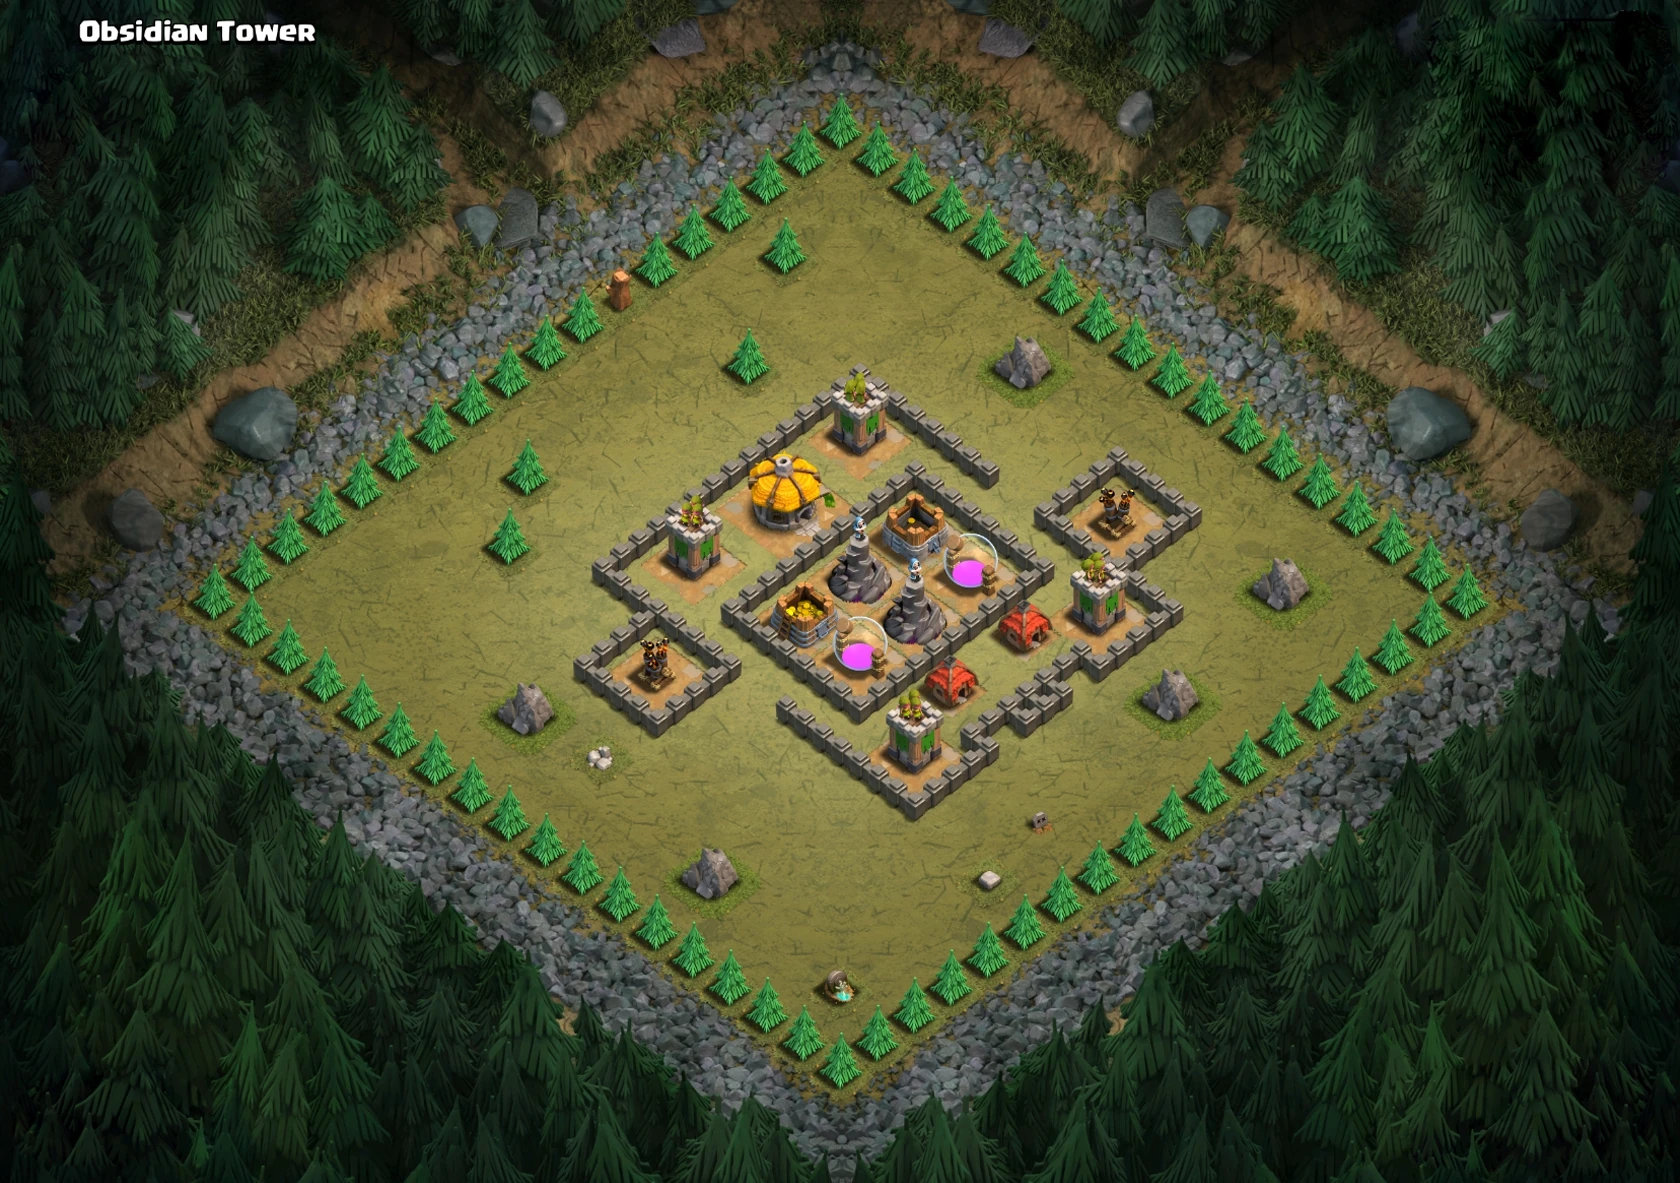
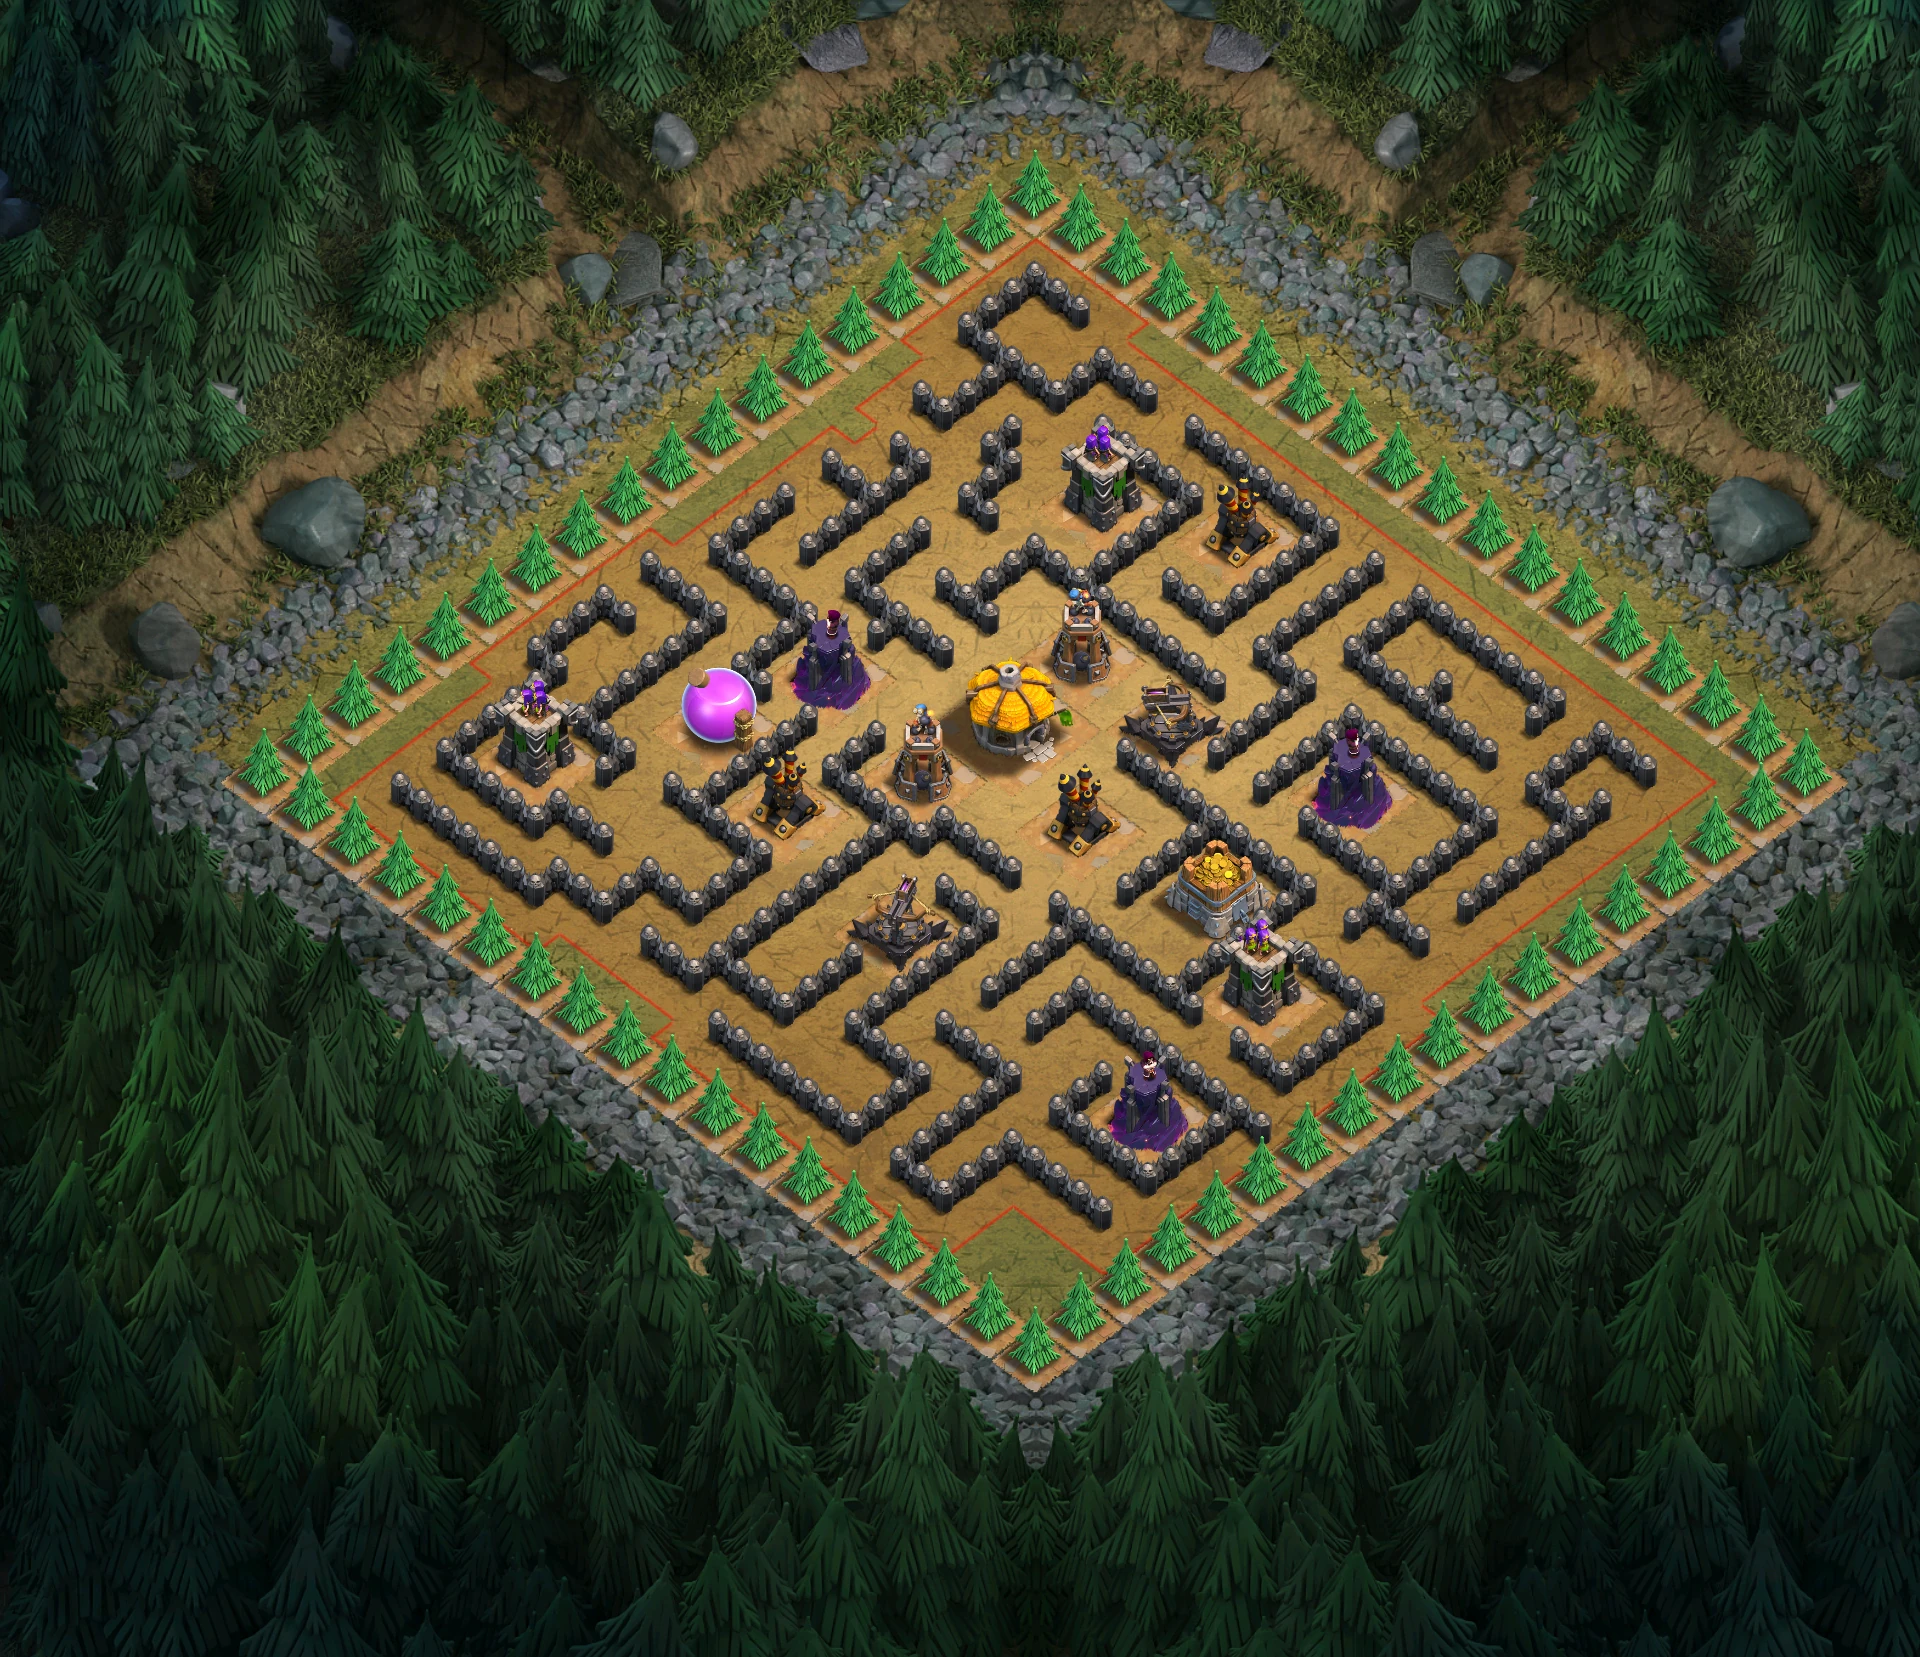
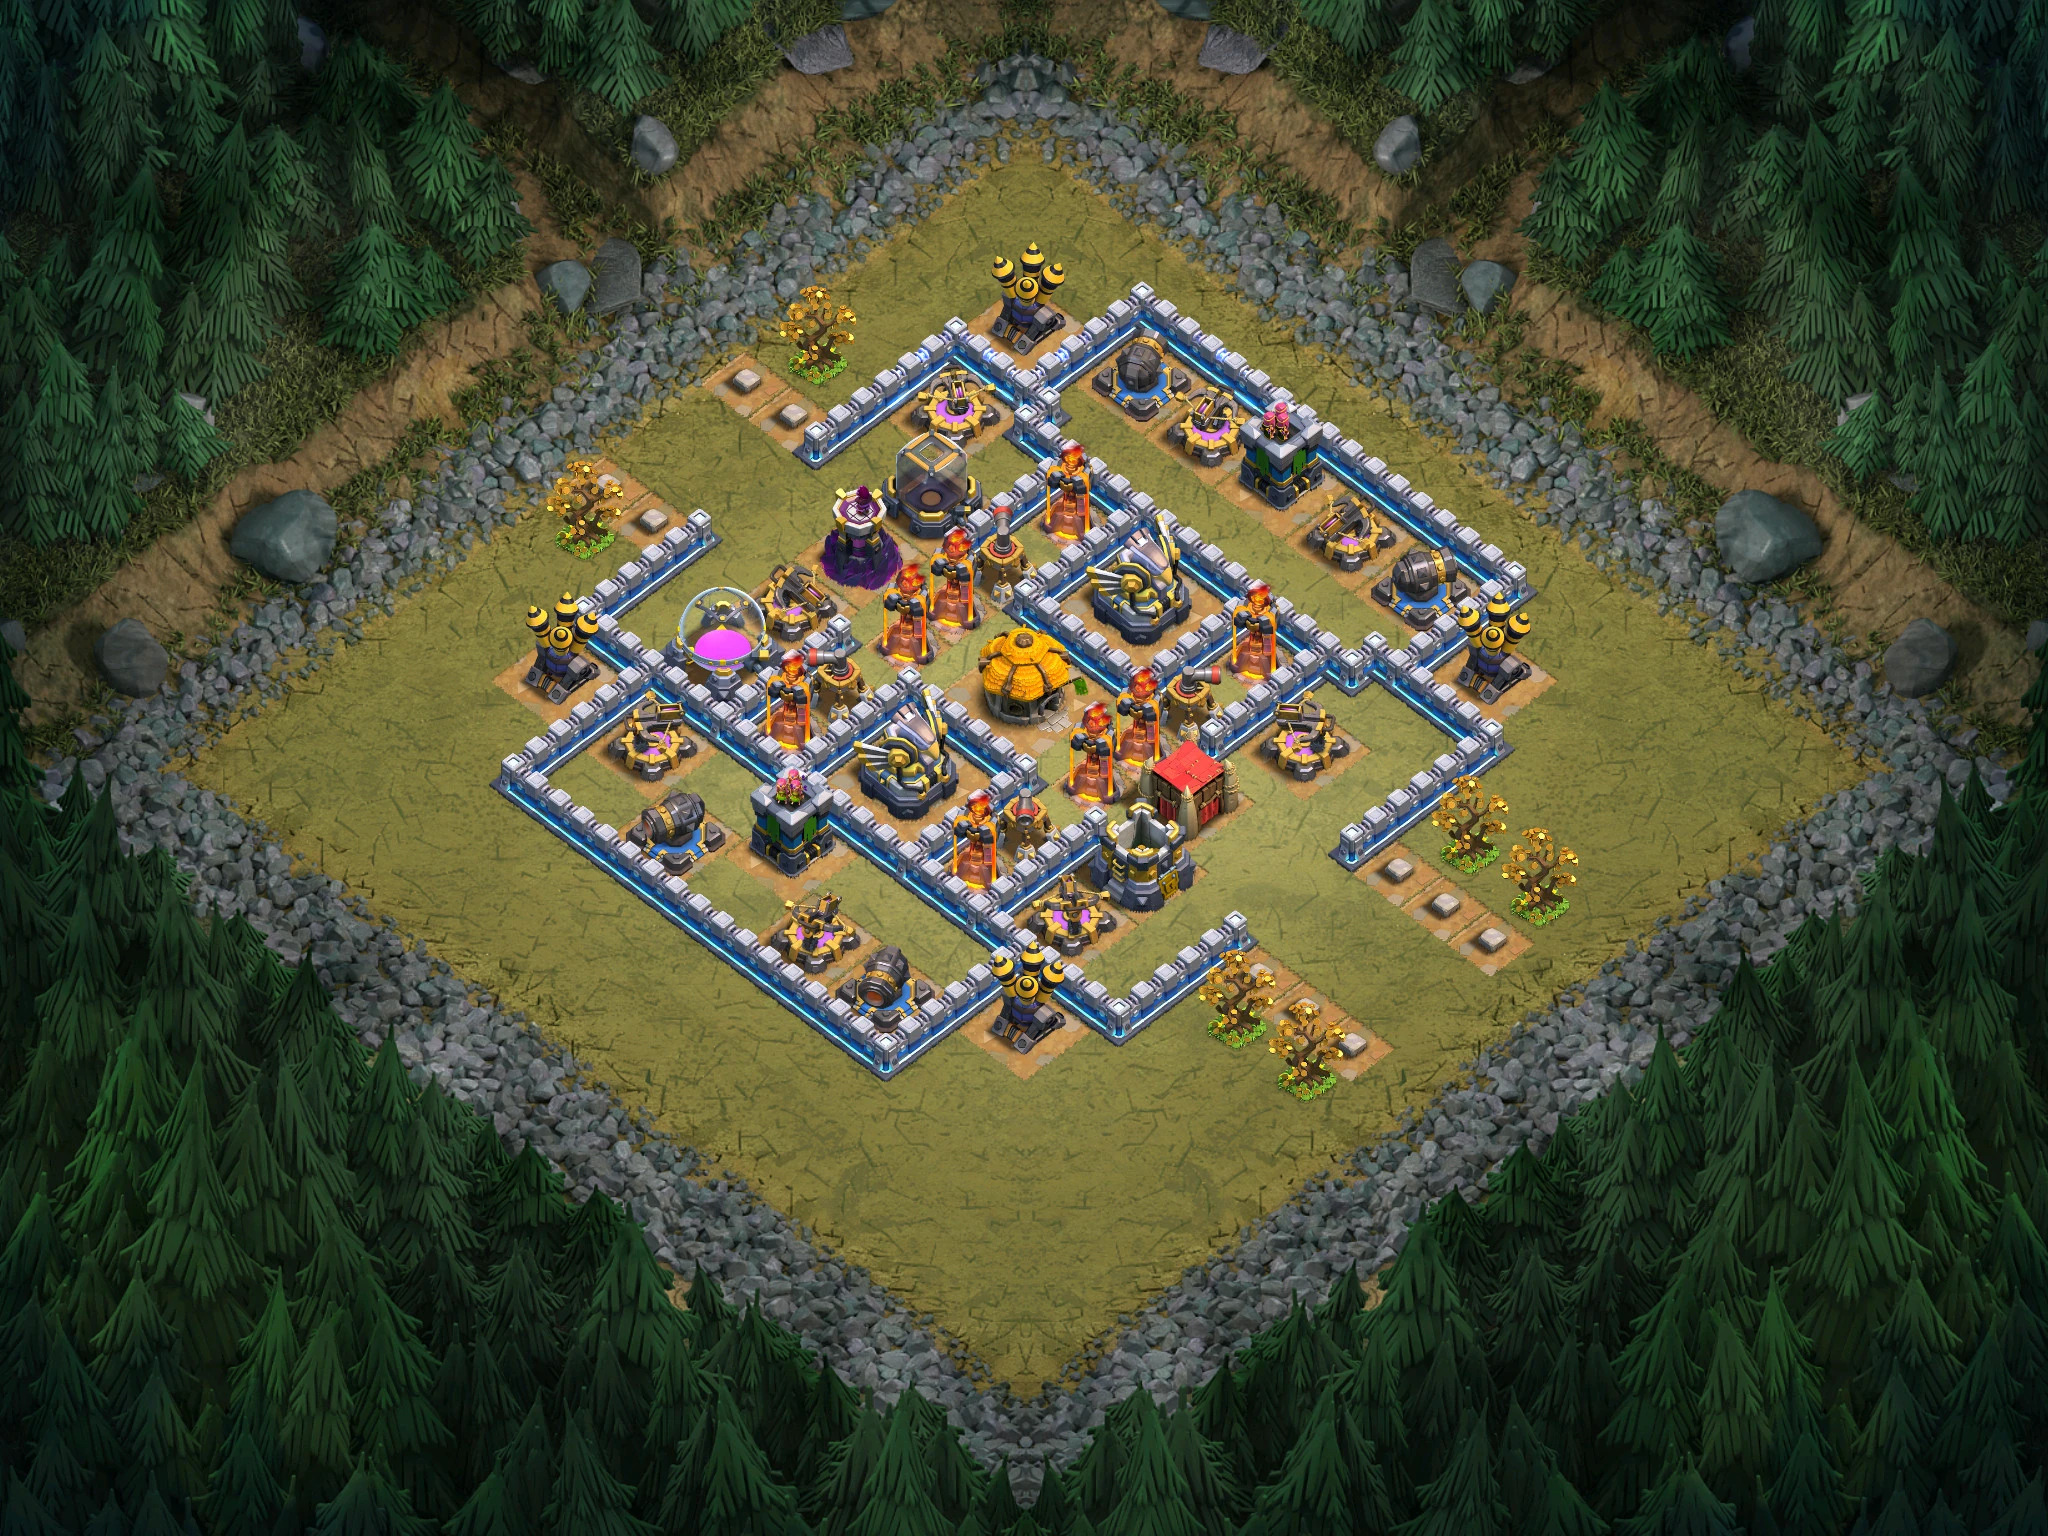
Obsidian Tower
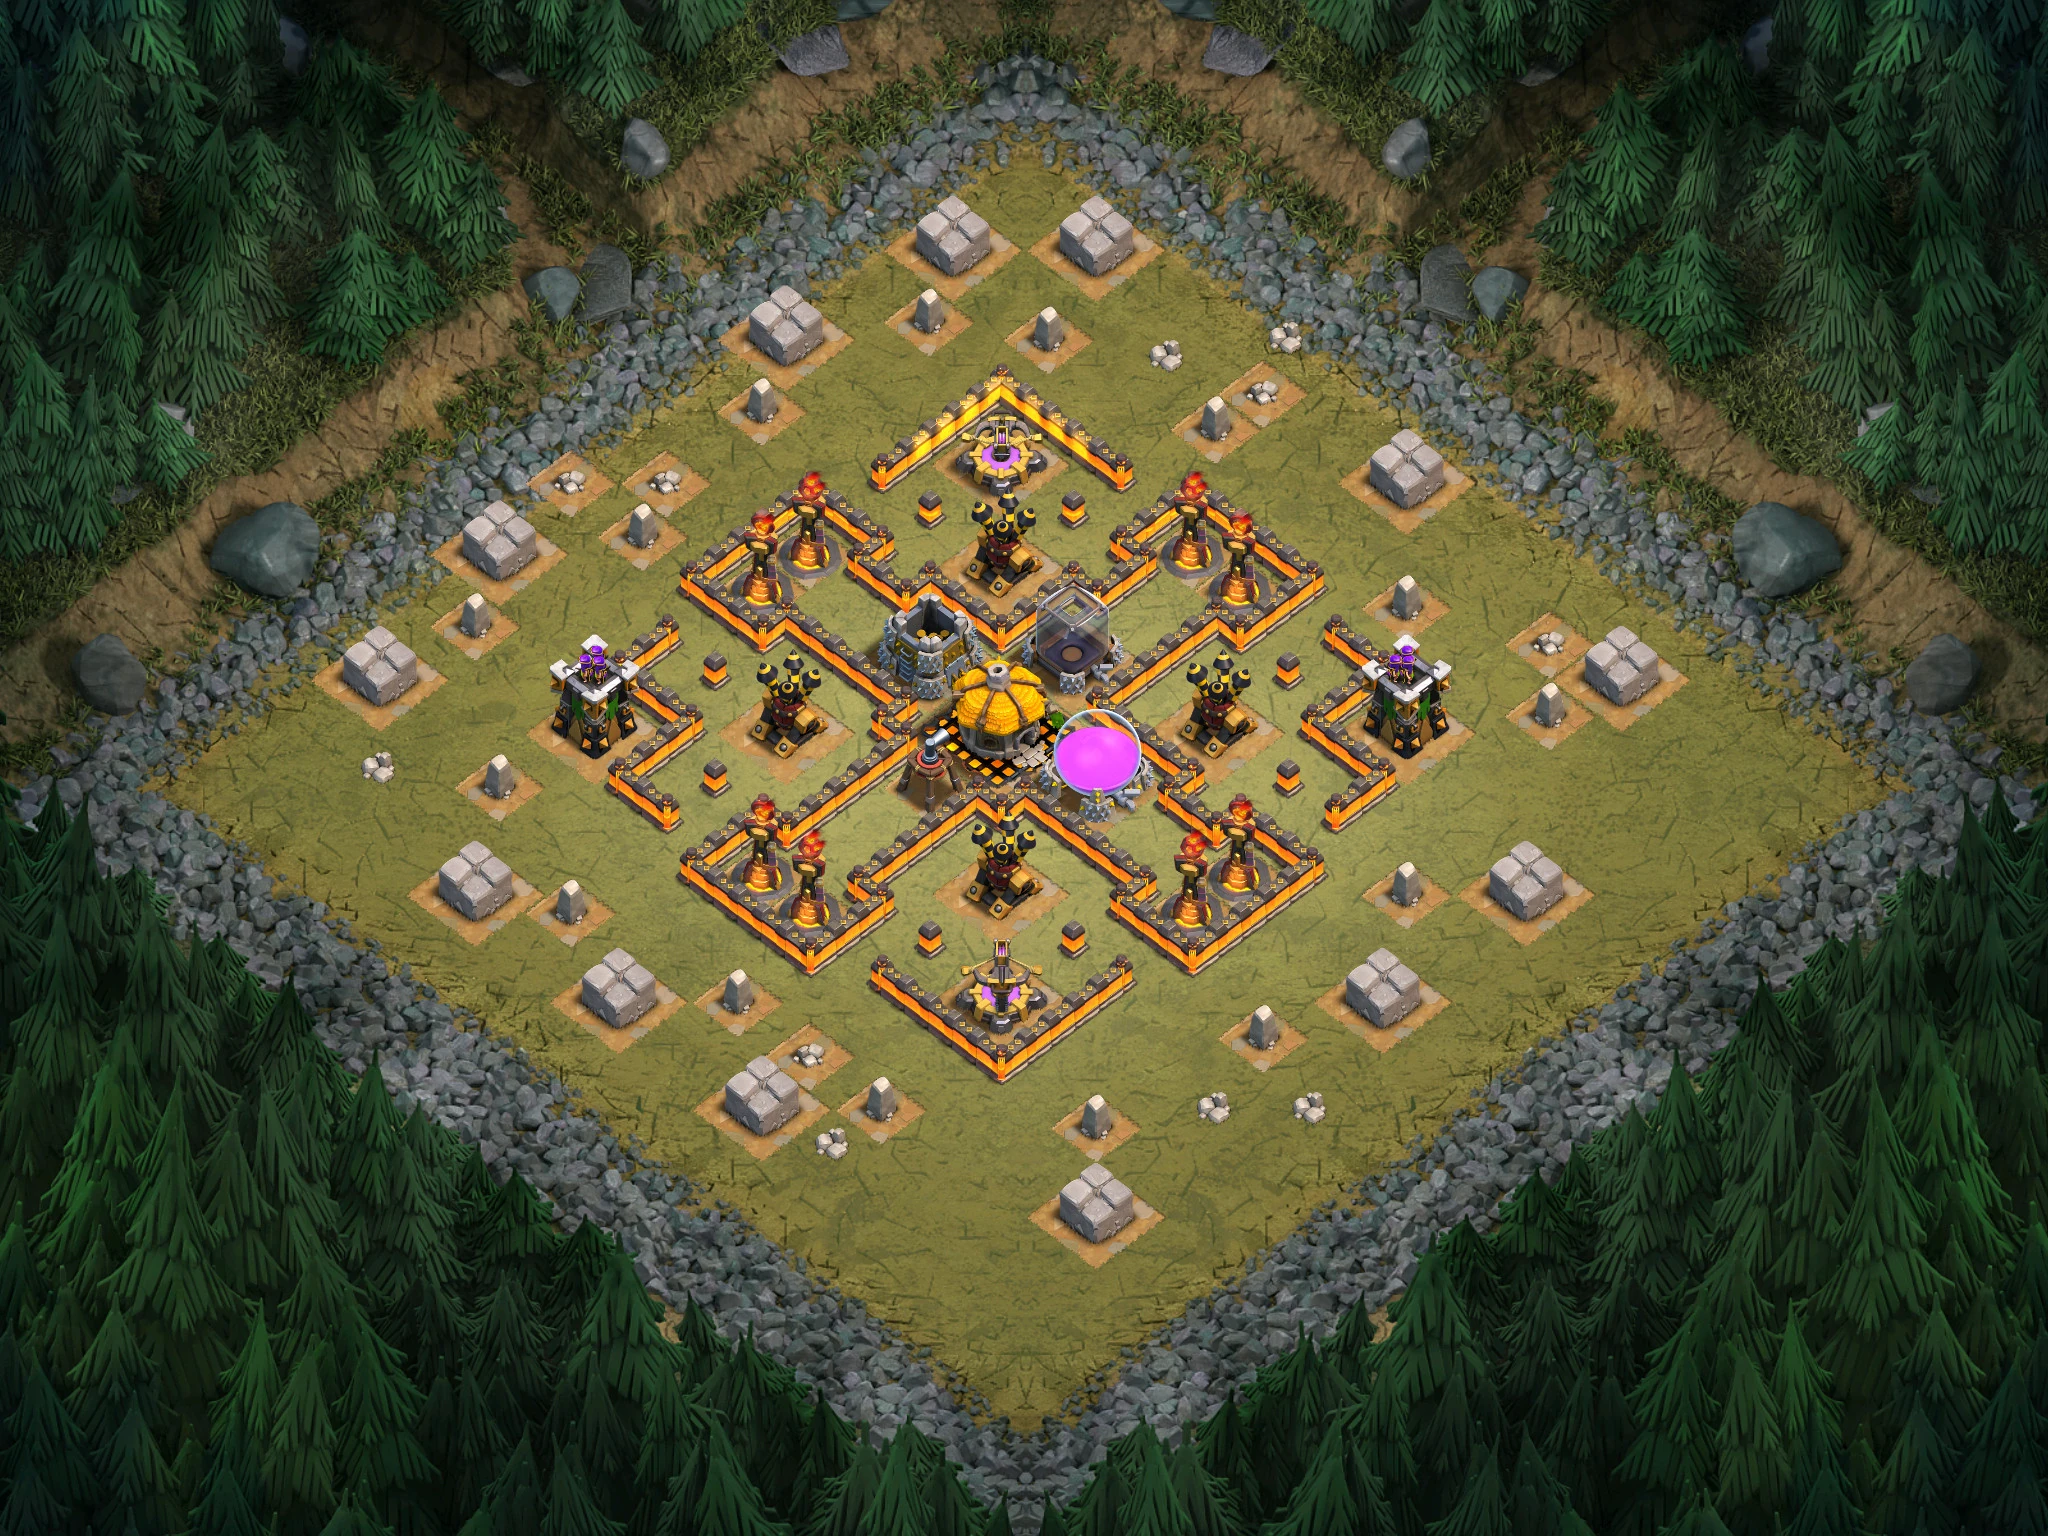
Loot: 20,000 Gold and 80,000 Elixir.
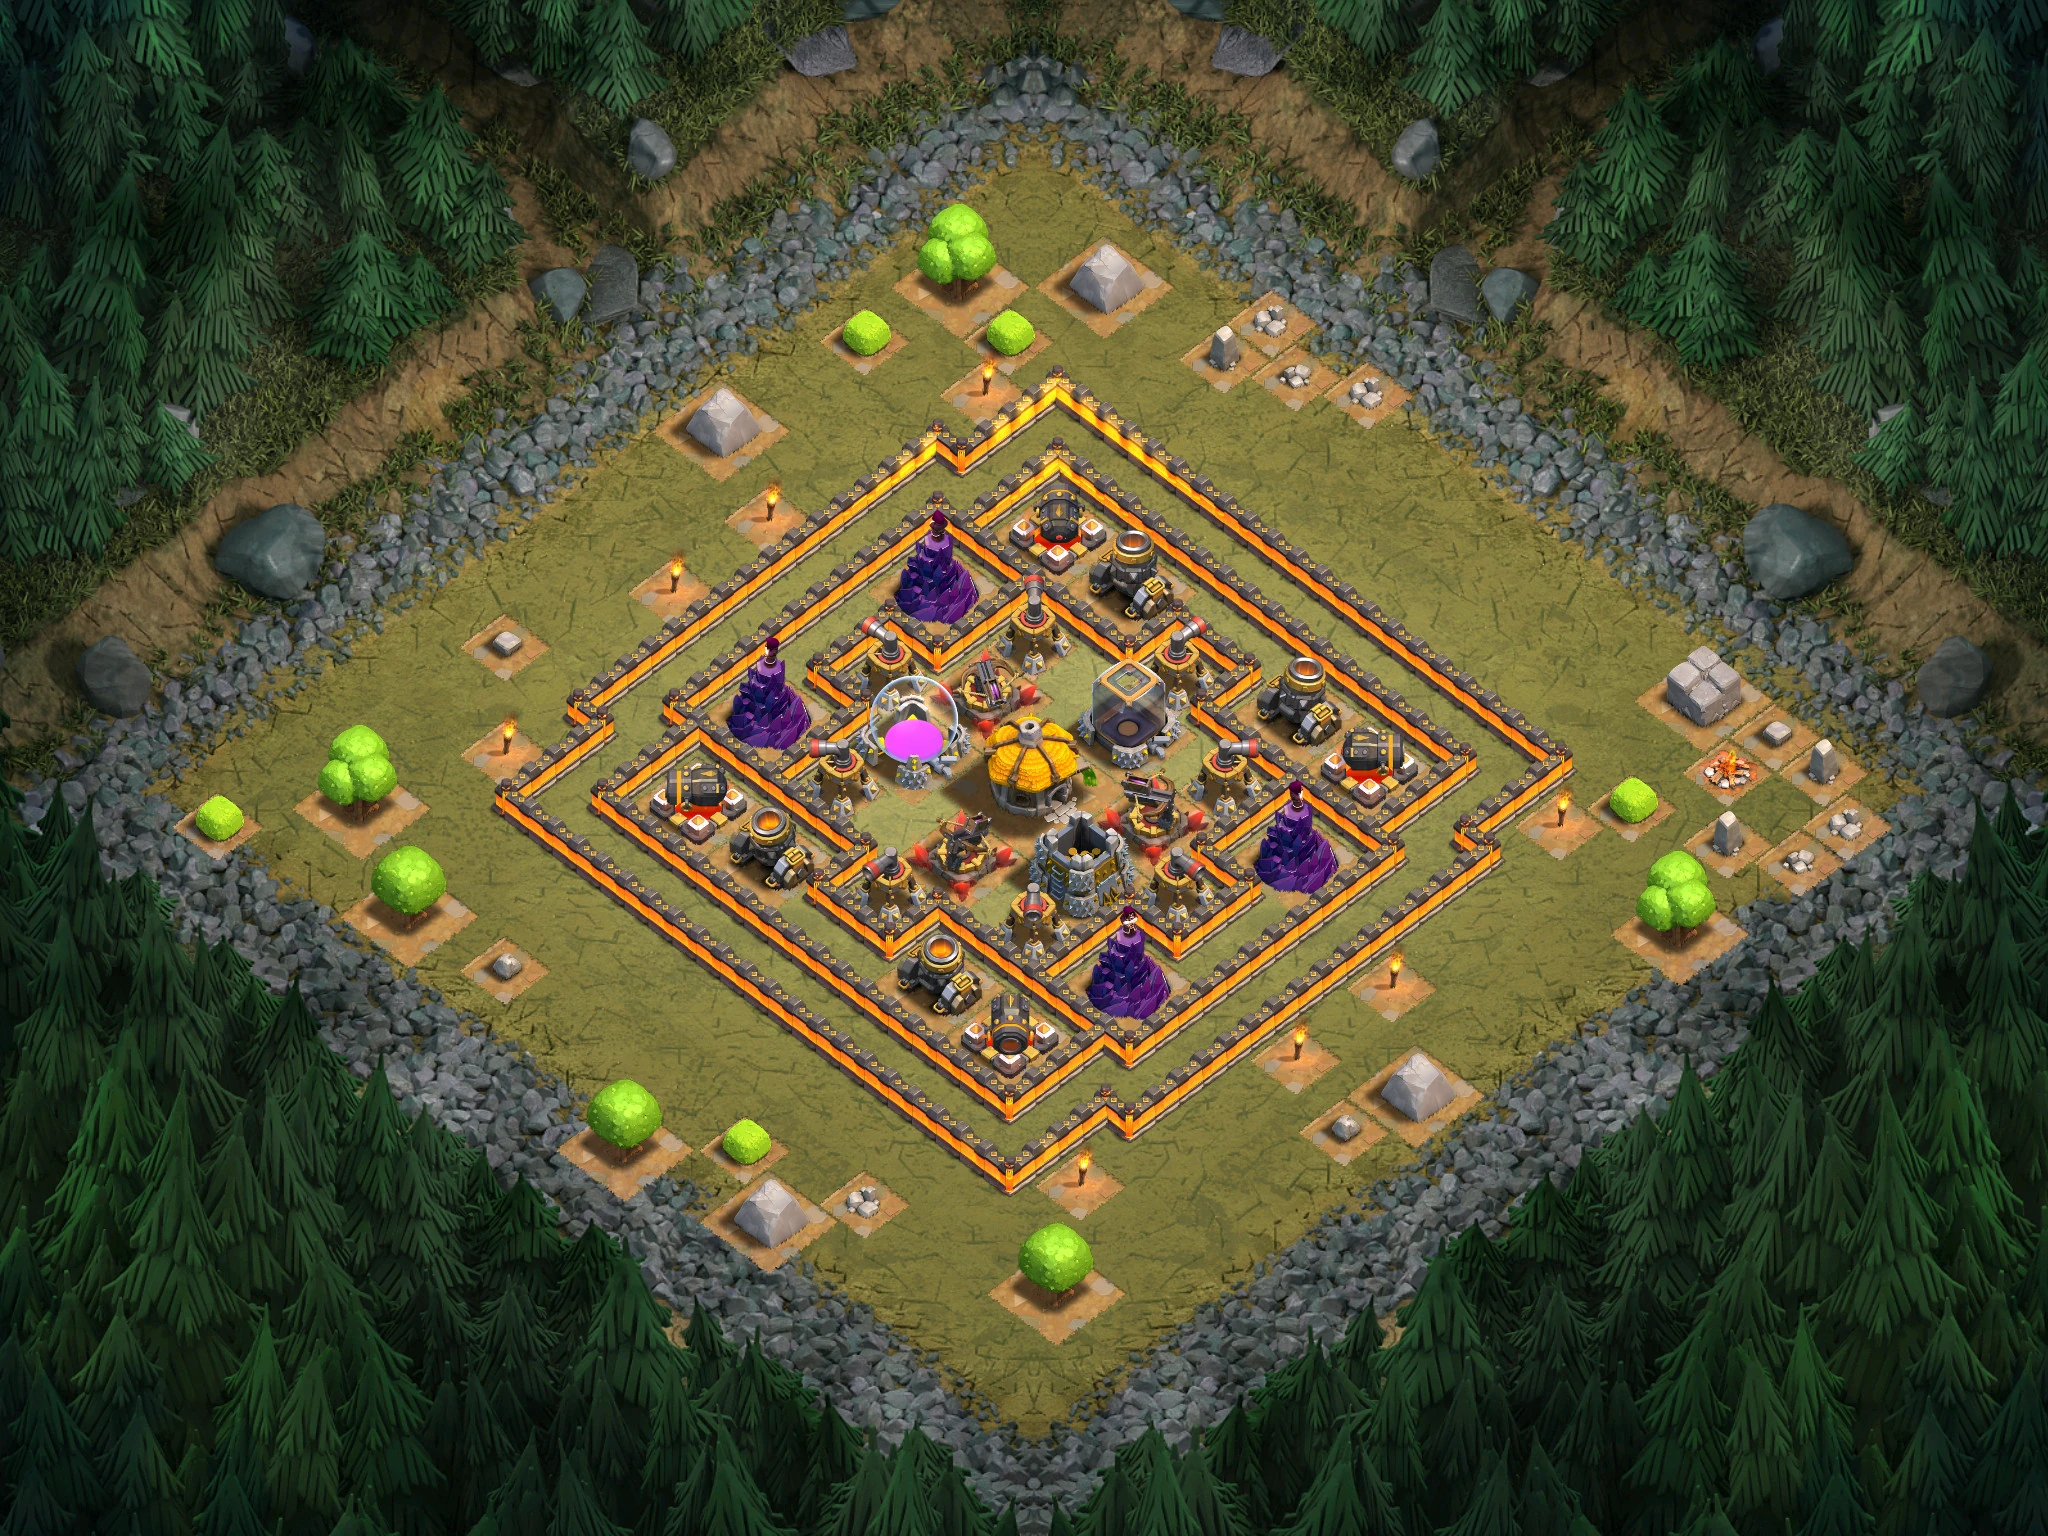
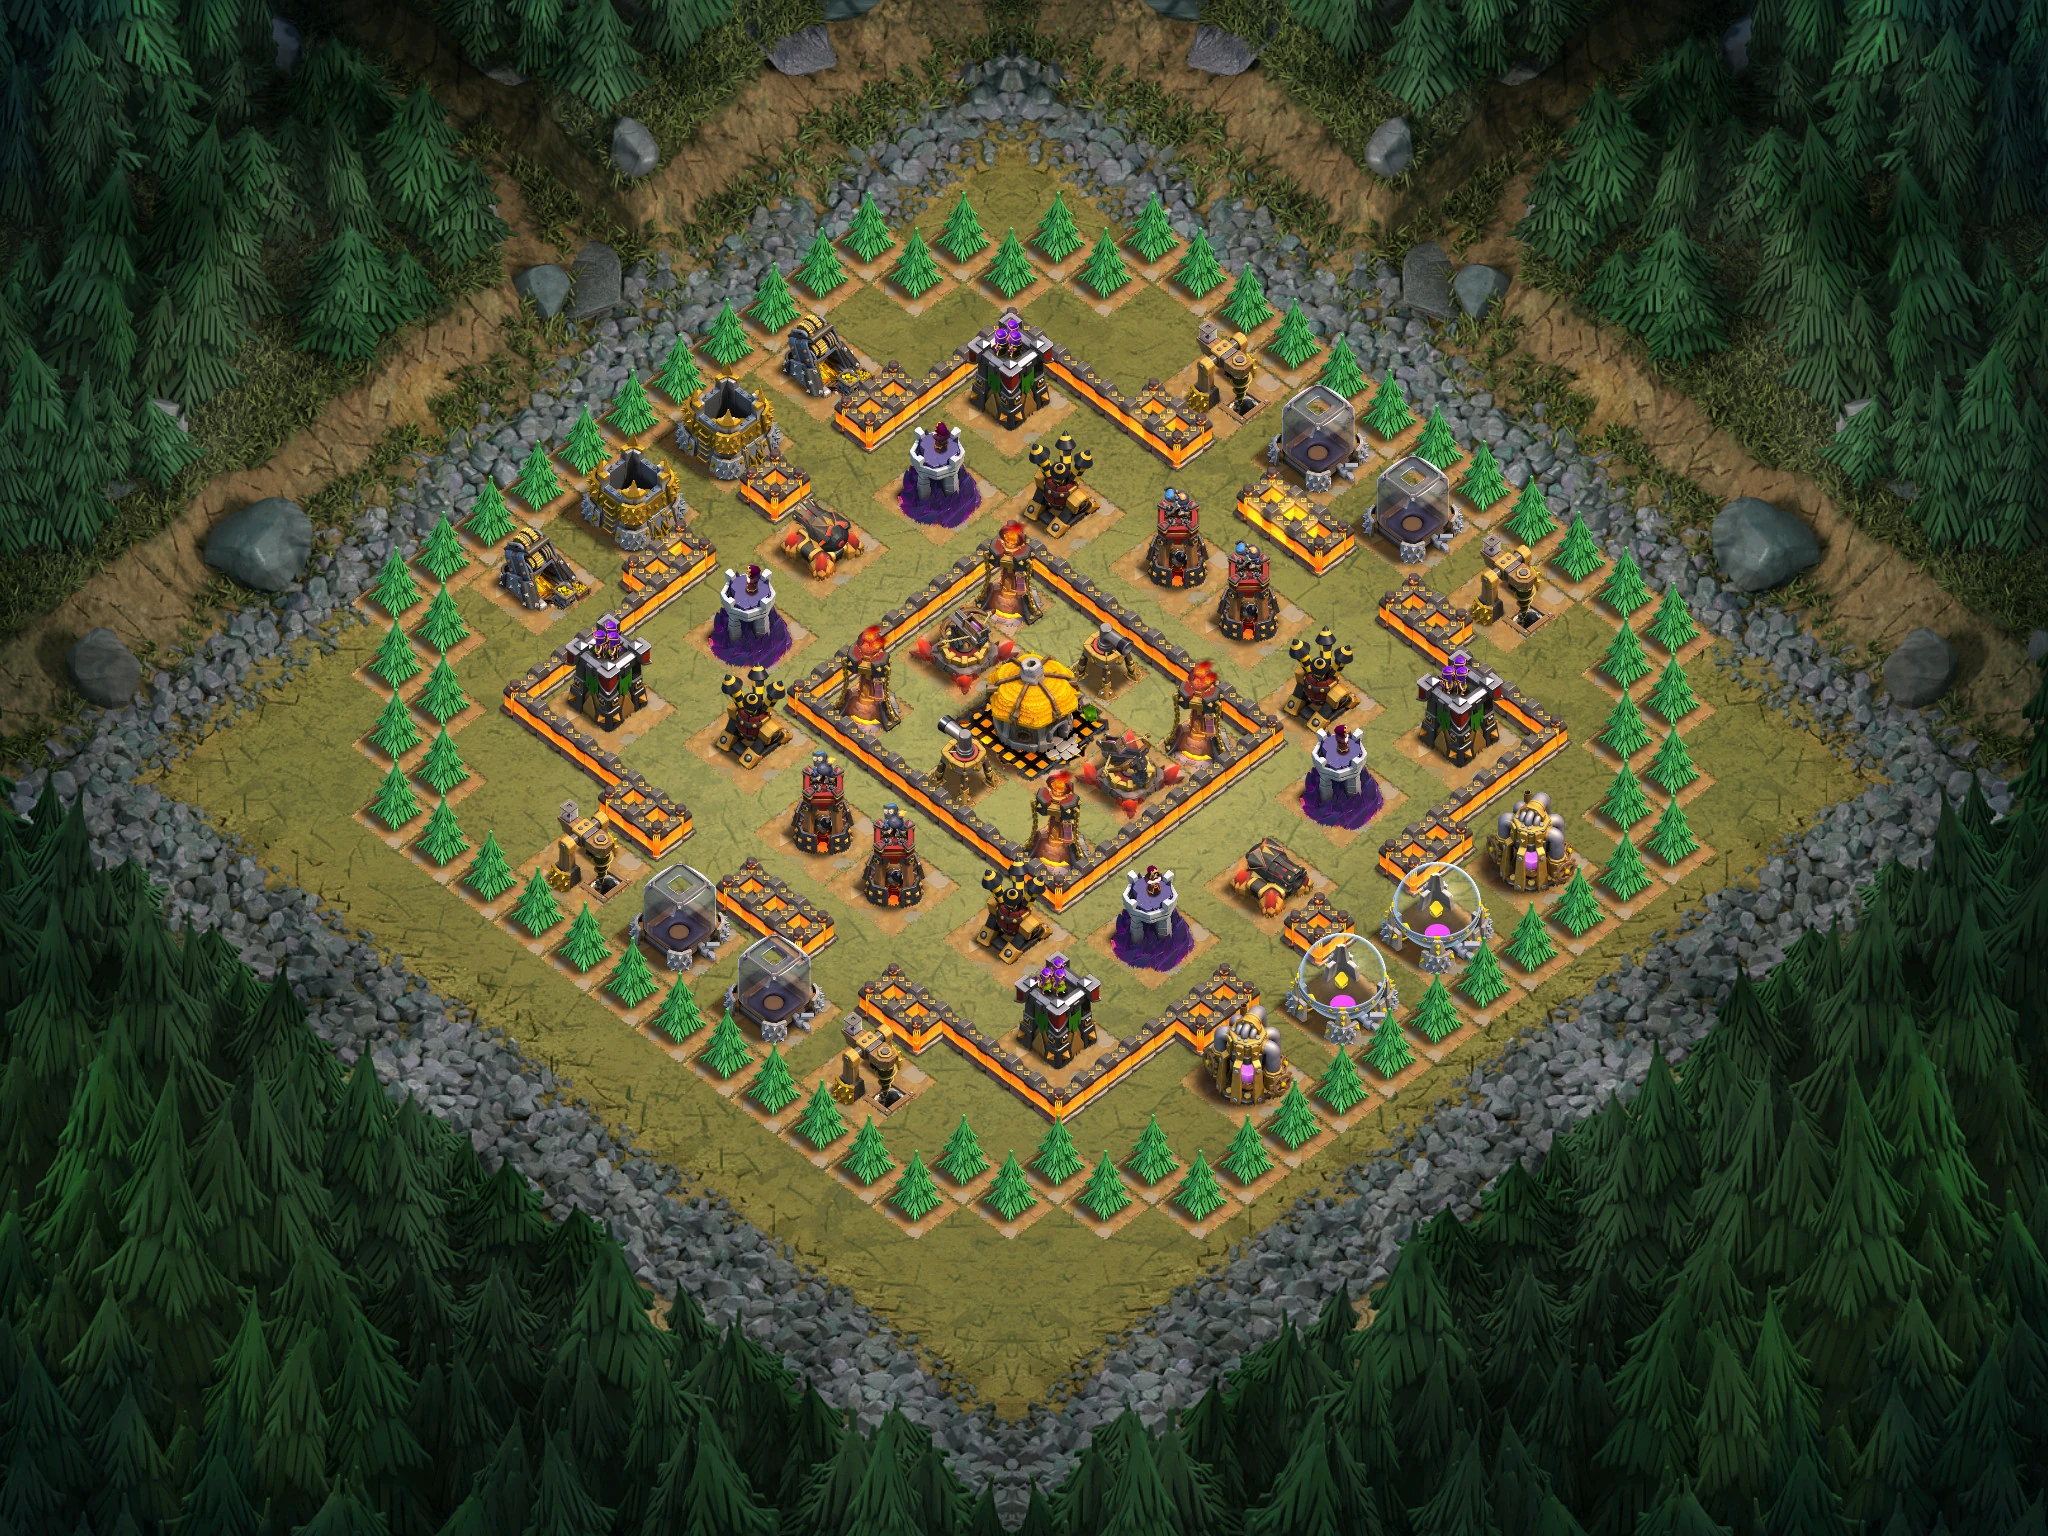
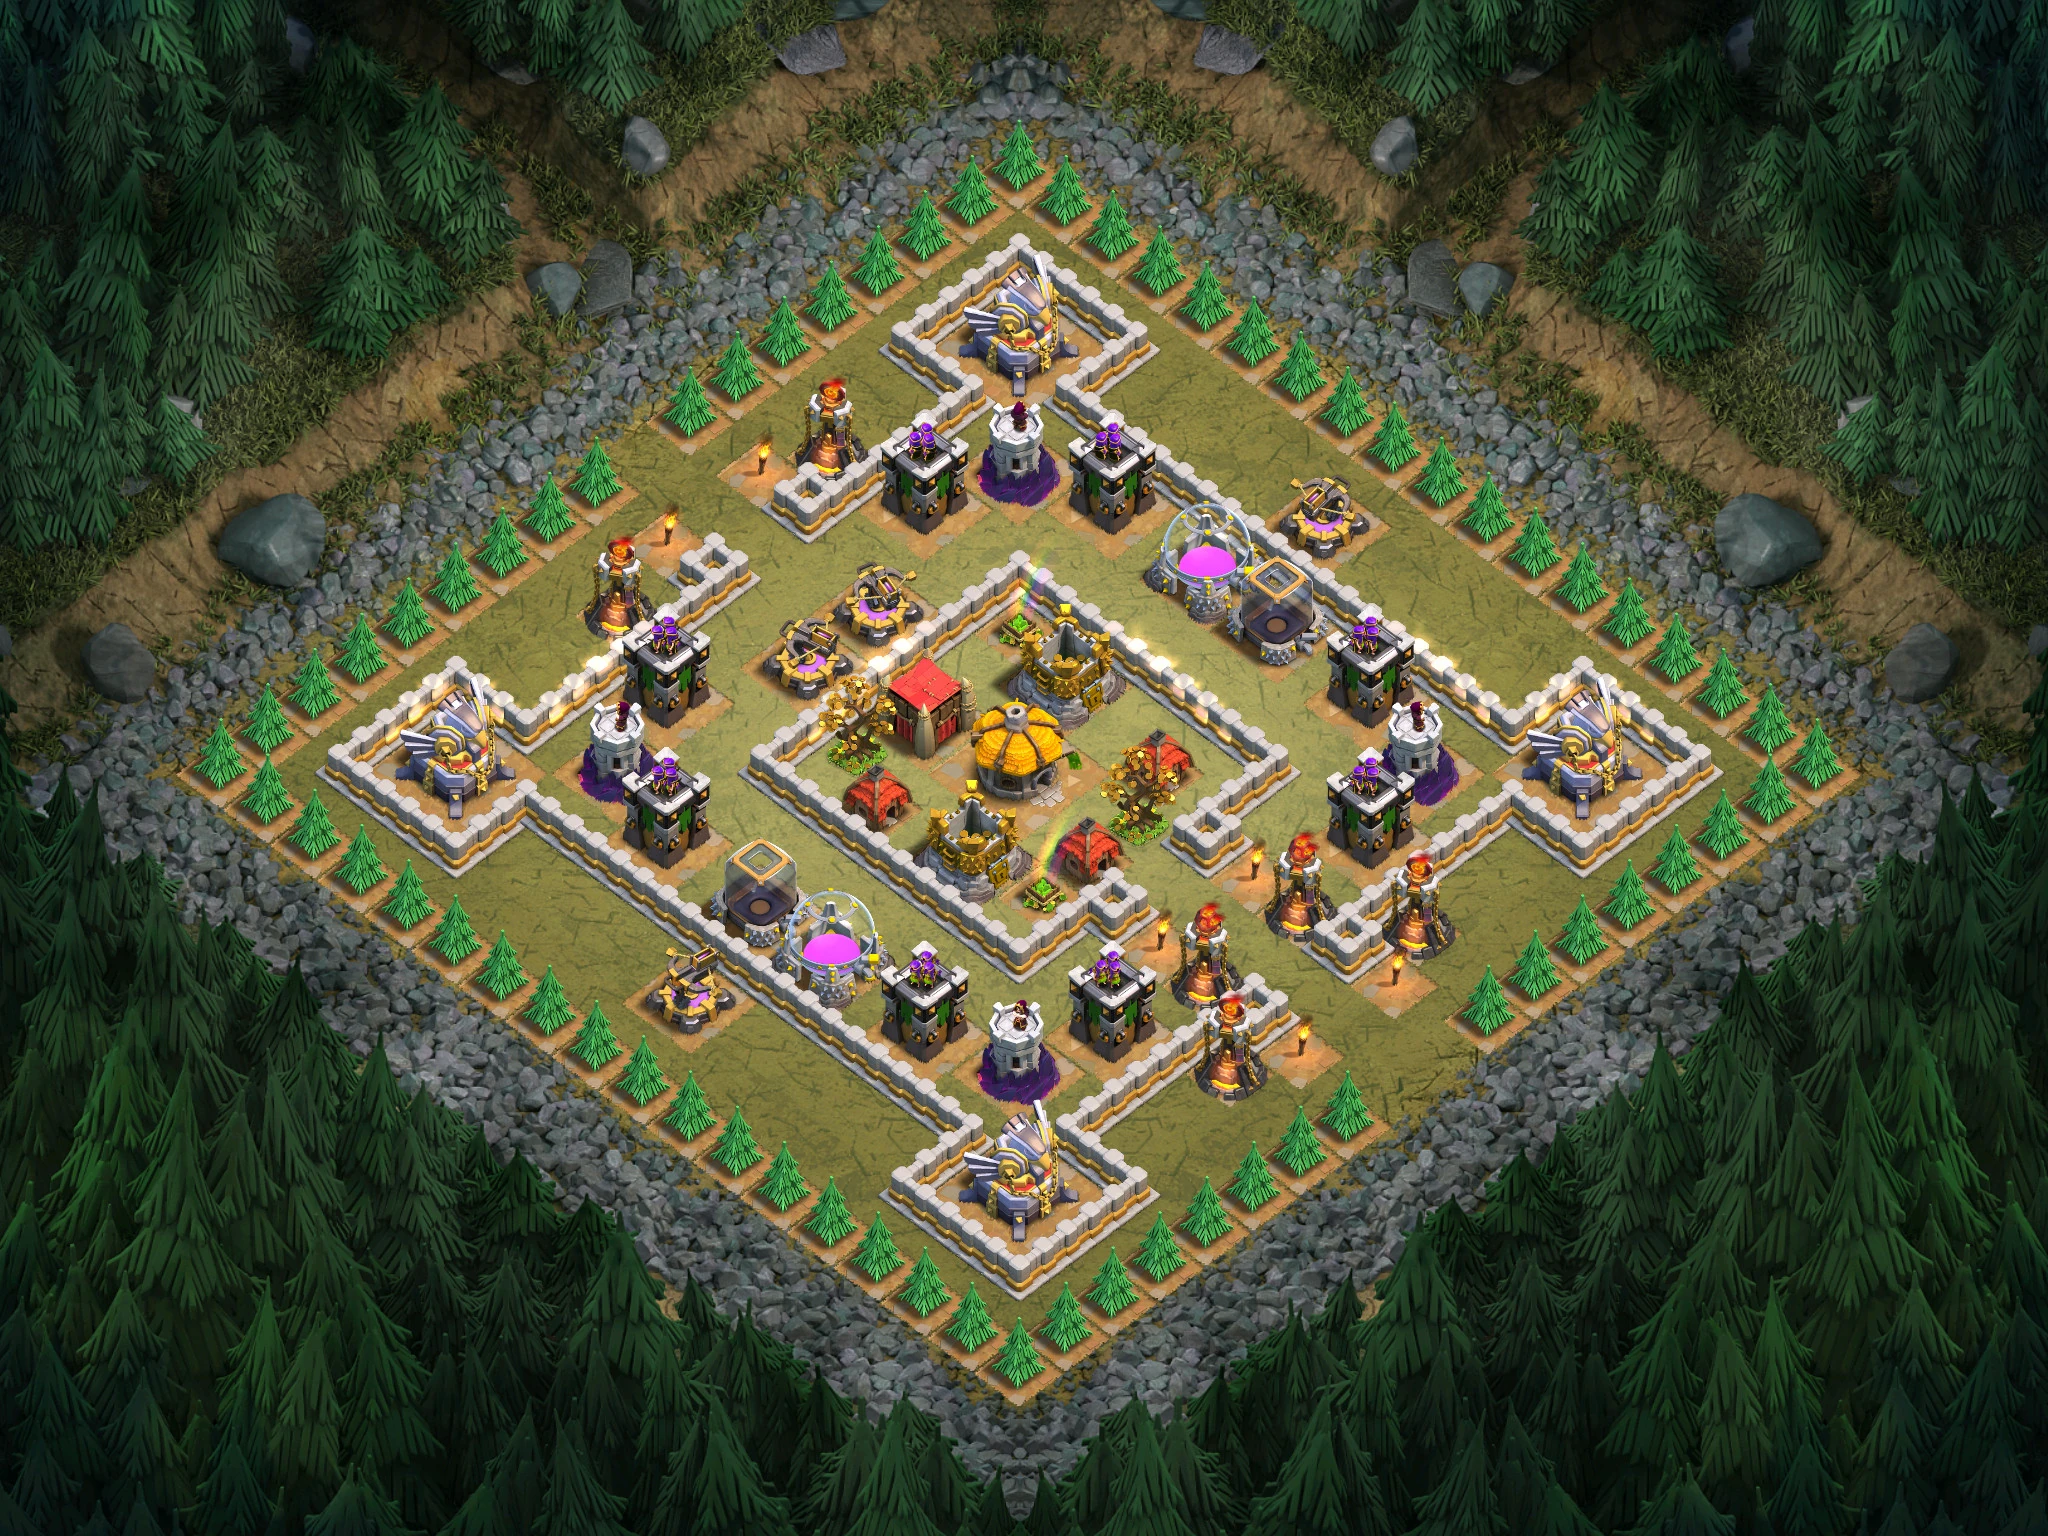
This level introduces the Wizard Tower, a splash damage defense.
Have at least 100 Archers. Start at the top with about 20, then the bottom with about the same. Keep reinforcing until you work your way into the Wizard Towers.
Another strategy is to use 2 or 3 Lightning Spells (depending on level) on the Wizard Towers, and then swarm them with Barbarians and Archers. However, this is not very cost-effective but is useful if you need to dump spells.
Alternative 2: Deploy some well-placed Archers at each Air Defense until they are down. (you can do this without having Archer Towers shoot your troops.) Then, strafe the remaining defenses with Balloons. Use Lightning Spell for the Wizard Towers if necessary.
Easter egg: At the bottom of the map, there is a Halloween Headstone from the 2014 Halloween update. If you deploy your units there, there'll be many Skeleton Traps.

Arrow Head
Send in Barbarians to each of the 4 Archer Towers, and then Archers to take out the Air Defense. Clear the rest with a Balloon.
If your Archers aren't high enough level to take down the two central storages (the Archers will go for them first) then the Air Defense before they're killed, use two Wall Breakers (per side) to get into the storages near the center and then drop 15-20 Goblins to get them out of the way. This means your Archers will go straight for the Air Defense. The two Hidden Teslas that pop up from between the storages can be dealt with using two Giants to distract the defenses and then drop a few groups of Archers to clean up the Hidden Teslas.
Level 2 Goblins do 3x the damage of level 2 Archers when attacking resources and at level 2 the Cannon will 1-shot them both.
Alternative: Train 20 Level 3~4 Giants and rush them at the Hidden Teslas. Use a Healing Spell on the double-Wall layer behind the Hidden Teslas, then follow up with a Wall Breaker (2 if it's below level 3). Deploy a Healer once the Air Defense is down and send in as many Barbarians as your Army Camps can hold at the top.
Loot: 60,000 Gold and 60,000 Elixir.
Red Carpet
Loot: 70,000 Gold and 70,000 Elixir.


Deploy at least 35-45 Barbarians at the top to take out the Archer Towers and the Air Defense. Put at least 5 Giants each by the Wizard Towers as a meat shield then place a few Wizards to take out the Wizard Towers. Finish up with a Balloon.
Alternative: Strafe 2 or 3 (depending on level) Lightning Spells to destroy the Mortars, then deploy 200 level 4 Barbarians (maybe a Barbarian King too) at the opening.
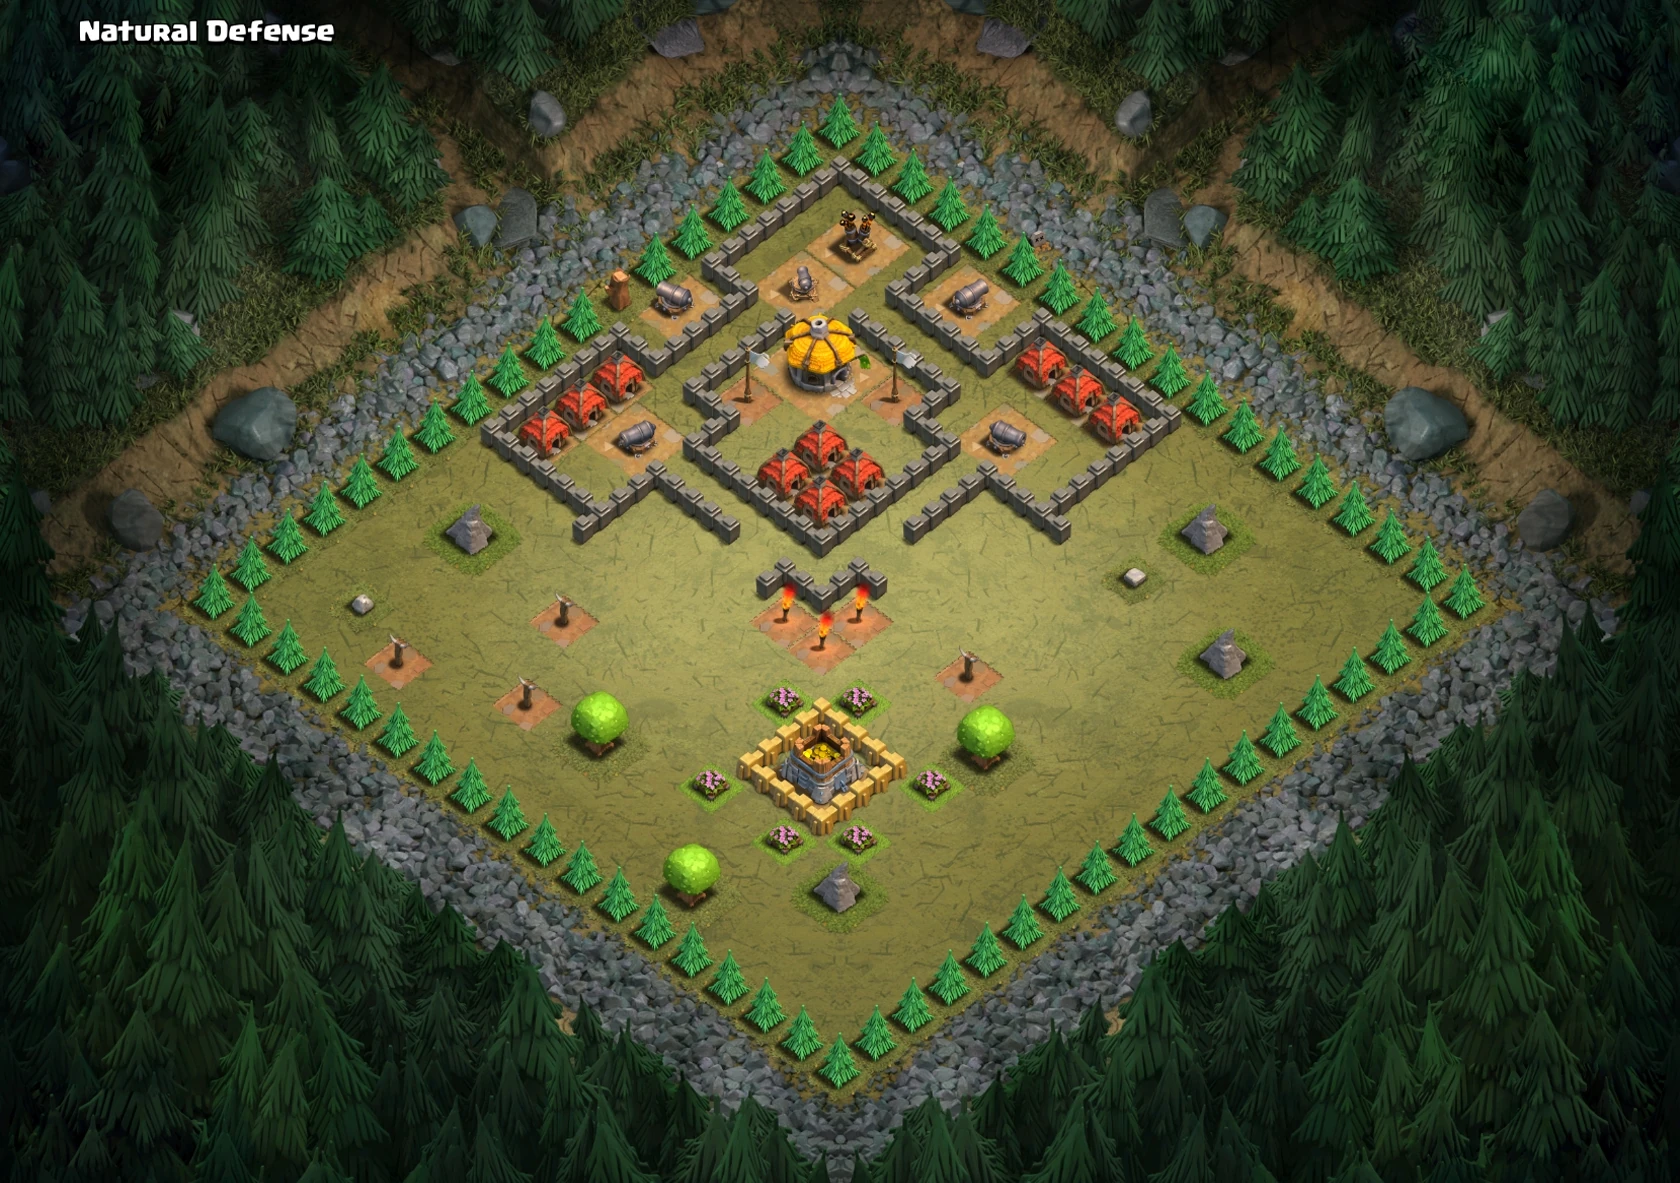
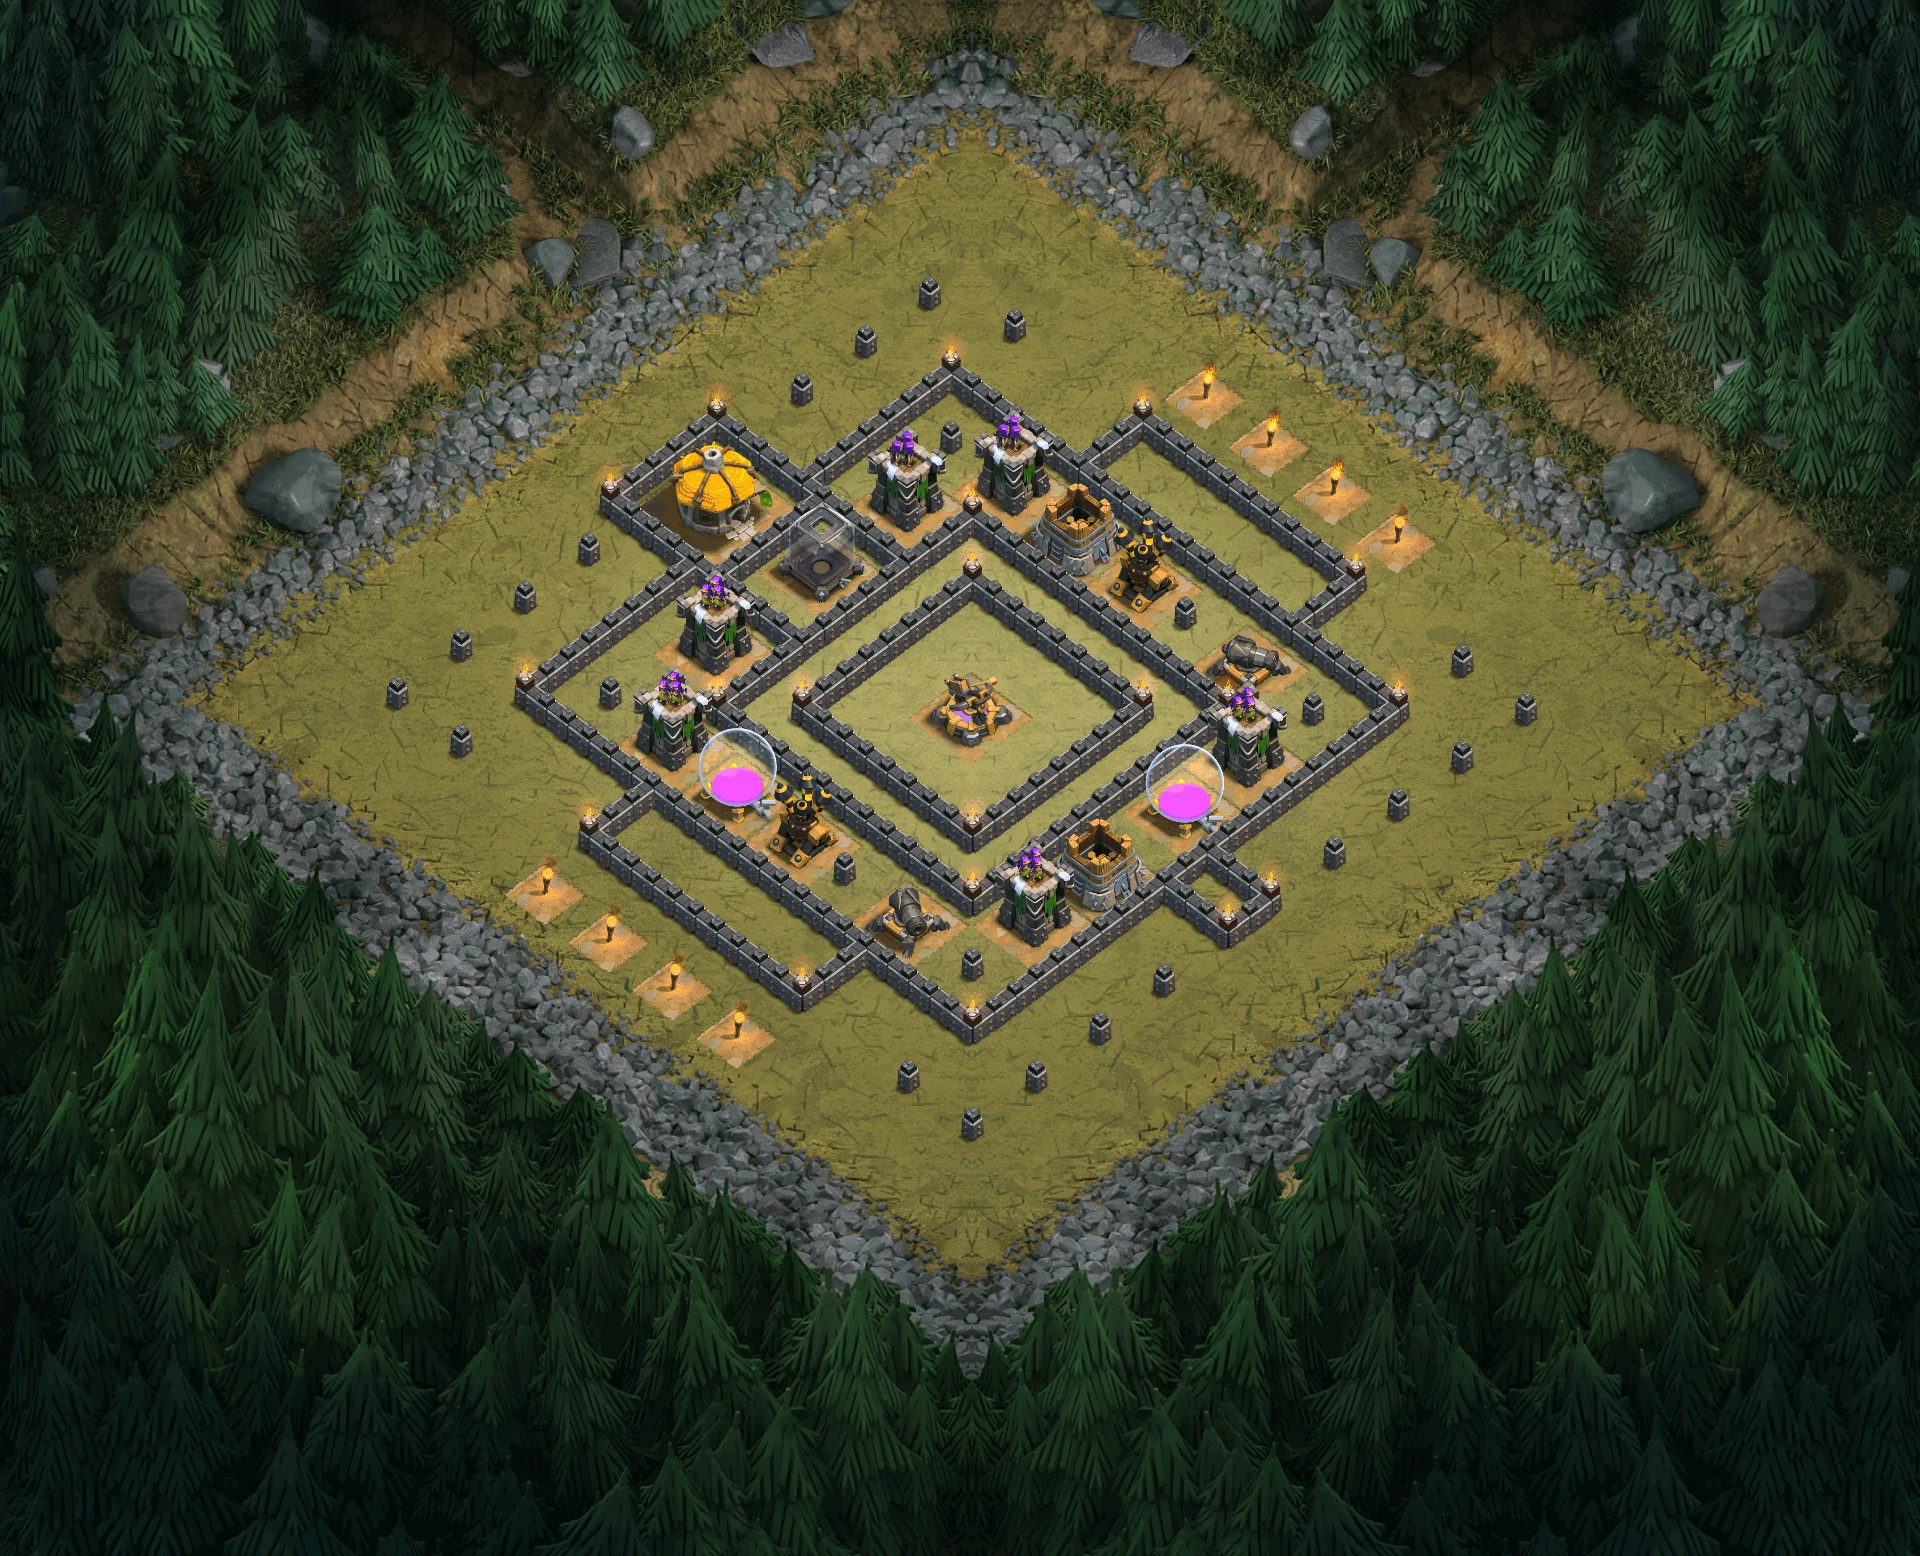
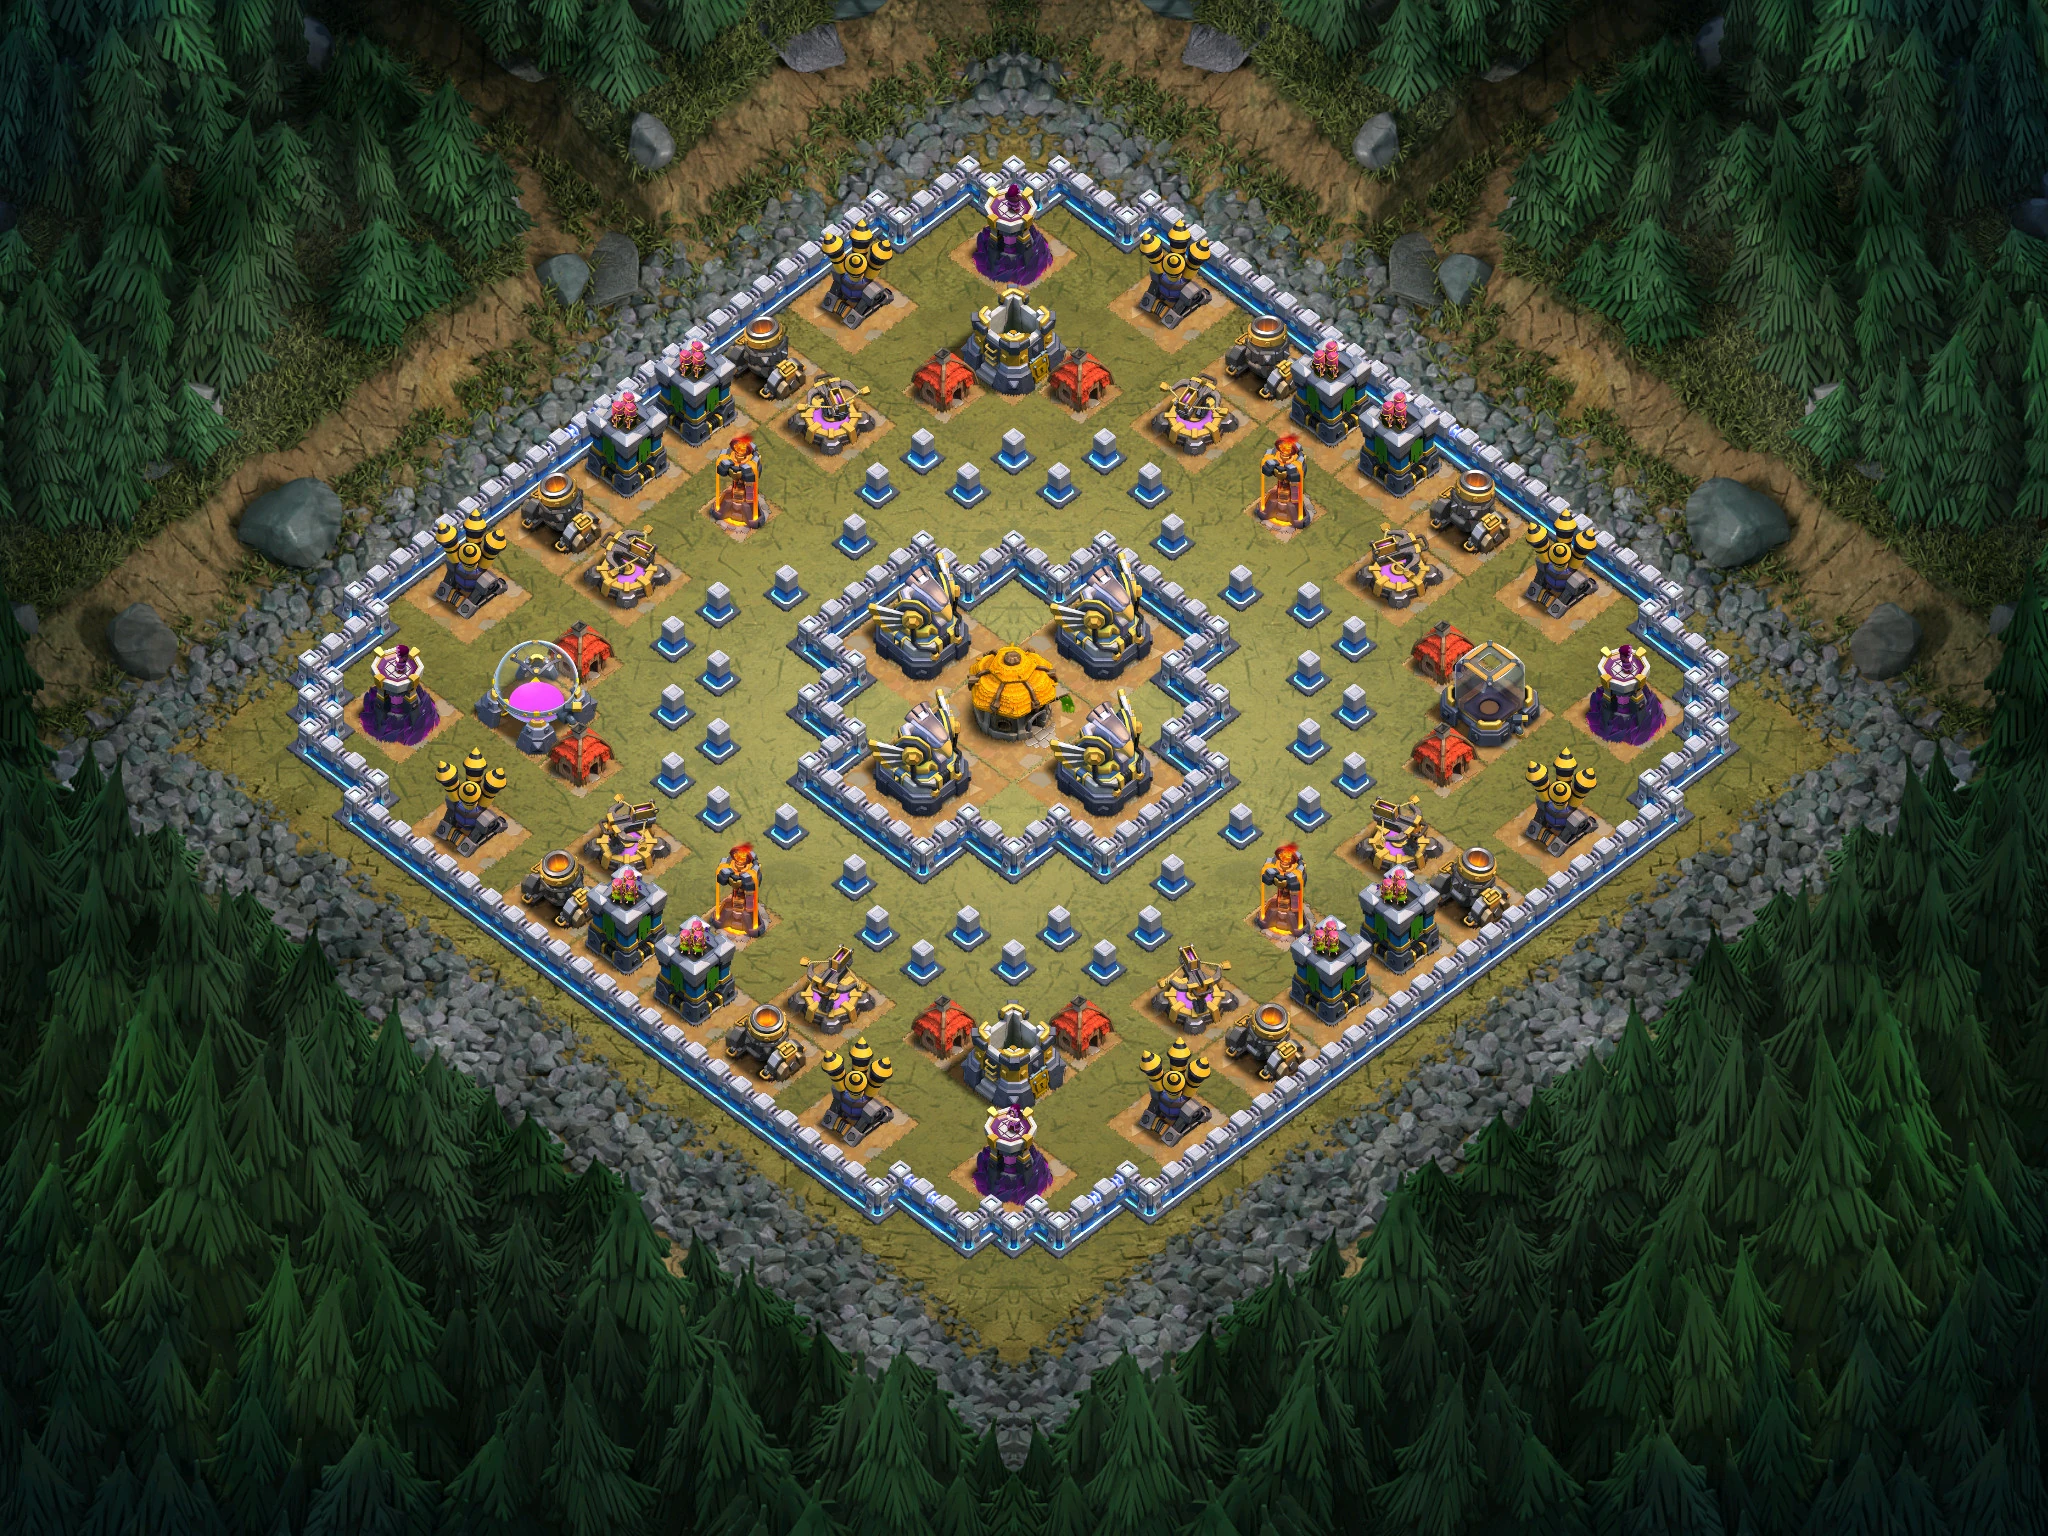
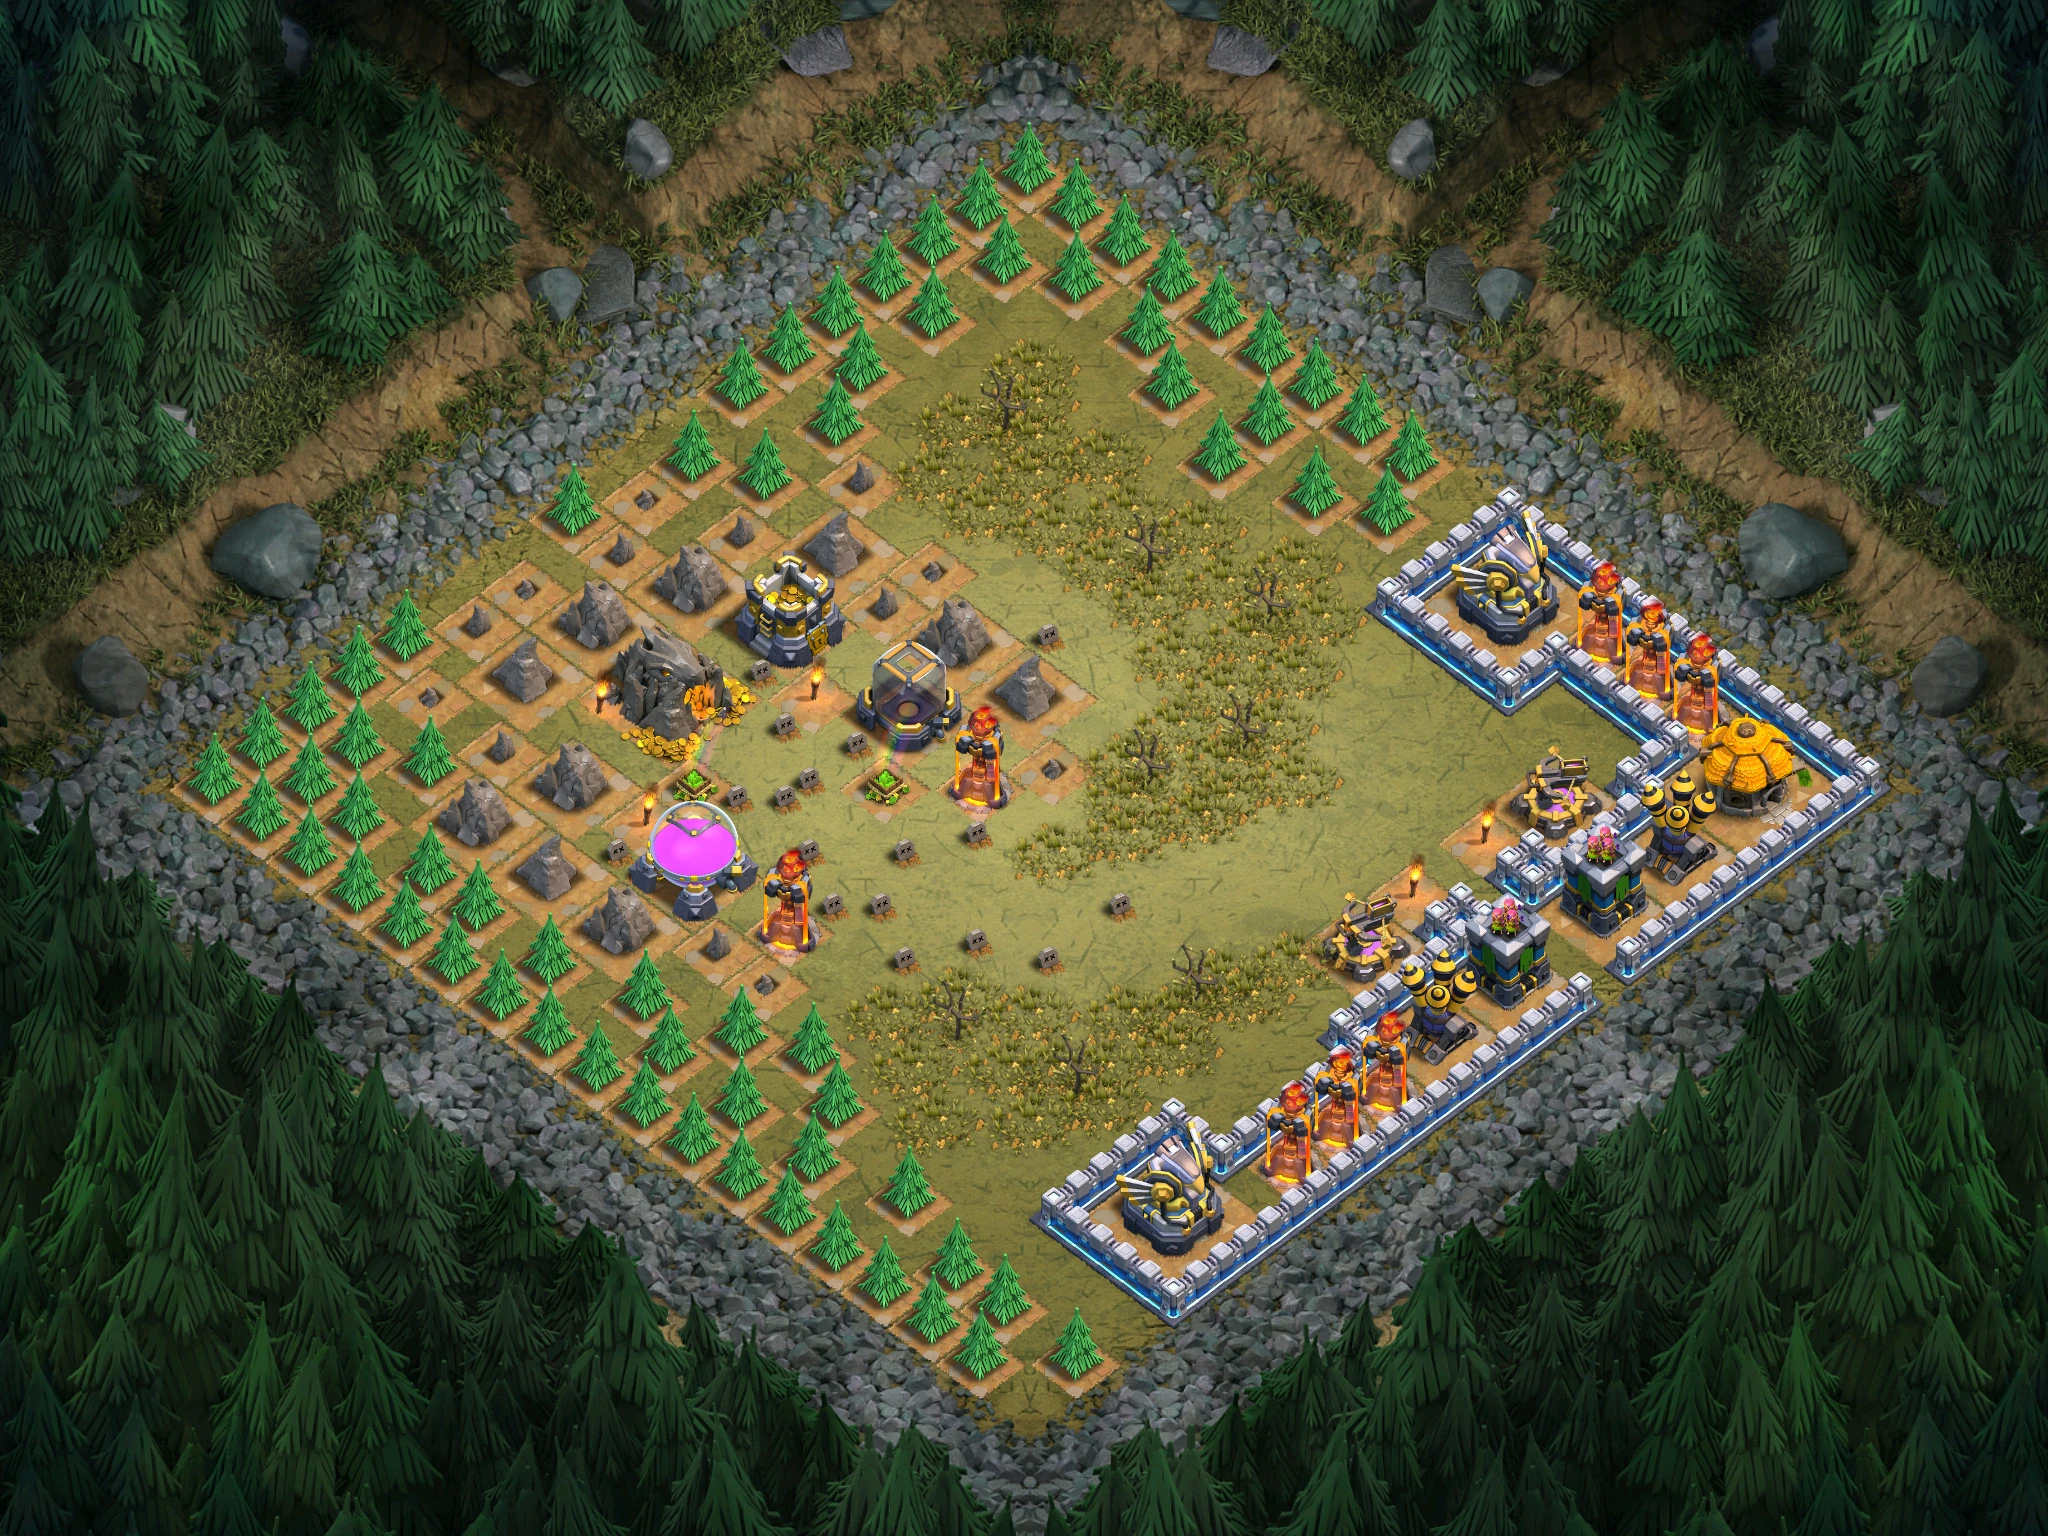
Natural Defense
Use Wall Breakers on the Wallss where the Air Defense is located. Then deploy Barbarians to take it out and leave the rest of the job for a Balloon. Alternatively, just deploy Archers in the trees (yes, you can!) to take out the Air Defense, then deploy a single Balloon to mop-up, as above.
Alternative 2: Deploy a single Wall Breaker at the Air Defense. Place a single Giant, then a Wizard behind him to fight the Air Defense. Once it is down, clear the rest with a Balloon or a Minion.
Note: There is a Gold Storage surrounded by level 5 Walls near the middle of the map. It is protected by 4 Hidden Teslas (marked by Cornflower Beds). You can drop a Dragon near it, but if it is not a high enough level, you can use a few Balloons.
Loot: 150,000 Gold and 2,000 Elixir.

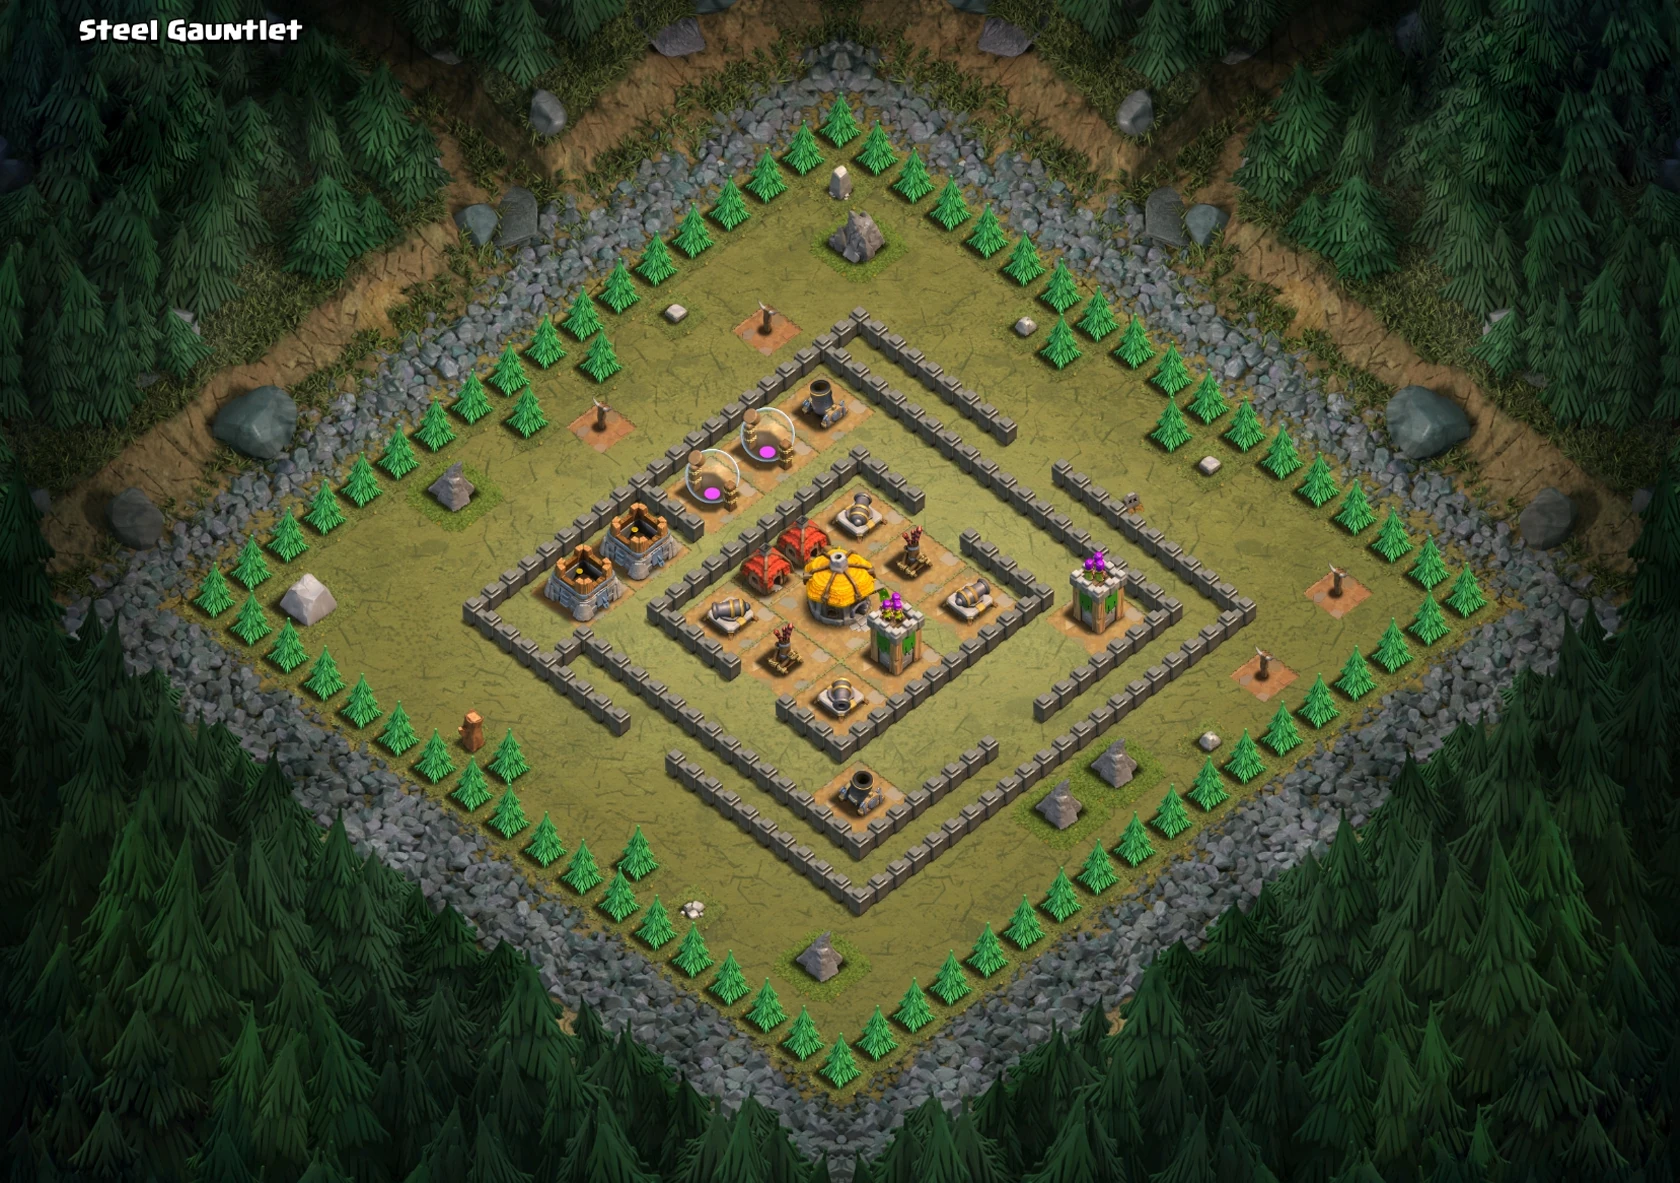
Steel Gauntlet
Deploy a few Giants next to the bottom Mortar (you can spawn in there) to take it out. Drop a Giant as a meat shield near the top Mortar while a few spread out Archers take it out. As both Mortars go down, swarm Barbarians and Archers near the Archer Towers and they should be able to overwhelm the remaining defenses.
Alternative 1: Balloon Rush the gap in the red area near the bottom of the base. Use Rage Spells or support Minions and Archers.
Alternative 2: Straight up 40 Minions or more at the bottom. Air Defenses and Archer Towers can't take them out fast enough. Survivors will take care of the rest. The easiest, most efficient way to 3 star.
Loot: 80,000 Gold and 80,000 Elixir.

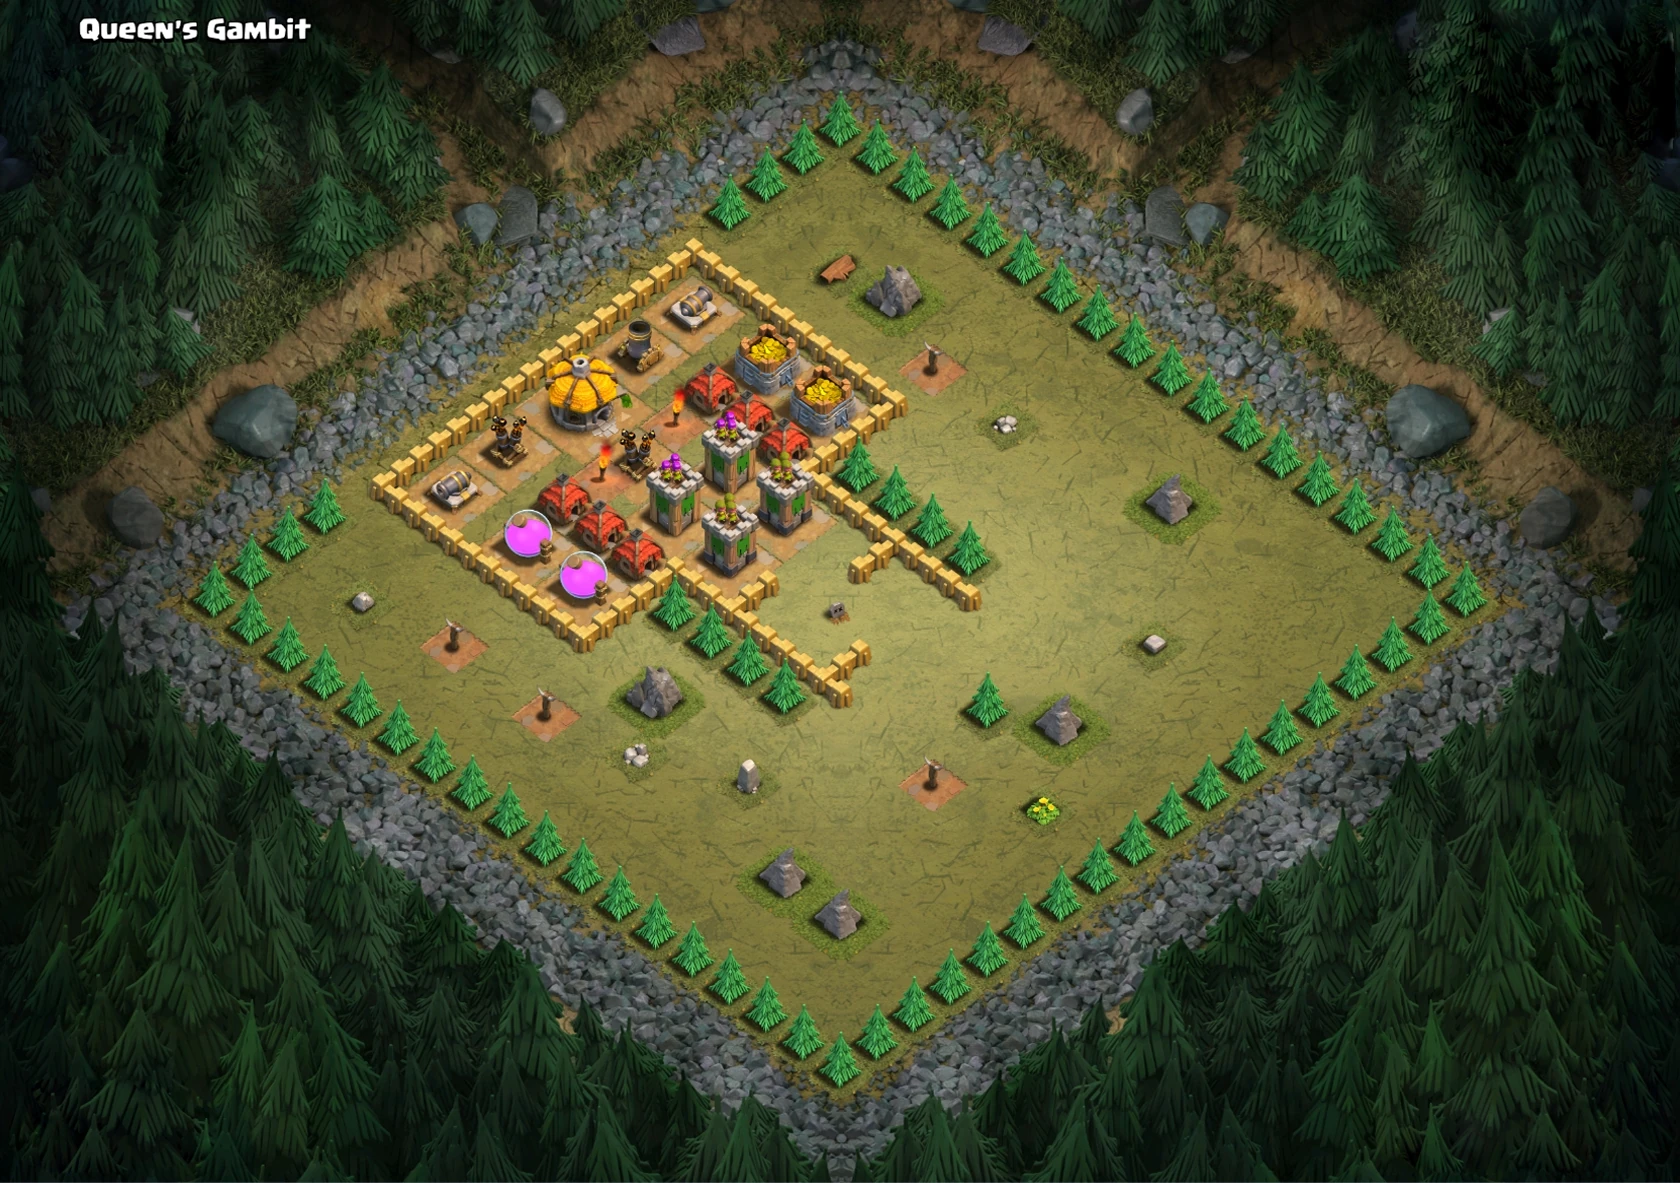
Queen's Gambit
Deploy a few Barbarians or a Giant to set off the Bombs in front. Then use a Giant as a meat shield for the Mortar while Archers take it out. Once the Mortar goes down swarm the Archer Towers in the front with Barbarians and/or Archers and the remaining defenses will not be able to stop the troops.
Alternative: Set off the Bombs with a Giant, then deploy 33 Giants as close to the Archer Towers as possible (level 4).
Loot: 90,000 Gold and 90,000 Elixir.

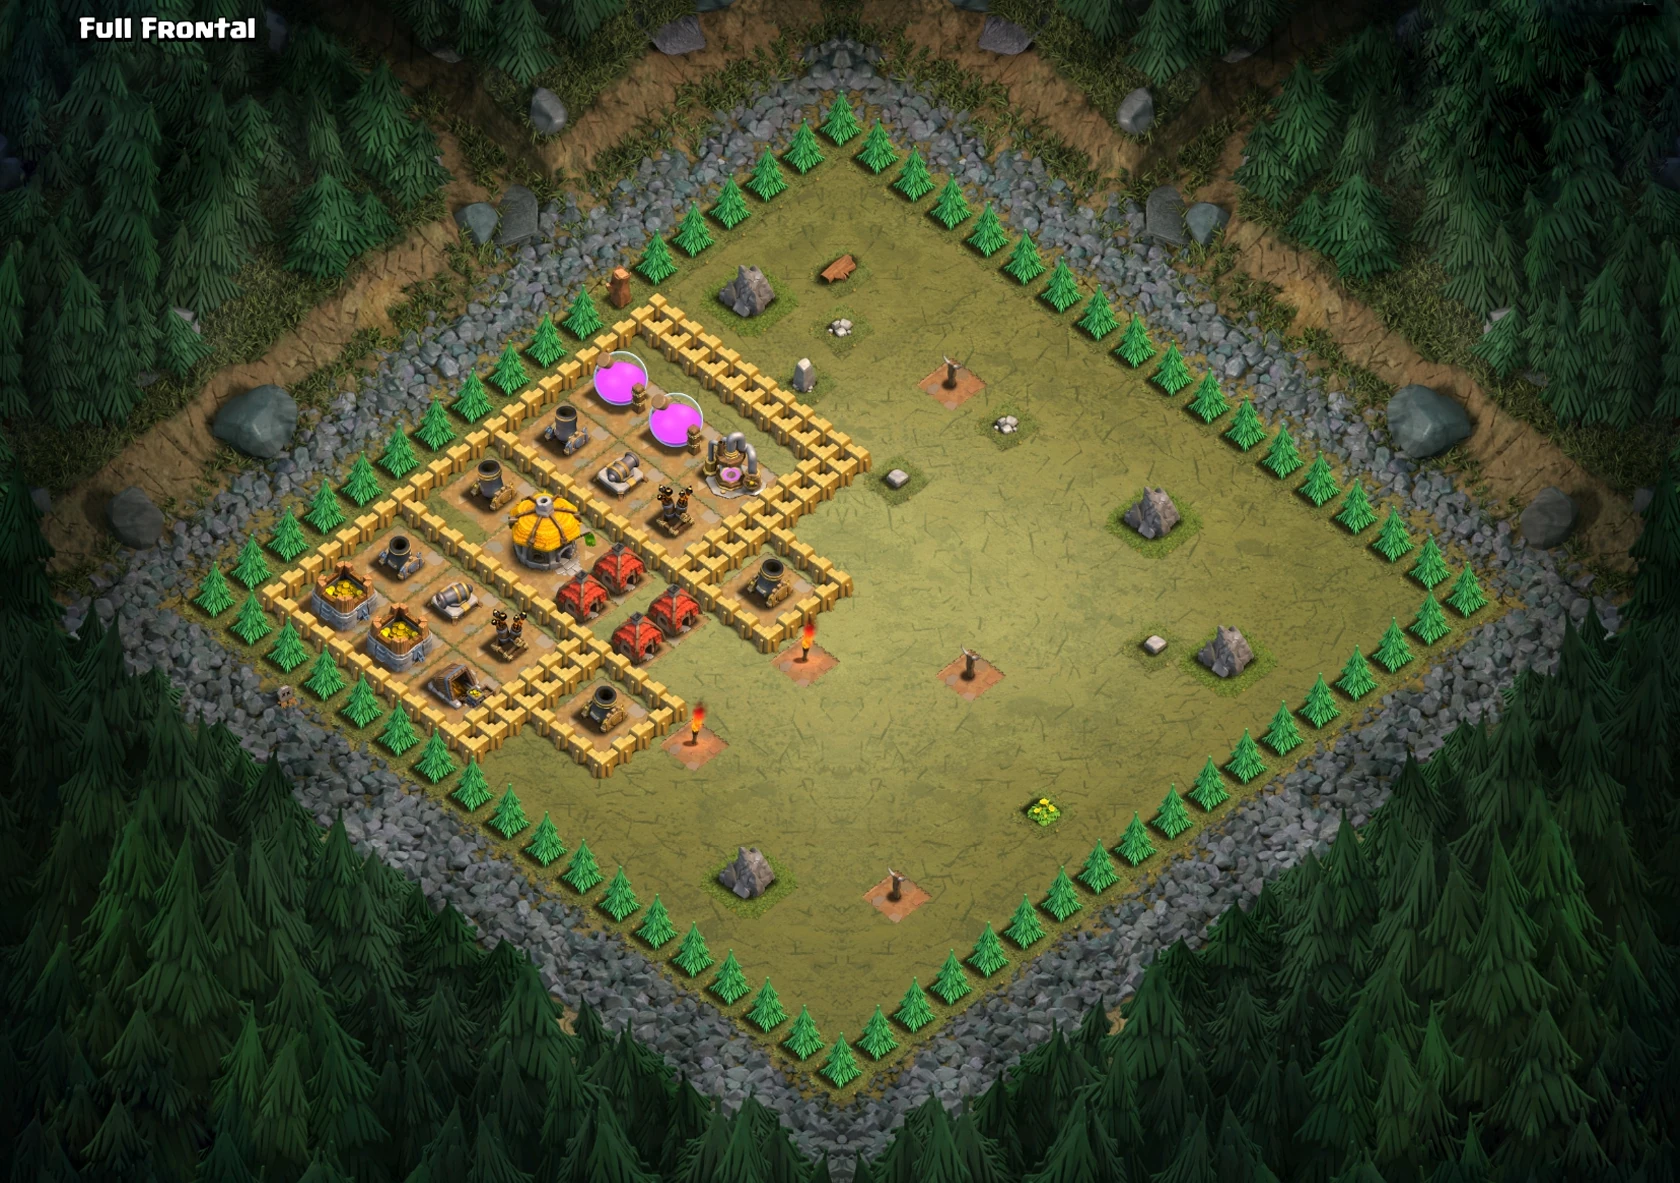
Full Frontal
Deploy Giants as a meat shield while Wall Breakers break the junctions at the top of the base. Deploy more Giants through the three openings created by the Wall Breakers, and as the bottom Mortars focus on the Giants, deploy Archers in a semicircle around the Mortars to destroy them. After that, drop any clean-up troops to speed up the destruction of the base if necessary.
Alternative 1: Strafe 10 Wall Breakers at the top with 200 Barbarians.
Alternative 2: Deploy an army of 40 Minions or more at the bottom. The Air Defenses can't take them out fast enough. Cheapest way to 3 star.
Loot: 50,000 Gold and 140,000 Elixir.

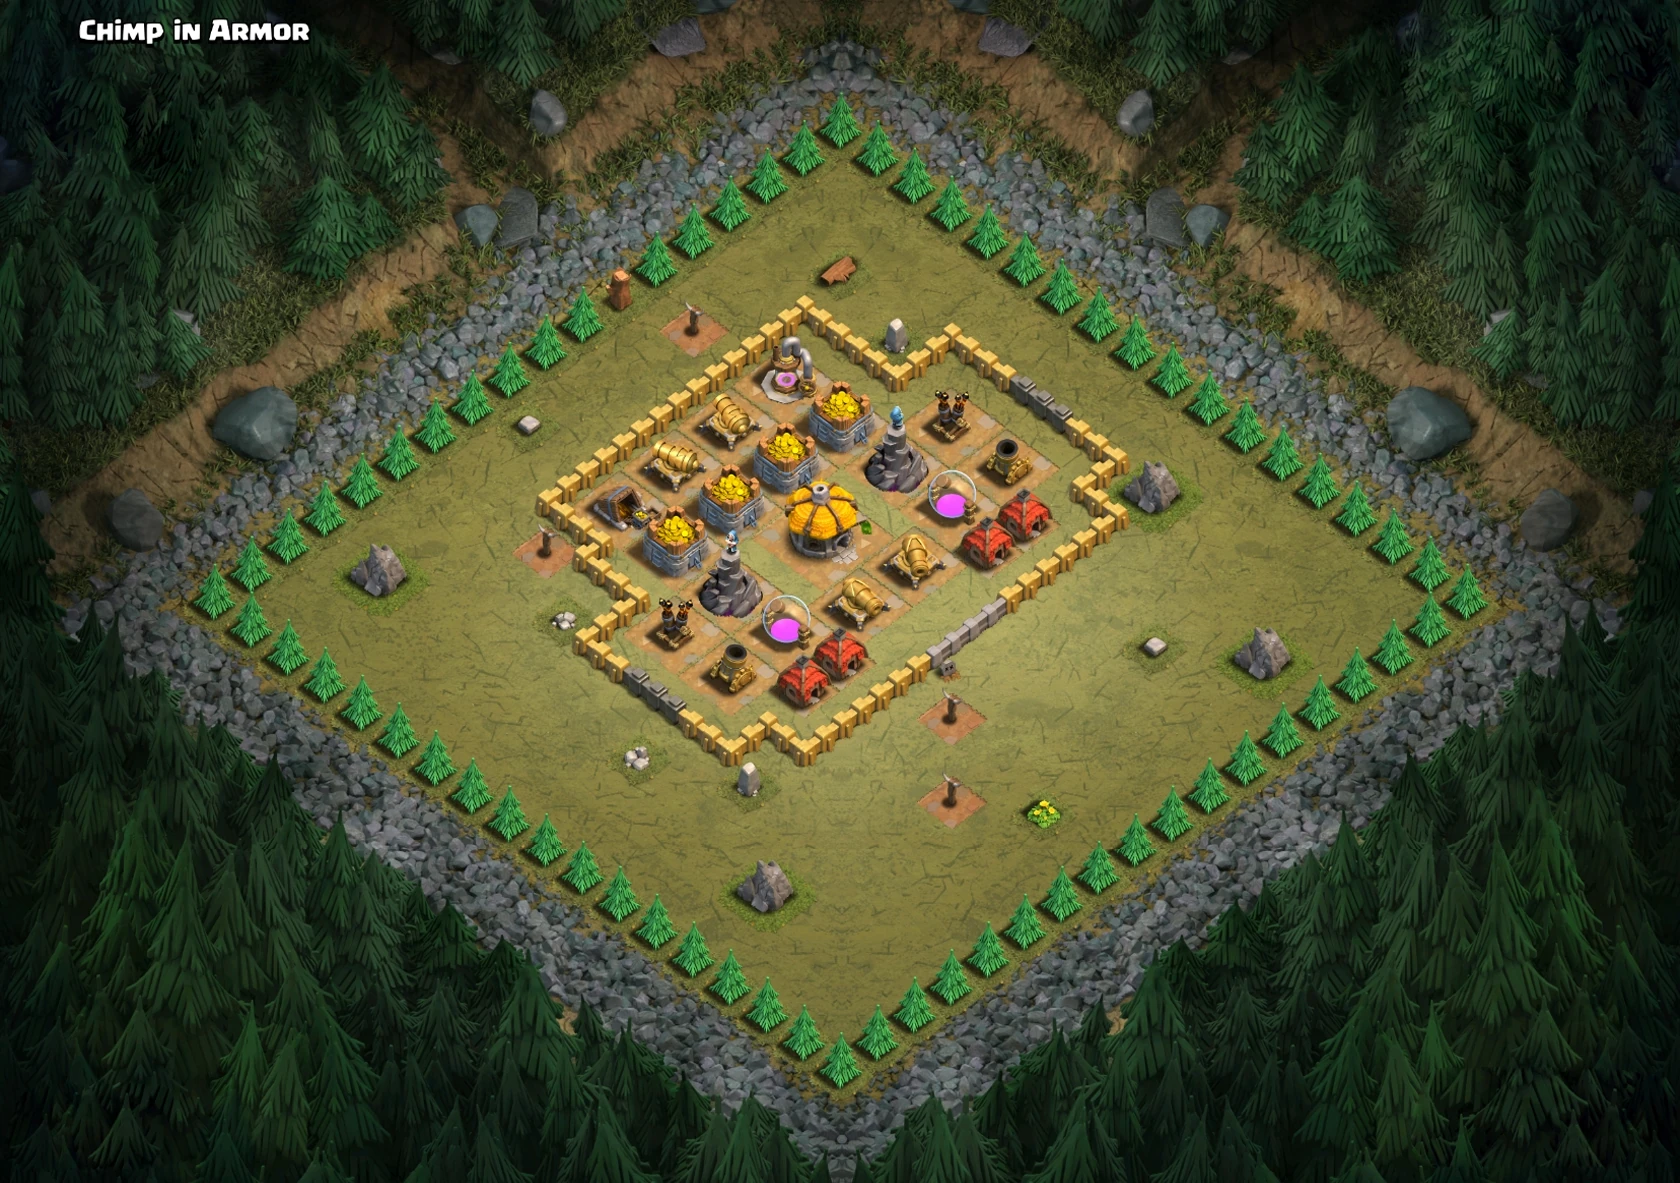
Chimp in Armor
Recommended Town Hall 7.
Loot: 150,000 Gold and 50,000 Elixir.
Deploy 10-15 Giants followed up by Wall Breakers on the right side, near the Level 4 Walls. Let them destroy the Air Defense, then deploy a Healer or two. As the Giants work through the base, deploy about 6-10 Balloons to clear out the other Air Defense and other remaining anti-air towers. Afterward simply use any necessary clean up troops if you want to speed up the destruction, as the lack of anti-air defenses afterward means that any surviving Balloons will not be able to be stopped.
Alternative 1: Plop 3 Lightning Spells at the right Air Defense, then deploy a few Balloons to defeat the other one. Use Minions or Dragons to take care of the rest.
Alternative 2: Deploy 1-2 Giants on each side to draw the Wizard Towers' attention. Then, send in mass of at least 25 Minions on each side to take out Air Defenses and the Wizard Towers. Cheapest way to 3 star.

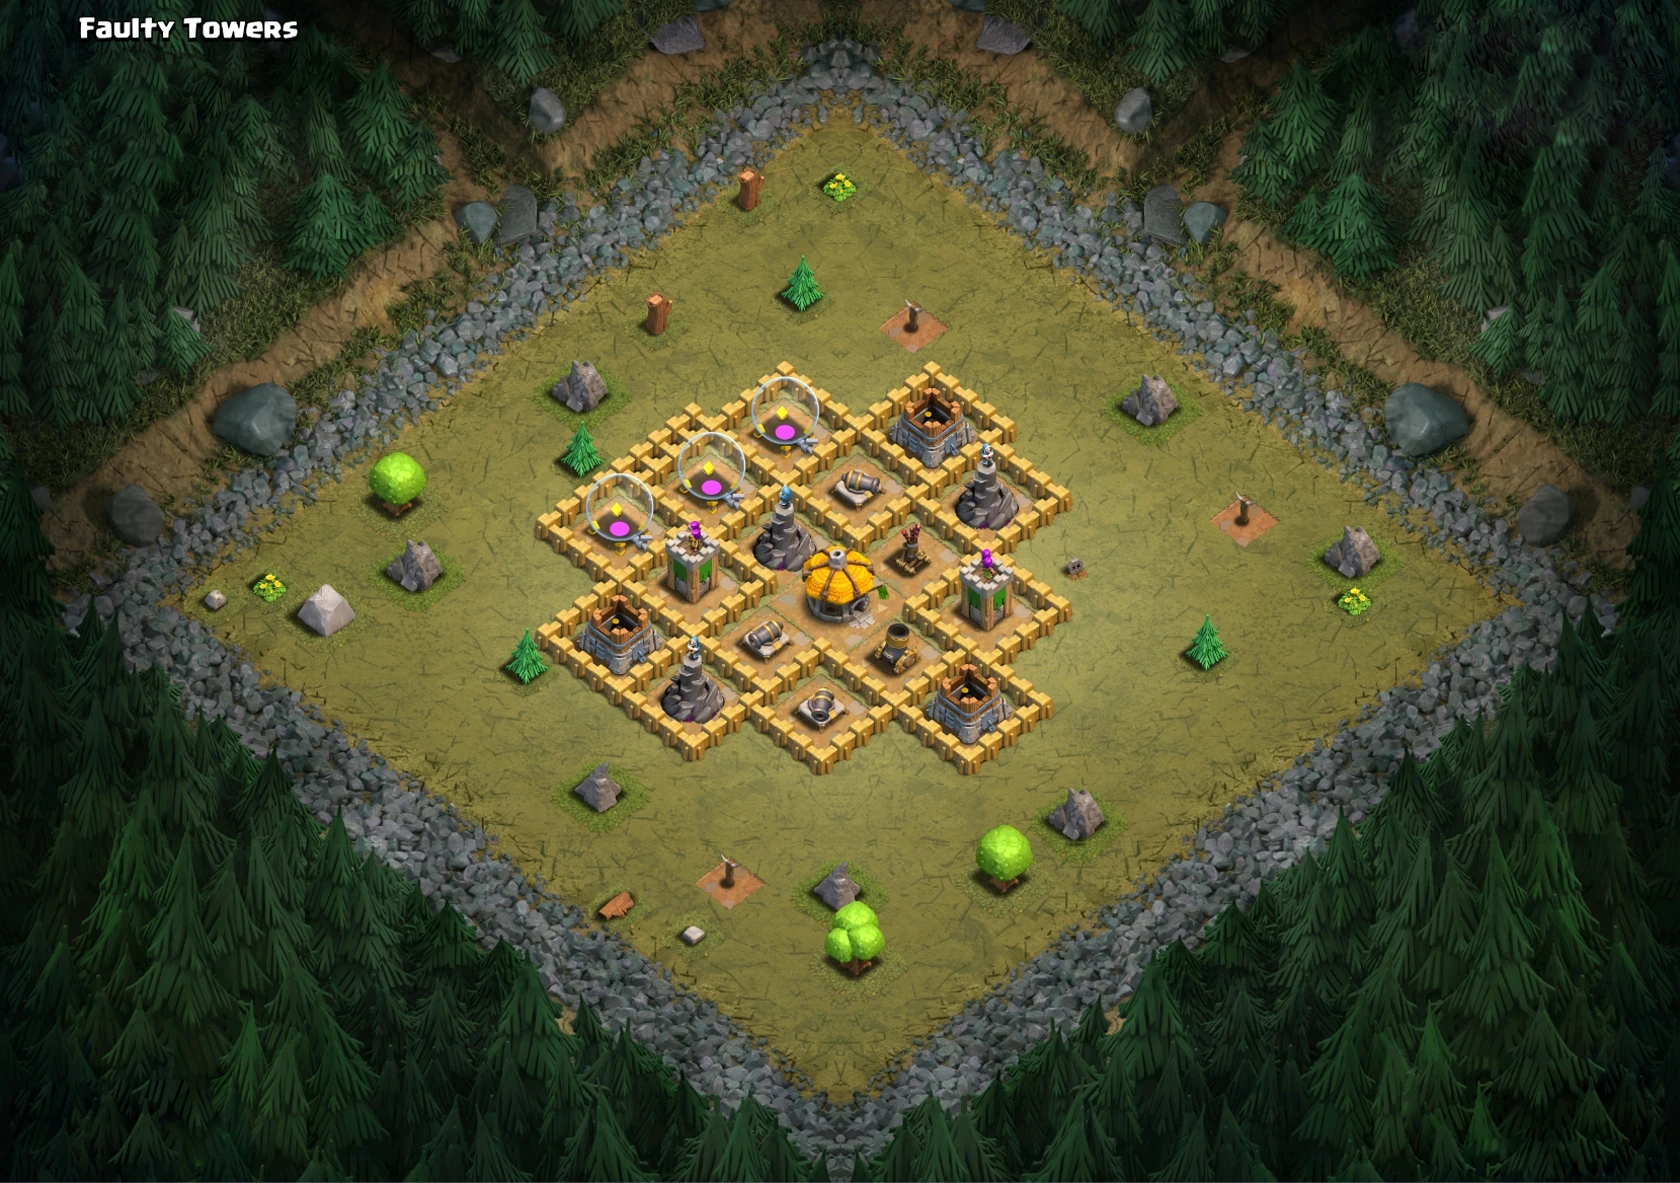
Faulty Towers
Recommended Town Hall level 8.
Loot: 110,000 Gold and 110,000 Elixir.
Defense: 3 x Level 8 Cannon, 2 x Level 6 Archer Tower, 1 x Level 5 Mortar, 1 x Level 3 Air Defense, 3 x Level 2 Wizard Tower.
Use a Giant-Healer combo from the right side where the Air Defense is located. Drop a Healing Spell whenever necessary.
Alternative: Triple Lightning Spell the area near the Air Defense and remove the anti-air towers. Place Balloons and Minions from the left side (Minions are not necessary).

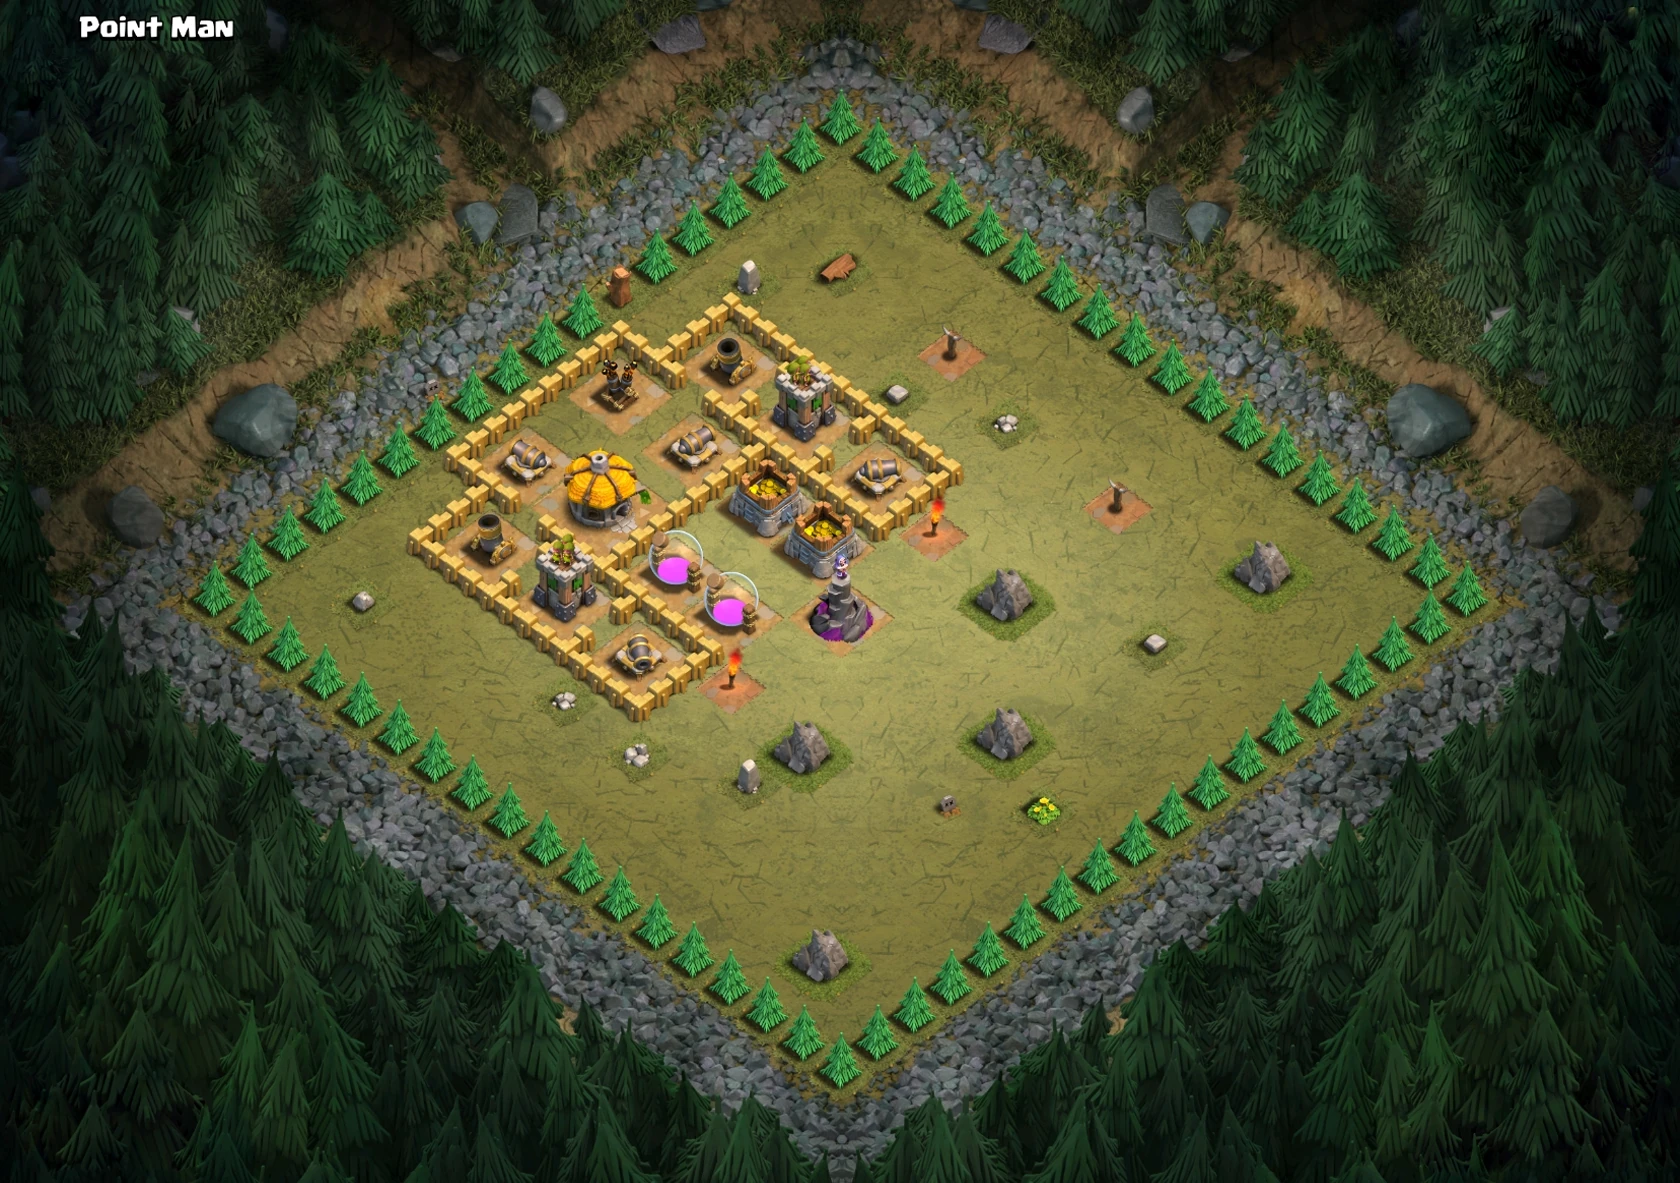
Point Man
Recommended Town Hall level 8.
Loot: 120,000 Gold and 120,000 Elixir.
Place a few Barbarians to clear the Bombs around the Wizard Tower. Then surround it with a wave of Barbarians and a wave of Archers. Next, destroy both Mortars at the same time with Wall Breakers and Barbarians. Takedown the rest of the single-target defenses with Barbarians and Archers. To play safe and ensure success, you may also use a Giant-Healer combo from the top where the Air Defense is located.
Alternative: Deploy 2 Giants at the Air Defense, then place a single Wizard behind. Once the Air Defense is destroyed, deploy 3 Balloons at each remaining anti-air defense.

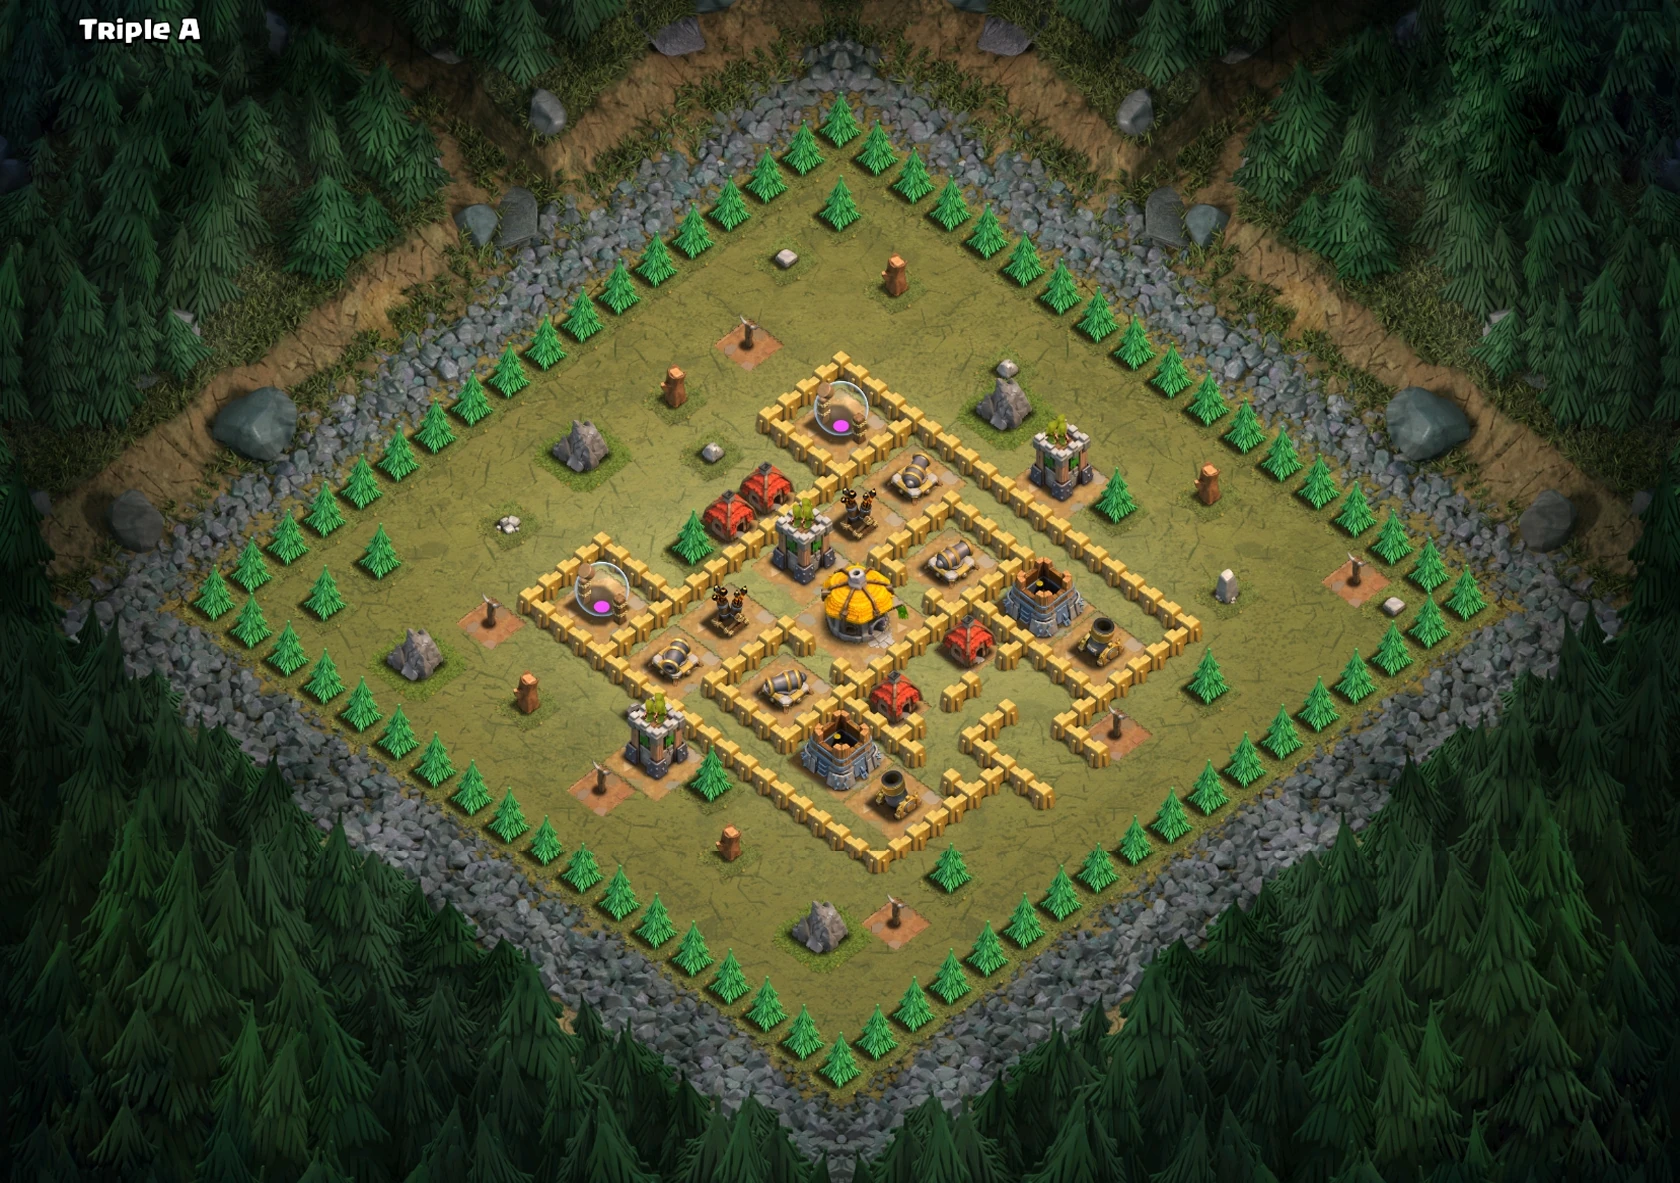
Triple A
Recommended Town Hall level 8.
Loot: 130,000 Gold and 130,000 Elixir.
Drop a few Giants as distractions for the Mortars, then destroy the Mortars with Archers. Swarm the rest of the base with Barbarians and Archers.
Alternative: Use 2 Dragons, 5 Balloons and a Rage Spell to clear the Air Defenses. At the same time, use 3 Balloons or Minions (more are needed) to take care of the Archer Towers.

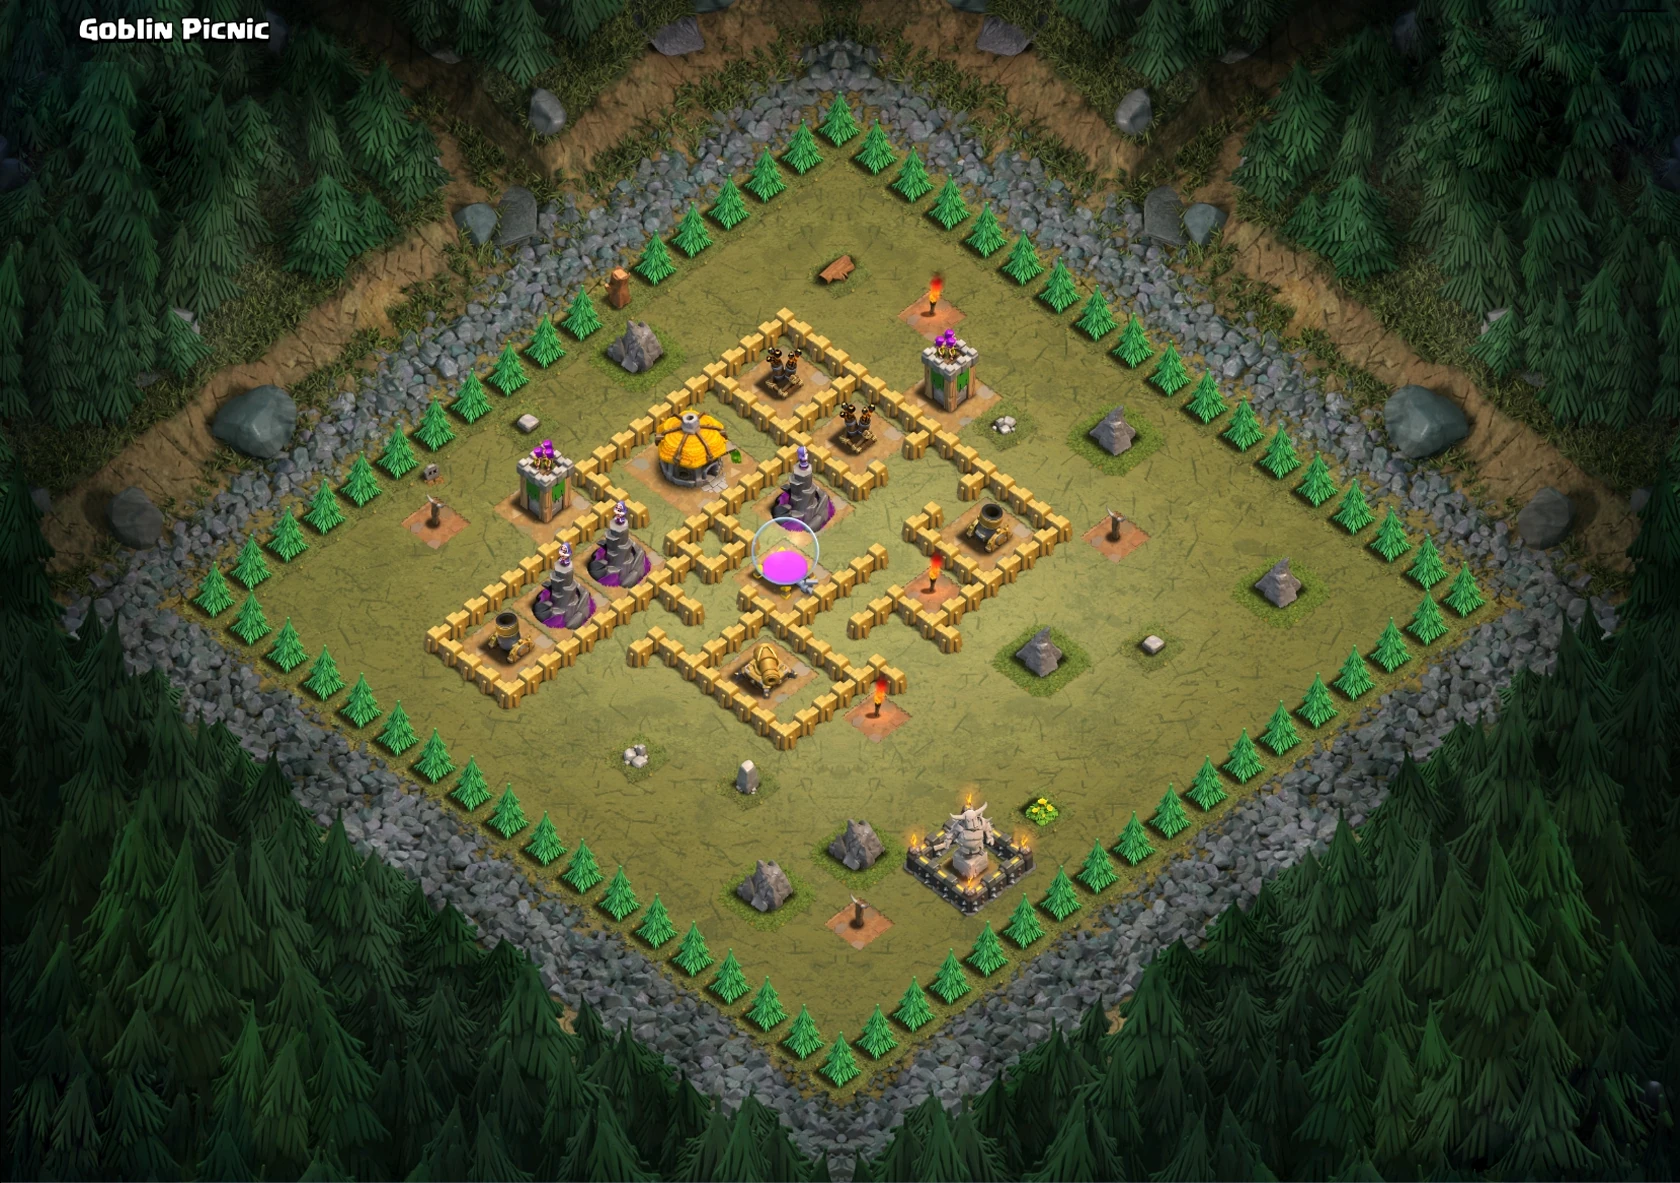
Goblin Picnic
Recommended Town Hall level 8.
Loot: 140,000 Gold and 140,000 Elixir.
Use a Giant-Healer combo from the top-right side of the base.
Note: There's an Easter egg put in by Supercell most likely since the July 1, 2015 Update. To do this, drop a Jump Spell on the P.E.K.K.A Statue at the bottom right, deploy some units to get over the statue. Once they're inside, they'll trip on something. Santa Claus will appear and drop several presents.

Bait 'n Switch
Recommended Town Hall level 8.
Loot: 140,000 Gold and 140,000 Elixir.
Swarm as many Balloons as you can near the Air Defenses, then as both Air Defenses go down there won't be anything to stop them.
Alternative: Use one Dragon per Air Defense, then use 3 Balloons per Air Defense to support them. Use Minions as needed.


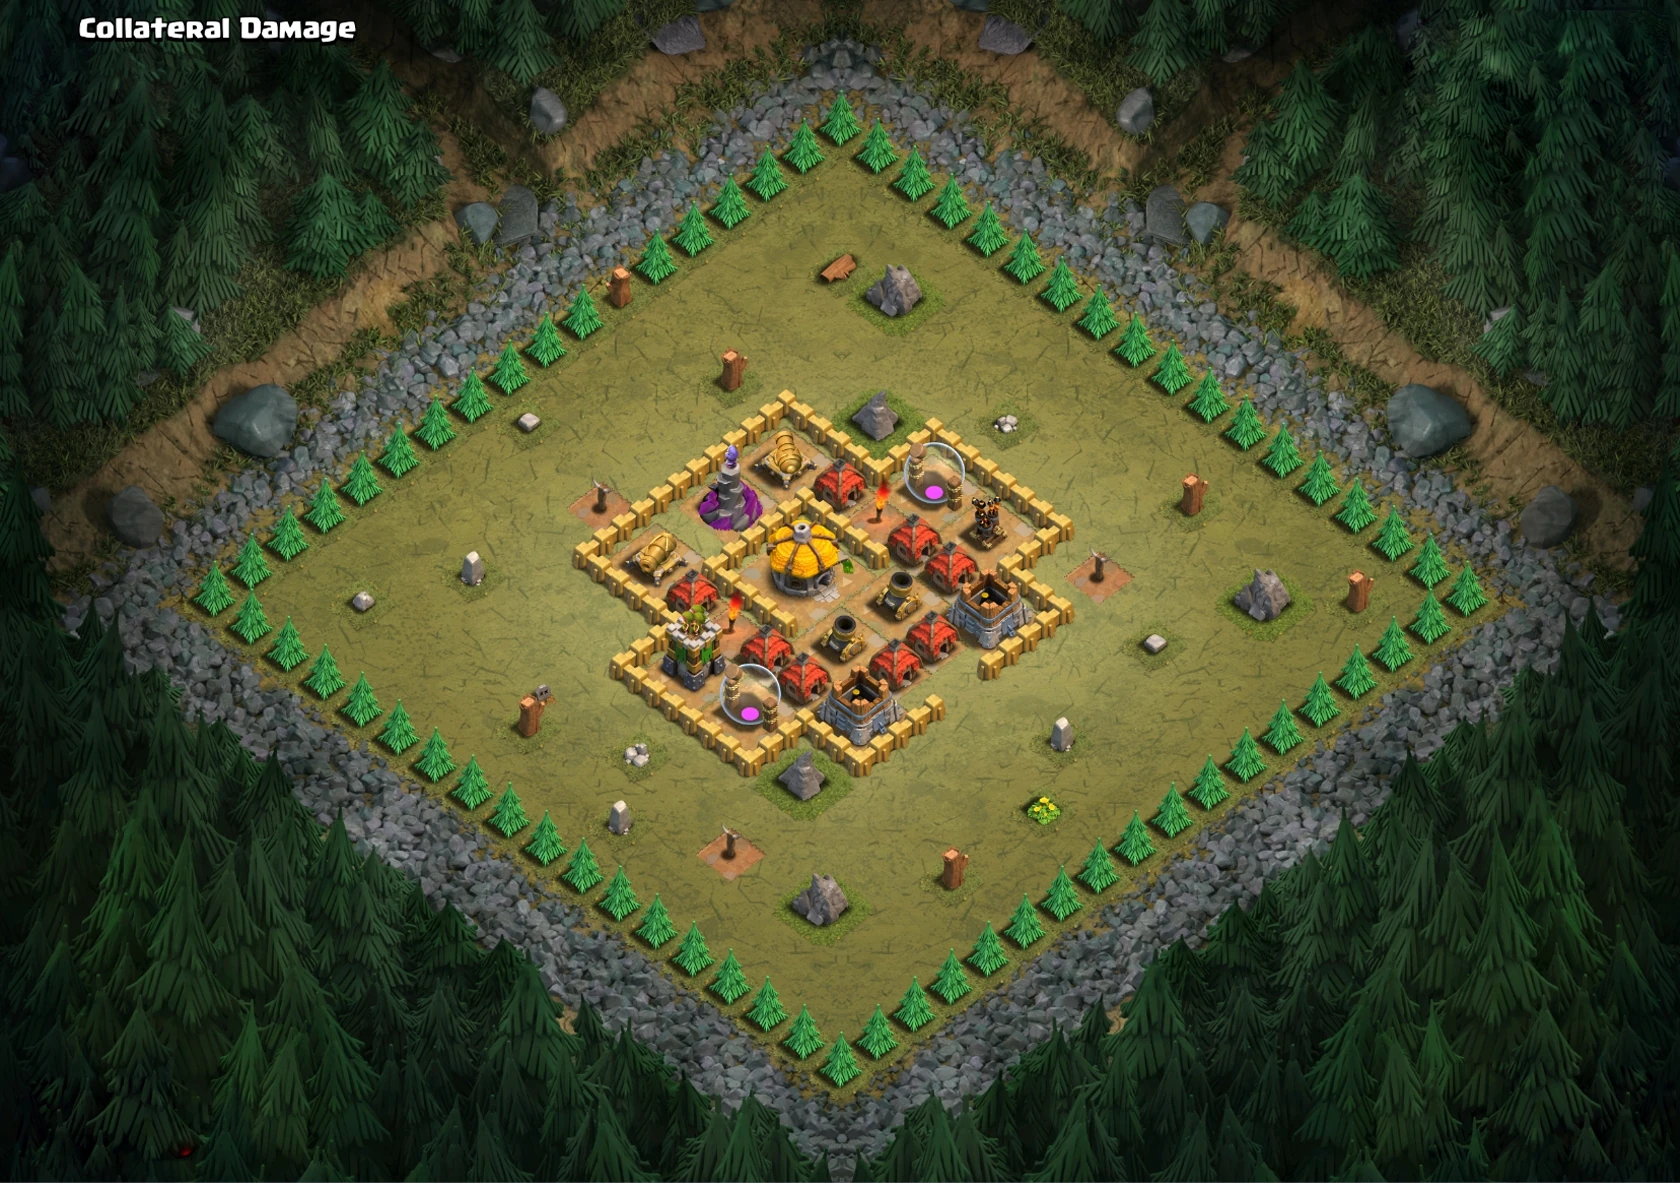
Collateral Damage
Recommended Town Hall level 8.
Loot: 150,000 Gold and 150,000 Elixir.
Use spread-out Archers to take out the Air Defense, and then use about three or four Balloons (depends on the level of your Balloons) to take out the Wizard Tower, followed by using another 4-6 Balloons to take out the Archer Tower. The surviving Balloons will then help you to clean up the rest of the base.
Alternative: Deploy 25+ Minions at the Air Defense and Enrage them. Deploy 3 Balloons at each remaining anti-air tower.

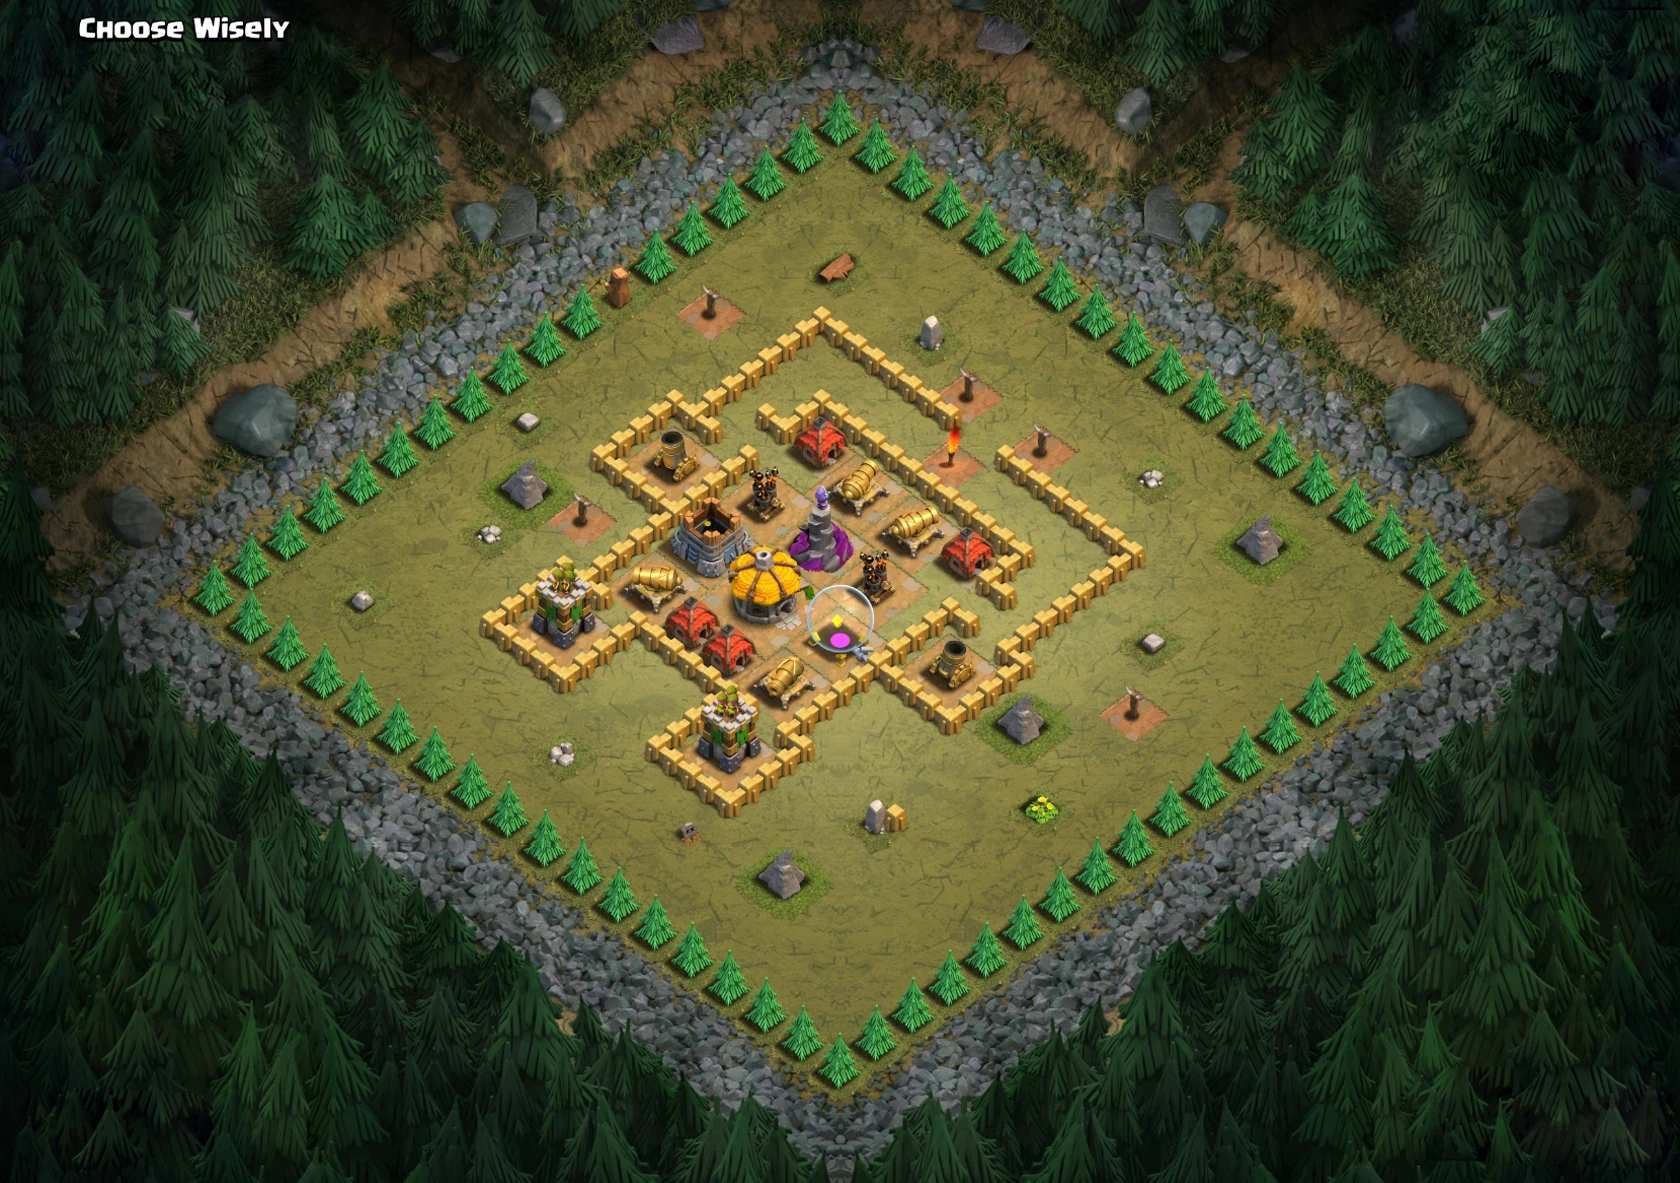
Choose Wisely
Recommended Town Hall level 8.
Loot: 150,000 Gold and 150,000 Elixir.
Swarm Barbarians with some Wall Breakers at both Mortars, then use Barbarians and Archers at the lone Archer Towers on the outskirts. Deploy all (most) of your rest Barbarians at the Wizard Towers with a Healing Spell (alternatively you can use Giants at the Wizard Tower).
Alternative: Deploy 2 Giants followed by 1 Wizard at each corner defense. Then send Hog Riders with Healing Spells.

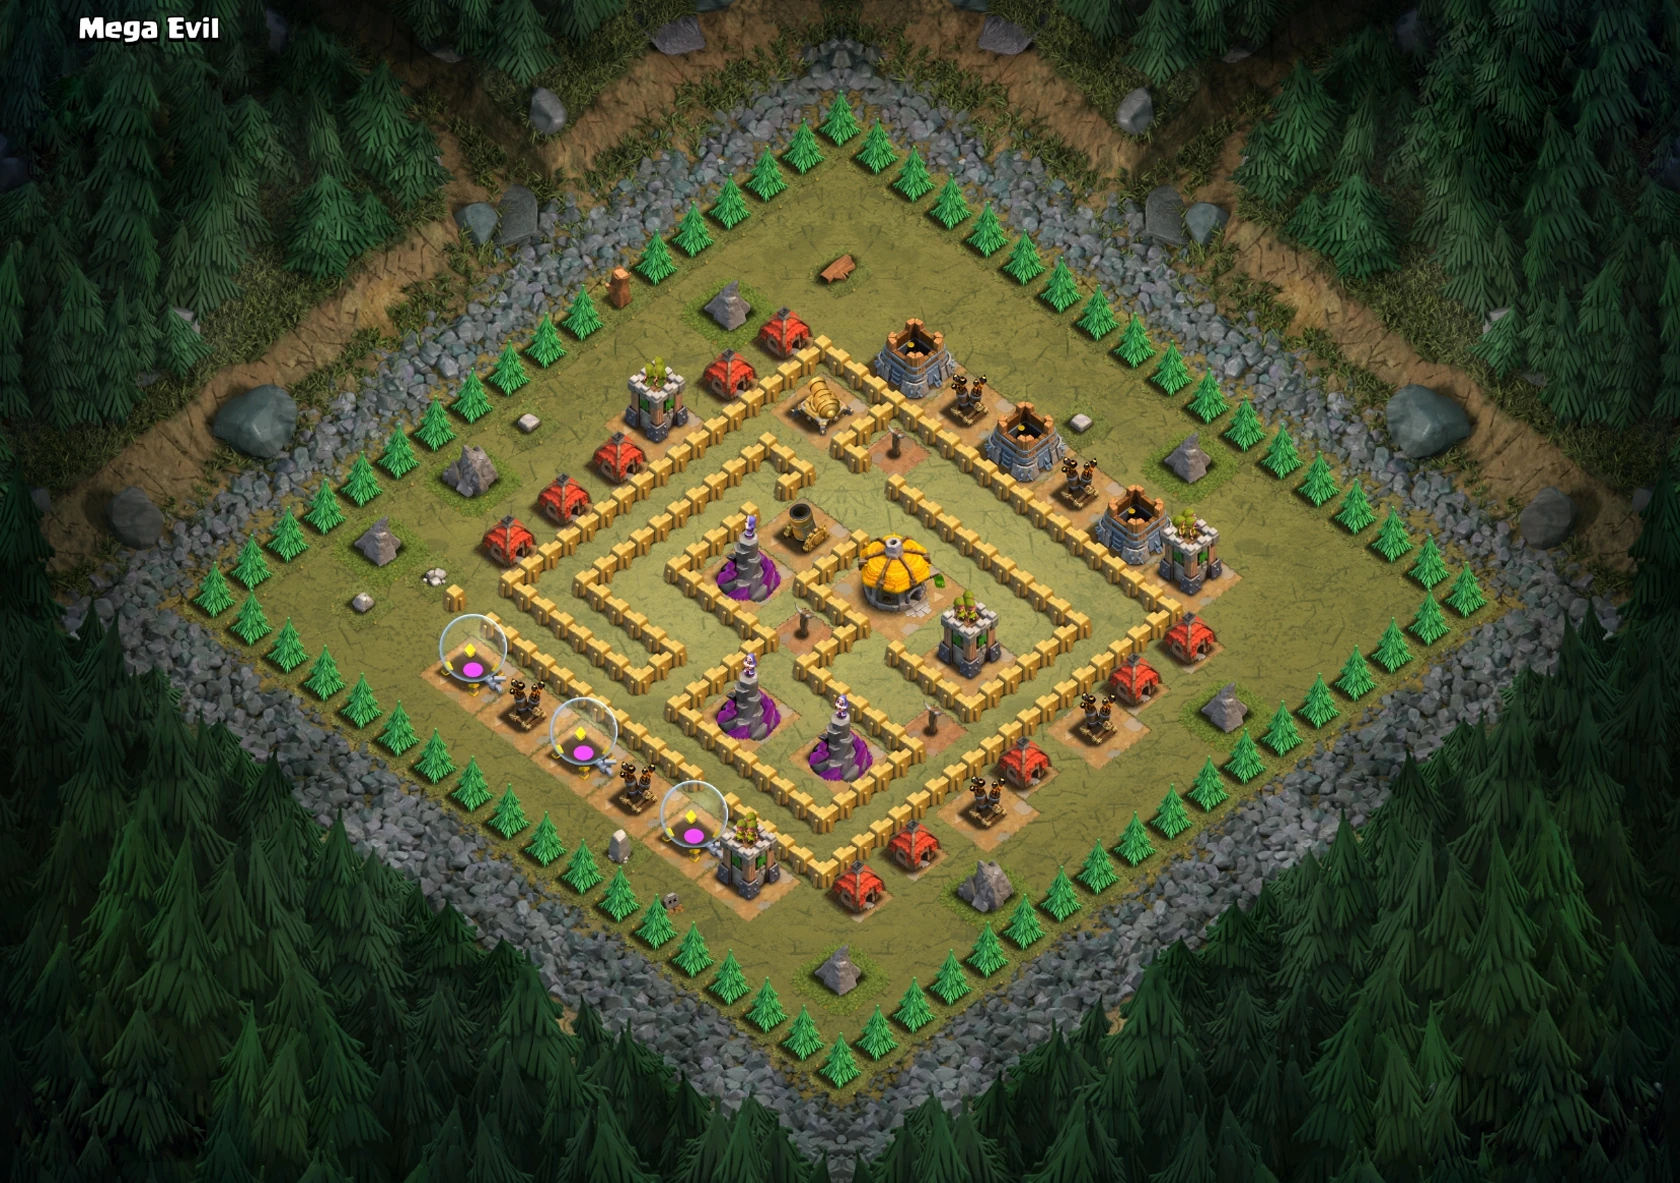
Mega Evil
Recommended Town Hall level 8.
Loot: 150,000 Gold and 150,000 Elixir.
Use a small amount of Giants and Archers (about 1-2 Giants and 3-5 Archers per Archer Tower) to destroy the three Archer Towers on the perimeter of the base. As soon as they are all destroyed, use a single Archer for each Air Defense on the perimeter; they should be out of range of all the remaining defenses.
Once all the Air Defenses are destroyed, send in a large number of Balloons against the remaining Archer Tower. Use Healing Spells to keep the group of Balloons alive as they then go on to attack the Wizard Towers. Once all the Wizard Towers are destroyed, there is nothing to stop your Balloons to finish cleaning up the rest of the base.

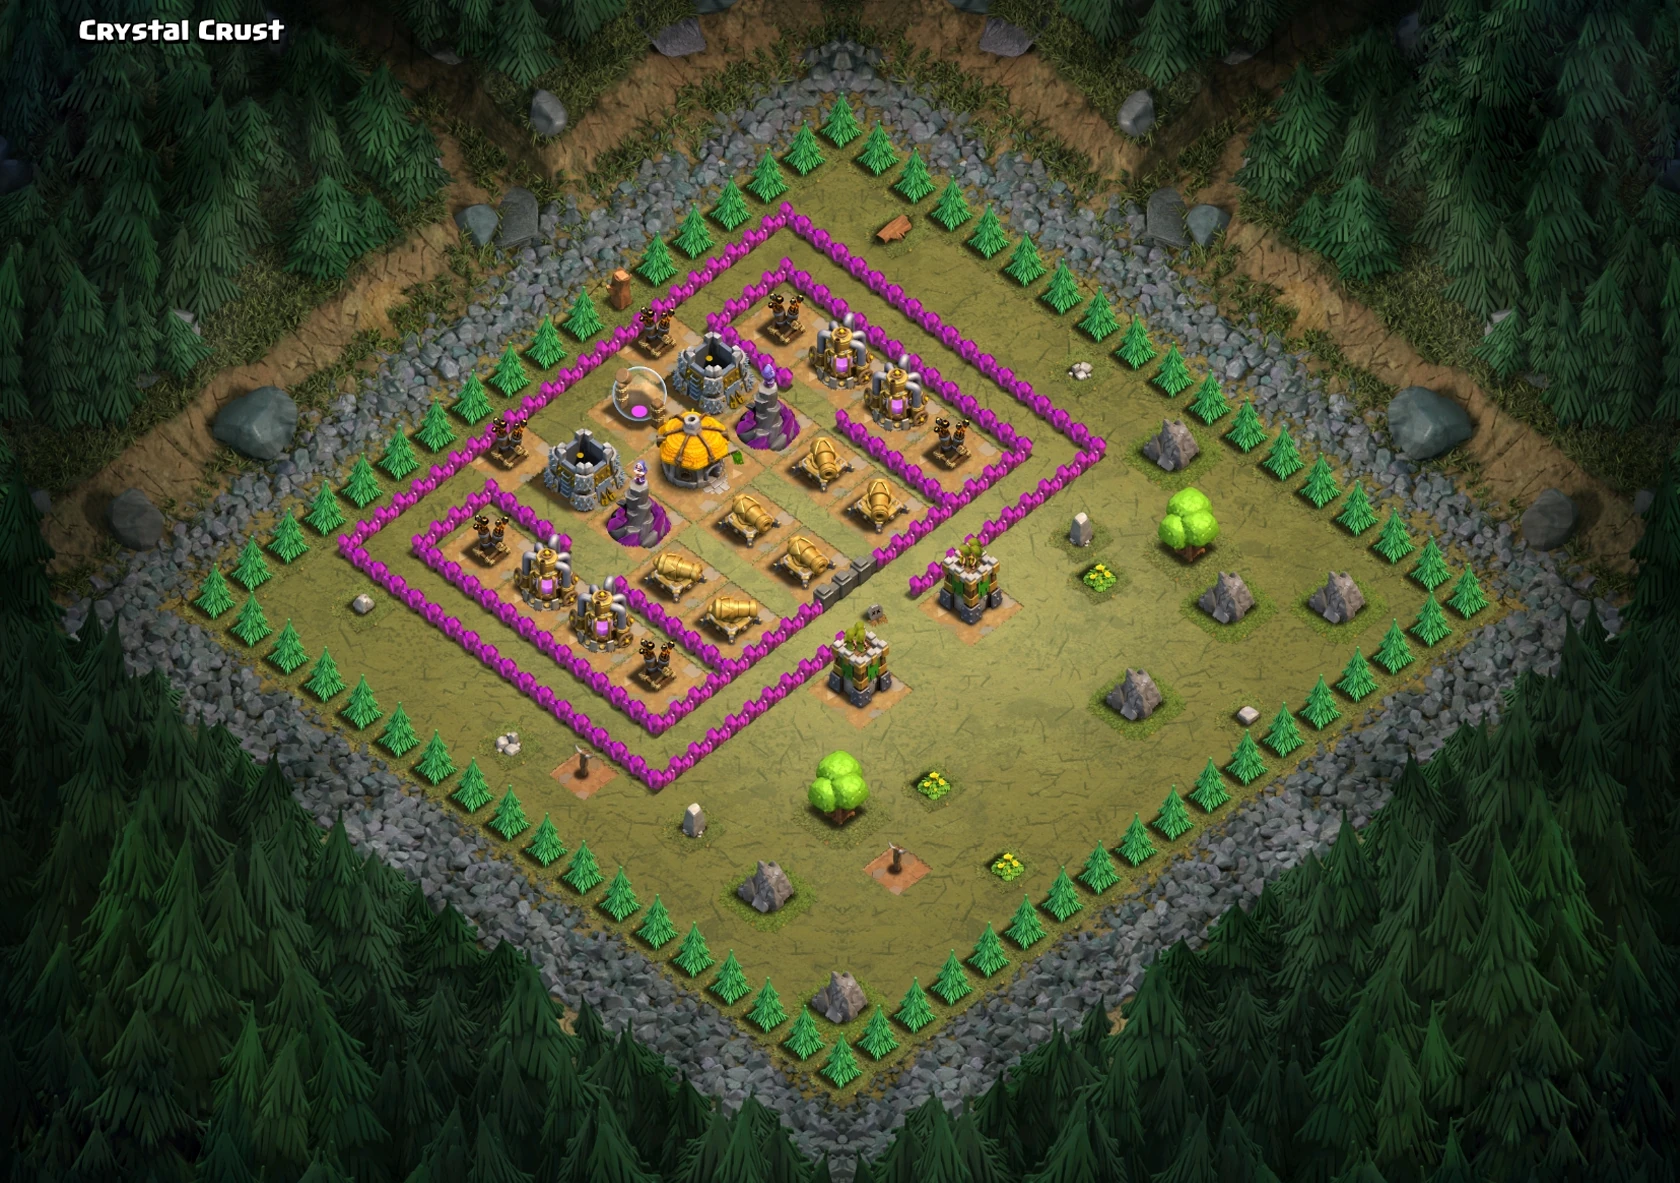
Crystal Crust
Recommended Town Hall level 9.
Loot: 200,000 Gold and 200,000 Elixir.
Deploy Giants with some Archers at the bottom. Immediately place a few Wall Breakers after both Archer Towers are down. When the Giants reach the Wizard Towers, decide if you need any Healing Spells depending on the level of Giants. (Barbarians proved to work as well, though one Healing Spell must be used).

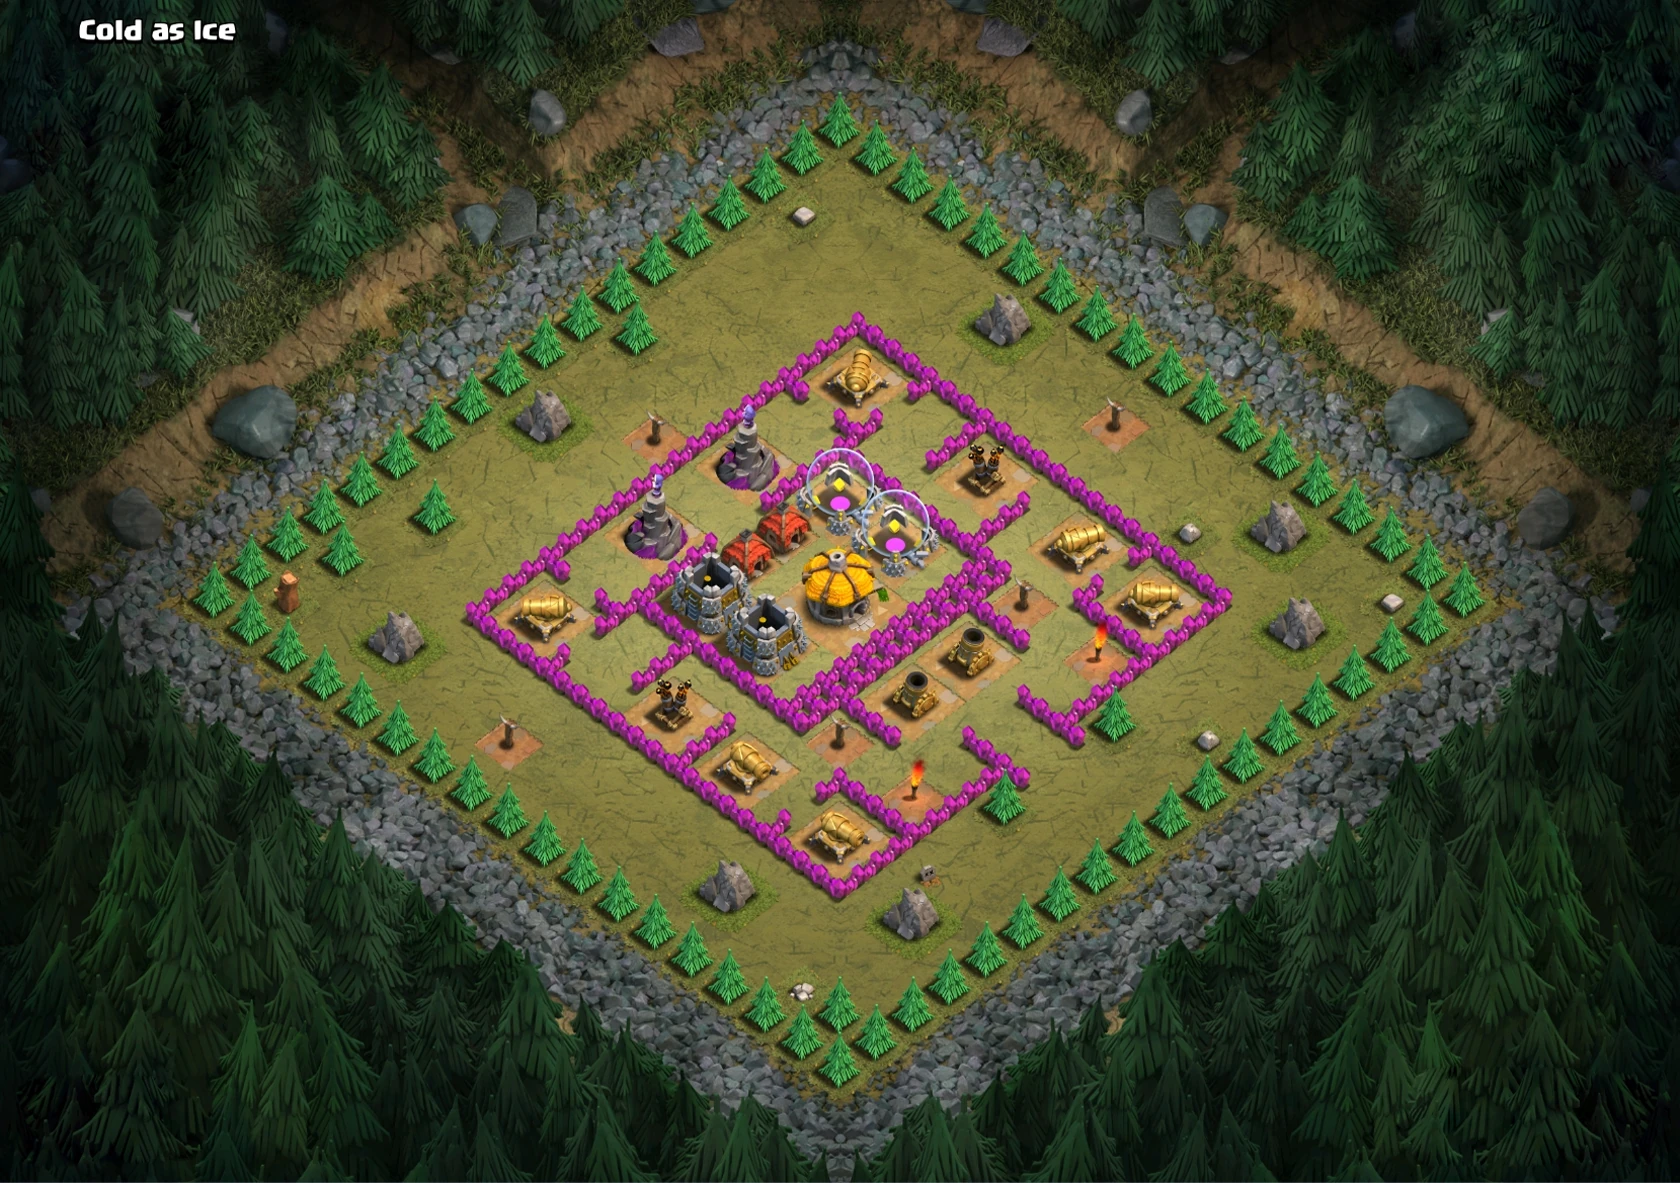
Cold as Ice
Recommended Town Hall level 9.
Loot: 250,000 Gold and 250,000 Elixir.
Use Barbarians and spread-out Archers to take down the top Wizard Towers. Next, spawn Barbarians in the bottom hole in the base to take care of both Mortars. Use the remaining Barbarians and Archers to clear the rest of the single-target defenses.
Alternatively, you can use Archers to destroy both Air Defenses, after destroying the Wizard Towerss, and deploy one Balloon.

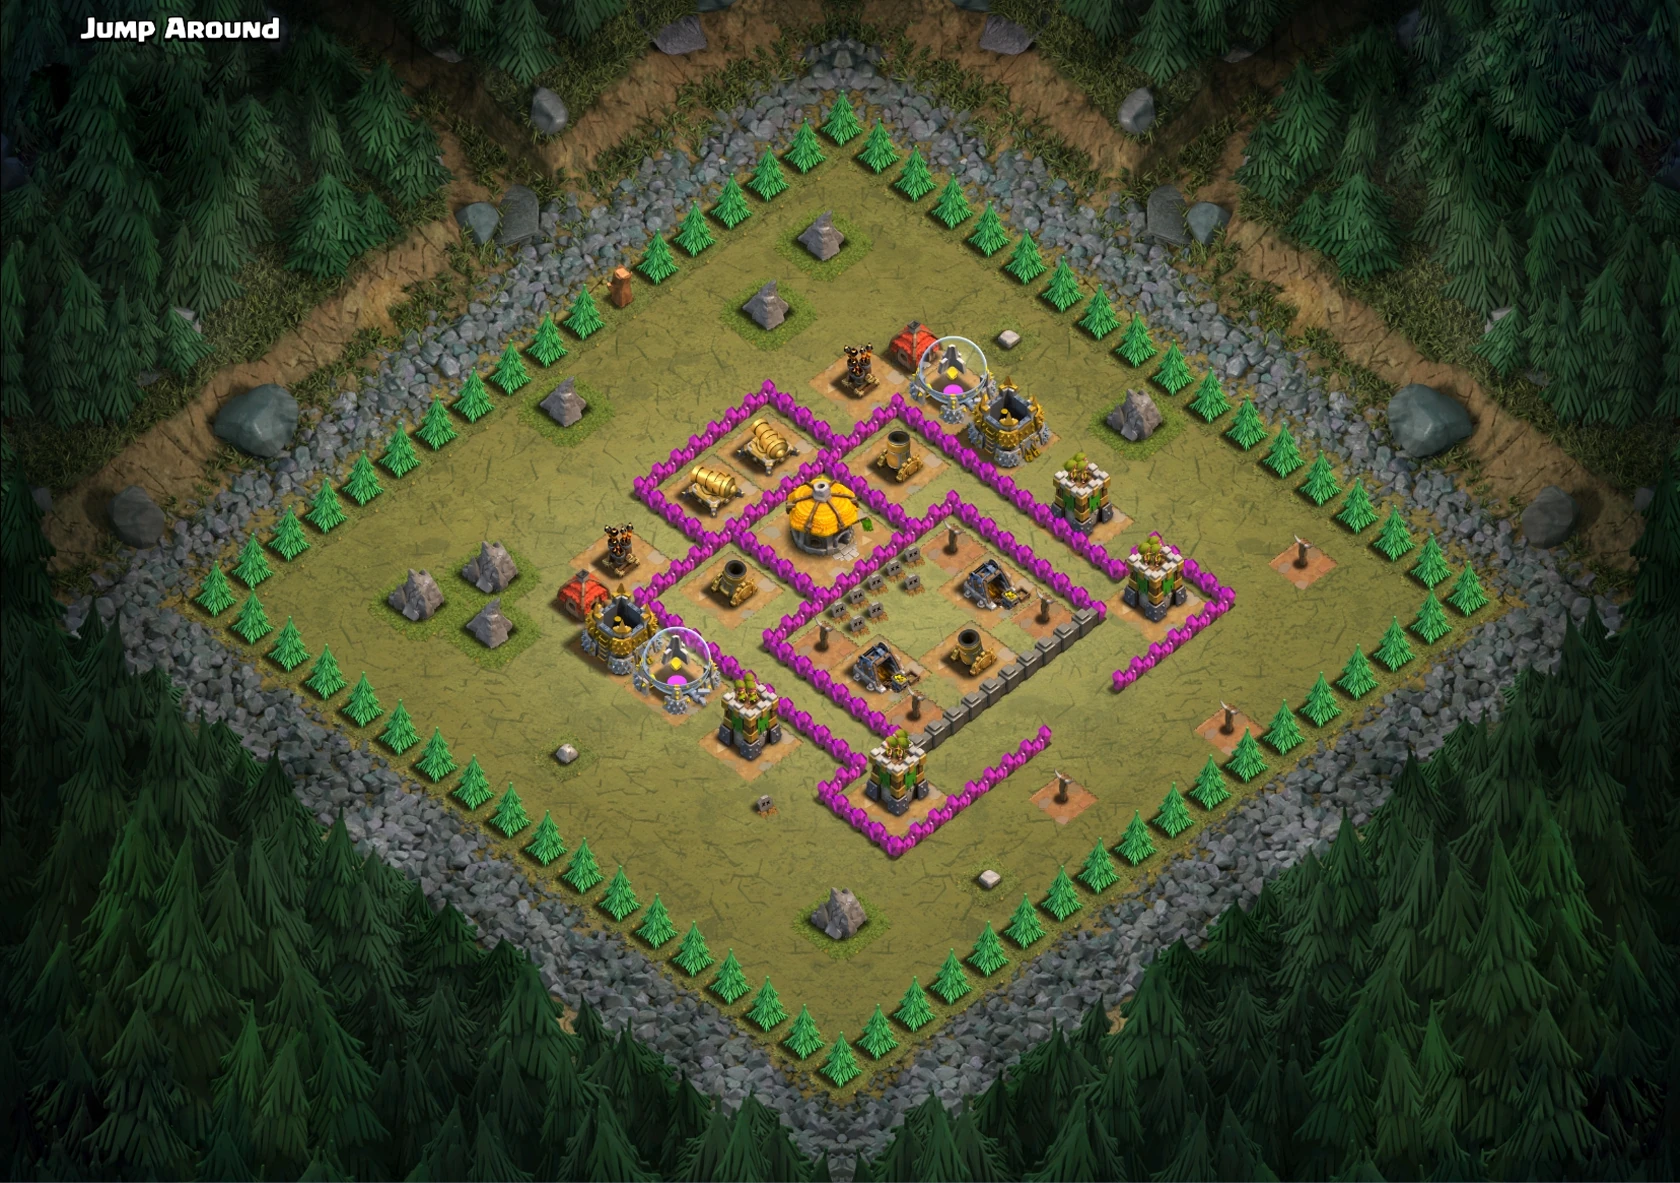
Jump Around
Recommended Town Hall level 9.
Loot: 300,000 Gold and 300,000 Elixir.
Barbarian rush at both Air Defenses (avoid the Spring Traps!) After that, place Giants/Barbarians at the Archer Towers. Then, place one Balloon to clean up the rest.

Kitchen Sink
Recommended Town Hall level 9.
Place (many) Giants at the Air Defenses and then deploy Wall Breakers. Place 2 Healers (probably 1) to heal up Giants. It should be easy for the remaining troops to achieve 3-stars.
Alternative: Deploy 5 Giants, the Barbarian King and two Wizards (in that order) at the Air Defenses. Then deploy 26 Minions spread out to distract the Archer Towers, followed immediately by one Balloon per tower. (you will need level 4 Balloons otherwise it won't work.) Then deploy one Dragon at each remaining Archer Tower. Fill the remaining camps with Balloons and sweep the Hidden Teslas on the right.
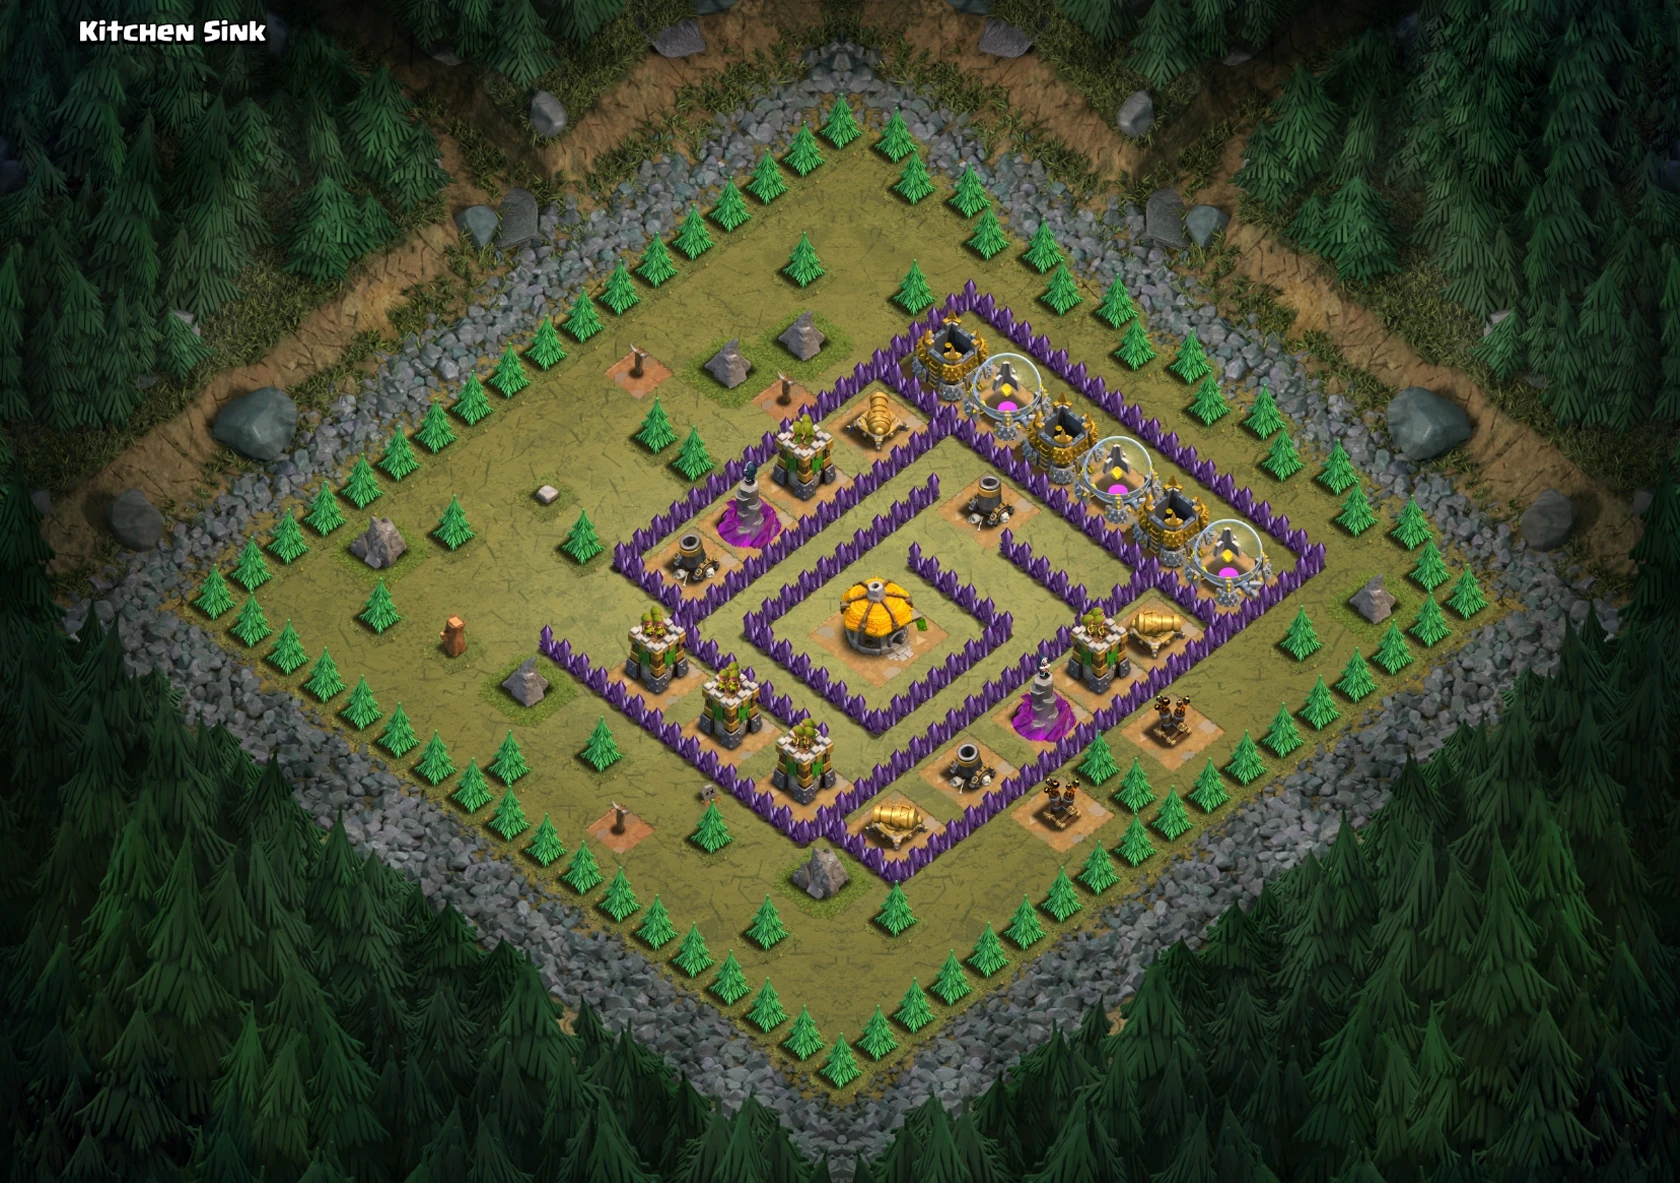

Updated: Works after March 2013 update.

NOTE: 5 Hidden Teslas have been added outside the northeast wall (March 2013 update).
Rolling Terror
Recommended Town Hall level 9.
Loot: 500,000 Gold and 500,000 Elixir.
Use 80 Archers to take out the Hidden Teslas at the bottom. Then deploy 6 Dragons at the bottom (level 1 is ok, try aiming for the Air Defenses and bring more in the Clan Castle if you can.) Immediately throw in a level 3 Rage Spell (cover both Air Defenses and the Town Hall), and you will 3-star the base with many surviving Dragons.
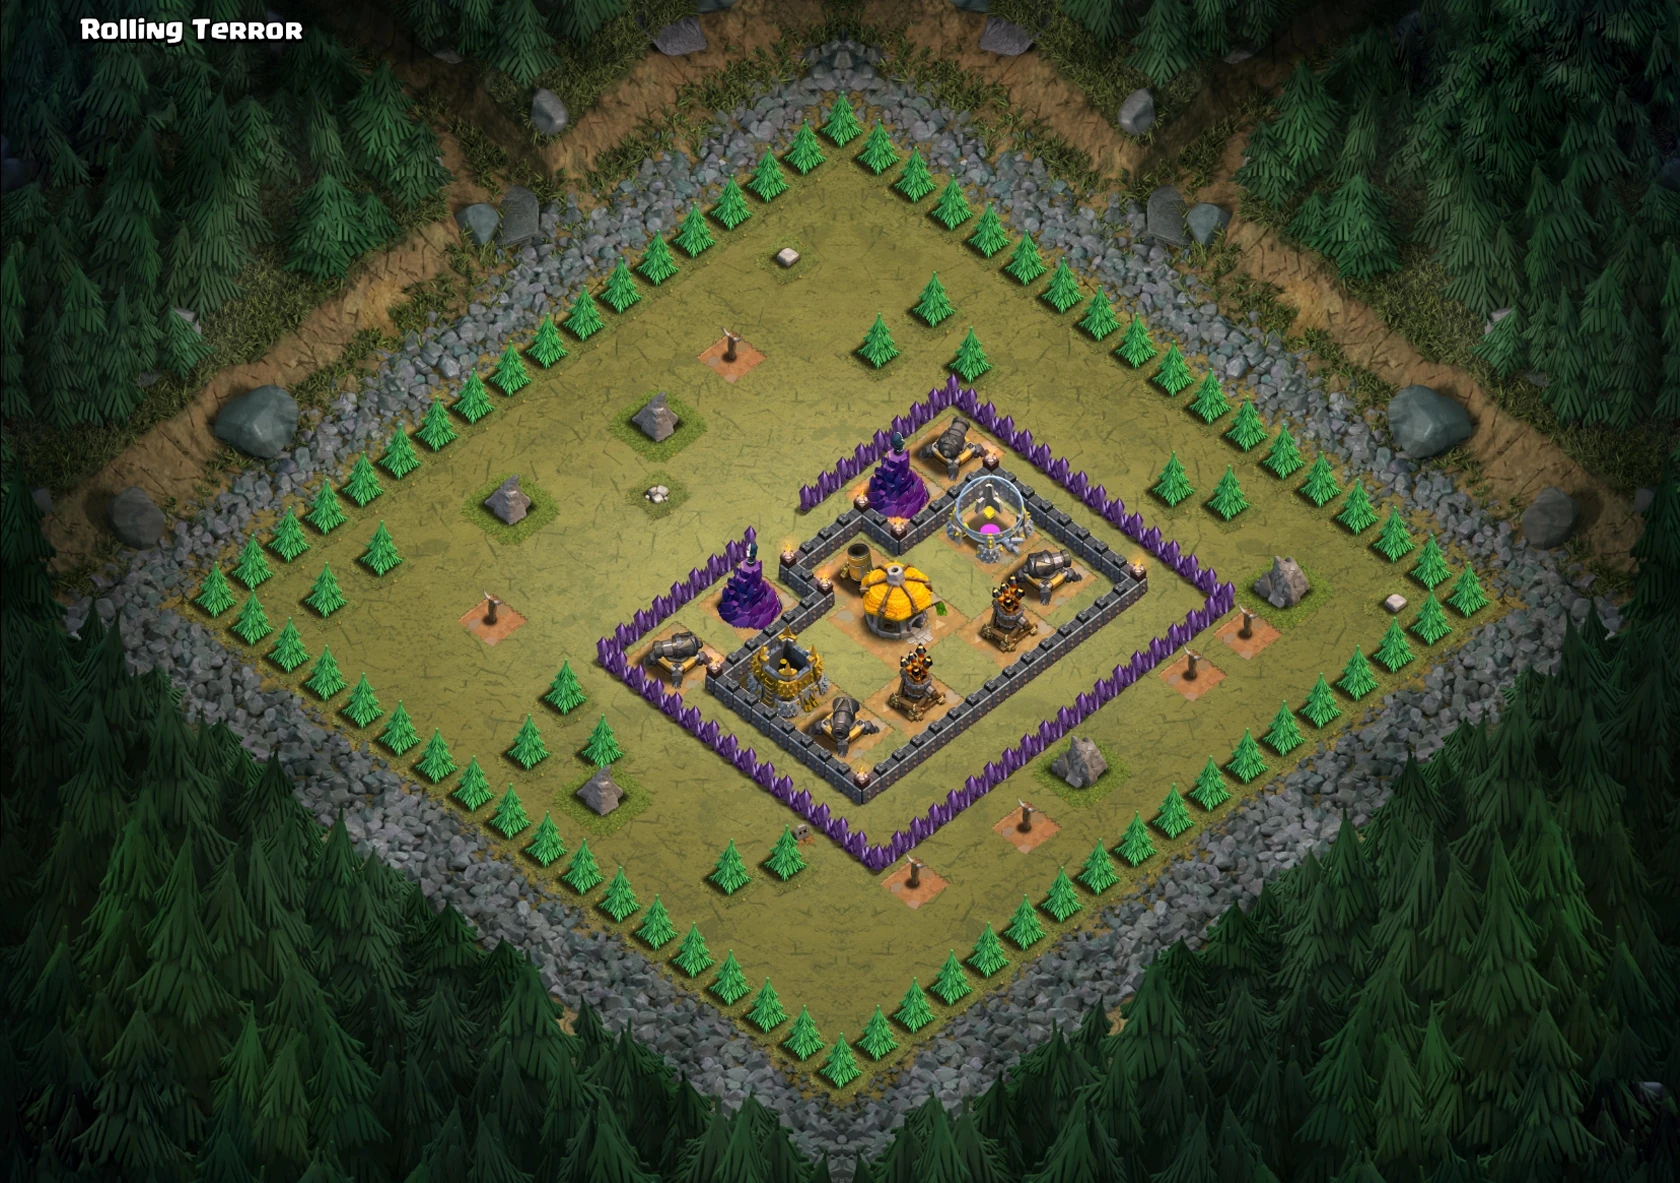
Updated: Works after March 2013 update, with TH7 troops.

New! Post March 2013 update, cheapest troop composition.

Megamansion
Recommended Town Hall level 9.
Loot: 600,000 Gold and 600,000 Elixir.
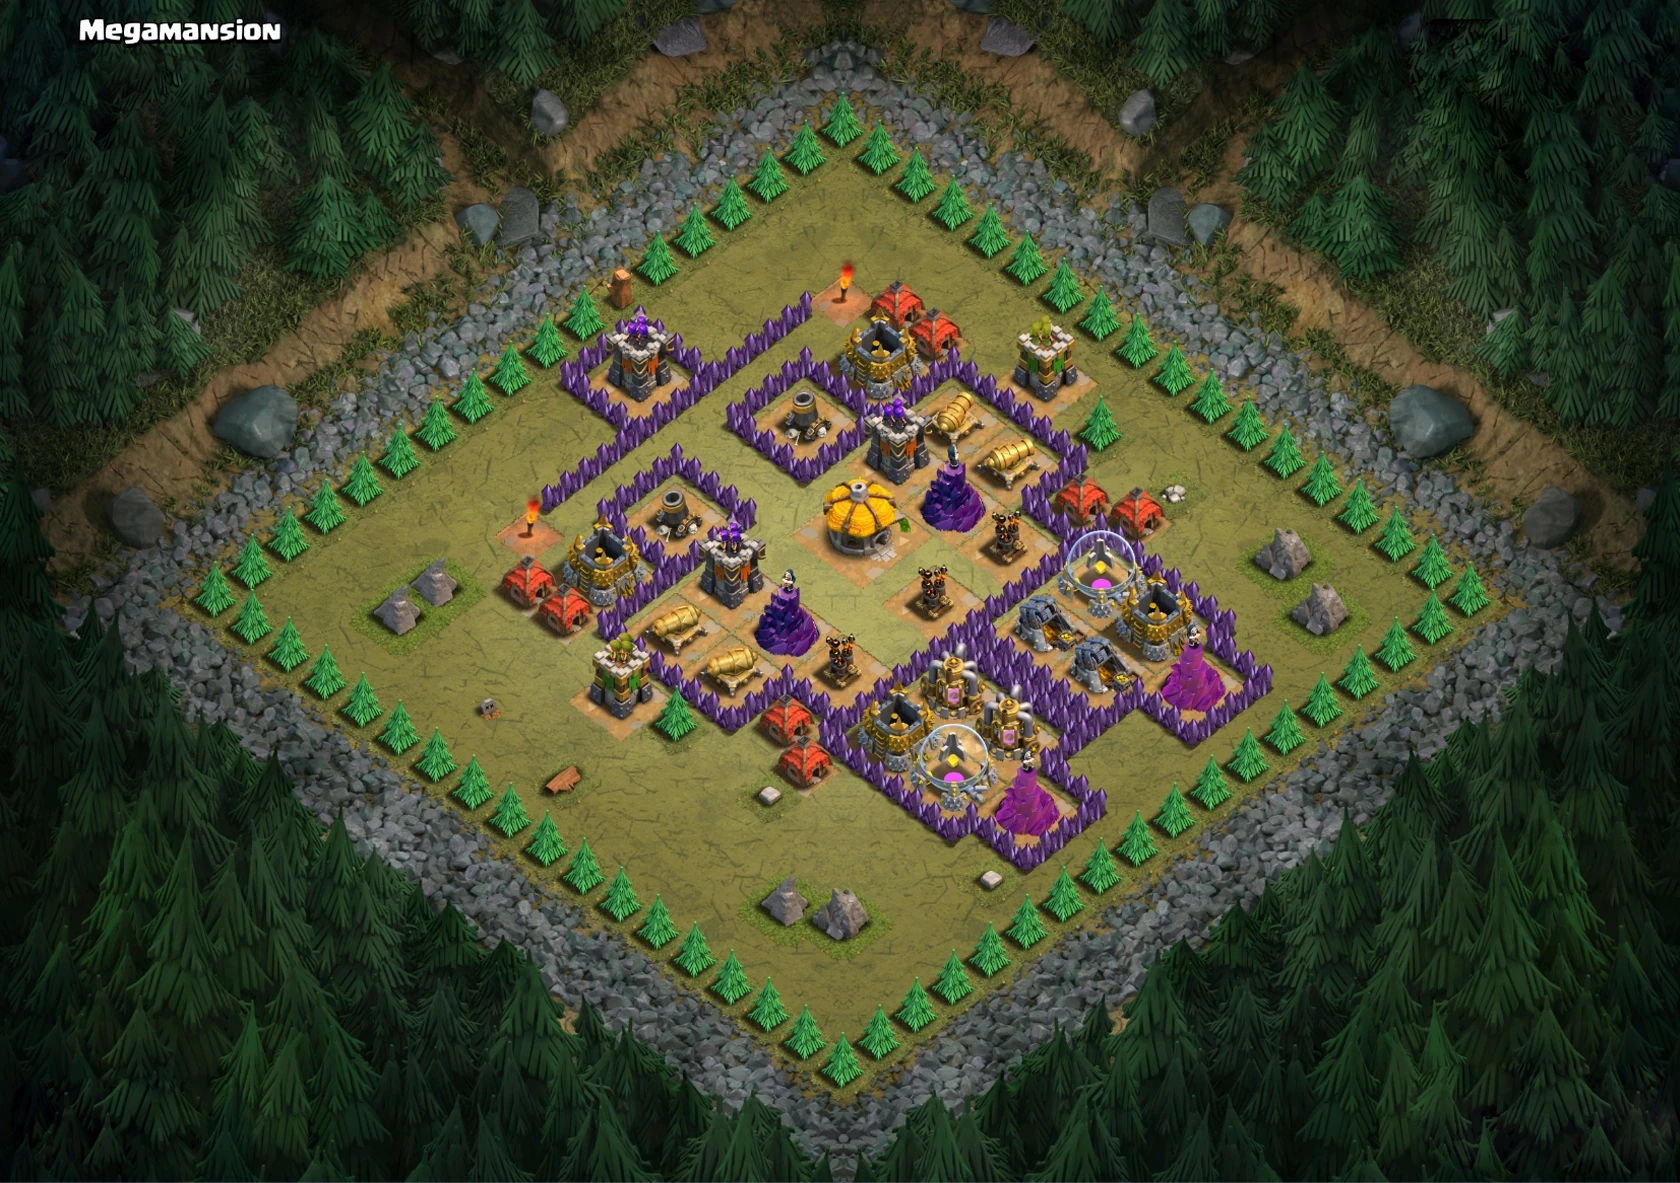
After March update:
2 Dragons (1 in Clan Castle)
27 Giants
37 Archers
4 Wall Breakers (only 2 needed)

Even cheaper setup with level 5 troops and spells: http://forums.appsgoer.com/showthread.php?3943-Clash-of-Clans-Level-48-Megamansion-(Updated)
5 Wall Breakers (only 2 needed)
2 Healing Spells (only 1 used in this video)
17 Giants
105 Archers
P.E.K.K.A's Playhouse
Recommended Town Hall level 9
Loot: 700,000 Gold and 700,000 Elixir.
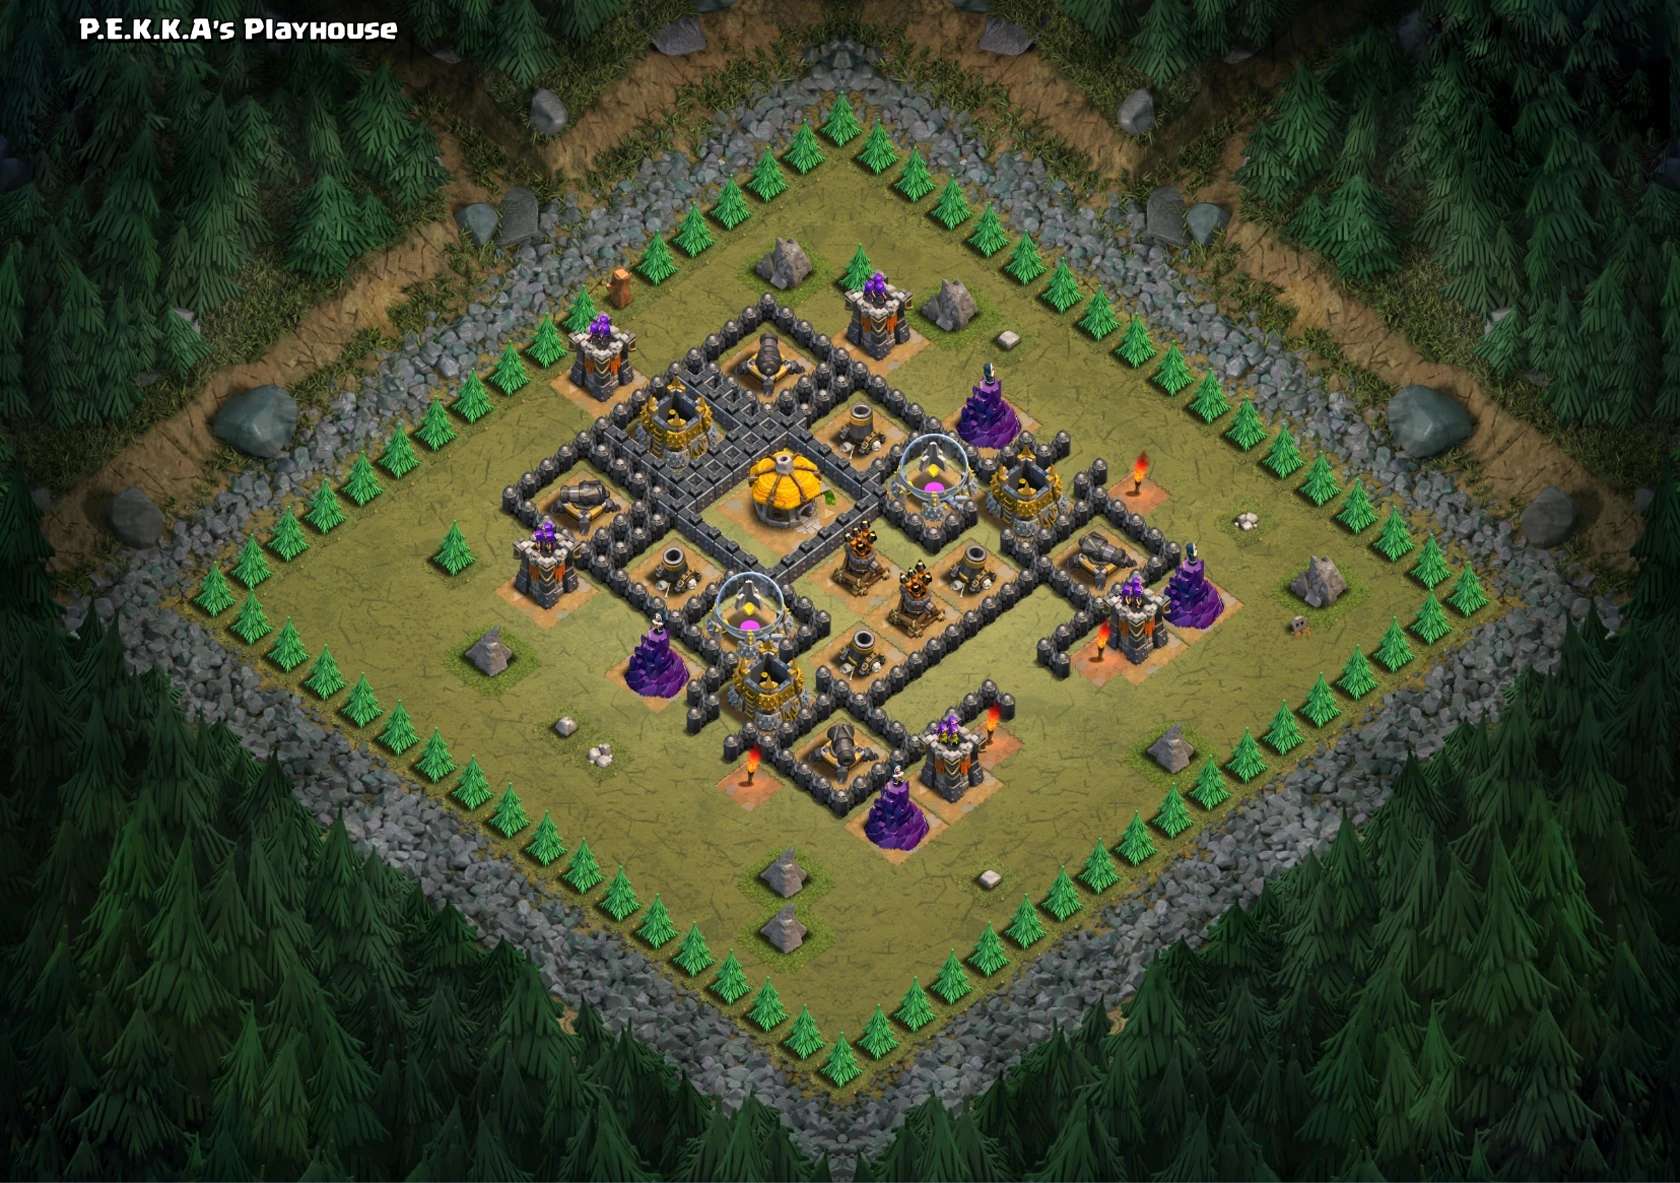
Updated map: 3 Lightning Spells, 1 Earthquake Spell, 5 Dragons, 2 Golems, Remainder Wizards. First place all three Lightning Spells between the 2 Air Defenses, then finish them off with an Earthquake Spell. Send the 2 Golems in on each side so the Archers and Wizards will target them. Send Dragons in from the top, and Wizards behind each Golem. It should be a fairly easy 3 star. There is also an Easter egg, someone called Lava Hound can be found here so keep a sharp eye out for him.

With TH7 troops, after March update:

Sherbet Towers
Recommended Town Hall level 9
Loot: 800,000 Gold and 800,000 Elixir.
Drop Archers to get the Elixir Storages at the top left and right, then place several Wall Breakers at the top center, left and middle. Swarm 10 Giants or 2 P.E.K.K.As through each hole. A Barbarian King and several Healing Spells will serve as a useful backup to the Giants/P.E.K.K.As. Once the majority of Air Defenses are gone, drop one or two Dragons to clean up the rest.
Alternate option: GoWiPE (2 Golems, 4 P.E.K.K.As, 3-4 Wall Breakers and rest Wizards. Bring along 2 Rage Spells and 1 Healing Spell.
(This use to be the last level in the single-player campaign before the 11.49.4 update on October 23rd, 2018).

Invaders
Recommended Town Hall level 9
Loot: 300,000 ![]() , 300,000
, 300,000 ![]() , and 2,000
, and 2,000 ![]() .
.
40 or more Balloons, 2 Rage Spells. Drop 1 Balloon at the front on each side of the entrance corridor, so that they trigger potential Air Bombs and make at least 1 Hidden Tesla pop up. After that, drop 30 Balloons (15 on each side) and when they are heading towards the X-Bows, drop a Rage Spells on any side. Afterward, deploy your remaining 10 Balloons (or more if you have more army space) and drop a Rage Spells on them. If you want, you can use your Barbarian King and/or Archer Queen or Grand Warden too. You might not even need them.
Cross and Bows
Recommended Town Hall level 10
Loot: 350,000 ![]() , 350,000
, 350,000 ![]() , and 2,500
, and 2,500 ![]() .
.
Use 1 Minion in each corner of those empty compartments, so that they'll trigger the Skeleton Trap located in each corner and the Hidden Teslas in the empty compartments. Then drop the remaining Minion at the top, just behind the Town hall, so that the 4 Hidden Teslas pop up. Then, as fast as possible, drop (preferably) your Barbarian King, 4 Balloons (for each Hidden Teslas) and a Dragon. When the Skeletons come close, drop a Poison Spell to get rid of them. When the 2 in-range Archer Towers are locked on the Dragon, drop 2 Balloons on each side of the Dragon, so that they'll go for those 2 Archer Towers. Then drop a Rage Spell on each side of the compartments where the Hidden Teslas are located, followed by about 10 Balloons each. Evenly deploy the remaining Balloons at the bottom Archer Towers. When the first group of Balloons go for the centered X-Bow, drop a Healing Spell right on top so the Balloons won't be taken down from many Air Bombs set around the structure.
Forest Outing
Recommended Town Hall 10.
Loot: 350,000 ![]() , 350,000
, 350,000 ![]() , and 3,000
, and 3,000 ![]() .
.
This maze level has many Spring Traps and Air Bombs.
Alternative 1: Put a non-spring able troop like the Golem or P.E.K.K.A to trigger most of the Spring Trap and use Witches or Wizards to finish the base.
Alternative 2: Use 4 Lightning Spells (and an Earthquake Spell, if necessary) in 2 of 3 Air Defenses, then deploy the Archer Queen to destroy the last, use Dragons and Balloons to finish all defenses.
Skeleton Run
Recommended Town Hall level 10.
Loot: 400,000 ![]() , 400,000
, 400,000 ![]() , and 3,500
, and 3,500 ![]() .
.
Although the map has only 4 X-Bows, there are a lot of Skeleton Traps around the map.
Deploy 4 Golems at each corner of the village, and 3 Wizards behind of each meat shield (9 Wizards at three of four corners and the Archer Queen in the last), then you can finish the Town Hall using Hog Riders and Poison Spell or Valkyries to deal with the Skeleton Traps in the middle.
Magic Practice
Recommended Town Hall 10.
Loot: 400,000 ![]() , 400,000
, 400,000 ![]() , and 4,000
, and 4,000 ![]() .
.
This level has the temporary structure Shrink Trap, it's similar to another temporary structure, Freeze Trap.
Place Barbarians or Archers around the base to trigger some or all the Shrink Traps (if you place any troop in the trap area before the Shrink Trap ends, the troop still to be affected, but placing any hero at the end of the trap will regenerate their HPs), after that you can use a Jump Spell to place ground troops inside the village, because either defense after first Walls are weak splash damages and no ground-attack defense around the Town Hall, making easy for clean all the defenses.
High Pressure
Recommended Town Hall level 10.
Loot: 450,000 ![]() , 450,000
, 450,000 ![]() , and 4,000
, and 4,000 ![]() .
.
Place 1 or 2 Golems at the right part of the village to lure the X-Bow, Wizard Tower and a Cannon. Then, place Wall Breakers to open a hole into the village. Deploy your Archer Queen to walk inside the base's gaps and trigger some of Spring Traps, use Jump Spell to enter into the middle, let your Barbarian King enter in the fight! And deploy Valkyries behind your King to finish them all.
No Flight Zone
Recommended Town Hall level 10.
Loot: 450,000 ![]() , 450,000
, 450,000 ![]() , and 4,500
, and 4,500 ![]() .
.
This level has defensive troops situated in the Goblin Castle: one level 7 Dragon, and three-level 8 Balloons.
Graduation Ceremony
Recommended Town Hall level 10.
Loot: 500,000 ![]() , 500,000
, 500,000 ![]() , and 4,500
, and 4,500 ![]() .
.
This map does not contain many traps.
Place 9 Balloons in the bottom corner and assist with a Rage Spell. Place 12 Balloons as well as your Barbarian King in the left corner, assist with a Rage Spell and activate the Barbarian King's ability when his health drops. Place another 12 Balloons in the top corner and assist with a Rage Spell. Deploy remaining Balloons and your Archer Queen in the right corner. Assist with Haste Spell.
Midnight Oil
Recommended Town Hall level 10.
Loot: 500,000 ![]() , 500,000
, 500,000 ![]() , and 5,000
, and 5,000 ![]() .
.
This level has a large amount of Air Bombs outside the Walls. Deploy one Balloon at each Cannon as well as the Archer Tower's to defuse the Air Bombs. Place Rage Spells near the Archer Towers at the top and deploy 9 Balloons at each of the two Archer Towers. Place three Balloons at the top of the map, immediately. Place your Barbarian King right above the Elixir Storage. Place remaining Balloons by Gold Storage. The name of this level may be a reference to the band Midnight Oil.
All Angle Attack
Recommended Town Hall level 11.
Loot: 550,000 ![]() , 550,000
, 550,000 ![]() , and 5,000
, and 5,000 ![]() .
.
This map has many air Skeleton Traps by the Inferno Towers. Deploy one Minion by each of the Inferno Towers to trigger as many Skeleton Traps as possible. Place a Dragon in the bottom corner to lure the Skeletons and place a Poison Spell in front of the Dragon once the Skeletons reach it. Once all of the Skeletons are dead, deploy five Dragons and 4 Balloons along the bottom three Inferno Towers. Deploy 4 Dragons in the left corner of the base. Assist with Healing Spells, Rage Spells, Freeze Spells and/or Haste Spells when necessary.
Burning Sensation
Recommended Town Hall level 11.
Loot: 550,000 ![]() , 550,000
, 550,000 ![]() , and 5,500
, and 5,500 ![]() .
.
Underground Workaround
Recommended Town Hall level 11.
Loot: 600,000 ![]() , 600,000
, 600,000 ![]() , and 5,500
, and 5,500 ![]() .
.
Teamwork Opportunity
Recommended Town Hall level 11.
Loot: 600,000 ![]() , 600,000
, 600,000 ![]() , and 6,000
, and 6,000 ![]() .
.
Bowling Alley
Recommended Town Hall level 11.
Loot: 650,000 ![]() , 650,000
, 650,000 ![]() , and 6,000
, and 6,000 ![]() .
.
Keep Your Cool
Recommended Town Hall level 11.
Loot: 650,000 ![]() , 650,000
, 650,000 ![]() , and 6,500
, and 6,500 ![]() .
.
Where Eagles Dare
Recommended Town Hall level 11.
Loot: 700,000 ![]() , 700,000
, 700,000 ![]() , and 6,500
, and 6,500 ![]() .
.
This level is very difficult. Use Balloons to get rid of the traps then use an Archer Queen and many Healers to clean up the base. Bring some Rage Spells too.
Fireworks Inc.
Recommended Town Hall level 11.
Loot: 700,000 ![]() , 700,000
, 700,000 ![]() , and 7,000
, and 7,000 ![]() .
.
Goblin Capital
Recommended Town Hall level 12.
Loot: 750,000 ![]() , 750,000
, 750,000 ![]() , and 7,000
, and 7,000 ![]() .
.
This level has defensive troops situated in the Goblin Castle. It contains 40 level 7 Goblins.
Pick Your Poison
Recommended Town Hall level 12.
Loot: 750,000 ![]() , 750,000
, 750,000 ![]() , and 7,500
, and 7,500 ![]() .
.
The Arena
Recommended Town Hall level 12.
Loot: 800,000 ![]() , 800,000
, 800,000 ![]() , and 7,500
, and 7,500 ![]() .
.
This level has defensive troops situated in a red hut similar to the one that appears in Goblin Capital. The hut contains, in order, a level 4 Bowler, a level 7 Valkyrie, a level 6 Baby Dragon, a level 4 Witch, a level 7 Dragon, a level 8 P.E.K.K.A, a level 8 Golem, and a level 3 Electro Dragon.
Paper Map
Recommended Town Hall level 12.
Loot: 800,000 ![]() , 800,000
, 800,000 ![]() , and 8,000
, and 8,000 ![]() .
.
Flagged for Traps
Recommended Town Hall level 12.
Loot: 850,000 ![]() , 850,000
, 850,000 ![]() , and 8,500
, and 8,500 ![]() .
.
Grand Avenue
Recommended Town Hall level 12.
Loot: 1,000,000 ![]() , 1,000,000
, 1,000,000 ![]() , and 10,000
, and 10,000 ![]() .
.
This level has defensive troops situated in a red hut similar to the previous ones. The hut contains three level 5 Dragons.
Besieged
Recommended Town Hall level 12.
Loot: 1,250,000 ![]() , 1,250,000
, 1,250,000 ![]() , and 12,500
, and 12,500 ![]() .
.
Dragon's Lair
Recommended Town Hall level 12.
Loot: 2,500,000 ![]() , 2,500,000
, 2,500,000 ![]() , and 25,000
, and 25,000 ![]() .
.
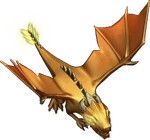
The Giant Dragon
This level has a special Dragon Cave. When units are close enough (or when the Dragon Cave is sufficiently damaged), a Giant Dragon will emerge. The Giant Dragon is much more fearsome than a regular Dragon, or even an Electro Dragon, being much stronger than them and deals much more damage than both these Dragons.
The Giant Dragon's statistics:
| Attack Type |
Movement Speed |
Attack Speed |
Range |
Damage per Second |
Damage per Attack |
Hitpoints |
|---|---|---|---|---|---|---|
| Area Splash 1 Tile Radius (Ground & Air) | 16 | 1.25 sec | 3 tiles | 1,400 | 1,750 | 32,000 |
When the Giant Dragon is defeated for the first time, players earn the "Dragon Slayer" achievement, which is worth 200 Experience and 20 Gems.
Available Loot Table
| Base Number | Base Name | Gold | Elixir | Dark Elixir | Th Level |
|---|---|---|---|---|---|
| 1 | Payback | 500 | 500 | 0 | 1 |
| 2 | Goblin Forest | 500 | 500 | 0 | 1 |
| 3 | Goblin Outpost | 1,000 | 1,500 | 0 | 2 |
| 4 | Rocky Fort | 1,000 | 1,500 | 0 | 3 |
| 5 | Goblin Gauntlet | 1,000 | 1,500 | 0 | 3 |
| 6 | Cannonball Run | 1,000 | 1,500 | 0 | 3 |
| 7 | Two Smoking Barrels | 1,500 | 2,000 | 0 | 4 |
| 8 | Gold Rush | 6,000 | 2,000 | 0 | 4 |
| 9 | Maginot Line | 4,000 | 4,000 | 0 | 4 |
| 10 | Rat Valley | 2,000 | 6,000 | 0 | 4 |
| 11 | Brute Force | 4,000 | 10,000 | 0 | 4 |
| 12 | Gobbotown | 12,000 | 2,000 | 0 | 5 |
| 13 | M is for Mortar | 8,000 | 8,000 | 0 | 5 |
| 14 | Megablaster | 8,000 | 8,000 | 0 | 5 |
| 15 | Immovable Object | 10,000 | 10,000 | 0 | 5 |
| 16 | Fort Knobs | 15,000 | 15,000 | 0 | 5 |
| 17 | Watchtower | 10,000 | 12,000 | 0 | 5 |
| 18 | Fool's Gold | 20,000 | 6,000 | 0 | 5 |
| 19 | Thoroughfare | 15,000 | 15,000 | 0 | 6 |
| 20 | Bouncy Castle | 17,000 | 17,000 | 0 | 6 |
| 21 | Fivoka | 20,000 | 20,000 | 0 | 6 |
| 22 | Gobbo Campus | 25,000 | 25,000 | 0 | 6 |
| 23 | Danny Boy | 30,000 | 30,000 | 0 | 6 |
| 24 | Ommahha Beech | 35,000 | 35,000 | 0 | 6 |
| 25 | Walls of Steel | 40,000 | 40,000 | 0 | 6 |
| 26 | Silician Defense | 45,000 | 45,000 | 0 | 6 |
| 27 | Obsidian Tower | 20,000 | 80,000 | 0 | 7 |
| 28 | Arrow Head | 60,000 | 60,000 | 0 | 7 |
| 29 | Red Carpet | 70,000 | 70,000 | 0 | 7 |
| 30 | Natural Defense | 150,000 | 2,000 | 0 | 7 |
| 31 | Steel Gauntlet | 80,000 | 80,000 | 0 | 7 |
| 32 | Queen's Gambit | 90,000 | 90,000 | 0 | 7 |
| 33 | Full Frontal | 50,000 | 140,000 | 0 | 7 |
| 34 | Chimp in Armor | 150,000 | 50,000 | 0 | 7 |
| 35 | Faulty Towers | 110,000 | 110,000 | 0 | 8 |
| 36 | Point Man | 120,000 | 120,000 | 0 | 8 |
| 37 | Triple A | 130,000 | 130,000 | 0 | 8 |
| 38 | Goblin Picnic | 2,000 | 270,000 | 0 | 8 |
| 39 | Bait 'n Switch | 140,000 | 140,000 | 0 | 8 |
| 40 | Collateral Damage | 150,000 | 150,000 | 0 | 8 |
| 41 | Choose Wisely | 150,000 | 150,000 | 0 | 8 |
| 42 | Mega Evil | 150,000 | 150,000 | 0 | 8 |
| 43 | Crystal Crust | 200,000 | 200,000 | 0 | 9 |
| 44 | Cold as Ice | 250,000 | 250,000 | 0 | 9 |
| 45 | Jump Around | 300,000 | 300,000 | 0 | 9 |
| 46 | Kitchen Sink | 400,000 | 400,000 | 0 | 9 |
| 47 | Rolling Terror | 500,000 | 500,000 | 0 | 9 |
| 48 | Megamansion | 600,000 | 600,000 | 0 | 9 |
| 49 | P.E.K.K.A.'s Playhouse | 700,000 | 700,000 | 0 | 9 |
| 50 | Sherbet Towers | 800,000 | 800,000 | 0 | 9 |
| 51 | Invaders | 300,000 | 300,000 | 2,000 | 9 |
| 52 | Cross and Bows | 350,000 | 350,000 | 2,500 | 10 |
| 53 | Forest Outing | 350,000 | 350,000 | 3,000 | 10 |
| 54 | Skeleton Run | 400,000 | 400,000 | 3,500 | 10 |
| 55 | Magic Practice | 400,000 | 400,000 | 4,000 | 10 |
| 56 | High Pressure | 450,000 | 450,000 | 4,000 | 10 |
| 57 | No Flight Zone | 450,000 | 450,000 | 4,500 | 10 |
| 58 | Graduation Ceremony | 500,000 | 500,000 | 4,500 | 10 |
| 59 | Midnight Oil | 500,000 | 500,000 | 5,000 | 10 |
| 60 | All Angle Attack | 550,000 | 550,000 | 5,000 | 11 |
| 61 | Burning Sensation | 550,000 | 550,000 | 5,500 | 11 |
| 62 | Underground Workaround | 600,000 | 600,000 | 5,500 | 11 |
| 63 | Teamwork Opportunity | 600,000 | 600,000 | 6,000 | 11 |
| 64 | Bowling Alley | 650,000 | 650,000 | 6,000 | 11 |
| 65 | Keep Your Cool | 650,000 | 650,000 | 6,500 | 11 |
| 66 | Where Eagles Dare | 700,000 | 700,000 | 6,500 | 11 |
| 67 | Fireworks Inc. | 700,000 | 700,000 | 7,000 | 11 |
| 68 | Goblin Capital | 750,000 | 750,000 | 7,000 | 12 |
| 69 | Pick Your Poison | 750,000 | 750,000 | 7,500 | 12 |
| 70 | The Arena | 800,000 | 800,000 | 7,500 | 12 |
| 71 | Paper Map | 800,000 | 800,000 | 8,000 | 12 |
| 72 | Flagged for Traps | 850,000 | 850,000 | 8,500 | 12 |
| 73 | Grand Avenue | 1,000,000 | 1,000,000 | 10,000 | 12 |
| 74 | Besieged | 1,250,000 | 1,250,000 | 12,500 | 12 |
| 75 | Dragon's Lair | 2,500,000 | 2,500,000 | 25,000 | 12 |
| Total | 23,104,500 | 23,261,000 | 167,000 |
Trivia
- Even though it is recommended to not attack Dragon's Lair until Town Hall 12, you can (with maxed Clan Castle troops), beat it, as well as all bases prior to it, at Town Hall 8.
- When Practice Mode was first released, stars earned there would count towards the "Get those Goblins!" and "Get those other Goblins" achievements and thus it was possible to get the rewards for free, without the expenses of an army.
- The same was originally true of the Builder Base tutorial - stars earned in the tutorial also formerly counted towards the Single Player Campaign achievements.
- The Sherbet Towers use to be labeled as 'Goblin King's Hideout'. However, the Sherbet Towers was later relabeled as 'Abandoned Hideout'.
- Before its relabelling, some players believed the 'Goblin King's Hideout' label referred to the Goblin that appeared in the tutorial.
- When the Skeleton Run level was initially added, it featured all Halloween obstacles up to and including the 2018 obstacle (the level was added in the October 2018 update alongside the levels past Sherbet Towers). The 2020 Winter update also added the 2019 and 2020 Halloween obstacles to the level.
- The P.E.K.K.A's Playhouse from the Single Player Campaign is an inspiration of an arena from Clash Royale.
- The name of the Two Smoking Barrel level could be a reference to a movie called Lock, Stock and Two Smoking Barrels.