(Fixed typo) Tags: Visual edit apiedit |
(Some additional copywriting) Tag: sourceedit |
||
| Line 20: | Line 20: | ||
<div style="border:4px ridge #F00; padding:5px; background-color:#FFB6C1; margin-top:6px; margin-bottom:6px; width:75px;"><h2 style="text-align:center; margin-top:0px; margin-bottom:0px; border-bottom:0px; color:#888800;">'''''[[Tier 1|<span style="color:#000;">Tier 1 Troops</span>]]'''''</h2></div> |
<div style="border:4px ridge #F00; padding:5px; background-color:#FFB6C1; margin-top:6px; margin-bottom:6px; width:75px;"><h2 style="text-align:center; margin-top:0px; margin-bottom:0px; border-bottom:0px; color:#888800;">'''''[[Tier 1|<span style="color:#000;">Tier 1 Troops</span>]]'''''</h2></div> |
||
</center> |
</center> |
||
| − | ===='''[[Barbarian]]'''[[File:Barbarian info.png|right| |
+ | ===='''[[Barbarian]]'''[[File:Barbarian info.png|right|300x150px|link=]]==== |
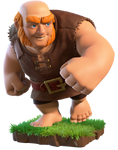
| − | Barbarians are the first unit you unlock in the [[Barracks]]. The Barbarian, due to its above average amount of HP, is a good meat shield. The Barbarian is the fastest troop to train at only 20 seconds, so they are used mostly |
+ | Barbarians are the first unit you unlock in the [[Barracks]]. The Barbarian, due to its above average amount of HP, is a good meat shield. The Barbarian is the fastest troop to train at only 20 seconds, so they are used mostly as meat shields for [[Wall Breaker]]s, [[Archer]]s, [[Goblin]]s and [[Wizard]]s. If using Barbarians in groups, keep in mind that buildings that do splash damage like [[Mortar]]s and [[Wizard Tower]]s can take them out quickly.{{Clr}} |
---- |
---- |
||
| − | ===='''[[Archer]]'''[[File:Archer info.png|right| |
+ | ===='''[[Archer]]'''[[File:Archer info.png|right|300x150px|link=]]==== |
| − | Archers are ranged combat [[troops]], meaning that they attack from a distance and shoot over walls. They are quite effective solo, but they are also very capable in groups. Archers are commonly used with [[Dragon]]s |
+ | Archers are ranged combat [[troops]], meaning that they attack from a distance and shoot over [[walls]]. They are quite effective solo, but they are also very capable in groups. Archers are commonly used with [[Dragon]]s or [[Balloon]]s, or [[Hog Rider]]s at later levels. At lower levels, some players use Archers with [[Giant]]s or [[Barbarian]]s because they, if deployed first, will take on all defensive fire while Archers can shoot behind them. Archers can only shoot at a distance of 3.5 tiles, though, so bear that in mind.{{Clr}} |
---- |
---- |
||
| − | ===='''[[Goblin]]'''[[File:Goblin info.png|right| |
+ | ===='''[[Goblin]]'''[[File:Goblin info.png|right|300x150px|link=]]==== |
| − | Goblins are one of the fastest troops in the game and are currently the only troop whose favorite targets are resources. Goblins are mostly used to farm resources; when farming you will go in with [[Army Camp]]s full of Goblins along with a small number of [[Wall Breaker]]s. Especially for lower level players, Goblins are more suitable for farming than for trophy hunting. Goblins, like [[Giant]]s |
+ | Goblins are one of the fastest [[troops]] in the game and are currently the only troop whose favorite targets are [[resources]]. Goblins are mostly used to farm resources; when farming you will go in with [[Army Camp]]s full of Goblins along with a small number of [[Wall Breaker]]s. Especially for lower level players, Goblins are more suitable for farming than for trophy hunting. Goblins, like [[Giant]]s and other troops that have a particular favorite target, will not attack defending [[Clan Castle]] troops unless all of its favorite targets have been destroyed.{{Clr}} |
---- |
---- |
||
| Line 33: | Line 33: | ||
<div style="border:4px ridge #00F; padding:5px; background-color:#87ceeb; margin-top:6px; margin-bottom:6px; width:75px;"><h2 style="text-align:center; margin-top:0px; margin-bottom:0px; border-bottom:0px; color:#888800;">'''''[[Tier 2|<span style="color:#000;">Tier 2 Troops</span>]]'''''</h2></div> |
<div style="border:4px ridge #00F; padding:5px; background-color:#87ceeb; margin-top:6px; margin-bottom:6px; width:75px;"><h2 style="text-align:center; margin-top:0px; margin-bottom:0px; border-bottom:0px; color:#888800;">'''''[[Tier 2|<span style="color:#000;">Tier 2 Troops</span>]]'''''</h2></div> |
||
</center> |
</center> |
||
| − | ===='''[[Giant]]'''[[File:Giant info.png|right| |
+ | ===='''[[Giant]]'''[[File:Giant info.png|right|300x150px|link=]]==== |
| − | Giants are the first unit in the game whose AI targets defenses first. Giants are tank-class units who have high amounts of HP, but |
+ | Giants are the first unit in the game whose AI targets [[Defensive Buildings|defenses]] first. Giants are tank-class units who have high amounts of HP, but low DPS. As such, they make good meat shields. They are commonly used to draw fire away from other crucial units such as [[Wall Breaker]]s, [[Archer]]s and the like. The only downside to Giants is their poor DPS. Although Giants attack defenses first, they will not fight back against [[Clan Castle]] troops until '''all''' other defenses are taken out.{{Clr}} |
---- |
---- |
||
| − | ===='''[[Wall Breaker]]'''[[File:Wall Breaker info.png|right| |
+ | ===='''[[Wall Breaker]]'''[[File:Wall Breaker info.png|right|300x150px|link=]]==== |
| − | Wall Breakers are only used to break through [[Walls]]. Wall Breakers will deal 40x more damage to walls so they are the perfect troop to break through [[Walls]]. Wall Breakers are usually deployed after [[Giant]]s or other high-HP troops that are drawing fire from nearby defenses. {{Clr}} |
+ | Wall Breakers are only used to break through [[Walls]]. Wall Breakers will deal 40x more damage to walls so they are the perfect troop to break through [[Walls]]. Wall Breakers are usually deployed after [[Giant]]s or other high-HP [[troops]] that are drawing fire from nearby defenses. {{Clr}} |
---- |
---- |
||
| − | ===='''[[Balloon]]'''[[File:Balloon info.png|right| |
+ | ===='''[[Balloon]]'''[[File:Balloon info.png|right|300x150px|link=]]==== |
| − | Balloons are the first flying unit unlocked in the [[Barracks]] and deal area splash damage. When their HP reaches zero, they will |
+ | Balloons are the first flying unit unlocked in the [[Barracks]] and deal area splash damage. When their HP reaches zero, they will crash into the ground and deal a small amount of extra splash damage. In the [[Single Player Campaign]], if you take out all of the air defenses, a single Balloon can destroy the rest of the village and achieve 3 stars. Balloons, like [[Giant]]s, target defensive structures first. Avoiding [[Wizard Tower]]s is a good idea for Balloons (especially levels 1-4), due to how they clump together.{{Clr}} |
---- |
---- |
||
| − | ===='''[[Wizard]]'''[[File:Wizard info.png|right| |
+ | ===='''[[Wizard]]'''[[File:Wizard info.png|right|300x150px|link=]]==== |
| − | Wizards are used |
+ | Wizards are used similarly to Archers as backup troops, but are generally superior (though more costly and time-consuming to train). Wizards have very high damage per second but low HP compared to their housing space and training cost. Wizards, like [[Archer]]s, can fire over [[Walls]]. Lower level players have no need to use Wizards as they will usually just perish in battle quickly, but still get and upgrade them for the future when you go higher. Once they reach level 4, they are extremely useful. {{Clr}} |
---- |
---- |
||
| Line 49: | Line 49: | ||
<div style="border:4px ridge #FF0; padding:5px; background-color:#FFFACD; margin-top:6px; margin-bottom:6px; width:75px;"><h2 style="text-align:center; margin-top:0px; margin-bottom:0px; border-bottom:0px; color:#888800;">'''''[[Tier 3|<span style="color:#000;">Tier 3 Troops</span>]]'''''</h2></div> |
<div style="border:4px ridge #FF0; padding:5px; background-color:#FFFACD; margin-top:6px; margin-bottom:6px; width:75px;"><h2 style="text-align:center; margin-top:0px; margin-bottom:0px; border-bottom:0px; color:#888800;">'''''[[Tier 3|<span style="color:#000;">Tier 3 Troops</span>]]'''''</h2></div> |
||
</center> |
</center> |
||
| − | ===='''[[Healer]]'''[[File:Healer info.png|right| |
+ | ===='''[[Healer]]'''[[File:Healer info.png|right|300x150px|link=]]==== |
| − | The Healer just does that: |
+ | The Healer just does that: heal. If you deploy her she will heal [[troops]] that take damage from defenses and can keep [[Giant]]s alive for a long time. When using a Healer, make sure you destroy as many [[Air Defense]]s first as you can. If she is in range of an [[Air Defense]], she will be killed in a matter of seconds. Also, other defensive buildings such as [[Archer Tower]]s or [[Wizard Tower]]s may target the Healer.{{Clr}} |
---- |
---- |
||
| − | ===='''[[Dragon]]'''[[File:Dragon info.png|right| |
+ | ===='''[[Dragon]]'''[[File:Dragon info.png|right|300x150px|link=]]==== |
| − | Dragons are a flying unit unlocked |
+ | Dragons are a [[:Category:Air Troops|flying unit]] unlocked in the level 9 [[Barracks]]. Dragons are one of the strongest troops, with high HP and high DPS. They also deal small area splash damage (although this splash damage component is very powerful on defense versus a large number of [[Tier 1|Tier 1 troops]]). 10 Dragons will usually destroy a full TH7 village in about a minute and a half. Dragons are often paired up with [[Rage Spell]]s to ensure the win.{{Clr}} |
---- |
---- |
||
| − | ===='''[[P.E.K.K.A]]'''[[File:P.E.K.K.A info.png|right| |
+ | ===='''[[P.E.K.K.A]]'''[[File:P.E.K.K.A info.png|right|300x150px|link=]]==== |
| − | + | P.E.K.K.A is the last troop unlocked in the [[Barracks]] and has the most HP of any of the Elixir-based [[troops]]. She receives 2x damage from [[Hidden Tesla]]s, so it is advised to be cautious when attacking players with potentially high level [[Hidden Tesla]]s. {{Clr}} |
|
<div style="border:4px ridge #000000; padding:5px; background-color:#CCCCCC; margin-top:6px; margin-bottom:6px; color:#000000;"><h2 style="text-align:center; margin-top:0px; margin-bottom:0px; border-bottom:0px;">{{Res|RES=Dark Elixir|SIZE=20}} '''''[[Resources#Dark Elixir|<span style="color:#000000;">Dark Elixir</span>]] [[Dark Elixir Troops|<span style="color:#000000;">Troops</span>]]''''' {{Res|RES=Dark Elixir|SIZE=20}}</h2></div> |
<div style="border:4px ridge #000000; padding:5px; background-color:#CCCCCC; margin-top:6px; margin-bottom:6px; color:#000000;"><h2 style="text-align:center; margin-top:0px; margin-bottom:0px; border-bottom:0px;">{{Res|RES=Dark Elixir|SIZE=20}} '''''[[Resources#Dark Elixir|<span style="color:#000000;">Dark Elixir</span>]] [[Dark Elixir Troops|<span style="color:#000000;">Troops</span>]]''''' {{Res|RES=Dark Elixir|SIZE=20}}</h2></div> |
||
| − | ===='''[[Minion]]'''[[File:Minion info.png|right| |
+ | ===='''[[Minion]]'''[[File:Minion info.png|right|300x150px|link=]]==== |
| − | Minions are the first [[Dark Elixir Troops|dark elixir troop]] unlocked in the [[Dark Barracks]]. The Minion is a flying unit that attacks by |
+ | Minions are the first [[Dark Elixir Troops|dark elixir troop]] unlocked in the [[Dark Barracks]]. The Minion is a [[:Category:Air Troops|flying unit]] that attacks by spitting blobs of [[Resources#Dark Elixir|Dark Elixir]]. It is the one of the two fastest troops in the game, along with the [[Goblin]]. The Minion has low hit points compared to other [[Dark Elixir Troops|dark elixir troops]]. Minions are inexpensive compared to the other [[Dark Elixir Troops|dark elixir troops]], and only take 45 seconds to train.{{Clr}} |
---- |
---- |
||
| − | ===='''[[Hog Rider]]'''[[File:Hog Rider info.png|right| |
+ | ===='''[[Hog Rider]]'''[[File:Hog Rider info.png|right|300x150px|link=]]==== |
| − | Hog Riders are the only [[:Category:Ground Troops|ground troop]] in the game that can jump over [[Walls]] without the [[Jump Spell]]. The Hog Rider has a relatively cheap training cost compared to other Dark Elixir troops, taking only at 65 [[Resources#Dark Elixir|Dark Elixir]] at max level. It takes two minutes to train the Hog Rider, and they target defenses first, similar to [[Giant]]s.{{Clr}} |
+ | Hog Riders are the only [[:Category:Ground Troops|ground troop]] in the game that can jump over [[Walls]] without the [[Jump Spell]]. The Hog Rider has a relatively cheap training cost compared to most other [[Dark Elixir Troops|dark elixir troops]], taking only at 65 [[Resources#Dark Elixir|Dark Elixir]] at max level. It takes two minutes to train the Hog Rider, and they target defenses first, similar to [[Giant]]s.{{Clr}} |
---- |
---- |
||
| − | ===='''[[Valkyrie]]'''[[File:Valkyrie info.png|right| |
+ | ===='''[[Valkyrie]]'''[[File:Valkyrie info.png|right|300x150px|link=]]==== |
| − | Valkyries are |
+ | Valkyries are hardy warriors with a double-bladed axe. Valkyries, when used in groups, will destroy most anything in seconds. They are mainly used to destroy villages and get 3 stars, though it doesn't happen very often. Valkyries do splash damage with their axes, so they are very effective in taking out [[Clan Castle]] troops and are used in [[Clan Castle]]s defensively to take out infantries, though they are weak to large number of ranged enemy troops such as [[Archer]]s. Their whirlwind attack can damage multiple buildings at once, and Valkyries will automatically place themselves where they are in range of multiple buildings if possible.{{Clr}} |
---- |
---- |
||
| − | ===='''[[Golem]]'''[[File:Golem info.png|right| |
+ | ===='''[[Golem]]'''[[File:Golem info.png|right|300x150px|link=]]==== |
| − | Golems are large, |
+ | Golems are large, rocklike creatures with extremely high hit points. They are used just like [[Giant]]s - to absorb fire away from other [[troops]]. The Golem, when killed, will not just perish. Instead, it will split into two troops which are called [[Golem/Golemite|Golemites]]. Golemites will have 1/5 of the Golem's base hit points and damage per second.{{Clr}} |
---- |
---- |
||
| − | ===='''[[Witch]]'''[[File:Witch info.png|right| |
+ | ===='''[[Witch]]'''[[File:Witch info.png|right|300x150px|link=]]==== |
| − | The Witch is a powerful troop that can only be trained with Dark Elixir in the level 5 [[Dark Barracks]]. When used, |
+ | The Witch is a powerful troop that can only be trained with Dark Elixir in the level 5 [[Dark Barracks]]. When used, she periodically summons dead troops that appear as [[Witch/Skeleton|Skeletons]]. In battle, Witches should be used with a meat shield, such as [[Giant]]s, [[Golem]]s or other troops with high HP, as they have reasonably low hit points. {{Clr}} |
---- |
---- |
||
| − | ===='''[[Lava Hound]]'''[[File:Lava Hound info.png|right| |
+ | ===='''[[Lava Hound]]'''[[File:Lava Hound info.png|right|300x150px|link=]]==== |
| − | The Lava Hound is an air |
+ | The Lava Hound is an [[:Category:Air Troops|air unit]] with the highest HP of any troop, but extremely low DPS for their housing space. They are used to absorb fire from anti-air defenses, and its own attack prioritizes [[Air Defense]]s specifically. When killed, the Lava Hound will split into multiple [[Lava Hound#Lava Pup|Lava Pup]]s, the number dependent on the level of the [[Lava Hound]], starting from 8 at level 1 to a maximum of 12 at level 3. Lava Pups are similar to [[Minion]]s, though they have less damage per second, fewer hitpoints and shorter range. Note that like [[Balloon]]s, Lava Hounds cannot attack other [[:Category:Air Troops|air units]] (although [[Lava Hound#Lava Pup|Lava Pups]] can).{{Clr}} |
<div style="border:4px ridge #880000; padding:5px; background-color:#FFCCCC; margin-top:6px; margin-bottom:6px;"><h2 style="text-align:center; margin-top:0px; margin-bottom:0px; border-bottom:0px;">{{Res|RES=Dark Elixir|SIZE=20}} '''''[[Resources#Dark Elixir|<span style="color:#FF0000;">Heroes</span>]]''''' {{Res|RES=Dark Elixir|SIZE=20}}</h2></div> |
<div style="border:4px ridge #880000; padding:5px; background-color:#FFCCCC; margin-top:6px; margin-bottom:6px;"><h2 style="text-align:center; margin-top:0px; margin-bottom:0px; border-bottom:0px;">{{Res|RES=Dark Elixir|SIZE=20}} '''''[[Resources#Dark Elixir|<span style="color:#FF0000;">Heroes</span>]]''''' {{Res|RES=Dark Elixir|SIZE=20}}</h2></div> |
||
| − | ===='''[[Barbarian King]]'''[[File:Barbarian King info.png|right| |
+ | ===='''[[Barbarian King]]'''[[File:Barbarian King info.png|right|300x150px|link=]]==== |
| − | The Barbarian King is the toughest of [[Barbarian]]s. He can be upgraded to level 40 and as he is upgraded, his HP and DPS increase. He can be used to defend your base, or to attack with your army. |
+ | The Barbarian King is the toughest of [[Barbarian]]s. He can be upgraded to level 40 and as he is upgraded, his HP and DPS increase. He can be used to defend your base, or to attack with your army. The Barbarian King cannot be killed like other troops, as he is immortal; however, he will need to sleep to regenerate when he is damaged during a battle. Note that while sleeping (or being upgraded) the Barbarian King is unable to defend or attack.{{Clr}} |
---- |
---- |
||
| − | ===='''[[Archer Queen]]'''[[File:Archer Queen info.png|right| |
+ | ===='''[[Archer Queen]]'''[[File:Archer Queen info.png|right|300x150px|link=]]==== |
| − | The Archer Queen is the second hero available at level 9 [[Town Hall]]. It costs 40,000 Dark Elixir to summon her. The Archer Queen can shoot over walls and should be placed so she isn't immediately in the line of fire, so use a meat shield for full advantage. |
+ | The Archer Queen is the second hero available at level 9 [[Town Hall]]. It costs 40,000 [[Resources#Dark Elixir|Dark Elixir]] to summon her. The Archer Queen can shoot over walls and should be placed so she isn't immediately in the line of fire, so use a meat shield for full advantage. She should be upgraded if possible, as she can shoot over walls with a high DPS (damage per second). The Archer Queen's range (5 tiles) is longer than any other ranged [[Troops|troop]].{{Clr}} |
<div style="border:4px ridge #888800; padding:5px; background-color:#FFFFCC; margin-top:6px; margin-bottom:6px;"><h2 style="text-align:center; margin-top:0px; margin-bottom:0px; border-bottom:0px; color:#888800;">{{Res|RES=Elixir|SIZE=20}} '''''[[Resources#Elixir|<span style="color:#CF9700;">Spells</span>]]''''' {{Res|RES=Elixir|SIZE=20}}</h2></div> |
<div style="border:4px ridge #888800; padding:5px; background-color:#FFFFCC; margin-top:6px; margin-bottom:6px;"><h2 style="text-align:center; margin-top:0px; margin-bottom:0px; border-bottom:0px; color:#888800;">{{Res|RES=Elixir|SIZE=20}} '''''[[Resources#Elixir|<span style="color:#CF9700;">Spells</span>]]''''' {{Res|RES=Elixir|SIZE=20}}</h2></div> |
||
| − | ===='''[[Lightning Spell]]'''[[File:Lightning_Spell.png|right| |
+ | ===='''[[Lightning Spell]]'''[[File:Lightning_Spell.png|right|300x150px|link=]]==== |
| − | The Lightning Spell is the first spell unlocked in the [[Spell Factory]]. It takes 20 minutes to create. The Lightning Spell is mostly used to take out crucial defenses, such as [[Air Defense]]s, followed with [[Mortar]]s and [[Wizard Tower]]s. It is also commonly used to destroy troops coming out of the [[Clan Castle]]. It costs 15,000 and |
+ | The Lightning Spell is the first spell unlocked in the [[Spell Factory]]. It takes 20 minutes to create. The Lightning Spell is mostly used to take out crucial defenses, such as [[Air Defense]]s, followed with [[Mortar]]s and [[Wizard Tower]]s. It is also commonly used to destroy troops coming out of the [[Clan Castle]]. It costs 15,000 and 26,000 [[Resources#Elixir|Elixir]] to create level 1 and level 7 Lightning Spells, respectively.{{Clr}} |
---- |
---- |
||
| − | ===='''[[Healing Spell]]'''[[File:Healing_Spell.png|right| |
+ | ===='''[[Healing Spell]]'''[[File:Healing_Spell.png|right|300x150px|link=]]==== |
| − | The Healing Spell is the second spell unlocked. It takes 20 minutes to create, the same as the Lightning Spell. Healing spells are often used to support valuable troops |
+ | The Healing Spell is the second spell unlocked. It takes 20 minutes to create, the same as the Lightning Spell. Healing spells are often used to support valuable troops such as [[Giant]]s, [[Balloon]]s or [[Hog Rider]]s. It costs 15,000 and 24,000 [[Resources#Elixir|Elixir]] to create level 1 and level 6 Healing Spells, respectively.{{Clr}} |
---- |
---- |
||
| − | ===='''[[Rage Spell]]'''[[File:Rage_Spell.png|right| |
+ | ===='''[[Rage Spell]]'''[[File:Rage_Spell.png|right|300x150px|link=]]==== |
The Rage Spell creates a ring of rage. It takes 30 minutes to create. People use the Rage Spell to make their troops faster and stronger. Rage Spells are often used for slow and/or high-HP troops, as the spell will enhance the stats of the troops significantly. It costs 23,000 and 33,000 [[Resources#Elixir|Elixir]] to create level 1 and level 5 Rage Spells, respectively.{{Clr}} |
The Rage Spell creates a ring of rage. It takes 30 minutes to create. People use the Rage Spell to make their troops faster and stronger. Rage Spells are often used for slow and/or high-HP troops, as the spell will enhance the stats of the troops significantly. It costs 23,000 and 33,000 [[Resources#Elixir|Elixir]] to create level 1 and level 5 Rage Spells, respectively.{{Clr}} |
||
---- |
---- |
||
| − | ===='''[[Jump Spell]]'''[[File:Jump_Spell.png|right| |
+ | ===='''[[Jump Spell]]'''[[File:Jump_Spell.png|right|300x150px|link=]]==== |
| − | The Jump Spell is used to enable ground [[troops]] within the spell radius to jump over [[Walls]]. It takes 30 minutes to create. Level 1 Jump Spell costs 23,000 [[Resources#Elixir|Elixir]] to create and the level 3 Jump Spell costs 31,000 [[Resources#Elixir|Elixir]].{{Clr}} |
+ | The Jump Spell is used to enable ground [[troops]] within the spell radius to jump over [[Walls]]. It takes 30 minutes to create. Level 1 Jump Spell costs 23,000 [[Resources#Elixir|Elixir]] to create and the level 3 Jump Spell costs 31,000 [[Resources#Elixir|Elixir]]. The higher the Jump Spell's level, the longer the effect lasts.{{Clr}} |
---- |
---- |
||
| − | ===='''[[Freeze Spell]]'''[[File:Freeze_Spell.png|right| |
+ | ===='''[[Freeze Spell]]'''[[File:Freeze_Spell.png|right|300x150px|link=]]==== |
| − | The Freeze Spell is used to freeze enemy [[Troops]] and [[Defensive Buildings|Defenses]] for several seconds to either allow the player's [[ |
+ | The Freeze Spell is used to freeze enemy [[Troops]] and [[Defensive Buildings|Defenses]] for several seconds to either allow the player's [[troops]] to destroy them or to move out of range. It takes 30 minutes to create. The level 1 Freeze Spell costs 26,000 [[Resources#Elixir|Elixir]] to create and the level 5 Freeze Spell costs 35,000 [[Resources#Elixir|Elixir]]. The Freeze Spell can be used to freeze [[Wizard Tower]]s or [[Mortar]]s from taking out hoard of [[Barbarian]]s or [[Archer]]s. As with the Jump Spell, the higher the Freeze Spell's level, the longer the effect lasts.{{Clr}} |
---- |
---- |
||
| − | ===='''[[Santa's Surprise]]'''[[File:Santassurprise.png|right| |
+ | ===='''[[Santa's Surprise]]'''[[File:Santassurprise.png|right|300x150px|link=]]==== |
| − | Santa's Surprise is a holiday-themed spell that was only available in December 2012 (it |
+ | Santa's Surprise is a holiday-themed spell that was only available in December 2012 (it has not yet reappeared, although a small handful of players still have one in their [[Spell Factory|Spell Factories]]). It is a very powerful spell; 3 of them were able to knock out a then-maximum level 9 [[Town Hall]] (at the time it had 4,200 hitpoints), but its primary downside was that each spell took 25 hours to create (so destroying that level 9 [[Town Hall]] required 75 hours of brewing time). After casting the Santa's Surprise, Santa flies in, being pulled by reindeer in his sleigh, and drops explosive presents on the target.{{Clr}} |
---- |
---- |
||
<div style="border:4px ridge #000000; padding:5px; background-color:#CCCCCC; margin-top:6px; margin-bottom:6px;"><h2 style="text-align:center; margin-top:0px; margin-bottom:0px; border-bottom:0px; color:#000000;">{{Res|RES=Dark Elixir|SIZE=20}} '''''[[Resources#Dark Elixir|<span style="color:#000000;">Dark Spells</span>]]''''' {{Res|RES=Dark Elixir|SIZE=20}}</h2></div> |
<div style="border:4px ridge #000000; padding:5px; background-color:#CCCCCC; margin-top:6px; margin-bottom:6px;"><h2 style="text-align:center; margin-top:0px; margin-bottom:0px; border-bottom:0px; color:#000000;">{{Res|RES=Dark Elixir|SIZE=20}} '''''[[Resources#Dark Elixir|<span style="color:#000000;">Dark Spells</span>]]''''' {{Res|RES=Dark Elixir|SIZE=20}}</h2></div> |
||
| − | ===='''[[Poison Spell]]'''[[File:Poison Spell info.png|right| |
+ | ===='''[[Poison Spell]]'''[[File:Poison Spell info.png|right|300x150px|link=]]==== |
| − | The Poison Spell is the first spell unlocked in the [[Dark Spell Factory]]. It is used to both damage and slow down enemy troops, and is very effective in doing so, killing [[ |
+ | The Poison Spell is the first spell unlocked in the [[Dark Spell Factory]]. It is used to both damage and slow down enemy troops, and is very effective in doing so, killing [[Tier 1]] troops with ease as well as other low health troops like [[Wizard]]s and [[Witch]]es. It can also be used to damage higher-health troops and [[Heroes]] as well, though it will not damage [[Buildings]] in any way. It costs 95 and 140 [[Resources#Dark Elixir|Dark Elixir]] to brew a level 1 and 4 Poison Spell respectively.{{Clr}} |
---- |
---- |
||
| − | ===='''[[Earthquake Spell]]'''[[File:Earthquake Spell info.png|right| |
+ | ===='''[[Earthquake Spell]]'''[[File:Earthquake Spell info.png|right|300x150px|link=]]==== |
| − | The Earthquake Spell is used to generate an earthquake on |
+ | The Earthquake Spell is used to generate an earthquake on the targeted location, damaging [[Buildings]] and [[Walls]] within its area of effect. Taking 15 minutes to brew, it is used to weaken buildings, and do extremely high damage to [[Walls]]. Damage is percentage-based, and each successive Earthquake Spell will cause less damage to the same building (but increasing damage to the same [[Walls|wall]]). Four Earthquake Spells of any level is enough to completely destroy any level [[Walls]]. It costs 125 and 180 [[Resources#Dark Elixir|Dark Elixir]] to brew a level 1 and 4 Earthquake Spell respectively.{{Clr}} |
---- |
---- |
||
| − | ===='''[[Haste Spell]]'''[[File:Haste Spell info.png|right| |
+ | ===='''[[Haste Spell]]'''[[File:Haste Spell info.png|right|300x150px|link=]]==== |
| − | The Haste Spell is used to speed up troops, ground and air. It gives them a greater speed boost than that of [[Rage Spell]]s |
+ | The Haste Spell is used to speed up troops, both ground and air. It gives them a greater speed boost than that of [[Rage Spell]]s, though they do not increase the troop's damage. It takes up half the space of a [[Rage Spell]] so it can be considered a replacement to the Rage Spell if the extra damage is not needed. It costs 80 and 95 [[Resources#Dark Elixir|Dark Elixir]] to brew a level 1 and 4 Haste Spell respectively.{{Clr}} |
---- |
---- |
||
Revision as of 00:36, 21 October 2015


|

|
|
File:Troop-DET.png | File:Troop-H.png | File:Troop-Spells.png |
On this page you can view reviews and strategies on every individual troop and spells.
Tier 1 Troops
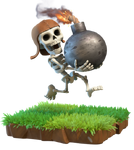
Barbarian

Barbarians are the first unit you unlock in the Barracks. The Barbarian, due to its above average amount of HP, is a good meat shield. The Barbarian is the fastest troop to train at only 20 seconds, so they are used mostly as meat shields for Wall Breakers, Archers, Goblins and Wizards. If using Barbarians in groups, keep in mind that buildings that do splash damage like Mortars and Wizard Towers can take them out quickly.
Archer

Archers are ranged combat troops, meaning that they attack from a distance and shoot over walls. They are quite effective solo, but they are also very capable in groups. Archers are commonly used with Dragons or Balloons, or Hog Riders at later levels. At lower levels, some players use Archers with Giants or Barbarians because they, if deployed first, will take on all defensive fire while Archers can shoot behind them. Archers can only shoot at a distance of 3.5 tiles, though, so bear that in mind.
Goblin
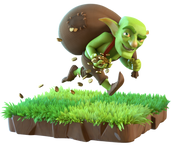
Goblins are one of the fastest troops in the game and are currently the only troop whose favorite targets are resources. Goblins are mostly used to farm resources; when farming you will go in with Army Camps full of Goblins along with a small number of Wall Breakers. Especially for lower level players, Goblins are more suitable for farming than for trophy hunting. Goblins, like Giants and other troops that have a particular favorite target, will not attack defending Clan Castle troops unless all of its favorite targets have been destroyed.
Tier 2 Troops
Giant
Giants are the first unit in the game whose AI targets defenses first. Giants are tank-class units who have high amounts of HP, but low DPS. As such, they make good meat shields. They are commonly used to draw fire away from other crucial units such as Wall Breakers, Archers and the like. The only downside to Giants is their poor DPS. Although Giants attack defenses first, they will not fight back against Clan Castle troops until all other defenses are taken out.
Wall Breaker
Wall Breakers are only used to break through Walls. Wall Breakers will deal 40x more damage to walls so they are the perfect troop to break through Walls. Wall Breakers are usually deployed after Giants or other high-HP troops that are drawing fire from nearby defenses.
Balloon

Balloons are the first flying unit unlocked in the Barracks and deal area splash damage. When their HP reaches zero, they will crash into the ground and deal a small amount of extra splash damage. In the Single Player Campaign, if you take out all of the air defenses, a single Balloon can destroy the rest of the village and achieve 3 stars. Balloons, like Giants, target defensive structures first. Avoiding Wizard Towers is a good idea for Balloons (especially levels 1-4), due to how they clump together.
Wizard

Wizards are used similarly to Archers as backup troops, but are generally superior (though more costly and time-consuming to train). Wizards have very high damage per second but low HP compared to their housing space and training cost. Wizards, like Archers, can fire over Walls. Lower level players have no need to use Wizards as they will usually just perish in battle quickly, but still get and upgrade them for the future when you go higher. Once they reach level 4, they are extremely useful.
Tier 3 Troops
Healer

The Healer just does that: heal. If you deploy her she will heal troops that take damage from defenses and can keep Giants alive for a long time. When using a Healer, make sure you destroy as many Air Defenses first as you can. If she is in range of an Air Defense, she will be killed in a matter of seconds. Also, other defensive buildings such as Archer Towers or Wizard Towers may target the Healer.
Dragon
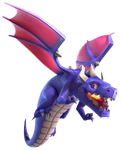
Dragons are a flying unit unlocked in the level 9 Barracks. Dragons are one of the strongest troops, with high HP and high DPS. They also deal small area splash damage (although this splash damage component is very powerful on defense versus a large number of Tier 1 troops). 10 Dragons will usually destroy a full TH7 village in about a minute and a half. Dragons are often paired up with Rage Spells to ensure the win.
P.E.K.K.A
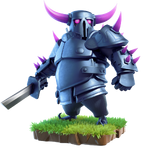
P.E.K.K.A is the last troop unlocked in the Barracks and has the most HP of any of the Elixir-based troops. She receives 2x damage from Hidden Teslas, so it is advised to be cautious when attacking players with potentially high level Hidden Teslas.
Minion
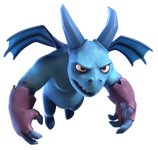
Minions are the first dark elixir troop unlocked in the Dark Barracks. The Minion is a flying unit that attacks by spitting blobs of Dark Elixir. It is the one of the two fastest troops in the game, along with the Goblin. The Minion has low hit points compared to other dark elixir troops. Minions are inexpensive compared to the other dark elixir troops, and only take 45 seconds to train.
Hog Rider
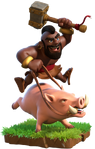
Hog Riders are the only ground troop in the game that can jump over Walls without the Jump Spell. The Hog Rider has a relatively cheap training cost compared to most other dark elixir troops, taking only at 65 Dark Elixir at max level. It takes two minutes to train the Hog Rider, and they target defenses first, similar to Giants.
Valkyrie
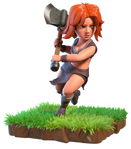
Valkyries are hardy warriors with a double-bladed axe. Valkyries, when used in groups, will destroy most anything in seconds. They are mainly used to destroy villages and get 3 stars, though it doesn't happen very often. Valkyries do splash damage with their axes, so they are very effective in taking out Clan Castle troops and are used in Clan Castles defensively to take out infantries, though they are weak to large number of ranged enemy troops such as Archers. Their whirlwind attack can damage multiple buildings at once, and Valkyries will automatically place themselves where they are in range of multiple buildings if possible.
Golem
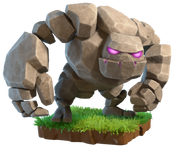
Golems are large, rocklike creatures with extremely high hit points. They are used just like Giants - to absorb fire away from other troops. The Golem, when killed, will not just perish. Instead, it will split into two troops which are called Golemites. Golemites will have 1/5 of the Golem's base hit points and damage per second.
Witch

The Witch is a powerful troop that can only be trained with Dark Elixir in the level 5 Dark Barracks. When used, she periodically summons dead troops that appear as Skeletons. In battle, Witches should be used with a meat shield, such as Giants, Golems or other troops with high HP, as they have reasonably low hit points.
Lava Hound
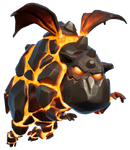
The Lava Hound is an air unit with the highest HP of any troop, but extremely low DPS for their housing space. They are used to absorb fire from anti-air defenses, and its own attack prioritizes Air Defenses specifically. When killed, the Lava Hound will split into multiple Lava Pups, the number dependent on the level of the Lava Hound, starting from 8 at level 1 to a maximum of 12 at level 3. Lava Pups are similar to Minions, though they have less damage per second, fewer hitpoints and shorter range. Note that like Balloons, Lava Hounds cannot attack other air units (although Lava Pups can).
Barbarian King
The Barbarian King is the toughest of Barbarians. He can be upgraded to level 40 and as he is upgraded, his HP and DPS increase. He can be used to defend your base, or to attack with your army. The Barbarian King cannot be killed like other troops, as he is immortal; however, he will need to sleep to regenerate when he is damaged during a battle. Note that while sleeping (or being upgraded) the Barbarian King is unable to defend or attack.
Archer Queen

The Archer Queen is the second hero available at level 9 Town Hall. It costs 40,000 Dark Elixir to summon her. The Archer Queen can shoot over walls and should be placed so she isn't immediately in the line of fire, so use a meat shield for full advantage. She should be upgraded if possible, as she can shoot over walls with a high DPS (damage per second). The Archer Queen's range (5 tiles) is longer than any other ranged troop.
Lightning Spell

The Lightning Spell is the first spell unlocked in the Spell Factory. It takes 20 minutes to create. The Lightning Spell is mostly used to take out crucial defenses, such as Air Defenses, followed with Mortars and Wizard Towers. It is also commonly used to destroy troops coming out of the Clan Castle. It costs 15,000 and 26,000 Elixir to create level 1 and level 7 Lightning Spells, respectively.
Healing Spell

The Healing Spell is the second spell unlocked. It takes 20 minutes to create, the same as the Lightning Spell. Healing spells are often used to support valuable troops such as Giants, Balloons or Hog Riders. It costs 15,000 and 24,000 Elixir to create level 1 and level 6 Healing Spells, respectively.
Rage Spell

The Rage Spell creates a ring of rage. It takes 30 minutes to create. People use the Rage Spell to make their troops faster and stronger. Rage Spells are often used for slow and/or high-HP troops, as the spell will enhance the stats of the troops significantly. It costs 23,000 and 33,000 Elixir to create level 1 and level 5 Rage Spells, respectively.
Jump Spell

The Jump Spell is used to enable ground troops within the spell radius to jump over Walls. It takes 30 minutes to create. Level 1 Jump Spell costs 23,000 Elixir to create and the level 3 Jump Spell costs 31,000 Elixir. The higher the Jump Spell's level, the longer the effect lasts.
Freeze Spell

The Freeze Spell is used to freeze enemy Troops and Defenses for several seconds to either allow the player's troops to destroy them or to move out of range. It takes 30 minutes to create. The level 1 Freeze Spell costs 26,000 Elixir to create and the level 5 Freeze Spell costs 35,000 Elixir. The Freeze Spell can be used to freeze Wizard Towers or Mortars from taking out hoard of Barbarians or Archers. As with the Jump Spell, the higher the Freeze Spell's level, the longer the effect lasts.
Santa's Surprise
Santa's Surprise is a holiday-themed spell that was only available in December 2012 (it has not yet reappeared, although a small handful of players still have one in their Spell Factories). It is a very powerful spell; 3 of them were able to knock out a then-maximum level 9 Town Hall (at the time it had 4,200 hitpoints), but its primary downside was that each spell took 25 hours to create (so destroying that level 9 Town Hall required 75 hours of brewing time). After casting the Santa's Surprise, Santa flies in, being pulled by reindeer in his sleigh, and drops explosive presents on the target.
Poison Spell
The Poison Spell is the first spell unlocked in the Dark Spell Factory. It is used to both damage and slow down enemy troops, and is very effective in doing so, killing Tier 1 troops with ease as well as other low health troops like Wizards and Witches. It can also be used to damage higher-health troops and Heroes as well, though it will not damage Buildings in any way. It costs 95 and 140 Dark Elixir to brew a level 1 and 4 Poison Spell respectively.
Earthquake Spell
The Earthquake Spell is used to generate an earthquake on the targeted location, damaging Buildings and Walls within its area of effect. Taking 15 minutes to brew, it is used to weaken buildings, and do extremely high damage to Walls. Damage is percentage-based, and each successive Earthquake Spell will cause less damage to the same building (but increasing damage to the same wall). Four Earthquake Spells of any level is enough to completely destroy any level Walls. It costs 125 and 180 Dark Elixir to brew a level 1 and 4 Earthquake Spell respectively.
Haste Spell
The Haste Spell is used to speed up troops, both ground and air. It gives them a greater speed boost than that of Rage Spells, though they do not increase the troop's damage. It takes up half the space of a Rage Spell so it can be considered a replacement to the Rage Spell if the extra damage is not needed. It costs 80 and 95 Dark Elixir to brew a level 1 and 4 Haste Spell respectively.
Template:TroopsMenu
Feedback
If this Strategy Guide contains any inappropriate content, please report it here: Clash of Clans Wiki:Report